
How to Clean Suede Boots: A Safe 3-Step Method That Works
This post contains affiliate links. As an Amazon Associate, we earn from qualifying purchases.
This post contains affiliate links. As an Amazon Associate, we earn from qualifying purchases.
To clean suede boots, you need three things: a specialized cleaner (foaming or spray), a brush made for suede or nubuck, and a clean, absorbent cloth. The process is clean, dry, and brush, never soak the leather, never use household cleaners, and always dry away from direct heat.
Let’s be clear about this. Suede isn’t dirty leather you scrub back to a glossy finish. It’s a surface finish you maintain. Most cleaning disasters happen when people treat suede like polished calfskin, drowning it in water or scrubbing it with the wrong side of a brush. That rough texture you love? It’s incredibly fragile. The goal isn’t to sterilize; it’s to lift surface dirt and gently persuade stains to leave without taking the nap with them.
What follows is a breakdown of the only method that works across brands like Timberland, Clarks, and Dr. Martens. The guide lists their recommended tools, directly addresses grease, salt, and water stains, and explains why a simple preventative spray works better than an intensive cleaning effort.
Key Takeaways
- Never use water first. Always start with a dry brush. Water pushes dirt deeper into the porous suede.
- Match the cleaner to the brand if you can. Dr. Martens Suede Cleaner, Timberland Renewbuck Foaming Cleaner, and Clarks’ foaming cleansers are formulated for their specific leathers.
- Dry naturally, always. Stuff boots with paper to hold their shape and dry them in a room-temperature, ventilated area. Heat from radiators or hair dryers shrinks and stiffens the leather.
- Protection is not optional. A quality water and stain repellent spray, applied after cleaning and drying, is the single best thing you can do for suede’s longevity.
- Grease and oil require patience. Sprinkle corn starch or talcum powder on the fresh stain and let it sit for 24-48 hours to absorb the oil before brushing.
What is Suede and Why is it Tricky?
Suede is made from the inner layer of a hide, split away from the tougher top-grain. This split layer is then buffed to create that signature soft, velvety nap. That nap is the whole game. It’s a forest of tiny fibers standing on end. When you brush with the grain, you’re smoothing those fibers back into place. When you scrub against the grain, or worse, use a rough brush, you’re tearing them out.
This isn’t a cleaning challenge you can muscle through. The porous structure absorbs liquids instantly, turning a water drop into a dark stain as it soaks in unevenly. Dirt grinds into the base of the fibers. That’s why your first move is always a dry, soft-bristled brush. You’re trying to lift the dirt out, not liquefy it and drive it deeper. Understanding this one physical fact changes everything about your approach. It’s why the Timberland guide says to brush with the natural flow and the Dr. Martens Boot Doctor stresses using the soft rubber side of the brush in one direction only.
Where this goes sideways: Using a rough brush or scouring pad on suede. You’ll see a bald patch form after three or four aggressive scrubs, and the color will be permanently lighter there. The nap doesn’t grow back.
The 3-Step Clean, Dry, and Brush Method
This is the core routine for general dirt and dust. It works for Clarks, Dr. Martens, Timberland, and Blundstone boots alike. The brands agree on the sequence; they just brand their kits differently.
Step 1: Dry Brush First. Remove the laces. Take a dedicated suede brush or a soft toothbrush and gently sweep over the entire boot, following the direction of the nap. This dislodges dry mud and dust. If you see scuff marks, this is where a suede eraser bar (like the one in the Timberland Dry Clean Kit) works wonders. Rub it gently over the mark.
Step 2: Apply a Specialized Cleaner. Don’t use saddle soap or all-purpose leather cleaner. They’re often too harsh and leave residues that matte the nap. Shake a suede-specific cleaner, a foaming type like Clarks recommends or a spray like Dr. Martens Suede Cleaner. Apply it evenly. Use a clean, damp cloth or the included applicator to gently work it in, again moving with the grain.
Step 3: Dry & Brush Again. Wipe off any excess cleaner with a barely-damp cloth. Now, stuff the boots with crumpled paper or a boot tree. This is critical, it keeps the shape from collapsing as the moisture leaves. Let them dry naturally for at least 12 hours, away from sun or heaters. Once bone-dry, use your brush to resurrect the nap with soft, directional strokes.
Common mistake: Skipping the dry brush and going straight to liquid cleaner. The mud turns into a paste, grinds into the suede, and you’ll see a permanent, grimy shadow after drying.
I learned the importance of the right brush the hard way. Years ago, I used a stiff horsehair brush meant for smooth leather on a pair of suede chukkas. After one cleaning, the toes looked worn and pale, like the fuzz had been sanded off. The nap was gone. Now I keep a separate, ultra-soft brush labeled strictly for suede and nubuck.
Your Stain-Specific Battle Plan
General cleaning is one thing. Stains are where suede owners panic. Here’s the targeted approach, straight from the brand playbooks.
Water Stains
The stain isn’t the water; it’s the ring where dirty water dried. The Timberland method is the gold standard. Dampen the entire area around the stain with room-temperature water using a cloth. Don’t just wet the dark spot. Then, use a suede brush to gently blend the moisture. You’re trying to re-wet the leather evenly so it dries uniformly. Stuff and dry. The stain usually disappears.
Salt Stains
Winter’s curse. Brush off the crusty salt first. Then mix one part white vinegar with two parts water. Dab, don’t rub, this solution onto the stain with a cloth. The mild acidity breaks down the salt. Wipe with a clean water-dampened cloth to neutralize. Let dry overnight. The Blundstone guide echoes this exactly.
Grease or Oil
This is a patience test. If it’s fresh, blot, never rub, with an absorbent paper towel. Then, cover the stain liberally with corn starch (as UGG recommends) or talcum powder. Let it sit for a full day, even two for a big spill. The powder absorbs the oil from the inside out. Vacuum or brush it away. You may need a second application. Rushing this with cleaner will just spread the grease.
| Stain Type | First Response | Tool/Method | Time Commitment |
|---|---|---|---|
| Water Ring | Dampen surrounding area | Cloth + Brush to blend | 12+ hour dry time |
| Salt | Brush off crystals | 1:2 Vinegar/Water solution dab | Overnight dry |
| Grease/Oil | Blot, don’t rub | Corn starch absorbent powder | 24-48 hour absorb time |
| Mud | Let dry completely | Dry brush first | 5 minutes brushing |
The Tools You Actually Need (And One to Skip)
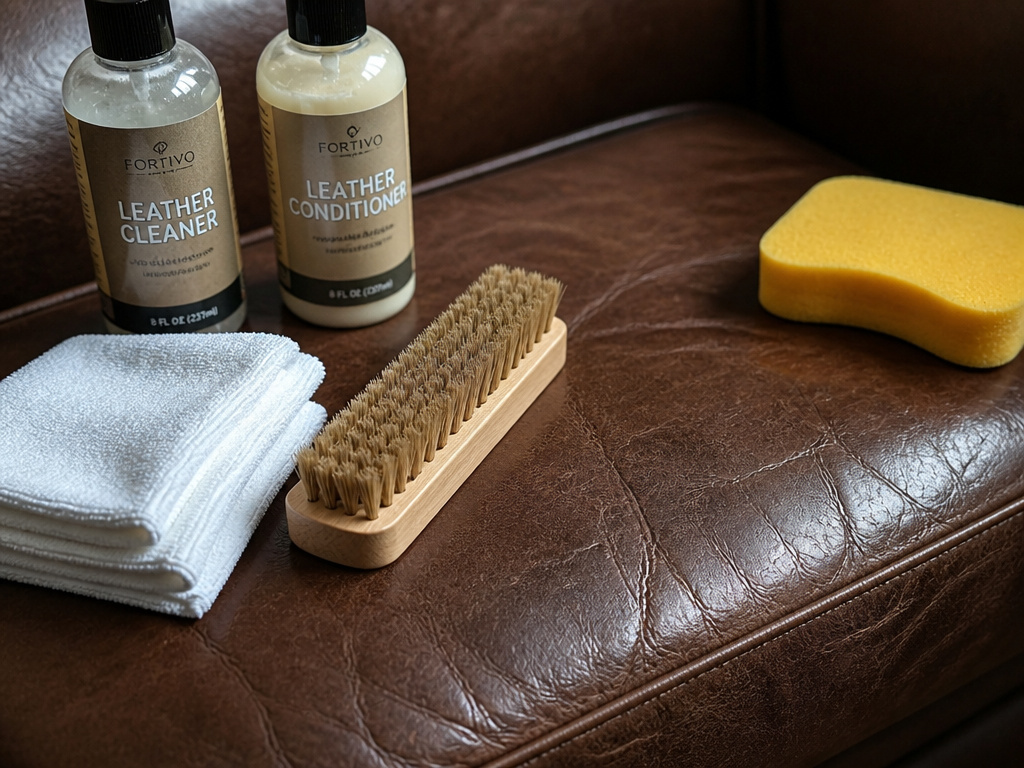
You don’t need a chemist’s lab. You need three dedicated tools.
- A Proper Suede/Nubuck Brush. This has soft, brass or synthetic bristles set in a wide block. Some, like the Dr. Martens version, have a soft rubber side for final finishing. This is essential. A hardware store brush is too stiff.
- A Suede Eraser. This is a firm, rubbery block, often included in kits like the Timberland Dry Clean Kit. It’s for scuffs and light stains. Rub gently, then brush away the residue.
- A Dedicated Suede Cleaner. Pick one aligned with your boot brand if possible. The Dr. Martens Suede Cleaner is a reliable spray. The Timberland Renewbuck Foaming Cleaner gives you more control. Clarks sells its own foaming cleanser. They’re all formulated to clean without leaving a damaging residue.
Skip the “Universal Leather Cleaner.” These are almost always designed for finished, non-porous leathers. They can leave a film that clogs suede’s pores, making it stiff and altering its color. Your cleaning arsenal should be separate from your general suede cleaning kit for smooth leather goods.
A clean, white cotton cloth is better than a colored towel. Dyes can transfer to the damp suede. Microfiber can sometimes be too abrasive. Simple is best.
Protecting Your Boots Before They Get Dirty

Cleaning is a reaction. Protection is the smart move. Every brand guide ends with this advice: apply a water and stain repellent.
Look for a spray designed for suede and nubuck, like Clarks Rain and Stain or Timberland Balm Proofer. In my experience, silicone-based sprays can darken the leather more than fluorocarbon-based ones. Test on a small, hidden area first. Hold the can 6 inches away and spray in a light, even coat over clean, dry boots. Let it dry fully. This doesn’t make them submarine-ready, but it gives you a crucial 10-20 second window to blot away a spill before it sores in. It’s the difference between a simple blot and a full corn-starch marathon. This step is the core of any long-term suede care routine.
Frequently Asked Questions
Can I use vinegar to clean suede boots?
Yes, but only in a specific way. A solution of one part white vinegar to two parts water is safe for tackling salt stains or some organic stains. Always dab, don’t soak, and follow with a clean water-damp cloth to rinse. Never use straight vinegar.
How do you clean suede boots that are stained?
Identify the stain first. For water, re-wet the entire area evenly. For salt, use a diluted vinegar solution. For grease, use an absorbent powder like corn starch. Always start with a dry brush, use a suede-specific cleaner for general grime, and never put stained boots near heat to dry.
What household items can clean suede?
Very few, and use them with caution. Corn starch or talcum powder is excellent for fresh oil stains. A pencil eraser can sometimes lift a scuff. A mixture of white vinegar and water can treat salt. For almost everything else, you’re better off with a proper suede cleaner. Avoid baking soda, laundry detergent, or dish soap.
Does water ruin suede boots?
Water doesn’t ruin suede, but improper drying does. Getting suede wet can cause dark water stains and, if dried with heat, can shrink and stiffen the leather. If they get soaked, stuff them, let them air dry naturally for 24-48 hours, and then brush the nap gently.
Can I use a magic eraser on suede?
Do not use a melamine foam Magic Eraser on suede. It’s an abrasive micro-sandpaper. It will flatten and potentially tear the nap, creating a smooth, damaged patch that cannot be restored.
The Bottom Line
Suede boot care comes down to respecting the nap. Brush with it, clean with it, dry away from it. Keep a dedicated kit: a soft brush, an eraser, and a brand-matched cleaner. Your first line of defense isn’t a stronger cleaner; it’s a quality protector spray applied to clean boots.
When you see a stain, pause. Identify it. Reach for the targeted solution, vinegar for salt, corn starch for oil, even re-wetting for water marks, not the strongest chemical you have. The goal is to lift the problem without lifting the leather’s texture. That texture is why you bought the boots in the first place.
One final, straightforward piece of advice: if you’re ever unsure, test any method on the inside of the boot’s shaft first. A hidden spot tells you everything you need to know without risking the face of your boot. That’s how you build confidence, one careful step at a time.
