
How to Make a Leather Belt | The 8-Step Method That Lasts
This post contains affiliate links. As an Amazon Associate, we earn from qualifying purchases.
This post contains affiliate links. As an Amazon Associate, we earn from qualifying purchases.
To make a leather belt, cut a strap of 8-9 oz vegetable-tanned leather to your waist size plus 8-10 inches, shape one end, punch five holes spaced 1 inch apart starting 5-6 inches from the tip, thin a 2-inch section at the buckle end, attach the buckle with a rivet, and finish with oil and conditioner. A belt made from a single piece of full-grain leather this way will outlast any layered, machine-sewn “genuine leather” belt you can buy.
You can follow that formula and get a functional belt. The difference between a belt that works and one that becomes a daily companion for decades is in the specifics the formula glosses over, the thickness you shave off, the order you apply finish, and the single fastener choice that prevents a common failure point. Store-bought belts fail at the buckle loop because they’re sewn through layered material. Yours won’t.
What follows is an eight-step walkthrough that treats leather as a living material, not just a blank. We’ll resolve the conflicting advice on length, show you how to avoid the most common first-timer mistakes, and give you a finish that develops a rich patina instead of cracking.
Key Takeaways
- Measure using your waist size plus 8-10 inches, or use a well-fitting belt as a template, to ensure proper length for the buckle fold and hole spacing.
- Use 8-9 oz vegetable-tanned leather for durability and the ability to tool, dye, and develop a personal patina over time.
- Always thin the leather at the buckle fold by about 50% of its thickness across a 2-inch section to prevent an uncomfortable, bulky loop.
- Secure the buckle with a rivet, not stitching; machine stitching on thick leather creates weak points and will separate with heavy use.
- Apply neatsfoot oil to condition the leather before sealing it with a beeswax-based conditioner; reversing this order can trap moisture and lead to mildew.
The Tools and Leather You Actually Need
Forget the lifetime collection of specialty tools some guides imply you need. You can make a professional-grade belt with a handful of basics. The leather choice, however, is essential.
You need a sharp utility knife or a dedicated leather knife, a metal ruler or straightedge, a measuring tape, a hammer, and a hole punch, a rotary punch is best for consistency. For attaching the buckle, a rivet setter and a single rivet are superior to thread. For finishing, have neatsfoot oil and a beeswax-based leather conditioner on hand.
Now, the leather. This is where most first projects go sideways before a cut is even made.
Common mistake: Using “genuine leather” from a craft store. That term often describes a layered, laminated material that’s more akin to leather pressboard. It doesn’t hold tooling, dyes unevenly, and the layers will separate where you fold it for the buckle.
You need a strap of vegetable-tanned leather, 8 to 9 ounces in weight. That weight translates to roughly 3.2 to 3.6 mm thick, sturdy enough for a belt but still workable. Vegetable-tanned leather is full-grain, meaning the top surface is intact. It’s firm, accepts tooling and dye beautifully, and, most importantly, it ages. It develops character and a rich color with wear and proper care. You can buy pre-cut belt blanks from suppliers like Tandy Leather, which saves the initial cutting step.
| Tool / Material | Purpose | Why It’s Better Than the Alternative |
|---|---|---|
| Vegetable-Tanned Leather (8-9 oz) | Belt body | Develops a patina; can be tooled and dyed; one solid piece won’t delaminate. |
| Rotary Punch | Creating belt holes | Produces clean, consistent holes vs. A drive punch that can distort leather. |
| Rivet Setter & Rivet | Securing the buckle | Creates a permanent mechanical bond; sewing can abrade and fail over years. |
| Neatsfoot Oil | Conditioning | Penetrates deeply to replenish natural oils without synthetic fillers. |
| Beeswax Conditioner | Sealing & protecting | Creates a breathable, water-resistant barrier without plasticky coatings. |
How to Measure for a Leather Belt (The Right Way)
Every guide gives you a different formula. Some say waist plus 2 inches for the buckle and 6 for the tail. Others say plus 9, or 11. The confusion comes from whether you’re measuring a belt you already own or your bare waist. Let me share what I’ve learned.
The most foolproof method is to use a belt that fits you perfectly. Put it on your pants at the hole you use most often. Measure from the inside of the buckle (where the leather fold starts) to that perfect hole. That’s your true wear length. To that number, add 2.5 to 3 inches to accommodate the fold of leather that will trap the new buckle. Then, add another 5 to 6 inches for the belt tail beyond that perfect hole. This tail gives you room to punch multiple adjustment holes.
If you’re measuring your waist directly with a tape measure, add 8 to 10 inches total to that waist number. The breakdown: 2.5-3 inches for the buckle fold, and 5-7 inches for the tail. This extra length is your margin for error and future waistline changes. It’s far easier to trim excess leather later than to add it.
Where this goes sideways: Measuring only your waist and adding a mere 2 inches. The resulting belt will be too short to buckle, leaving you with an expensive strap of scrap leather. Always err on the side of longer.
The 8-Step Method to Make a Leather Belt
This sequence is deliberate. It moves from cutting and shaping to detailing and finally securing the hardware, ensuring you don’t mar a finished surface with a later step.
Step 1: Cut the Leather Strap to Length and Width
If you’re using a pre-cut blank, you can skip to Step 2. If you’re cutting from a larger hide, start by creating one perfectly straight edge along the length you need. Use a metal ruler held firmly and score a line with your knife, then cut with confident, full-length strokes.
For width, the standard is between 1 1/4 and 1 1/2 inches. Match this width to your buckle. A 1.5-inch buckle won’t fit a 1.25-inch strap. Mark your width consistently every few inches down your straight edge, then connect the marks and cut the second side. A strap cutter tool makes this trivial, but it requires a steady hand, if the leather drifts, your strap tapers.
Step 2: Mark and Cut the Belt Holes
The hole pattern is more important than you think. It’s not just about spacing; it’s about placement relative to the belt tip.
Measure 5 to 6 inches from the tip of your chosen buckle end (the “tongue” end). Make a centered mark here for your first hole, this is your primary wear hole. From that first mark, measure and mark four more holes, each exactly 1 inch apart, moving back toward the buckle. This gives you five holes total, covering a 4-inch range of adjustability.
Use your rotary punch or a hammer-driven punch to create clean holes. The hole should be just large enough for your buckle’s tongue to slide through with a slight click. Test on a scrap first.
Step 3: Shape the Belt Tip
A squared-off tip works, but a shaped tip is easier to thread through belt loops. The two classic shapes are the angled cut and the rounded “English point.”
For an angled cut, simply mark a 45-degree angle from each corner of the belt tip and cut. For a rounded tip, it’s more precise. Mark the centerline of the belt tip. Then, mark points 1 inch down from the tip on both edges. Use a coin or a small can as a template to draw a gentle curve connecting these three points, then cut.
Step 4: Thin the Leather for the Buckle Fold
This is the step every rushed tutorial omits, and it’s the reason many homemade belts feel bulky and stiff at the buckle. If you fold a 9 oz leather strap back on itself, you’ve created a 6.4 mm thick lump. It’s uncomfortable and stresses the leather.
On the rough, flesh side of the opposite end from your holes, measure 3 inches in from the end. Mark a 2-inch long box centered on that mark. Within this box, you need to carefully shave the leather down to about half its original thickness. Use a very sharp knife held almost parallel to the leather and scrape thin layers away. Go slow. You can’t add leather back.
This thinning allows the leather to fold smoothly, creating a flat, comfortable loop. The difference in hand-feel is immediate, a supple fold versus a rigid hinge.
Step 5: Create the Buckle Slot
Now you’ll create the slot where the buckle’s center bar will sit. On the thinned section you just created, measure in 2.5 inches and 3.5 inches from the end of the strap. Punch a hole at each of these two marks, centered on the strap.
Next, use your utility knife to connect the left side of the first hole to the left side of the second hole. Repeat on the right side. Remove the small strip of leather between, creating a clean, 1-inch long slot. Test-fit your buckle’s center bar through this slot. The leather should fold over flat.
Step 6: Attach the Buckle
Before you set anything permanent, do a dry fit. Fold the thinned end of the leather through the buckle, aligning the slot with the center bar. Make sure the buckle is right-side up relative to your holes on the other end. It’s a frustrating discovery to make after the rivet is set.
For lasting durability, it’s best to rivet your buckle in place. Hand-stitching is possible, but on this thickness of leather, the thread can act like a saw under tension, slowly cutting through the fibers. A rivet is a mechanical lock.
Mark a point for the rivet about 1/2 inch from the buckle’s center bar, centered on the strap. Use your punch to make a hole through both layers of the folded leather. Insert the rivet, place the cap, and use the rivet setter and a hammer to peen it over on a hard, flat surface. The sound changes from a ring to a solid thunk when it’s fully set.
Step 7: Condition and Dye (If Desired)
If you want a natural belt that will darken with age, you can skip dye and just condition. If you want a specific color, dye comes first.
Apply leather dye with a dauber or rag in a well-ventilated area, wearing gloves. Work it in evenly along the grain side. Let it dry completely, overnight is best. Then, buff off any excess dye with a clean cloth.
Next, apply neatsfoot oil. This isn’t a finish; it’s food for the leather. Rub a light coat into the grain side with your fingers or a cloth. Let it absorb for an hour. Wipe off any that hasn’t soaked in. This step replenishes the oils lost during the tanning and drying process, making the leather supple and less prone to cracking.
Step 8: Apply the Protective Finish
The final step seals in the conditioning and provides a layer of protection. Use a conditioner that contains beeswax. Apply a thin coat over the entire belt, let it sit for a few minutes, then buff it vigorously with a clean cloth until the surface is smooth and has a soft sheen, not a tacky feel.
This wax finish will protect the belt from light moisture and dirt while allowing it to breathe. It’s the layer that will develop that coveted patina as you wear it, catching subtle scuffs and light that deepen the color over years.
Rivet vs. Stitch: How to Fasten Belt Loops
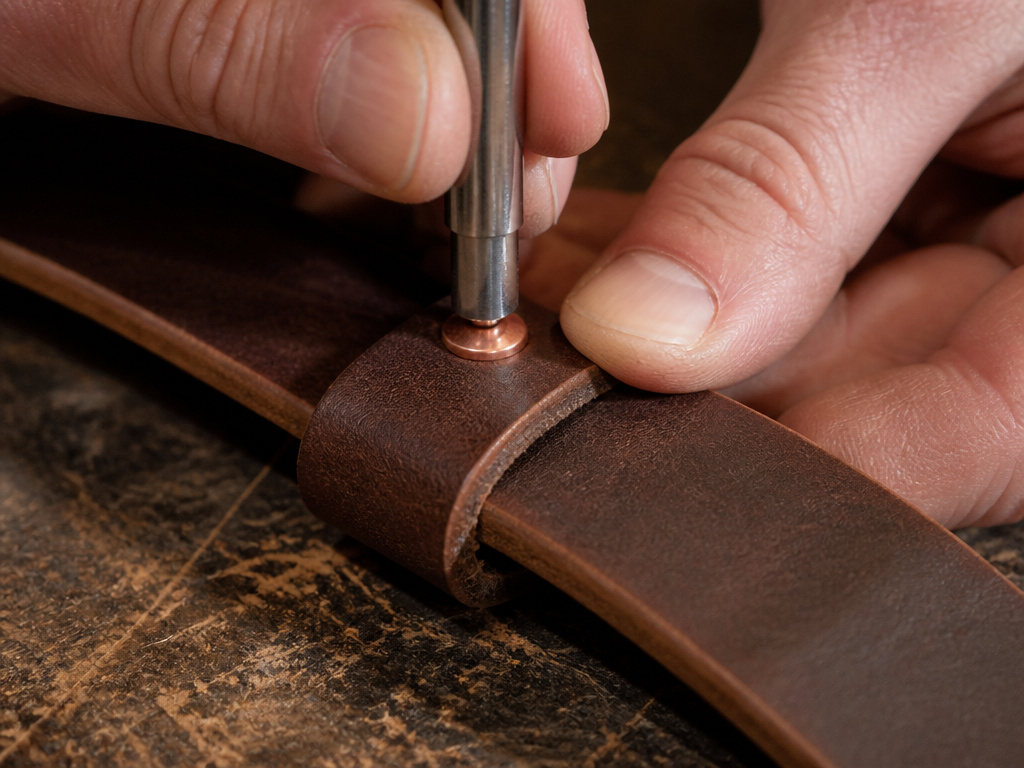 The small keeper loop that holds the tail of your belt is the other fastening decision. The same principle applies: rivets beat stitches for longevity.
You can cut a small strap about 3/8 inch wide and 4 inches long for the keeper. Wrap it around the main belt to gauge the size, overlap the ends, and secure them. While you can hand-sew this with a saddle stitch, the repeated friction of the belt tail sliding through it will eventually wear through the thread.
Setting a small rivet is faster and creates a permanent bond. The metal won’t wear out, and it adds a touch of honest hardware to the piece. If your main buckle is riveted, matching the keeper creates a cohesive look.
How to Finish and Care for Your New Belt
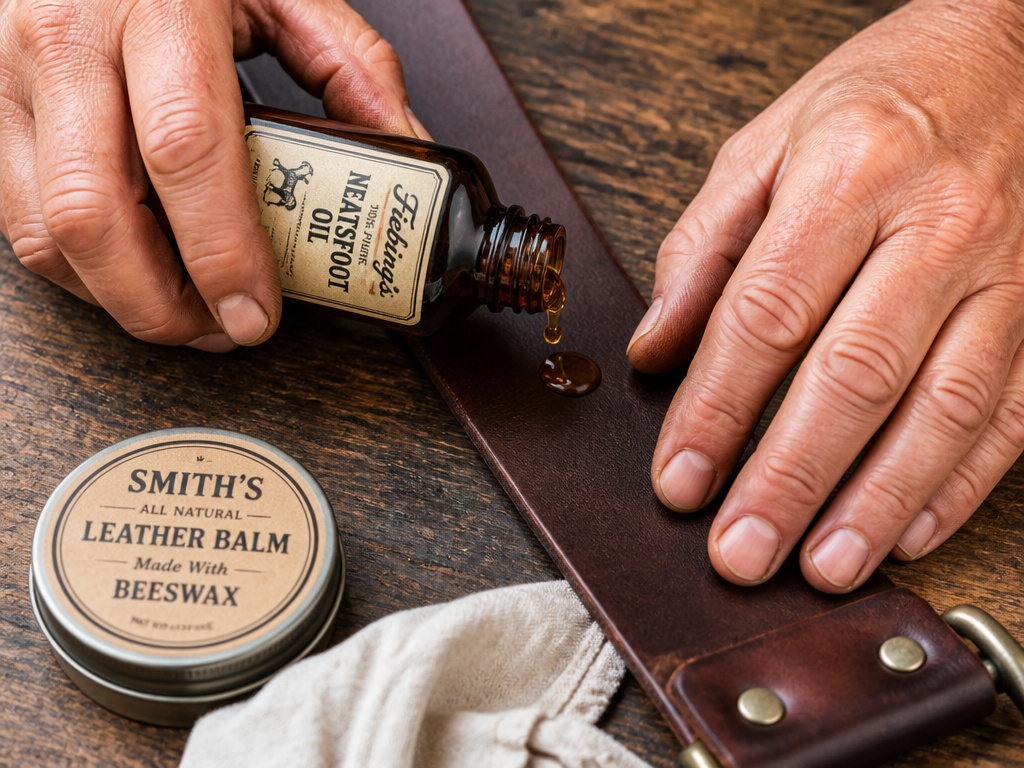 Your belt is now functional, but its life is just beginning. The finish you applied needs occasional renewal, and how you treat the leather in the first few weeks sets the tone.
Don’t soak it. Getting a leather belt soaking wet forces out its natural oils and can cause it to dry stiff and misshapen. If it gets caught in the rain, let it air dry at room temperature, away from direct heat. Once dry, give it a light buff with the beeswax conditioner.
To break it in comfortably and help it form to your body, you can gently soften a leather belt by wearing it for short periods at first and applying a tiny bit more neatsfoot oil to any areas that feel stiff after the first month. The goal is gradual suppleness, not a soggy strap.
Long-term, a simple routine keeps it perfect. Every six to twelve months, or if the leather starts to look dry, wipe it down with a damp cloth, let it dry, and apply another light coat of neatsfoot oil followed by the beeswax conditioner. This is how you care for a leather belt for decades.
Frequently Asked Questions
What type of leather is best for a beginner’s belt?
An 8-9 oz vegetable-tanned leather belt blank is ideal. It’s pre-cut to a standard width, the right thickness is forgiving for hole punching and folding, and its natural color makes finishing mistakes less noticeable. It’s the most straightforward path to a successful first project.
Can I use a regular drill to make the holes?
You can, but I wouldn’t recommend it. A drill bit can catch and tear the leather fibers, leaving a rough, frayed hole. A rotary punch or a dedicated leather hole punch shears the material cleanly, resulting in a smooth, professional-looking hole that won’t weaken over time.
How do I add a hole if my belt is too tight?
Use the same punch you used for the original holes. Measure carefully to continue the 1-inch spacing from your last hole. Place a scrap piece of wood underneath the belt to protect your work surface and punch straight down. Look for a belt made from full-grain leather with a solid brass buckle.com/how-to-punch-a-hole-in-a-leather-belt/)** tool in your kit for this exact maintenance task.
Why does my homemade belt feel so stiff?
New vegetable-tanned leather is firm by nature. The stiffness will reduce dramatically with wear as the leather flexes and conforms to your body. The neatsfoot oil application in the making process is crucial for initial suppleness. If it remains uncomfortably stiff after a week of wear, you can learn how to break a leather belt in safely with specific flexing and conditioning techniques.
How do I clean my leather belt if it gets dirty?
For general dust and dirt, a soft, dry brush or cloth is sufficient. For stains, use a damp cloth with a tiny drop of mild saddle soap, wipe the area, then immediately dry it. Once fully dry, condition the spot with a dab of oil. For a full guide on tackling set-in grime, refer to a dedicated tutorial on how to clean a leather belt.
Before You Go
The belt you just made isn’t a disposable accessory. It’s a foundational piece of leathercraft that teaches you grain, thickness, and mechanical fastening. The single rivet holding your buckle will outlive any row of machine stitches. The next logical project is a leather journal cover, it applies the same skills of measuring, cutting, and finishing on a larger, flat canvas.
One final, practical tip: if you ever need to size a leather belt down because you’ve trimmed too much or lost weight, don’t just cut the buckle end off. You’ll ruin the carefully thinned fold. Instead, trim from the tail end and re-shape the tip. It’s simpler and preserves the belt’s structure. Now go wear it. The first scratch is the start of its story.
