
Learn How to Strop a Knife on Leather for a Razor-Sharp Edge
This post contains affiliate links. As an Amazon Associate, we earn from qualifying purchases.
This post contains affiliate links. As an Amazon Associate, we earn from qualifying purchases.
To strop a knife on leather, draw the blade spine-first across the surface at a consistent 15-20 degree angle, using only the weight of the knife. The edge must trail away from you to avoid cutting into the leather. This action polishes the microscopic apex of an already sharpened edge, removing the final burr and refining the cutting feel without removing significant steel.
That 15-degree window isn’t a suggestion. It’s the difference between a mirror polish and a rounded, dull edge. A few degrees too high and you’re no longer touching the very tip of the edge you just sharpened. A few degrees too low and the spine drags, doing nothing.
What follows is a breakdown of the gear, the exact motion, and the mistakes that turn a maintenance step into a repair job. By the end, you’ll know why a longer strop is better, when to walk away from a folding knife, and how to tell if your leather is actually working against you.
Key Takeaways
- Stropping refines, it does not sharpen. If your knife won’t cleanly slice paper, return to a stone first.
- The ideal strop is 12-15 inches long and 2-3 inches wide. Shorter lengths force too much repositioning.
- Always strop with the edge trailing, spine leading, edge facing away from you. Pushing the edge into the leather cuts it.
- A two-stage process using a compound-charged side followed by a clean leather side delivers the finest finish.
- Never strop a folding knife, even a locking one. The risk of the mechanism failing and the blade closing on your hand is real.
What You’ll Need (And What to Avoid)
Before you make a single stroke, get your kit right. A bad setup guarantees a bad result.
You need a flat, stable surface for your strop. A workbench is perfect; a kitchen counter with a non-slip mat works. The strop itself must be firm. A floppy piece of leather draped over your hand won’t give you the consistent feedback you need.
The part nobody mentions: A strop shorter than 12 inches forces you to reposition the knife constantly. Each reposition is a chance to change your angle, and that inconsistency rounds the edge over multiple sessions. Go long.
For the leather, vegetable-tanned cowhide is the reliable default. It’s firm, smooth, and widely available. For a higher-performance surface, many professionals, like those at Peachey Conservation, prefer horsebutt leather. It’s denser and lasts longer under repeated use. The best leather for a strop often comes down to this balance between firmness and longevity.
You’ll also need a stropping compound. This is a fine abrasive paste that loads the leather. Green chromium oxide (around 0.5 micron) is the standard for a reason, it’s aggressive enough to remove metal quickly but fine enough to polish. A little goes an incredibly long way; shading it on like sidewalk chalk is sufficient.
The Core Technique: Angle, Pressure, and Motion
Here’s where muscle memory from sharpening will fight you. You must unlearn pushing the edge forward.
Place your loaded strop on your stable surface. Hold your knife with a firm, comfortable grip. Rest the blade flat on the far end of the strop with the edge pointing away from you. Now, raise the spine until the bevel contacts the leather. For most kitchen and pocket knives, that’s between 15 and 20 degrees.
A properly stropped edge is not sharper in the traditional sense. It’s more refined. The microscopic teeth left by the stone are aligned and polished, so the knife glides through material with less resistance and stays effective longer. That’s the real benefit.
The motion is a smooth, full-length pull. Draw the knife toward you, leading with the spine. The edge trails behind. You should hear a faint, consistent shhhhh sound. Silence means the edge is digging in; a gritty scrape means your angle is wrong.
| Element | Right Way | Wrong Way | Consequence of Wrong Way |
|---|---|---|---|
| Direction | Edge trailing, spine leading | Edge leading into the leather | Cuts the strop, rolls the apex |
| Pressure | Weight of the knife only | Pressing down | Rounds the edge, creates a wire burr |
| Angle | Consistent 15-20° | Inconsistent, changes mid-stroke | Polishes the wrong part of the bevel, dulls edge |
| Strokes | 10-20 per side, alternating | 50+ per side without checking | Over-polishes, removes too much metal |
Count your strokes. Start with 10-20 per side, alternating after each pass. This keeps wear even. After the compound side, you can make a few final, even lighter passes on a clean leather side for a sublime finish. This two-stage method, compound then bare leather, is what turns a sharp edge into a glorious one.
What a Strop Can and Cannot Fix
This is the most important boundary to understand. A strop is a finisher, not a savior.
If your knife struggles to cut a ripe tomato or can’t catch on your thumbnail, it’s dull. Stropping a dull knife is like trying to polish a rusted piece of metal, you’re wasting time on a surface that needs complete reformation. Go back to a whetstone.
A strop excels at two jobs: 1. Final Burr Removal: After sharpening on a stone, a microscopic burr often remains. The strop cleans this off, leaving a clean apex. 2. Edge Maintenance: Daily use can cause the very edge to fold over slightly. A few strokes on a strop can realign this metal, bringing back that “just sharpened” feel without touching a stone.
Think of it as the difference between sanding rough wood and applying a hand-rubbed oil finish. The stone does the sanding; the strop applies the oil. Understanding what a strop is for makes all your other sharpening decisions clearer.
Common Stropping Mistakes (And How to Hear Them)
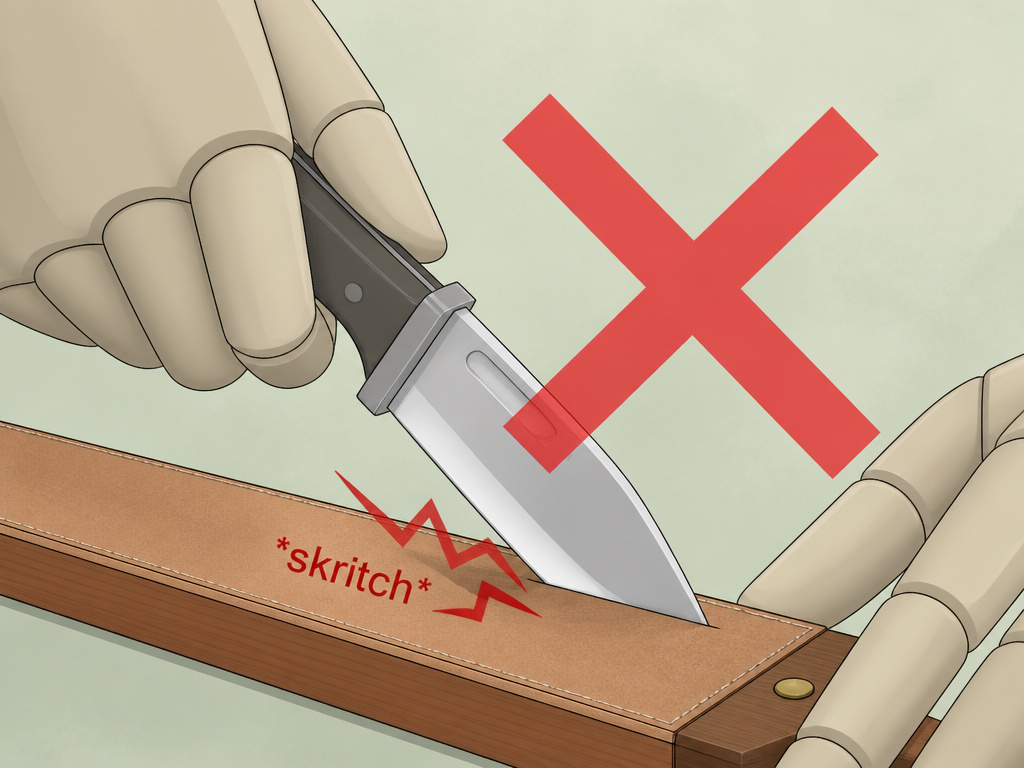 You can often hear a mistake before you see it. Listen to your strop.
Mistake 1: Pushing the Edge. This is the cardinal sin. If you push the edge into the leather, it will catch and cut. The sound is a sudden skritch, not a smooth shhh. You’ve now damaged both your strop and the edge you were trying to improve. The proper stropping technique is essential here.
Mistake 2: Too Much Pressure. Pressing down flattens the leather substrate, allowing the edge to sink in and become rounded. The knife feels like it’s dragging through mud. The edge will feel slick to the touch but won’t bite into material.
Mistake 3: Stropping a Dirty Knife. If you’ve just cut an apple or trimmed some herbs, wipe the blade clean. Transferring food residue or moisture to your strop invites mold, especially if you store it in a drawer. It also gums up the abrasive compound.
Mistake 4: Using a Strop That’s Too Soft. If your strop base compresses easily under the knife’s weight, it will round the edge. A firm backing, wood, MDF, or thick, dense leather, is non-negotiable. A soft strop creates a soft edge.
Strop Care and Storage
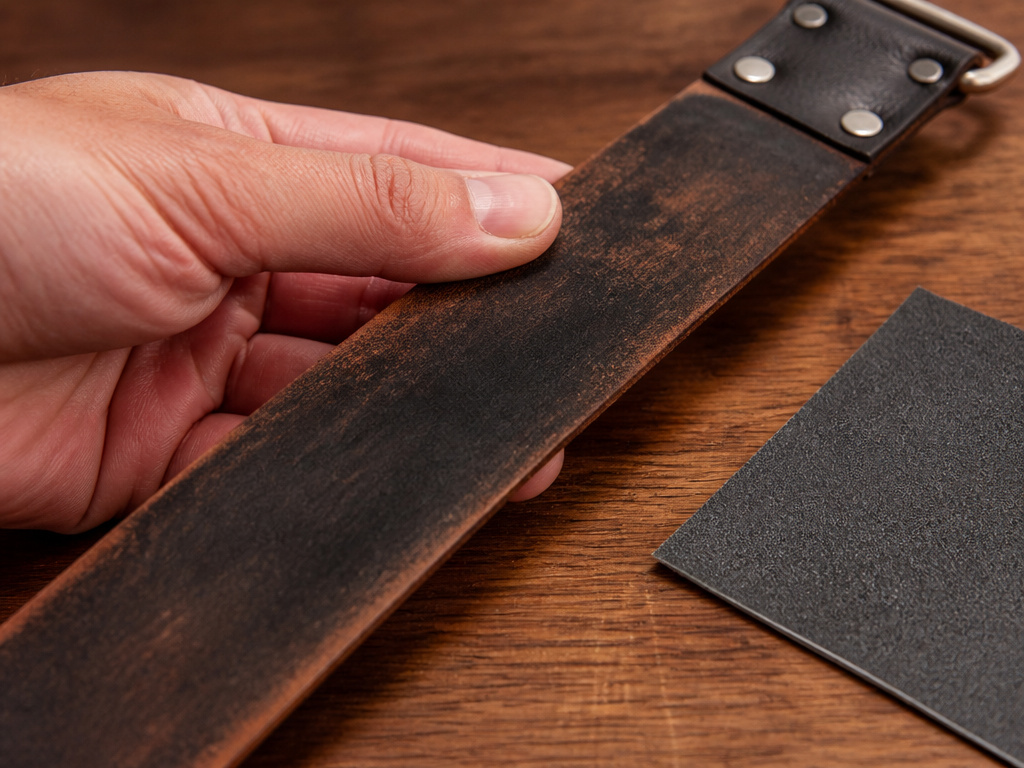 Your strop is a tool, not a decoration. But neglecting it ruins its function.
After use, you don’t need to clean the compound off. The black residue that builds up is metal removed from your blades, a sign it’s working. However, if the surface becomes glazed and slick, you can refresh it by rubbing the leathers together or lightly sanding the surface with fine-grit sandpaper before reapplying a tiny amount of compound.
Storage is simple: keep it flat and indoors. Don’t leave it in a damp garage or a hot car. Leather prefers the same stable climate you do. If you’re also caring for a leather knife sheath, the same rule applies, consistent, moderate humidity prevents cracking and mold.
When the leather becomes deeply cut, overly dry, or just doesn’t seem to work anymore, replace the pad. For a model like the Lee Valley Tools strop, replacement pads need to be 1 3/4″ × 9″ and 1/8″ thick or less to sit flush.
Frequently Asked Questions
Can I make my own leather strop?
Absolutely. It’s a great project. You need a flat piece of wood or acrylic, a firm piece of vegetable-tanned leather, and some adhesive. Glue the leather flesh-side-up to the base, let it cure, and load it with compound. It’s a perfect way to use scrap and learn about leather types in a practical way.
How often should I strop my knife?
It depends on use. A kitchen knife used daily might benefit from a few strokes every week. An EDC pocket knife might need it every couple of weeks. Strop when you feel the bite diminish slightly, not when the knife is completely dull. For a curated list of tools, see our picks for the best leather strops.
Is stropping necessary if I use a honing steel?
They do different jobs. A honing steel realigns a slightly rolled edge through abrasion. A strop polishes and refines the apex after sharpening. Many people use a steel for weekly maintenance and a strop as the final step after a full sharpening session.
Why is my knife not sharper after stropping?
You’re likely starting with a blade that’s too dull. Stropping cannot create a new edge; it only polishes an existing one. If the knife doesn’t improve after 20 strokes per side, it needs to go back to a sharpening stone. This is the most common point of frustration for beginners.
Before You Go
Stropping is the detail work. It’s what separates a functional edge from a exceptional one. The goal isn’t to see how many strokes you can do, but to use the fewest strokes necessary to bring back that clean, aggressive bite.
Commit to the 15-degree angle. Respect the trailing stroke. And for safety’s sake, keep your folding knives away from the strop, use a fixed blade or remove the blade from a folding knife if you must. The best edge in the world isn’t worth a trip to the ER.
Your first attempt might not be perfect. That’s fine. The rhythm comes with practice. Start with an old kitchen knife you don’t care about, and listen to the sound it makes on the leather. That quiet, consistent pull is the sound of a job done right.
