
Stop Leather Car Seat Cracking: Protection & Care Methods
This post contains affiliate links. As an Amazon Associate, we earn from qualifying purchases.
To keep leather car seats from cracking, you need to shield the factory-applied topcoat. That means using a pH-balanced cleaner, a UV-blocking protectant, and a conditioner made for finished leather—never saddle soap, silicone sprays, or vinegar. Clean monthly, protect every three months, and park in the shade. The coating cracks first; the leather underneath follows.
Here’s the thing. That advice flips most of what you know about raw leather. Automotive leather isn’t a saddle. It’s a hide coated in pigment and plastic for durability, and the coating is what fails. Crack that, and the leather beneath dries and splits.
What follows: the three chemicals that destroy the coating, the one cleaning mistake that soaks into perforated seats, and the product categories that actually work. By the end, you’ll know why most “conditioning” is a waste of time and what to do instead.
Key Takeaways
- The enemy is the topcoat. Cracking starts in the factory-applied polyurethane or acrylic layer, not the leather hide. Protect the coating to protect the seat.
- Skip the “nourishment.” For coated automotive leather, a UV-protectant spray does more than any conditioner. Condition only if the seat feels stiff, and use a product labeled for finished leather.
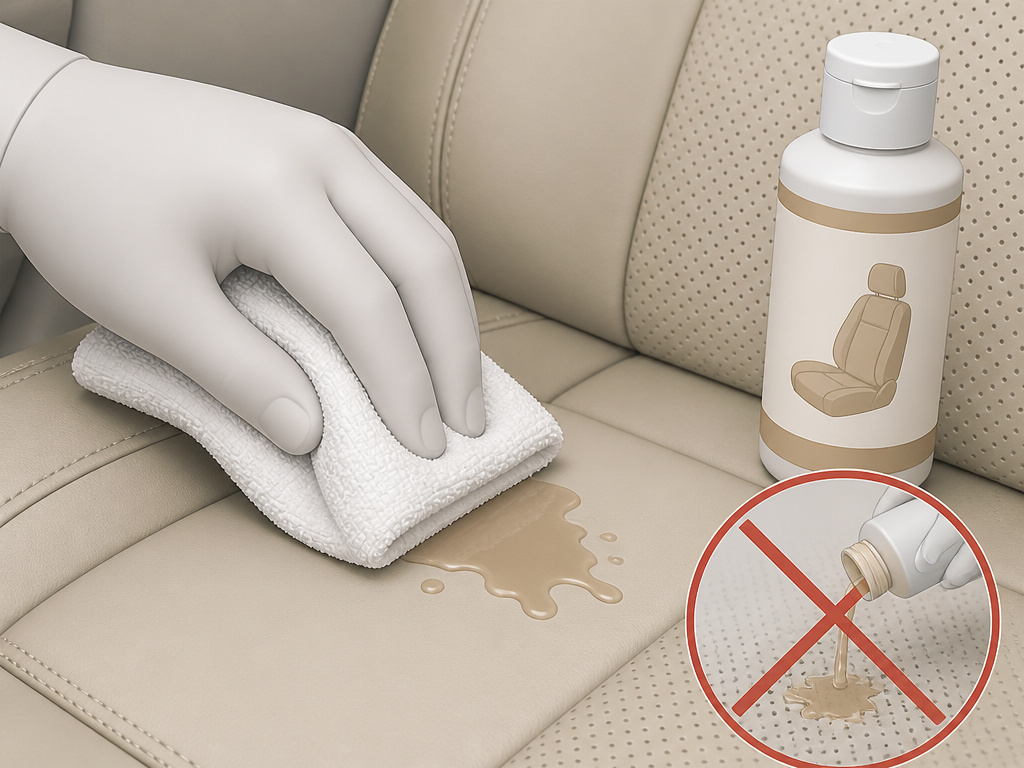
- Perforated seats are vulnerable. Liquids poured directly on them seep into the foam below. Always apply cleaner to a cloth first, never spray the seat.
- Heat and UV light are the primary causes. Parking in the sun does more damage in one summer than years of use. A windshield sun shade is a mandatory tool.
- Read your manual. Hyundai, Genesis, and Mercedes-Benz specifically warn against high-alcohol cleaners and soaking the leather—advice most generic guides miss.
The Real Reason Car Leather Cracks
It’s not about drying out. It’s about breaking down.
Automotive leather is almost always a “finished” or “corrected-grain” leather. The hide is sanded, an opaque pigment is applied for uniform color, and then a clear polyurethane or acrylic topcoat is layered on for protection and easy cleaning. This topcoat is a plastic film. It doesn’t breathe like raw leather, and it doesn’t absorb oils.
Cracks appear in this plastic coating first. They start as fine, shiny lines in the high-wear areas: the outer bolster you slide across, the crease of the seatback. Once the coating is compromised, UV rays and heat reach the leather substrate directly, drying and degrading the collagen fibers. The crack then propagates down into the hide itself. That’s when you get the deep, ragged splits that are expensive to repair.
The part nobody mentions: A 2018 NHTSA technical service bulletin for Toyota and Lexus vehicles explicitly notes that “cracking, peeling, and dye transfer may occur to the protective coating of the leather top coat.” The problem is documented at the federal level—it’s the coating that fails.
So your entire maintenance strategy shifts. You’re not “feeding” the leather. You’re preserving a plastic shield. This reframes every product choice you’ll make.
The 3-Step Shield: Clean, Condition, Protect
This isn’t a complicated ritual. It’s a sequence with a clear goal: remove abrasive grit, maintain coating flexibility, and block solar radiation. Do it in this order, and do it with the right tools.
Step 1: Vacuum & Clean (Monthly)
Dust and sand are abrasives. Every time you sit down, you grind them into the coating like fine sandpaper.
- Vacuum first. Use a soft brush attachment to lift dust from the grain and, critically, from the holes in perforated seats. Grit trapped in those holes will act like a pumice stone.
- **Apply a pH-balanced leather cleaner.This is essential. Strong alkaline (high pH) or acidic cleaners degrade the topcoat’s polymers. The Hyundai and Genesis owner’s manuals directly warn that “high alcohol content solutions or acid/alkaline detergents” can strip the surface.
- Product to reach for: Colourlock Mild Leather Cleaner or Leatherique Prestone Cleaner. Both are formulated for pH neutrality.
- Method: Spray the cleaner onto a microfiber cloth, not directly onto the seat. Rub in straight lines, not circles, with light pressure. For perforated seats, this prevents liquid from flooding the foam cushion beneath.
- Wipe dry. Immediately follow with a second, dry microfiber to remove any residue. Leaving cleaner to dry on the surface can leave a film that attracts more dirt.
Skip this if: You’re using an all-purpose interior cleaner, a vinegar solution, or anything labeled “degreaser.” They will haze or crack the coating over time.
Step 2: Condition (Only If Needed)
This is the most misunderstood step. A factory-coated seat does not absorb conditioner like a baseball glove. The conditioner sits on top of the coating, and its job is to keep that plastic layer supple, not to penetrate.
| When to Condition | What to Use | What to Avoid |
|---|---|---|
| Seats feel stiff or creak | Light, water-based conditioner for finished leather (e.g., Colourlock Leather Protectant) | Heavy oils, saddle soap, mink oil |
| After a deep clean | Same as above | “All-in-one” cleaner-conditioners (they clean poorly and condition poorly) |
| When to SKIP Conditioning | ||
| Seats are still slick or soft | Use a protectant only (see Step 3) | Adding product just because “it’s time” |
| In high humidity | Nothing – let the ambient moisture work | Trapping moisture under a layer of oil |
Where this goes sideways: Applying a silicone-based “conditioner.” It creates a temporary shine but attracts dust and eventually forms a gummy, cracked layer on top of your factory coating. The seat will feel slippery and look artificially glossy.
Conditioner is a corrective measure, not a preventative one. If your seats are still pliable, move straight to protection.
Step 3: Protect (Every 3 Months)
This is your primary defense. Solar radiation is the single biggest cause of topcoat failure. A protectant with UV blockers is more important than any conditioner.
- Choose a dedicated leather protectant. Look for labels that mention “UV inhibitors” or “UV protection.” 303 Automotive Leather Protectant is a benchmark here.
- Apply a thin, even coat. Again, use a cloth. One pass is enough. A second coat won’t add more protection; it will just take longer to dry and might streak.
- Let it cure. Give it at least an hour before using the seat. The protectant needs to cross-link and bond to the surface.
This step creates a sacrificial layer. Sunlight degrades the protectant instead of your seat’s topcoat. Reapplying it quarterly is the cheapest insurance you can buy.
The Enemies of Your Seats (And How to Fight Them)
Three factors work together to break down your leather. Isolate any one, and you add years of life.
1. UV Radiation & Heat
Parked in direct sun, a car interior can reach 140°F (60°C) in under an hour. That heat bakes the plasticizers out of the topcoat, making it brittle. The UV spectrum breaks the chemical bonds in the coating polymers. * The fix: A windshield sun shade is your first line of defense. Tinting your windows to a legal limit helps tremendously. Park in a garage or under cover whenever possible.
2. Abrasive Grit
Sand, salt, and road dust are microscopic shards of silica. They don’t just sit there; they grind into the surface with every movement. * The fix: The monthly vacuuming ritual isn’t optional. Pay special attention to the lower seatback and bolsters. Consider using a soft-bristled detailing brush to agitate grit out of the grain before vacuuming.
3. Chemical Attack
This is where well-meaning owners do the most damage. Common household and auto parts store products are often lethal to the topcoat. * Isopropyl alcohol: Dries and crazes the coating instantly. * Armor All or silicone sprays: Create a slick, dust-magnet layer that eventually yellows and cracks. * Vinegar or ammonia-based cleaners: Attack the coating’s acidity, causing fading and stiffness. * The fix: Read labels. If a product isn’t specifically formulated for finished automotive leather, don’t put it on your seat. When in doubt, a damp microfiber cloth with plain water is safer than a mystery chemical.
Special Cases: Perforated, Napa, and Light-Colored Leather
Not all car leather is the same. These three types need extra attention.
Perforated Leather Seats
The tiny holes are for ventilation, not drainage. Pouring liquid cleaner directly onto them lets it seep into the underlying foam. That foam never fully dries, leading to mildew, odors, and eventual breakdown of the adhesive holding the leather to the seat.
Specific warning: The Mercedes-Benz service bulletin explicitly says not to soak perforated areas. Always apply product to your cloth first.
Napa Leather
Softer and more supple, Napa leather is also more delicate. The Hyundai manual notes it fades and dries out faster under sun exposure. It’s also more prone to dye transfer from jeans. * Care: Stick to the 3-step shield religiously. Clean spills instantly with a blotting motion—never rub. Consider a leather guard product like Colourlock Leather Protector for an extra barrier against dye transfer.
Light-Colored Leather (Beige, Cream)
It shows every stain. The official manuals from Hyundai and Genesis state light colors “may be easily contaminated.” * Care: Clean spills the moment they happen. Use a dedicated leather spot cleaner like Leather Master for ink or oil. A matte-finish protectant will help repel stains without adding a shiny layer that highlights imperfections.
What Your Owner’s Manual Actually Says (And Why It Matters)
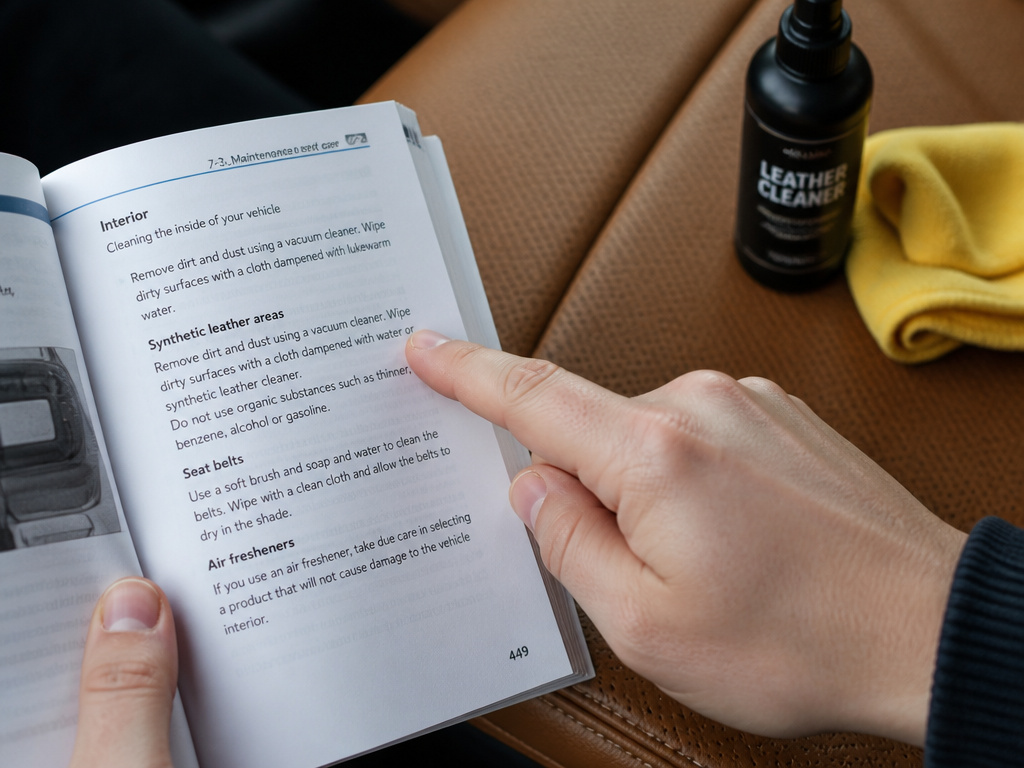
I want to help you make confident choices. That starts with the manufacturer’s guidance, which is often the best, most overlooked resource.
Let’s be clear about this. The car companies that specify leather interiors publish care instructions to avoid warranty claims. They tell you exactly what voids the warranty. Ignoring that is expensive.
Here are direct quotes from current manuals, which should reshape your entire approach: * Hyundai/Genesis: “If you use high alcohol content solutions or acid/alkaline detergents, the color of the leather may fade or the surface may get stripped off.” and “Be sure not to wet the seat. It may change the nature of natural leather.” * The Stakes: Using the wrong cleaner isn’t just ineffective; it’s a chemical attack that they explicitly warn against. Wetting the seat, especially a perforated one, can cause irreversible damage.
These aren’t suggestions. They are the documented failure modes the engineers have seen. Your game plan should start with this government guide for synthetic leather and your own car’s manual, not a generic blog post.
Tools & Products: A Short, Specific List
You don’t need a cabinet full of potions. You need three things that work.
- For Cleaning: Colourlock Mild Leather Cleaner. It’s pH-balanced, has no harsh solvents, and it’s the benchmark for a reason. A close second is Leatherique Prestone Cleaner.
- For Protection: 303 Automotive Leather Protectant. Its UV-blocking capability is proven, and it doesn’t leave a greasy or shiny finish. This is the product you’ll use most often.
- For Conditioning (if needed): Colourlock Leather Protectant (yes, it’s a conditioner). It’s designed for finished leathers, absorbs without residue, and contains a light protectant. This is your corrective tool for stiff seats.
- The Tools: A pack of edgeless microfiber cloths (different colors for clean and dirty work), a soft-bristle detailing brush, and a good vacuum with a soft upholstery attachment.
This kit covers 99% of situations. Buying anything else before you have these is a distraction. For a more detailed explanation of why these picks work, our guide on leather care products breaks down the chemistry.
Frequently Asked Questions
Can I use saddle soap on my car seats?
No. Never. Saddle soap is for unfinished, vegetable-tanned leather that needs its oils replenished. It will leave a waxy, sticky residue on your car’s coated leather that attracts dirt and clogs the grain. It’s one of the fastest ways to create a dull, cracked mess.
How often should I condition my leather seats?
Only when they need it. If the leather feels soft and supple, skip the conditioner and just use a protectant. Over-conditioning coated leather leads to product buildup, which can become sticky and attract debris. Condition leather seats once a year, or only if they start to feel stiff or show light creasing.
Will a seat cover prevent cracking?
High-quality seat cover is excellent preventative maintenance. It physically blocks UV rays and abrasion from clothing. Look for breathable, non-abrasive materials like sheepskin or custom-fit cloth covers. Avoid cheap vinyl or plastic covers that trap heat and moisture, as they can cause mildew and actually accelerate deterioration. Our reviews for seat covers designed to protect leather can help you choose.
What’s the best way to clean spilled coffee or soda?
Blot, don’t rub. Immediately use a dry microfiber to soak up as much liquid as possible. Then, lightly dampen a cloth with your pH-balanced leather cleaner and gently dab the area. Rinse the cloth with water, wring it out thoroughly, and dab the area again to remove cleaner residue. Dry with a separate cloth. The key is to avoid rubbing, which grinds the stain in, and to avoid using so much liquid that it soaks through to the foam.
Before You Go
One rule most guides skip: if you see fine, shiny lines on your seat bolsters, it’s not too late. That’s the topcoat cracking, not the leather. Stop using any product you’re using, switch to the clean-and-protect routine outlined here, and you can often stabilize it for years.
The biggest lever you have isn’t a fancy product. It’s the sun shade. Using it every single time you park is more impactful than any quarterly detailing ritual. Heat is the engine of decay; blocking it is the simplest, cheapest fix.
Everything above assumes daily drivers. If you’re storing a car for months, give the seats a full clean and protectant application, use a breathable car cover, and put a desiccant bag inside to control humidity. A parked car in a humid garage can grow mold on the seat backs faster than the sun can crack them.
Start this week: vacuum your seats, check your garage for a UV protectant, and order a high-quality sun shade if you don’t have one. That’s the trifecta. The rest is just keeping the shield intact.
