
Removing Water Stains from Leather: A Simple, Safe Guide
This post contains affiliate links. As an Amazon Associate, we earn from qualifying purchases.
This post contains affiliate links. As an Amazon Associate, we earn from qualifying purchases.
To remove water stains from leather, you need to understand what you’re actually dealing with. A “water stain” is often permanent discoloration caused by impurities in the water or by driving the water into the leather’s finish and dye. Your best chance is to treat a fresh spill by immediately blotting with a dry cloth, then letting the area air-dry at room temperature, no heat, no hair dryers. For dried marks, you can attempt to gently lift the discoloration using a damp, soapy cloth followed by a clean, damp rinse cloth, then condition the area once fully dry.
The damage happens in the first ten minutes a spill sits. Leather is skin; water acts like a solvent, pushing whatever’s in it, minerals, dirt, dye from your clothes, into the pores and the finish. Heat accelerates this, baking the impurities in place. So your first move is always blot, don’t rub, and let it dry slowly on its own.
What follows is a breakdown of why water marks leather, a safe step-by-step method that actually works, and a list of mistakes that guarantee a permanent ring. You’ll learn when a mark is just a temporary dark spot and when it’s a lost cause. The goal is to minimize the damage, not chase a perfect result that was never on the table.
Key Takeaways
- Blot, don’t rub, a fresh water spill immediately. Rubbing spreads the water and drives impurities deeper.
- Never apply direct heat (hair dryers, heaters, sunlight) to dry wet leather. Heat sets stains by evaporating water too quickly, leaving impurities behind.
- For dried water marks, the safest approach is a gentle clean with a mild soap solution (like diluted Ivory soap), a rinse with a clean damp cloth, and then conditioning after full drying.
- Perforated leather has specific risks. Water can darken the dye around the holes, which is often a change in the material itself rather than a cleanable stain.Cleaning can strip natural oils; conditioning replenishes them and can help even out the appearance of minor discoloration.
Why Water Leaves a Mark on Leather
Leather is a porous, fibrous material, more like skin than plastic, and is not waterproof. When water hits it, two things happen simultaneously.First, the water itself darkens the leather temporarily as it soaks in. Second, any dissolved minerals, dirt, or dyes in the water get carried into the leather’s surface.
That second part is the real problem. It’s not the H2O staining the leather; it’s the passengers it brought along. Tap water contains minerals like calcium and magnesium. Spilled coffee or wine adds sugar and pigments. This contamination gets deposited inside the leather’s top grain or finish as the water evaporates. What you see as a stain is often a concentrated ring of these leftovers.
The finish type matters hugely here. A heavily sealed, pigmented leather has a plastic-like topcoat that slows absorption, giving you more time to blot. An aniline or semi-aniline leather, with its open pores and minimal finish, drinks the water in seconds. The stain sets faster and goes deeper. So your first question shouldn’t be “how do I clean this?” It should be “how long has it been wet, and what kind of leather is this?”
Mistakes That Make It Worse
Most permanent water damage results from the frantic cleanup that follows a spill.
Common mistake: Rubbing a wet stain vigorously. This grinds the water and any contaminants across the surface and forces them deeper into the leather’s grain. You’re not lifting the stain; you’re painting with it.
Using any form of heat to dry the spot is the other guaranteed path to a dark ring. A hair dryer, a space heater, or sitting a wet bag in direct sun might feel efficient. You’re actually cooking the impurities into the leather by causing rapid, uneven evaporation. The water retreats, leaving all its passengers stranded in a concentrated line, the stain’s perimeter. The leather itself can also stiffen and crack from the shock of quick drying.
I learned this one the hard way. A modern, chrome-tanned jacket got soaked at the cuff. The standard historical advice is neat’s-foot oil for dry leather. I applied it while the area was still damp, then hit it with a hair dryer to “set” it. The leather turned an uneven, dark greasy patch that never fully faded. The lesson was clear: historical treatments don’t always fit modern materials, and heat is never your friend on wet leather.
Then there’s the well-intentioned use of harsh chemicals. Ammonia, vinegar, magic erasers, or generic household cleaners promise a quick fix. They often strip or bleach the leather’s dye and finish, leaving a different kind of damage that’s far harder to repair than the original water mark. The cure becomes the disease.
The Practical Three-Step Method (When the Mark Dries In)
If the water has dried and left a visible mark, you’re in remediation mode, not prevention. The goal now is to gently lift surface impurities and try to re-hydrate and even out the leather’s appearance. This isn’t a magic eraser; it’s a careful reset.
What You’ll Need:
- A clean, white microfiber cloth (color can transfer)
- Mild leather cleaner (like Angelus Easy Cleaner) or a drop of Ivory or Murphy’s Oil Soap
- A second clean, damp microfiber cloth
- Leather conditioner (like Bickmore Bick 4 or Leather Honey)
Step 1: Clean Gently
Dampen your white cloth with lukewarm water and wring it out thoroughly. If the mark is stubborn, add a tiny drop of your mild cleaner to the damp cloth, never pour cleaner directly onto the leather. Work in small, gentle circles, starting from the outside of the stain and moving inward. You’re not scrubbing. You’re trying to transfer the stain to the cloth.
If you see color coming off on your cloth, stop immediately. You’re lifting dye, not dirt. That means the water damage has likely compromised the finish, and further cleaning will make it worse. At that point, your only ethical move is to stop and consider professional help.
Step 2: Rinse and Blot Dry
Take your second cloth, dampen it with clean water, and wring it out well. Wipe over the entire cleaned area to remove any soapy residue. Soap left behind will attract more dirt. Then, use the dry side of your first cloth to blot the area firmly, absorbing all the moisture you can. Don’t rub.
Step 3: Condition and Wait
Let the leather dry completely at room temperature. This can take several hours or even a full day. Patience is the ingredient most people skip. Once it’s totally dry to the touch, apply a thin coat of leather conditioner to the entire panel, not just the stained spot. This helps replenish oils lost during the cleaning and can minimize the visual contrast of the affected area as it soaks in.
| Scenario | Immediate Action | What NOT To Do | Realistic Outcome |
|---|---|---|---|
| Fresh water spill on any leather | Blot aggressively with dry cloth. Let air-dry. | Apply heat. Rub the spot. | High chance of no permanent mark. |
| Dried water ring on finished leather | Gentle 3-step clean (clean, rinse, condition). | Use harsh chemicals or abrasive pads. | May lighten or even out; ring may remain faintly. |
| Dried water ring on aniline leather | Very gentle damp cloth wipe only. Condition after. | Attempt aggressive cleaning. | Likely permanent; conditioning may blend it slightly over time. |
| Perforated leather with dark spots near holes | Wipe entire surface with damp cloth & distilled water. Dry naturally. | Use leather cleaner on spots. Apply seat heat. | Darkening is often permanent dye change, not a cleanable stain. |
When It’s Not a Stain (And You Can’t “Remove” It)
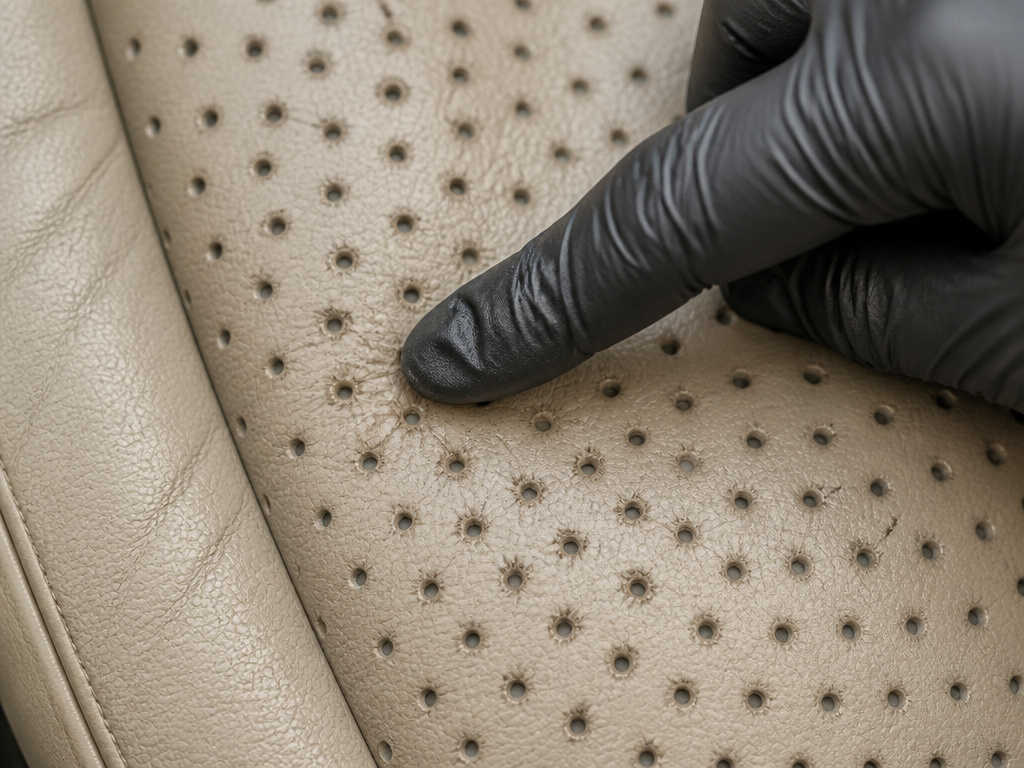 Sometimes, what looks like a water stain is actually a physical change to the leather. This is most common with two things: perforated leather and aniline leather.
Automotive manuals like the NHTSA technical service bulletin for some 2015 vehicles note that perforated seat leather can show dark spots around the holes after exposure to dampness or rain. This is the pre-dyed leather darkening where moisture concentrated, not dirt or a surface stain. The bulletin is clear: this is not a defect, and using leather cleaner on it won’t fix it.It may even make it more noticeable.
With high-quality aniline leather, water can permanently alter the dye’s saturation in the area it touched. You’re not cleaning a contaminant off; you’re looking at the material itself, now changed. In these cases, the best “treatment” is often a gentle conditioning to restore suppleness and accept that the leather has developed a bit of character. Chasing a perfect removal here usually ends in a bigger, shinier, or discolored patch.
Your Leather Care Toolkit
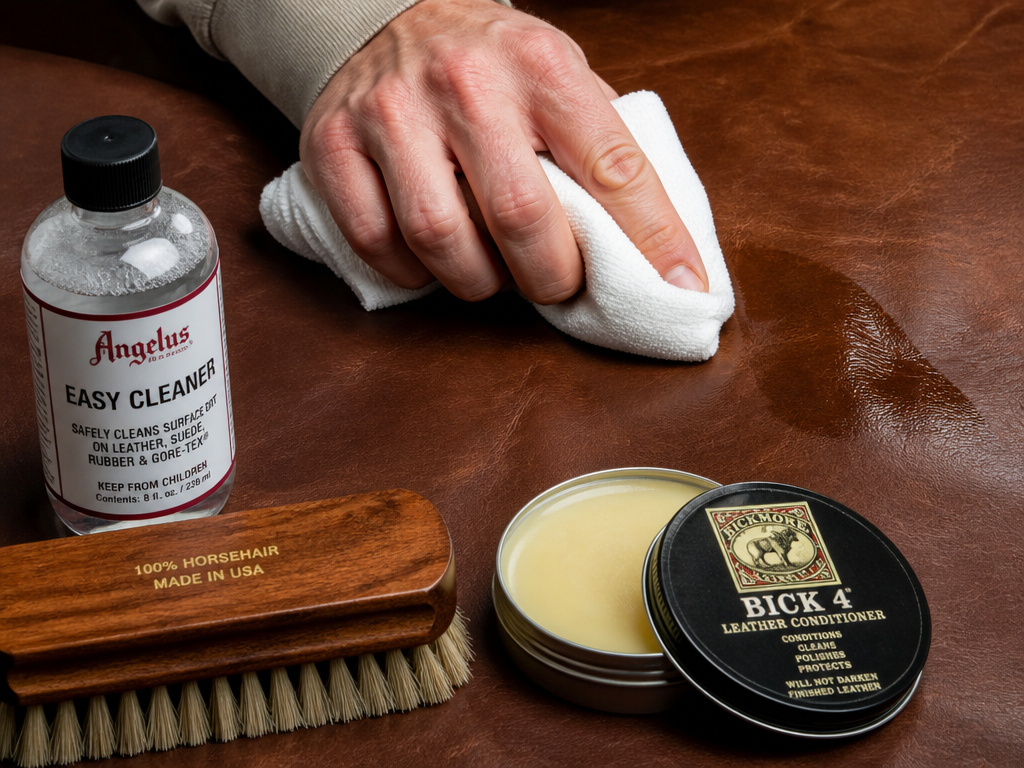 You don’t need a cabinet full of potions. A few specific, multi-use products cover ninety percent of situations. I keep my kit simple.
For cleaning, I reach for Angelus Easy Cleaner. It’s pH-balanced for leather, doesn’t strip dyes, and works on most finished types. For a DIY option, a drop of Ivory or Murphy’s Oil Soap in a quart of water is the dilution recommended in several professional guides.
Conditioning is essential after cleaning. Bickmore Bick 4 is my default for most modern, factory-finished leathers. It doesn’t darken excessively and absorbs well. For older, drier, or vegetable-tanned leathers, Leather Honey provides a deeper nourishment, though it does impart a richer color.
The tools are just as important. A pack of white, lint-free microfiber cloths is your best friend. For slightly more aggressive cleaning on durable leathers, a 3M Scotch-Brite Type T Scuff Sponge (the one specified in the automotive TSB) is perfect for applying cleaner without scratching. And for any treatment, always have a horsehair brush handy to work conditioner in and buff the surface to a soft sheen.
| Product Type | Specific Product | Best Used For | Key Benefit |
|---|---|---|---|
| Mild Cleaner | Angelus Easy Cleaner | General cleaning on finished leathers. | pH-balanced, safe on dyes, versatile. |
| DIY Cleaner | Ivory Soap / Murphy’s Oil Soap (diluted) | Light cleaning per manufacturer guides. | Readily available, gentle, inexpensive. |
| Conditioner (Light) | Bickmore Bick 4 | Jackets, bags, modern furniture. | Minimal darkening, non-greasy finish. |
| Conditioner (Heavy) | Leather Honey | Dry, older, or vegetable-tanned leather. | Deep penetration, excellent nourishment. |
| Tool | White Microfiber Cloths | All cleaning, blotting, and buffing. | Lint-free, color-safe, reusable. |
What About Prevention?
The only way to guarantee no water stains is to prevent the water from hitting the leather in the first place. For items you know will get wet, like boots or outdoor furniture, use a dedicated leather protectant like Tarrago Nano Protector or Saphir Super Invulner. These create a hydrophobic barrier. They slightly alter the leather’s hand-feel, but for a utility item, it’s a worthwhile trade-off.
For a favorite bag or sofa, the best prevention is awareness. Use coasters. Don’t set damp items directly on the surface. And if a spill happens, you now know the drill: blot, air-dry, assess later. A well-maintained piece with a layer of conditioner containing lanolin or beeswax is also more resilient, as the oils help repel water briefly, giving you those extra seconds to grab a cloth.
Frequently Asked Questions
Can you use vinegar to remove water stains from leather?
No, do not use vinegar. It is acidic and can strip the finish and dye from leather, creating a bleached or damaged area that is harder to repair than the original water mark. Stick to pH-balanced leather cleaners or mild soap solutions.
Does toothpaste remove water stains from leather?
Toothpaste is abrasive and often contains whitening agents or strong detergents meant for enamel. Using it on leather will likely scratch the finish and could bleach the color. It’s a household myth that causes more harm than good.
How do you remove old, set-in water stains from leather?
Old stains are challenging because the impurities have settled. Follow the three-step gentle cleaning method outlined above, but temper your expectations. You may only lighten the stain. Deep, set-in stains, especially on aniline leather, are often permanent. Conditioning afterward is crucial to restore flexibility and minimize the visual contrast.
Will a hair dryer remove water stains from leather?
Never use a hair dryer, heat gun, or direct sunlight to dry wet leather. Heat sets stains by causing rapid evaporation, which deposits impurities in a concentrated ring. It also risks drying out and cracking the leather. Always allow leather to air-dry at room temperature.
Can olive oil remove water stains from leather?
Do not use olive oil or other cooking oils. They can go rancid over time, creating unpleasant odors and attracting dirt. They also overly saturate the leather, leaving it greasy and prone to staining. Use a product specifically designed as a leather conditioner.
The Bottom Line
Water stains on leather are a battle against time and chemistry. Your best defense is a dry cloth and patience. Your best repair is a gentle hand and realistic expectations.
If you’re facing a fresh spill, remember: blot, don’t rub, and walk away. Let the room-temperature air do the work. If you’re confronting a dried ring, your gentle clean-and-condition routine is the only safe play. Accept that some marks, particularly on delicate or perforated leather, are a change in the material’s story, not a flaw to be erased.
The leather will tell you what it needs. Rushing it with heat or harsh chemicals is a sure way to write a chapter of damage. Working with it, conditioning it, caring for it, is how a piece gains its unique character. Sometimes, that includes a faint memory of a spilled glass, softened by time and oil into just another part of its patina.
