
How to Work with Leather | The Essential Starter Process
This post contains affiliate links. As an Amazon Associate, we earn from qualifying purchases.
This post contains affiliate links. As an Amazon Associate, we earn from qualifying purchases.
To work with leather, start with three core skills: cutting cleanly, stitching by hand, and finishing edges. You need three essential tools: a self-healing cutting mat, a sharp utility knife with replaceable blades, and a stitching awl. Your first project should be a simple, flat item like a key fob or card holder, made from affordable 3-4 oz vegetable-tanned tooling leather.
The process is about building muscle memory on manageable tasks, not about buying every tool you see online. A sharp blade and a patient hand will teach you more than a garage full of gear you don’t understand yet.
What follows: a breakdown of the three essential skills, the only tools worth buying first, a foolproof starter project walkthrough, and the one chemical mistake that ruins more beginner work than anything else.
Key Takeaways
- Focus on mastering three skills, cutting, stitching, and edge finishing, before exploring advanced techniques like carving or skiving.
- Buy only three quality starter tools: a self-healing cutting mat, a sharp utility knife, and a stitching awl. Avoid pre-packaged “kits.”
- Start with a simple, flat project using 3-4 oz vegetable-tanned tooling leather to learn fundamentals without wasting expensive material.
- Never use plastic or nylon edge burnishers on natural leather edges; the friction heat can melt the material onto your project.
- Condition leather only after your piece is fully constructed, not during the building process.
The 3 Skills Every Leatherworker Needs
Your first weeks with leather shouldn’t be about fancy carving or complex patterns. They should be about making your hands obey. Three skills form the foundation: cutting a straight line, pulling consistent stitches, and finishing a smooth edge. Master these, and every other technique becomes an addition, not a mystery.
The leather will tell you what it needs. A dull blade tears fibers instead of slicing them. Uneven stitch tension leaves a puckered seam that no amount of pounding will fix. A rushed edge burnish feels gritty and looks amateurish. Patience isn’t a virtue here; it’s the mechanism.
Let’s be clear about one thing. You don’t need a workshop. You need a flat, stable surface, a kitchen table over a towel will do, and about two square feet of space.
Cutting: It’s About the Blade, Not the Force
A clean cut starts with a sharp blade and ends with a single, confident pull. Pressing down with a dull knife mashes the leather, leaving a fuzzy, crushed edge that’s nearly impossible to clean up later.
- The right angle: Hold your knife vertical, or at a very slight angle away from your pattern line.
- The right pressure: Let the sharpness do the work. You’re guiding, not forcing.
- The right number of passes: For thicker leathers, score your line first with light pressure, then deepen the cut with a second pass. Never saw back and forth.
You’ll know you’ve cut correctly when the leather separates with a soft, crisp sound and the cut edge feels smooth to the finger, not ragged.
Hand Stitching: Consistency Beats Speed
Machine stitching has its place, but hand stitching with an awl creates a stronger, more repairable seam for the beginner. It also teaches you about tension and spacing in a way a machine never will.
Here’s the practical takeaway. Your goal isn’t to finish quickly. It’s to make every stitch look like the one before it. That means consistent hole spacing (a stitching chaser or pricking irons help later) and even pull tension.
Where this goes sideways: Yanking each stitch tight as you go. This pulls the leather out of alignment and can pucker the seam permanently. Pull firmly until the thread beds into the hole, then stop. The seam will tighten evenly when you’re done.
Edge Finishing: The Difference Between “Homemade” and “Handmade”
An unfinished leather edge is rough, absorbs dirt, and screams “first project.” Finishing it, beveling, sanding, and burnishing, seals the fibers and gives your work a polished look. This is where a lot of beginners get impatient and make a permanent mess.
I learned this the hard way. I used to use cheap, plastic edge burnishers. On one long edge, the friction built up so much heat it melted the plastic burnisher itself, leaving a gummy smear on the leather that I had to cut away and start over. Now I use a wooden slicker or a piece of canvas for a friction burnish, they can’t melt, and they apply heat more evenly.
| Edge Finishing Step | Tool | Goal |
|---|---|---|
| Bevel | Edge beveler (size #2) | Rounds over the sharp corner to prepare for sanding. |
| Sand | 400-grit, then 800-grit sandpaper | Smooths all scratches and creates a uniform surface. |
| Burnish | Wooden edge slicker or canvas cloth + water | Heats and compresses the fibers to create a glossy seal. |
The 3 Essential Tools (Skip the “Kit”)
Walk into any hobby store and you’ll see a wall of pre-packaged leatherworking “starter kits.” Ignore them. You’ll replace 80% of that plastic junk within six months. Instead, invest in three quality tools that you’ll use for years.
1. A Self-Healing Cutting Mat. This isn’t just to protect your table. The grid lines are your guide for straight cuts and right angles. A 18″ x 24″ mat gives you ample room.
2. A Sharp Utility Knife or Round Knife. I prefer a standard utility knife with replaceable blades (like an Olfa) for beginners. It’s familiar, cheap to maintain, and brutally effective when sharp. A dedicated round knife is a joy for long, flowing cuts, but it requires more skill to sharpen.
3. A Stitching Awl. This is your hole-puncher and needle driver in one. A basic diamond-point awl is perfect. It makes clean holes without tearing and helps you pull the needle through tough leather.
With these three tools, a metal ruler, a mallet (a household hammer works in a pinch), and some needles and thread, you can complete 90% of beginner projects. The rest, skiving knives, edge creasers, stamping tools, are for solving specific problems you haven’t encountered yet.
Your First Project: Keep It Flat, Keep It Simple
Your ambition is your enemy right now. Do not choose a wallet, a bag, or anything that requires folding, gussets, or complex pattern assembly. You will fail, get frustrated, and waste good leather.
The ideal first project is flat, small, and has only one or two seams to stitch. A key fob, a simple card holder, a bookmark, or a glasses case pattern are all perfect. They teach you the complete workflow on a manageable scale.
Here’s a straightforward guide to that first card holder:
- Transfer your pattern. Print or draw your design on paper, then trace it onto the flesh side (rough side) of your leather using a stylus or dry ballpoint pen.
- Cut it out. Use your sharp utility knife and metal ruler, cutting on the outside of your traced line.
- Punch your stitch holes. Mark your stitch spacing (3-4mm apart is good), then use your awl to punch clean holes straight through the leather.
- Stitch it together. Waxed polyester or linen thread works well. Use a simple saddle stitch, it’s strong and looks professional.
- Finish the edges. Bevel, sand, and burnish all the exposed edges. This is where your project goes from a leather craft to a leather good.
Choosing Your First Leather
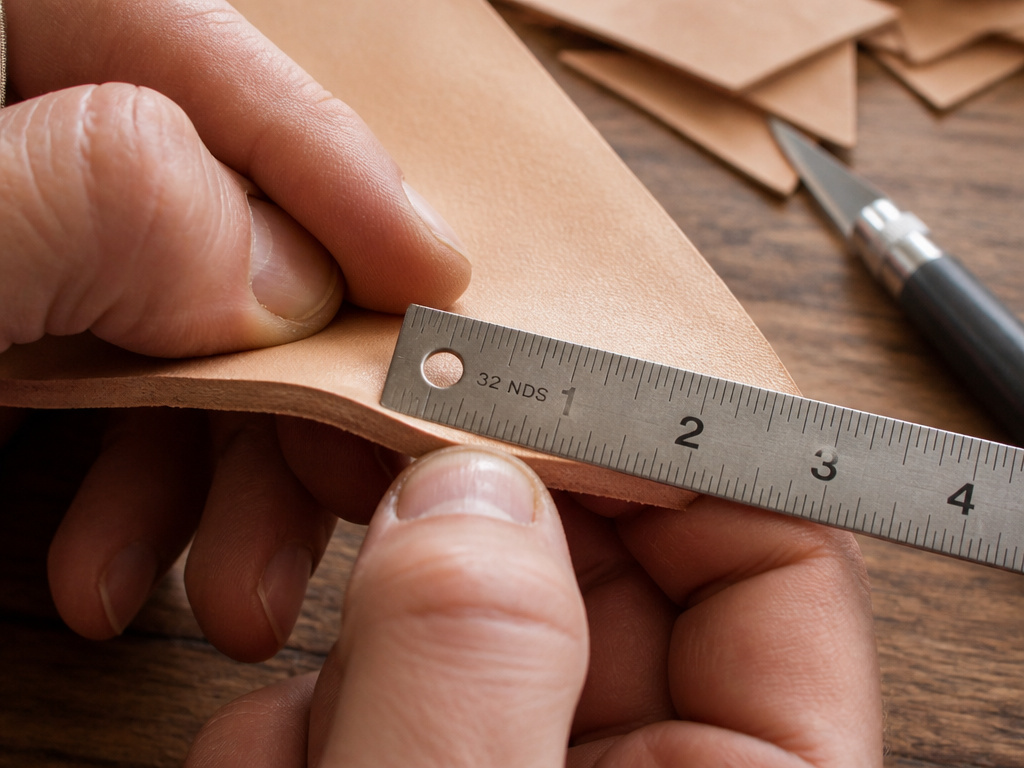 The leather you pick is more important than any tool. Get it wrong, and you’re fighting the material from the first cut.
For beginners, 3-4 oz vegetable-tanned tooling leather is the only answer. Here’s why that specific recommendation works:
- Vegetable-tanned: It’s firm, holds its shape, and molds to your touch over time. It’s also forgiving and readily available from suppliers like Tandy Leather, Weaver Leather Supply, and Springfield Leather Company.
- 3-4 oz weight: This is roughly 1.2–1.6mm thick. It’s substantial enough to feel like “real leather” but thin enough to cut and punch through without a struggle.
- Tooling grade: It’s meant to be worked. It will accept dye, conditioner, and a burnish beautifully.
Avoid chrome-tanned leathers, suedes, or super-thick harness leathers for now. They behave differently and introduce variables you don’t need.
The One Chemical Mistake Everyone Makes
Leather isn’t wood. You don’t seal it at the start. The most common chemical mistake is conditioning your leather piece before you’ve finished constructing it.
Oils and conditioners soften leather and make it more pliable. That’s great for a broken-in boot, but terrible when you’re trying to punch a clean hole or pull a tight stitch. The leather stretches and distorts.
The rule: Construct first, condition last. After your piece is fully assembled and the edges are finished, then apply a light coat of Tandy Leather Eco-Flo.amazon.com/dp/B003BCUM7A?linkCode=osi&th=1&psc=1&tag=test-20). Let it soak in overnight. Your project will thank you with a long life.
Frequently Asked Questions
What’s the best leather for a complete beginner?
Vegetable-tanned tooling leather in a 3-4 oz weight. It’s stiff, easy to cut, forgiving of mistakes, and takes edge finishing better than any other type. Skip the fancy exotics and chromes until you have the basics down.
Can I use a sewing machine on leather?
You can, but you shouldn’t, not at first. Home sewing machines struggle with anything over 2 oz thick, and the stitch is weaker than a hand-sewn saddle stitch. Learning to stitch by hand teaches you control and tension that will make you a better crafter even if you move to a machine later.
How do I sharpen my leatherworking tools?
For utility knife blades, just replace them. For a round knife or skiver, you’ll need a sharpening stone and a strop. The principle is the same as sharpening a kitchen knife: maintain a consistent angle and remove the burr. A dull tool is a dangerous tool that will ruin your work.
Is vegetable-tanned leather good for wallets?
Absolutely, but not for your first one. Vegetable-tanned leather develops a rich patina with use, making it ideal for items that age with you. Once you’re comfortable with stitching and folding, it’s a superb choice.
Why does my burnished edge still look rough?
You probably skipped the sanding. Burnishing only works on already-smooth fibers. If your edge is scratched from cutting or the beveler, you need to sand it progressively from 400 grit up to at least 800 grit until it’s perfectly smooth to the touch. Then apply a drop of water and burnish with wood or canvas.
Before You Go
The first cut is the hardest. After that, it’s just repetition. Buy the three tools, pick up a shoulder of vegetable-tanned tooling leather, and cut out ten identical rectangles. Practice cutting them cleanly. Practice punching straight lines of holes. Practice stitching them together with even spacing.
Your first finished piece might be rough. Your tenth will be recognizably better. That’s the whole game. Ignore the online videos of intricate masterpieces for now. Your job is to make your hands do a simple thing perfectly, not a complex thing poorly. The rest is just more simple things added together.
