
Learn How to Clean a Leather Knife Sheath to Prevent Damage
This post contains affiliate links. As an Amazon Associate, we earn from qualifying purchases.
To clean a leather knife sheath, remove the knife and brush off loose dirt. Wipe the sheath with a cloth dampened in lukewarm water and a drop of mild soap, rinse, then air-dry naturally for 12 to 24 hours. Never use heat. Once dry, apply a thin coat of a natural oil conditioner like neatsfoot oil or a beeswax paste.
That’s the safe, standard procedure. The part most guides skip is the timeline: that 12-24 hour drying window is the critical buffer between a supple sheath and one that’s stiff, brittle, and cooked.
This guide walks through the specifics that keep your sheath from becoming a liability. The guide explains the right tools, what to do when you see white fuzz or crusty salt lines, and why the conditioner you choose matters more than how hard you scrub.
What follows: a five-step cleaning process, a breakdown of conditioners that work versus those that cause harm, and the critical warnings that prevent permanent damage.
Key Takeaways
- Air-drying a cleaned sheath takes 12-24 hours; using any heat source (hair dryer, radiator, sun) cooks the natural oils out, leaving the leather permanently stiff and brittle.
- For deep cleaning, use a product made for leather like Montana Pitch Blend Leather Oil Soap or a single drop of Dawn dish soap in lukewarm water, never petroleum-based cleaners or saddle soap on modern sheaths.
- Condition every six months with a natural oil like neatsfoot oil or a beeswax/propolis blend (Obenauf’s); this restores suppleness and is your main defense against cracking.
- Never store a knife inside its leather sheath for more than a few days; trapped moisture causes “sheath rot” on the leather and can pit the steel blade.
- Address mold (white/green fuzz) immediately with a vinegar solution and salt stains with a mix of one part white vinegar to three parts water before conditioning.
The 5-Step Cleaning Process
Forget the complicated potions. Cleaning a leather sheath is about patience, not power. Reid Hyken from Sharpshooter Sheath Systems, the guy who makes sheaths for Bark River and Benchmade, calls over-cleaning and rushing the dry two cardinal sins. His advice is what we’re building on here.
Before you start: Never clean a sheath with the knife inside. Leather is vulnerable when wet and can be cut or deformed. Ensure your workspace is clean, dry, and at room temperature.
Here’s the sequence that works for everything from a dusty camp sheath to one caked in mud.
1. Remove & Dry Brush
Take the knife out. Inspect the interior for any debris like sand or wood chips. Tap it out. Using a soft-bristle brush (a horsehair brush or a clean, dry paintbrush works), vigorously brush the entire exterior. Focus on the stitching channels and the welt, that’s the strip of leather between the front and back panels where the knife edge rests. Grit trapped here acts like sandpaper on the threads.
Skip this step and you’ll just grind surface dirt into the leather during the wet wash.
2. The Lukewarm Wash
Fill a bowl with lukewarm water. Not hot. Hot water strips oils aggressively. – Light soil: Dampen a soft, lint-free cloth (microfiber is ideal), wring it out until it’s just moist, and wipe the sheath down. – Heavy soil or grease: Add a cleaner. For a manufacturer-approved option, use a leather-specific soap like Montana Pitch Blend Leather Oil Soap. If you don’t have that, a single drop of clear Dawn dish soap in your water bowl is the safe, accessible alternative. Work the soap into a lather on your damp cloth, then apply it to the leather using gentle, circular motions.
Don’t dunk the sheath. Don’t scrub. You’re lifting grime, not scouring a pan.
3. Rinse & Wipe
This is the step that prevents soap residue from drying into the leather and attracting more dirt. Rinse your cloth thoroughly, wring it out, and go over the sheath again to dilute and remove any soapy solution. Follow immediately with a second clean, dry cloth to wick away as much surface moisture as possible.
4. The Critical Air-Dry
Place the sheath on a dry towel in a room with good airflow. A warm room is fine. Direct sunlight, a radiator, a hair dryer, or a fireplace is not.
Where this goes sideways: Propping a wet sheath by a fire to dry fast. Heat causes the leather fibers to contract violently and the natural oils to evaporate. Hyken’s verdict is final: “Once leather is stiff and dry, its natural oils are gone for good, it’s cooked, it’s poached and there’s no restoring it.”
The drying time isn’t arbitrary. It takes 12 to 24 hours for the water to fully evaporate from the leather’s core, depending on your humidity. If the sheath feels cool to the touch, it’s still wet inside.
5. Post-Cleaning Inspection
Once completely dry, the leather will feel stiff. That’s normal. Check the stitching for integrity and feel for any odd textures. This is also the time to secure any hardware. If your sheath uses Chicago Screws (brass posts with a separate screw-on back), a drop of blue threadlocker can keep them from backing out during use, a tip straight from the Diomedes Industries care guide.
Conditioning: Restoring the Oils
Cleaning removes grime, but it also removes some of the leather’s essential oils. Conditioning puts them back. Think of it like applying a hand-rubbed oil finish to wood: you work in thin, even coats, letting each one be fully absorbed.
When to condition: Every six months for a sheath in regular use, or immediately after any deep clean.
| Conditioner Type | Best For | Risk If Misused |
|---|---|---|
| Neatsfoot Oil (Pure or compound) | Traditional vegetable-tanned sheaths; penetrates deeply. | Can over-soften and darken leather significantly; attracts dirt if over-applied. |
| Beeswax-Based Paste (e.g., Obenauf’s, Montana Pitch Blend Dressing) | All-around protection; adds water resistance. | Can build up a waxy film if not buffed thoroughly, trapping dirt. |
| Specialized Leather Milk/Balm (e.g., Leather Balm) | Light conditioning on already supple sheaths. | May not be sufficient for severely dry or older leather. |
The process is simple: 1. Apply a very small amount of your chosen conditioner to a clean cloth. 2. Massage it into the leather in a thin, even coat. Pay extra attention to high-wear areas like the belt loop and the mouth of the sheath. 3. Let it soak in for at least 30 minutes. 4. Buff aggressively with a clean, dry cloth to remove any excess. This buffing step is essential, excess oil or wax is a dirt magnet.
What most people get wrong: They use a silicone-based “protector” or a petroleum product. Leather is skin. If you wouldn’t rub motor oil on your arm, don’t put it on your sheath. These products clog the leather’s pores, preventing it from breathing and eventually causing it to dry out and crack from within.
Solving Specific Problems: Mold, Salt & Stretch
Sometimes a basic clean isn’t enough. Here’s how to handle the edge cases that can ruin a sheath if ignored.
Mold & Mildew
You’ll see it as white or green fuzzy patches. Mold eats leather if left unchecked. 1. Mix a solution of equal parts white vinegar and water. 2. Dampen a cloth with the solution and gently wipe the affected area. The vinegar’s acidity kills the mold spores. 3. Wipe the area with a water-dampened cloth to rinse. 4. Dry and condition immediately, as the vinegar can be drying.
Salt Stains
Those white, crusty lines are from sweat or saltwater. Salt pulls moisture from leather, making it brittle. 1. Mix one part white vinegar to three parts water. 2. Dampen a cloth and wipe the salt lines until they dissolve. 3. Rinse and dry thoroughly. 4. Condition immediately to replace lost oils.
A Sheath That’s Lost Its Grip
If your knife slides out too easily, you can perform a “damp fit.” 1. Lightly moisten the interior of the sheath until pliable. 2. Wrap your knife blade in several layers of plastic wrap (to protect it from moisture). 3. Insert the wrapped knife into the sheath. 4. Use your fingers to press and mold the leather snugly around the knife’s profile. 5. Let it dry completely with the knife inside. As it dries, the leather will shrink slightly, tightening the fit.
The Tools & Products You Actually Need
 You don’t need a specialty kit. A few simple, multi-purpose tools cover it.
- Soft-Bristle Brush: A horsehair brush or even a clean, dry toothbrush for stitching.
- Lint-Free Cloths: Microfiber cloths are perfect. Avoid paper towels, which can leave lint.
- Mild Cleaner: Montana Pitch Blend Leather Oil Soap or a bottle of clear Dawn dish soap.
- Conditioner: A small tin of Obenauf’s Heavy Duty LP or a bottle of pure neatsfoot oil.
- Bowls & Towels: For water and drying.
I keep it this simple in my own shop. Early on, I tried to improvise with whatever was nearby and learned the hard way that using the wrong cleaner, once it was a strong saddle soap, can strip a finish right off. Now, I stick with the basics that I know work without guesswork.
What Never to Do With a Leather Sheath
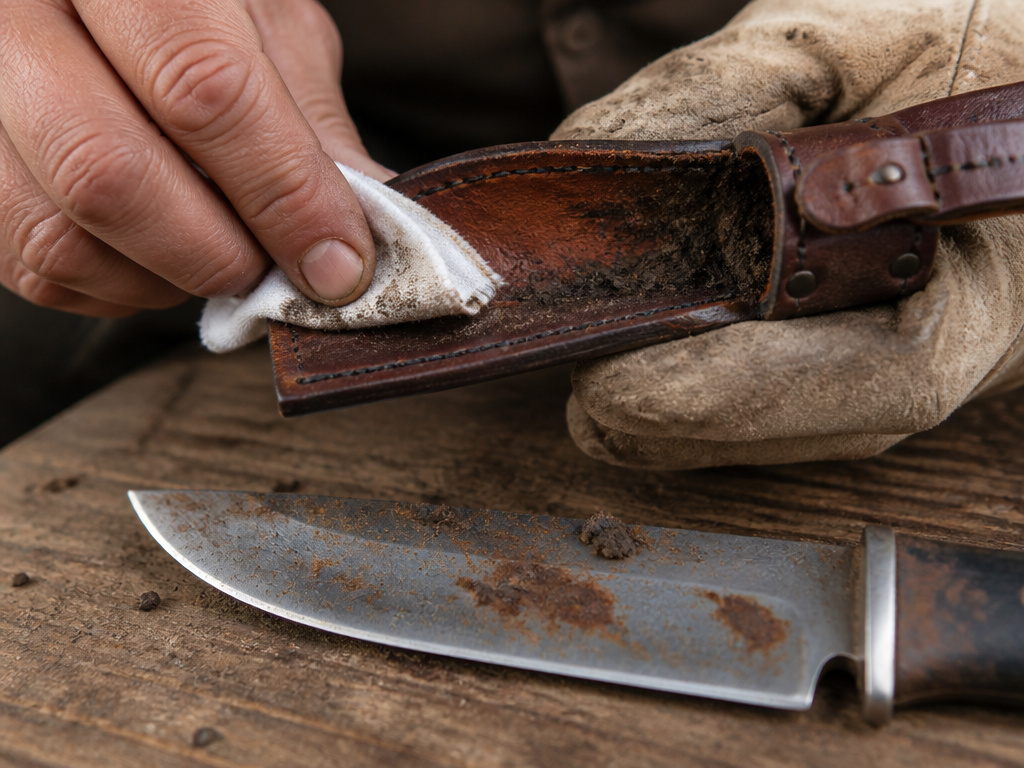 These warnings describe the predictable outcomes of specific mistakes.
Never store a knife in its leather sheath. This is the most common long-term mistake. Leather attracts ambient moisture. Trapped against the steel blade, that moisture causes two failures: “sheath rot” (a deterioration of the leather) and corrosion pitting on the blade. For storage, keep them separate.
Never re-sheath a wet or dirty knife. After cleaning game or working in the rain, wipe your knife dry and clean before it goes back in. Forcing a dirty blade in grinds abrasives into the leather lining, wearing it out from the inside.
Never use petroleum-based products. This includes most “waterproofing” sprays, mink oil blends with petroleum, or generic “leather treatment” from a hardware store. They degrade the leather fibers over time.
Never skip the conditioning buffer. Cleaning without follow-up conditioning leaves the leather thirsty and prone to cracking. They are a pair of actions.
Frequently Asked Questions
Can I use saddle soap on my knife sheath?
Probably not. Traditional saddle soap is designed for thick, unfinished saddle leather that gets caked in mud and sweat. On most modern knife sheaths, which often have a light factory finish or oil treatment, saddle soap can be too harsh and drying. For general cleaning, lukewarm water with a drop of Dawn is safer and more effective.
How often should I clean and condition my sheath?
Clean it when it’s dirty. Condition it on a schedule: every six months for a sheath you use frequently. If you get caught in the rain or the sheath is exposed to saltwater, clean and condition it as soon as possible afterwards.
My sheath is stiff after cleaning. Did I ruin it?
Some stiffness is normal after a wash, as the water temporarily swells the fibers. It should relax once you condition it. Permanent, board-like stiffness is a sign you dried it with heat (sun, hair dryer, heater), which cooks the collagen fibers. That damage is irreversible.
What’s the best leather conditioner for a knife sheath?
For a balance of penetration and protection, a beeswax and propolis blend like Obenauf’s Heavy Duty LP is an excellent choice. For pure penetration on very dry, vegetable-tanned leather, pure neatsfoot oil works well. The key is to use a little and buff off the excess.
How do I remove black dye transfer from my sheath onto my knife handle?
Some dyes, especially black, can transfer onto light-colored knife handles initially. Rubbing alcohol on a cloth will usually remove it without harming most handle materials (like G-10 or Micarta). Always check your knife manufacturer’s care instructions first.
Before You Go
Leather care is less about frequent intervention and more about timely, correct intervention. The one threshold that changes everything is that 12-24 hour drying window. Respect it, and you avoid the single most common irreversible mistake.
The first step to take this week is to check the sheath you use most often. Look for white salt lines at the belt loop, feel for unusual stiffness, and see if the knife still fits snugly.That five-minute inspection tells you what kind of care it actually needs, maybe none, maybe a quick condition, maybe the vinegar treatment for a salt line you hadn’t noticed.
And if you do need to clean it, now you know the rhythm: brush, wash with lukewarm water, rinse, air-dry patiently, then condition. It’s a simple cycle that keeps a functional piece of gear from becoming a retired one.
