
How to Condition a Leather Dog Collar: A Complete Guide
This post contains affiliate links. As an Amazon Associate, we earn from qualifying purchases.
To condition a leather dog collar, you match the conditioner to the leather type, apply it to clean, dry leather in a thin, even coat, and let it absorb fully before buffing off any excess. The wrong product, like a wax-heavy balm on a padded lining, can clog the leather and cause it to stiffen and crack.
Properly conditioning the leather is essential for a collar’s longevity. Latigo and bridle leathers absorb oils and waxes deeply, while the suede-like lining on many padded collars requires a gentler application.Getting it wrong doesn’t just look bad; it changes the leather’s flexibility where the buckle sits, which is where most collars fail first.
What follows is the breakdown: how to pick your fighter from the conditioner shelf, the exact hand motions that matter more than the brand, and the climate-driven schedule that keeps the leather pliable through swims, pulls, and downpours.
Key Takeaways
- Match the conditioner to the leather. Use oil- or wax-based products like Bick 4 or Smith’s Leather Balm on latigo and bridle leathers. For padded or lining leathers, stick with lighter conditioners like Bick 4 and avoid heavy oils.
- Clean first, always. Conditioning dirty leather seals grime into the pores, creating a gritty layer that accelerates wear and can irritate your dog’s neck.
- Condition based on feel and climate, not a calendar. A collar worn daily in a dry, coastal climate like Perth may need conditioning every 2–3 weeks, while one in a mild indoor environment might go 4–6 months.
- Let it dry flat. Hanging a damp or freshly conditioned collar can stretch and warp the leather. Lay it on a towel in a well-ventilated spot.
- Specialty finishes are hands-off. Embossed, metallic, or sparkle leathers are luxury items; clean them only with a damp cloth and never apply conditioner.
The First Rule: Know What You’re Conditioning
Not all leather is the same, and neither is every dog collar. The conditioner that revitalizes a thick working-dog lead will ruin a fashion collar with a soft lining.
Vegetable-tanned leather, common in quality collars, is porous and designed to absorb conditioning oils. Chrome-tanned or finished leathers have a surface coating; they need lighter products. Then there’s the lining, the part against your dog’s neck. It’s often a different, more absorbent leather.
Where this goes sideways: Using a wax-based conditioner like Huberd’s Shoe Grease on a collar’s padded lining. The wax seals the lining’s pores, trapping moisture from your dog’s skin. The leather underneath never dries properly, turns stiff, and can develop a sour smell within a few weeks.
The labels help. Full-grain, latigo, and bridle leathers are workhorses. They handle oils and waxes well. If your collar has a soft, fuzzy, or suede-like interior, treat that area with a lighter hand. A product like Bick 4 Conditioner is a safe bet for both sides because it’s designed not to darken leather or clog pores.
The 3-Step Conditioning Process (With Pictures in Your Head)
Here’s the thing. You can own the perfect conditioner and still mess this up by rushing. The process involves a slow, thorough soaking of the material.
Step 1: Start with a perfectly clean, dry collar.
Remove all hardware if you can. If the collar is stitched on, just ensure every inch is free of dirt and salt. Use a cloth dampened with lukewarm water (think 98–105°F or 36.5–40.5°C). For grime, a drop of glycerin saddle soap on the cloth works without residue. Dry it completely. No shortcuts. A collar conditioned while damp will dry stiff and can develop mildew.
Step 2: Apply a thin coat with your fingertips.
Dispense a pea-sized amount of conditioner onto a soft cloth or your fingers. Rub your hands together to warm it. Now massage it into the leather using small, circular motions. Cover the entire surface, paying extra attention to the area around the buckle holes and the D-ring, these high-stress points dry out first. You should see a slight darkening as the leather drinks it in, but there shouldn’t be a greasy film left on top.
Step 3: Wait, then buff.
Walk away. Let the collar sit on a flat surface, do not hang it, for at least an hour, preferably overnight. This lets the oils penetrate fully. Come back and buff it gently with a clean, dry cloth. This removes any excess product and brings up a soft sheen. If the leather still feels dry or stiff to the touch, repeat Step 2 on just those areas.
Picking Your Conditioner: Oil, Wax, or Balm?
The aisle is confusing. You have oils, balms, creams, and sprays. For a dog collar that sees real life, you can ignore most of it. Focus on three categories.
| Product Type | Best For | What It Does | A Named Example |
|---|---|---|---|
| Oil-Based | Dry, thirsty vegetable-tanned leather (latigo, bridle). | Penetrates deeply to replenish lost oils from the inside out. | Neatsfoot Oil (pure, not compound) |
| Wax-Based Balm | Collars exposed to frequent moisture or rough conditions. | Sits on the surface, providing a protective, water-resistant barrier. | Smith’s Leather Balm, Huberd’s Shoe Grease |
| Light Conditioner/Cream | All-purpose care, finished leathers, and padded linings. | Conditions without heavy wax buildup, minimizing darkening. | Bick 4 Conditioner, Leather Honey |
My default pick for someone who wants one answer: Bick 4 Conditioner. It works on almost every leather type in a collar, doesn’t darken significantly, and won’t gum up stitching or lining. For a working dog that swims or hikes in the rain, I’d step up to a wax-based balm like Smith’s for the weatherproofing.
How Often Should You Do This?
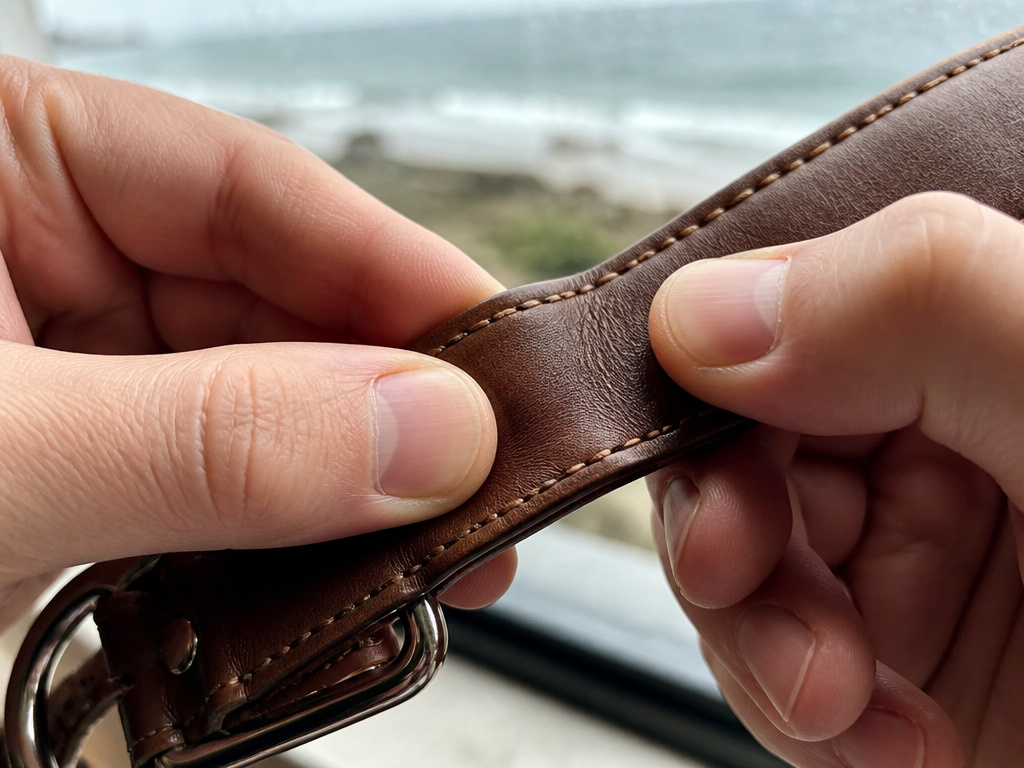
Throw out the “every six months” rule. Frequency depends on three variables: climate, use, and leather type.
A collar worn daily by a dog in humid, salty coastal Queensland needs attention every 2–3 weeks. The same collar on a dog in a dry, temperate indoor climate might be fine for 4–6 months. The best gauge is the leather itself.
The part nobody mentions: The “pinch test.” Pinch a fold of the leather between your thumb and forefinger. If it feels stiff, crackly, or looks noticeably lighter and dried out, it’s time. If it’s still supple and returns to shape smoothly, you can wait.
Here’s a quick reference to adjust for your situation:
| Condition | Suggested Frequency | Why |
|---|---|---|
| Normal daily wear, indoor climate | Every 4–6 months | Minimal environmental stress. |
| Coastal, high-humidity, or frequent swimming | Every 2–3 weeks | Salt and moisture strip oils rapidly. |
| Hot, arid climate (e.g., Arizona, Perth summer) | Every 3–4 weeks | Heat and dry air desiccate the leather. |
| New collar (first 6 months) | Every 4–6 weeks | Initial conditioning stabilizes the tannins and oils. |
| Collar stored off-dog | Once before storage, then check every 6 months | Prevents drying out in storage. |
What Happens If You Condition Dirty Leather?

You create a leather-and-grime sandwich. The conditioner acts as the glue.
Dirt and salt are abrasive. When you rub conditioner over them, you press those particles deeper into the leather’s pores. Over time, this forms a gritty layer inside the material. It doesn’t just feel rough; it acts like sandpaper against itself every time the collar flexes, accelerating wear from the inside out. You’ll see premature cracking around the bend points, especially at the buckle.
The fix is simple but essential. Always start with a clean slate. A quick wipe with a damp cloth is the bare minimum. Com/how-to-clean-a-leather-dog-collar/) walks through the safe way to lift dirt without harming the leather.
The “Wax Bloom” Mystery (And Why It’s Fine)
You condition your collar, store it for the winter, and pull it out to find a pale, chalky film on the surface. Don’t panic. That’s wax bloom.
It happens with conditioners containing natural waxes, like beeswax in Smith’s Leather Balm or Huberd’s Shoe Grease. In cold temperatures, the wax migrates to the surface and crystallizes. It looks strange but doesn’t harm the leather.
It’s a sign the product is doing its job, not a defect. The wax that bloomed out was your protective barrier.
To remove it, just rub the collar with a soft cloth. The friction from your hand will warm and re-melt the wax, letting you buff it back in or wipe it away. The collar will look good as new.
Special Cases: What Not to Condition
Some collars are meant to be admired, not slathered. Luxury or fashion collars made with specialty leathers require a restrained touch.
- Embossed, Metallic, Sparkle, or “Python Print” Leathers: These have a delicate surface finish or coating. Submerging them or using conditioner can dissolve the finish, causing peeling or discoloration. Clean them only with a lightly dampened cloth.
- Collars with Non-Leather Components: If your collar has fabric straps, woven sections, or certain plastics integrated, test the conditioner on a hidden spot first. Oils can stain fabric permanently.
- Extremely Oily or “Wet-Look” Leathers: These are often heavily pre-treated at the factory. Adding more conditioner can oversaturate them, leading to a sticky feel and attracting more dirt.
When in doubt, the maker’s care guide is the final word. If they say “wipe clean only,” listen.
Storing a Conditioned Collar
Where you put the collar between uses matters almost as much as how you treat it. The goal is a stable environment.
Aim for a cool, dry place with a temperature between 50–75°F (10–24°C) and 40–55% relative humidity. A closet shelf is perfect. Avoid attics, garages, or cars, where heat and moisture fluctuate wildly.
Common mistake: Storing a leather collar in a sealed plastic bag or airtight container. Leather needs to breathe. Trapped moisture from residual humidity or the dog’s neck sweat leads to mold, a fuzzy, greenish growth that smells like damp basement and ruins the leather.
Lay the collar flat or hang it loosely by the buckle. Don’t coil it tightly or cram it into a drawer. For long-term storage, a light conditioning application first creates a protective barrier. Then check on it every six months with the pinch test.
Frequently Asked Questions
Can I use coconut oil or olive oil on my leather dog collar?
I wouldn’t. Plant-based oils like coconut and olive can go rancid over time. They oxidize inside the leather, leading to a sour, unpleasant odor and potentially degrading the leather fibers. Stick with animal-based oils (like neatsfoot) or commercial conditioners with stabilizers.
Will conditioning darken my dog’s light-colored collar?
It can, especially with oil-based products. Conditioners like pure neatsfoot oil or Huberd’s Shoe Grease will darken tan leather noticeably. Products like Bick 4 Conditioner are formulated to minimize darkening. Always test on a small, hidden area first, like the tail end of the strap.
How do I know if I’ve over-conditioned?
The leather will feel greasy or tacky to the touch, and it may darken unevenly. It can also become overly soft and lose some of its supportive strength, which is a safety issue. If this happens, wipe off as much excess as you can with a clean cloth and let the collar air out for a few days before using it.
My dog swims often. Should I condition more?
Yes, significantly more. Fresh water leaches oils; saltwater is corrosive. After every swim, rinse the collar with fresh water, dry it thoroughly, and do the pinch test. In a weekly swimming routine, conditioning every 2-3 weeks is not excessive. Consider a dedicated waterproof duffel bag to carry a separate nylon collar for swim days.
Can a hardened, stiff collar be saved?
Sometimes, but not always. If it’s just dry, a careful, patient conditioning regimen can restore suppleness. If it’s cracked or the fibers have broken from being left stiff and bent, the damage is structural. The collar may look better after conditioning, but its strength is compromised. When in doubt, replace it for safety.
Before You Go
Conditioning is a practiced response to the material’s needs, rather than a scheduled task. Let the leather’s stiffness and dryness guide you, not a date on the calendar.
The one action to take this week: take your dog’s collar off and do the pinch test. If it’s stiff, give it a clean and a light coat of a matched conditioner. That single intervention adds more life to the collar than any other step.
All the advice above assumes a collar made from durable, oil-friendly leather. If you’re shopping for a new one, the calculus starts earlier. Our breakdown of key factors when choosing a leather dog collar explains how to pick a hide that will reward this kind of care for a decade, not just a season.
