
Dye Leather Shoes Properly to Avoid Blotches and Bronzing
This post contains affiliate links. As an Amazon Associate, we earn from qualifying purchases.
This post contains affiliate links. As an Amazon Associate, we earn from qualifying purchases.
To dye leather shoes, you must strip the factory finish, apply multiple thin coats of alcohol-based dye with proper drying time between each, and finish with a conditioner. The most common failure is over-saturation, which causes a metallic “bronzing” effect that requires stripping back with deglazer.
Most guides treat dyeing as a simple paint job. They don’t. Leather is a skin, not a canvas. The factory applies a sealant, oils, waxes, silicones, specifically to repel liquids, including your dye. If you don’t strip that barrier completely, the dye sits on top, blotches, and eventually rubs off. The real work happens before the dye bottle opens.
What follows is the method that works on smooth, vegetable-tanned leather. We’ll walk through the three essential phases: chemical prep with the right strippers, the patient layering of dye, and the final sealing that locks your color in for years.
Key Takeaways
- Preparation is 80% of the job. A product like Angelus Leather Preparer & Deglazer or Saphir Decapant must break the factory finish; simple cleaning won’t do it.
- Thin coats win. A saturated wool dauber causes drips, pooling, and the bronzing effect, a metallic sheen from dye particles floating on residual oils.
- Dry times are not suggestions. Rushing coats before the 3-4 hour mark traps solvents, which weakens the leather’s fibers from the inside.
- You must rehydrate. Dye and deglazer are drying. Finish with multiple coats of a leather cream that meets the Saphir Médaille d’Or standard.amazon.com/dp/B004ECWBZW?linkCode=osi&th=1&psc=1&tag=test-20)** or the dye brand’s matching conditioner.
- Practice on scrap first. The feel for a properly loaded dauber is something you learn, not something you read.
The Tools and Materials You Actually Need
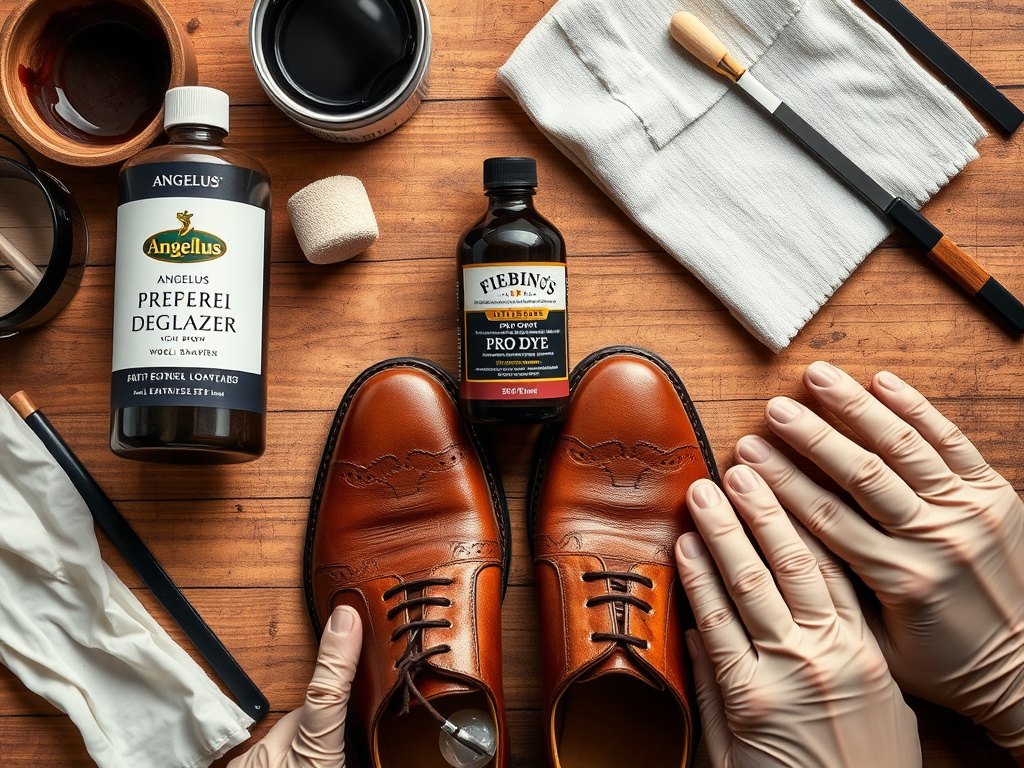
Forget the all-in-one kits. You need specific chemicals for specific jobs. Using a general leather cleaner instead of a dedicated deglazer is the number one reason home dye jobs fail.
Here’s what to gather before you start:
- Deglazer/Stripper: Angelus Leather Preparer & Deglazer is the benchmark. If you’re outside the US and can’t get it, pure acetone or high-concentration isopropyl alcohol (90%+) are your fallbacks. Saphir Decapant is another professional option, but it needs 12 hours for its solvents to fully flash off.
- Dye: Alcohol-based leather dye (Fiebing’s Pro Dye, Angelus Leather Dye, Saphir Teinture Francaise). For color restoration, a repair dye like Tarrago Self Shine Color Dye has higher pigment load. For a full color change, a penetrating dye is better.
- Applicators: Wool daubers (included with many dyes) and soft, lint-free cloths. A small, soft-bristle brush for seams.
- Finishing Products: A leather conditioner or cream (neutral or color-matched) and a wax-based polish for protection.
- Safety & Prep: Nitrile gloves, painter’s tape, paper towels, and a well-ventilated workspace.
Before you start: Deglazers and dyes are strong solvents. Work in a well-ventilated area or outside. Wear nitrile gloves, the dye stains skin for days. Protect your work surface with newspaper or a drop cloth.
Step 1: Strip the Factory Finish Completely
This step has no shortcut. The factory finish is your enemy. I’ve seen more dye jobs fail here than anywhere else because someone used a “strong cleaner” instead of a true deglazer.
First, remove all laces and tape off any areas you don’t want dyed, the sole edge, heel stack, lining. Use a couple layers of painter’s tape; dye creeps.
Next, you need to strip. Don’t use a general cleaner like saddle soap. You need a solvent designed to break down sealants.
- Remove Surface Polish: If the shoes have old wax or polish, use a product like Saphir Renomat on a cloth to lift it off. This clears the way for the deglazer.
- Apply the Deglazer: Soak a clean cloth in your deglazer (Angelus Preparer & Deglazer, acetone, or Saphir Decapant). Rub the entire leather surface firmly and thoroughly. You will see color transfer onto the cloth, this is the factory tint coming off. The leather will turn a dull, matte color.
- Hit the Seams: Use a cotton swab soaked in deglazer to scrub the tight seam where the upper meets the sole. This area holds finish and will repel dye if missed.
- Let It Flash Off: This is critical. You must let the solvents evaporate completely. For most deglazers, 30-60 minutes is fine. If you used Saphir Decapant, the manufacturer notes it needs a full 12 hours. Rushing this leaves a chemical residue that blocks dye absorption.
The leather should feel dry and look uniformly dull, with no shiny spots. That’s your green light.
Step 2: Apply the Dye in Thin Layers
This is where patience pays. Dye is not paint. You’re staining the leather fibers, not coating them.
The part nobody mentions: A wool dauber holds a surprising amount of dye. Dunking it creates a saturated mess. Dip just the tip, press it against the bottle’s inner neck to drain excess, then blot it on a paper towel. The dauber should be damp, not dripping.
Lightly dampen the leather with water from a spray bottle. A fine mist helps the dye spread more evenly. Don’t soak it.
Now, start applying. Use a tight, circular motion, working on one small section at a time, the toe, then the sides, then the heel. Overlap your passes slightly. Your first coat will look awful: streaky, blotchy, and uneven. This is normal.
Let the first coat dry completely. Touch it with a gloved finger. If it feels at all tacky or cool, it’s not ready. This takes 3-4 hours at room temperature. You can use a hairdryer on a low, cool setting held 12 inches away to speed it up slightly, but heat can make the dye set too fast on the surface and not penetrate.
Apply a second coat. You’ll see the color start to even out. Repeat this process, thin coat, full dry, until you achieve deep, uniform color. For a major color change, expect 4-6 coats.
| Common Issue | Likely Cause | The Fix |
|---|---|---|
| Blotchy, uneven color after 2 coats | Insufficient deglazing; factory finish still present. | Strip again with deglazer and restart. |
| Dye feels sticky after 6+ hours | High humidity or too-thick coats trapping solvent. | Move to a drier, warmer area and wait longer. |
| Color rubs off on cloth after drying | Dye wasn’t sealed; or leather was over-saturated. | Apply a thin coat of dye fixative or acrylic finisher. |
The Bronzing Effect (And How to Fix It)
Bronzing is that unwanted metallic, coppery sheen that appears on dark dyes, especially blacks and navies. It’s not a defect in the dye. It’s a user error.
Bronzing happens when you apply too much dye too quickly. The alcohol carrier evaporates, leaving an over-concentration of pigment particles suspended in the residual oils on the leather’s surface. They reflect light like tiny metal flakes.
If you see bronzing, stop. Let the shoe dry fully.
To fix it, take a clean cloth or cotton ball with a small amount of deglazer or rubbing alcohol. Gently wipe the affected area. You’ll see the bronzing lift onto the cloth. Let it dry, then resume dyeing with even thinner coats. Prevention is simple: less dye on the dauber.
Step 3: Condition and Protect the Dyed Leather
Dyeing is brutal on leather. The alcohol and solvents strip its natural oils. If you don’t put them back, the leather will become stiff, brittle, and prone to cracking.
Wait at least 24 hours after your final dye coat. Then, apply a generous amount of leather conditioner or cream. Saphir Médaille d’Or Renovateur is a superb all-around choice. Use a clean cloth and rub it in thoroughly. Let it absorb for 20 minutes, then buff off the excess.
Repeat this conditioning process 2-3 times over the next week. The leather will drink it up and regain its suppleness.
Finally, apply a wax-based polish for protection and shine. A neutral wax works over any color. For scuff repair, a pigmented cream polish in a matching shade is perfect.
Choosing Your Dye: Restoration vs. Total Change
Not all dyes are for the same job. Using a repair dye for a full color change is frustrating. Using a penetrating dye for a touch-up is overkill.
| Dye Type | Best For | How It Works | Example Product |
|---|---|---|---|
| Repair / Recoloring Dye | Covering scuffs, restoring faded color on the same shade. | High pigment load, often with waxes, sits more on the surface for coverage. | Tarrago Self Shine Color Dye, Collonil Colorit cream. |
| Penetrating Alcohol Dye | Changing leather color completely (e.g., brown to black). | Thin, alcohol-based stain soaks into the leather fibers. | Fiebing’s Pro Dye, Angelus Leather Dye. |
| Professional Mixable Dye | Large projects, custom color matching, sympathetic restoration. | Concentrated pigment meant to be diluted with a base for control. | LRC66 Leather Shoe Dye (mixed with Raw Hide Base). |
The LRC66 system from The Leather Repair Company is what pros use for control. You mix the concentrated dye with a neutral “Raw Hide Base” at precise ratios (e.g., 50ml base to 10ml dye). This lets you custom-blend the intensity, perfect for blending a repair into the surrounding leather.
Frequently Asked Questions
Can I dye suede or nubuck shoes?
No. Standard leather dyes are for smooth leathers only. The nap of suede and nubuck will mat down and ruin the texture. Use sprays and powders specifically formulated for suede.
How long does the dye last?
Properly done dye job, stripped, thin coats, sealed, is permanent. It won’t wash out. The color will age and wear along with the leather, developing a patina. A poor job will crack, flake, or rub off.
Can I mix dyes to create a custom color?
It’s not recommended, especially for beginners. Dye chemistry varies by brand. Mixing can cause unexpected reactions, poor adhesion, or uneven drying. If you need a custom color, start with a system like the LRC66 dyes designed for mixing, or use an acrylic leather paint over a dyed base.
Why did my dye turn out patchy on vegetable-tanned leather?
Vegetable-tanned leather is thirstier and less uniform than chrome-tanned. It absorbs dye at different rates. The fix is the light water mist before dyeing and using even thinner coats. The patchiness often evens out by the third or fourth coat.
Do I need a topcoat or sealant?
For alcohol-based dyes, yes. An acrylic finisher (like Angelus Acrylic Finisher) or a dedicated dye sealant prevents color rub-off and adds a layer of protection. For wax-based repair dyes, the product often contains its own sealants.
The Bottom Line
Dyeing leather shoes is a chemical process, not an artistic one. Respect the steps. The Angelus Leather Preparer & Deglazer stage is non-negotiable. The thin-coat patience isn’t optional. If you remember one thing, let it be this: a damp dauber beats a soaked one every single time.
Your first pair might not be perfect. That’s fine. Find an old belt or a scrap of veg-tan leather and practice the deglazing and the dauber touch first. The feel of the right amount of dye is something your hands need to learn. Once they do, you’re not just changing a color, you’re extending the life of a pair of shoes made from full-grain leather.
