
Leather Mallet vs Maul Comparison: Find Your Perfect Tool
This post contains affiliate links. As an Amazon Associate, we earn from qualifying purchases.
This post contains affiliate links. As an Amazon Associate, we earn from qualifying purchases.
A leather mallet has a flat or barrel-shaped head on a perpendicular handle, like a small hammer. A leather maul has a tapered cylindrical head you strike with a natural wrist-rocking motion. The maul’s shape makes full contact at any swing angle, spreads wear as you rotate it, and is the standard for repetitive tooling and stitching. Choose a mallet for occasional, precise strikes; choose a maul for sessions that last hours.
That head shape is the whole game. It dictates your swing, your accuracy, and how long the tool lasts before it deforms. The common advice to “just pick what feels good” ignores the engineering, a flat face must land square, a tapered cylinder forgives a off-center hit.
What follows is a breakdown of the four specs that actually matter: head shape, weight, head material, and your natural swing. We’ll name the tools that get it right and the one pick that covers 90% of leatherwork.
Key Takeaways
- A maul’s tapered cylindrical head contacts the tool fully at any angle, spreads its own wear, and uses a low-fatigue rocking swing. A mallet’s flat face demands a squared-up, hammer-like strike.
- For tooling and stamping, start with a 9 oz to 16 oz weight. For driving stitching chisels or punches through thick leather, move to a 1.5 lb to 2 lb maul.
- Polyurethane (poly) mallets/mauls offer the best durability. Rawhide mallets deliver a dead, non-bouncing blow but will dent and require maintenance.
- Never use a metal hammer on leather tools, it mushrooms and ruins the struck ends of chisels and stamps in one session.
- The default recommendation for most leatherworkers is a 16 oz weighted poly maul. It’s the balanced center point for control and power.
What’s the Physical Difference Between a Mallet and a Maul?
The difference isn’t cosmetic. It’s mechanical, and it changes how you work.
A maul has a cylindrical, slightly tapered head you strike with a natural arc, so the face contacts the tool fully no matter the angle of your swing. A mallet has a fixed flat or barrel face on a perpendicular handle, so you must square it up each strike.
Head Shape: Flat Face vs. Tapered Cylinder
Look at the business end. A mallet head is a block, flat on both ends or slightly barrel-shaped. Its geometry is simple, but it has one rigid requirement: to transfer force cleanly, you must hit the chisel or stamp perfectly square. If you’re off by a few degrees, the edge of the mallet face strikes first, deflecting the tool or sending a glancing blow into your workpiece. You’ll hear a sharp clack instead of a solid thud.
A maul head is a cylinder that narrows slightly toward the striking face. This taper is the key. When you swing it with a relaxed rocking motion of the wrist, the curved face rolls onto the tool. It doesn’t need to be perfectly square. The contact patch is full even if your swing is a little wide, which is why it’s the forgiving choice for repetitive work where fatigue sets in. The cylindrical shape also lets you rotate the maul a quarter turn every few strikes, distributing wear evenly across the face. A flat-faced mallet wears in one spot, creating a dent or flat spot that then worsens the deflection problem.
The Swing: Hitting vs. Rocking
This is where muscle memory separates the two tools. A mallet is used like a hammer: you lift it and drive it down in a straight line, using your elbow and shoulder. It’s a “hit.” This is fine for setting a rivet or a few stamp impressions. But after thirty minutes of tooling a floral pattern, that shoulder-driven motion becomes tiring. You start to compensate, your accuracy drops, and the quality of your impressions suffers.
A maul is used with a rocking motion from the wrist. You’re not so much hitting as you are guiding the weight of the head onto the tool. The swing is shorter, more controlled, and uses smaller muscle groups that fatigue less quickly. It feels unnatural for about ten minutes. Then it clicks, and you realize why pros working eight-hour days don’t use mallets. The maul does the work; you’re just the pivot point.
Weight and Material: The Trade-Off Between Force and Fatigue
You can have the right shape but the wrong heft. Weight determines how much muscle you need to supply, and material determines how that force is delivered to your tool.
How Weight Dictates the Job
Weight is not a “more is better” spec. It’s a matching game. A tool that’s too light forces you to swing harder, sacrificing control. A tool that’s too heavy is exhausting and can over-drive a fine tool.
| Weight Range | Best For | Why It Works |
|---|---|---|
| 2 oz – 9 oz (e.g., Garland #0, #1) | Intricate jewelry work, fine leather tooling, delicate stone setting. | Delivers a gentle, precise touch. Lets you tap repeatedly without fear of crushing delicate work. |
| 9 oz – 16 oz (e.g., standard poly mallets, Garland #3) | General leather stamping, tooling, setting rivets and snaps. | The sweet spot for control. Provides enough mass for a solid impression without wearing out your wrist during a long session. |
| 1.5 lb – 2 lb (e.g., weighted mauls) | Driving stitching chisels, punching holes, setting copper rivets. | The mass does the work. A controlled drop from this weight cleanly shears leather fibers where a lighter tool requires a hard, less-accurate swing. |
| 2 lb+ (heavy mauls) | Striking large oblong punches, strap-end punches, industrial leatherwork. | Pure brute force. Accuracy is less critical because the tool’s size and the mass guarantee penetration. |
The most common mistake is using a 9 oz mallet for everything. It will struggle to drive a stitching chisel through 8 oz leather, forcing you into erratic, hard swings. Conversely, using a 2 lb maul for fine stamping is like using a sledgehammer to drive a finishing nail, you’ll lose all detail.
Head Material: Poly vs. Rawhide vs. The Forbidden Hammer
The striker must be softer than the steel tool it hits. This is the essential rule. The striker absorbs the shock; if it’s harder, the steel deforms.
- Polyurethane (Poly) Mallets/Mauls: This is the modern standard. As CS Osborne states for their Poly Mallet #496, the “strong polymer head is wear resistant and long lasting” and “absorbs shock.” A poly head is tough, provides a consistent impact, and shows little wear after years of use. A weighted poly maul includes a steel core inside the polymer head, adding momentum for a “dead-blow” effect with minimal bounce-back. This is the best all-around choice for durability and tool protection.
- Rawhide Mallets: The traditional choice, like the Garland Rawhide Jewelers Mallets made from tightly rolled water buffalo hide. They offer a uniquely “dead” strike, the rawhide compresses and doesn’t bounce, which some craftsmen prefer for the feel and control in stamping. However, as Weaver Leather Supply notes, rawhide “lack[s] the durability of poly mallets.” They will dent, fray, and require occasional sanding to re-dress the face. They’re a feeling, not a forever, tool.
- Wooden Mallets: Cheap and not cheerful. They wear out fast, often splitting along the grain, and lack the necessary density for consistent work. Skip them.
- Metal Hammers: Never use one. A steel hammer will mushroom the top of your expensive chisel or stamp in one sitting. It’s the fastest way to ruin tools. This isn’t a preference; it’s a preservation rule.
Common mistake: Using a rawhide mallet for heavy punching. The 9 oz Garland #3 is rated for “heavier leather stamping,” but a 2 lb poly maul is built for driving punches. Using the rawhide for that job will compress and deform its face within a few projects.
The 16 oz Weighted Poly Maul Default
If you’re asking “Which one should I buy first?”, here’s the straightforward answer: a 16 oz (1 lb) weighted poly maul. Let me share what I’ve learned after watching students struggle with mismatched tools.
This weight is the pivot point. It’s heavy enough to drive stitching chisels through medium-weight leather with a tap, not a slam. It’s light enough to maintain control during an afternoon of stamping without destroying your elbow. The weighted core provides that critical dead-blow action, so the energy goes into the tool, not into bouncing the maul back into your hand. The poly face protects your tools indefinitely.
Brands like Barry King have built their reputation on tools like this, balanced, contoured for the hand, and designed to reduce stress. You can spend more for a fancier handle, but the core specs remain: ~1 lb, poly head, steel core. This one tool eliminates the “should I use the mallet or the maul?” question for 90% of the work on your bench.
When to Choose a Mallet (and Which One)
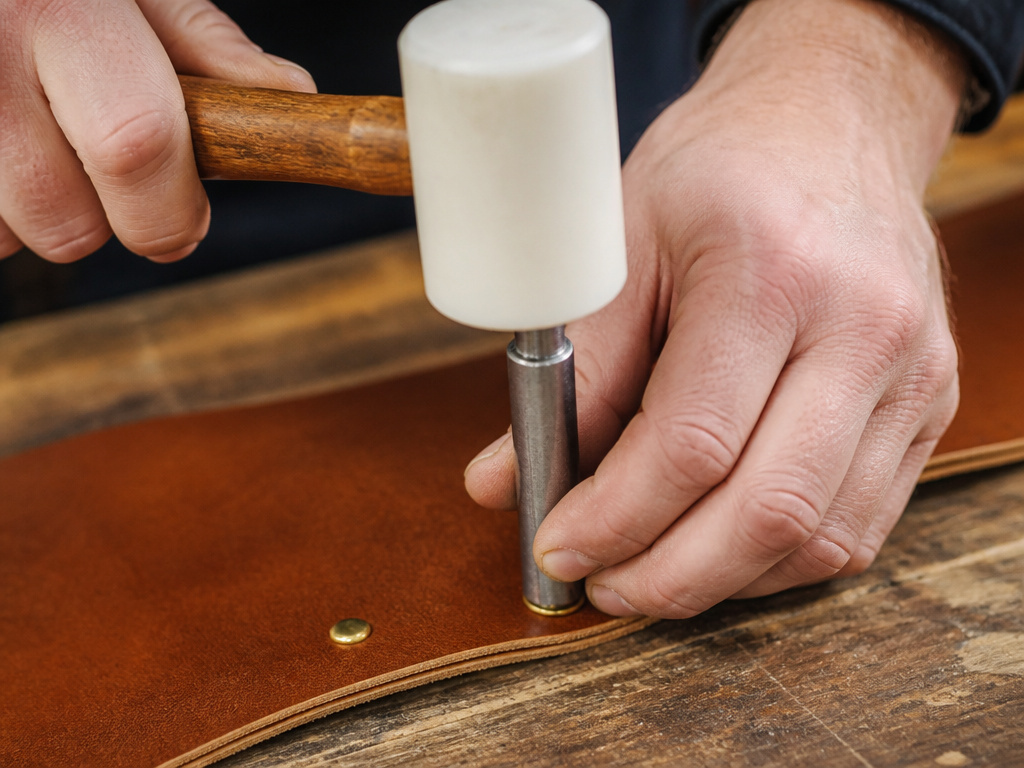 The maul is the default, but the mallet still has a place. Its flat face is an advantage for one thing: absolute precision in a single strike.
You want a mallet for tasks where a perfectly square, focused blow is paramount and you’re only doing it a few times. Setting a tubular rivet is the classic example. The rivet setter has a small, concave face; a flat mallet face ensures all the force drives the rivet head straight down, not at an angle. The same goes for tapping a pricking iron perfectly vertical into the leather before you pull it out.
For these jobs, a mid-weight rawhide mallet (like an 11 oz) is actually the better pick. The dead blow prevents bounce, and you’re not using it repetitively, so the durability concern is moot. The Garland Rawhide Jewelers Mallet #1 (4 oz) or an 11 oz standard rawhide mallet are your tools here. You’re choosing feel and precision over longevity.
The One Tool to Never Use on Your Bench
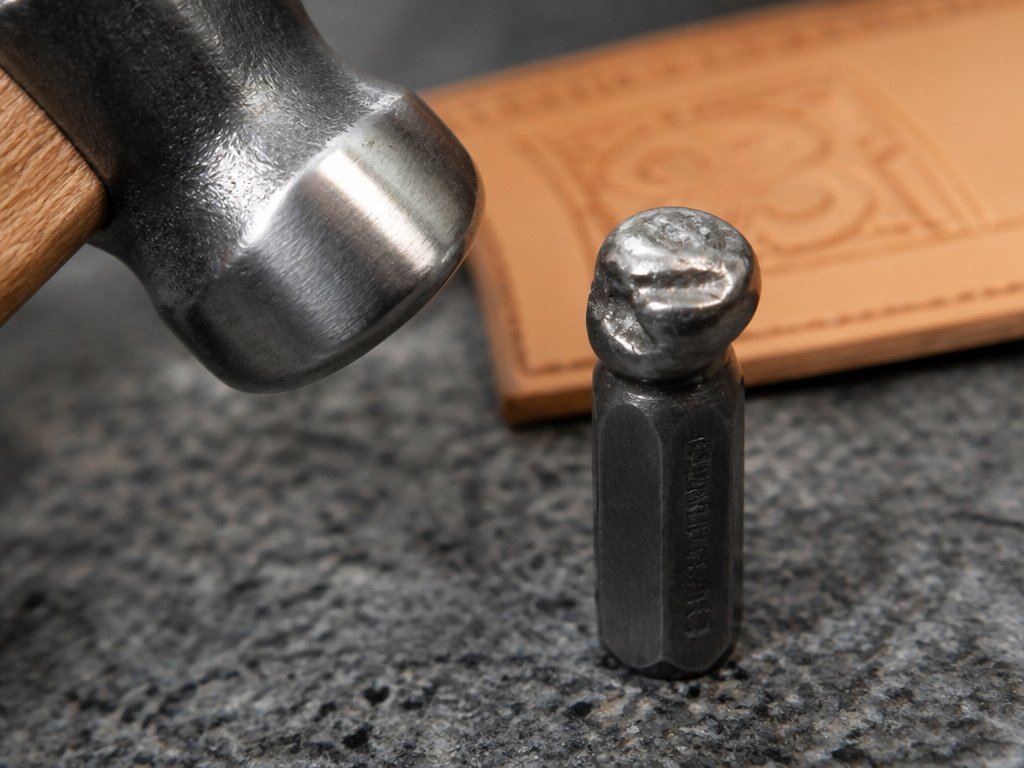 This bears repeating because I see it often: never strike a leatherworking tool with a metal hammer. Not a ball-peen, not a claw hammer, not a machinist’s hammer. The steel-to-steel contact deforms the softer steel of your chisel or stamp. You’ll see a rounded, mushroomed edge form on the tool’s top after just a few strikes. Once that happens, the tool is compromised; the deformed metal can shear off, and the strike surface is no longer flat, leading to dangerous deflections.
The only metal that should touch your leather tools is the anvil or the granite slab beneath them. Your striker must always be softer. It’s the first rule of tool preservation.
Frequently Asked Questions
Can I use a regular hammer if I’m careful?
No. Care doesn’t change the physics of metal-on-metal impact. Even a single mis-strike or a slightly hardened hammer face can damage your tool. The risk is never worth it. A basic poly mallet is inexpensive tool insurance.
How do I maintain a rawhide mallet?
They require occasional dressing. When the striking face becomes frayed, compressed, or uneven, sand it flat with coarse (80-120 grit) sandpaper on a flat surface. Re-sand to a smoother finish (220 grit). This removes the damaged fibers and restores a clean, flat striking surface. Store it in a dry place to prevent moisture absorption.
My poly maul has a flat spot. Can I fix it?
Yes. Polyurethane can be sanded. Secure the maul and use a flat sanding block to gently resurface the face, rotating the maul to keep it even. Some models, like certain Barry King mauls, have replaceable heads, which is even simpler.
Is a heavier maul always better for punching holes?
Only up to a point. A 1.5 lb to 2 lb maul is ideal for most hand stitching chisels and drive punches. Going heavier (3 lb+) is for industrial punches and thick strap ends. Excessive weight can actually split leather or damage the chisel if you lose control. Let the tool’s size guide you, bigger tools need more mass.
What about “mauls” from other industries, like a woodworking mallet?
Avoid them. A carpenter’s mallet is designed for striking wood chisels, which have much larger, reinforced strike caps. The head material is often too hard (lignum vitae) or the shape is wrong. Stick to tools designed for leatherwork.
Before You Go
The leather mallet vs maul choice crystallizes into one question: are you hitting or are you rocking? If your work is short bursts of precise strikes, a flat-faced rawhide mallet fits. If you’re at the bench for hours driving chisels or laying down a tooling pattern, the tapered maul is your only sane choice.
My rule after repairing too many mushroomed chisels: buy the 16 oz weighted poly maul first. It’s the single tool that does the most jobs well. Then, if you find yourself doing lots of precise rivet work, add an 11 oz rawhide mallet. That two-tool set covers everything from a watch strap to a saddle skirt, and it protects the real investment, your cutting and stamping tools.
Understand the tool better, and you’ll make confident choices that save your energy, your money, and your work. The right striker doesn’t just drive the tool; it lets the craft flow.
