
Leather Recliner Cleaning: Learn How to Clean & Maintain It
This post contains affiliate links. As an Amazon Associate, we earn from qualifying purchases.
This post contains affiliate links. As an Amazon Associate, we earn from qualifying purchases.
Cleaning a leather recliner involves a strict three-step protocol: dry brushing with a soft brush, wiping with a slightly damp microfiber cloth, and only then applying a pH-neutral leather cleaner if needed. Follow this escalation to avoid saturating the hide. You must also check your manufacturer’s manual for cleaning codes, as water is prohibited on certain fabrics.
That protocol isn’t a suggestion, it’s the line between a chair that looks new for a decade and one that dries out in two years. Leather isn’t a self-cleaning surface; it absorbs everything you put on it, from dust to body oils to the occasional spill.
This guide walks you through the weekly ritual, the quarterly deep clean, and the emergency spill response. You’ll learn which products I trust, why you should skip all-in-one formulas, and how to spot the cleaning code that completely changes the game.
Key Takeaways
- Start every cleaning session with a dry, soft-bristle brush. This removes surface grit without risking moisture damage.
- Never use a water-based cleaner until you’ve checked for a “Cleaning Code X” on the label; some La-Z-Boy fabrics specifically forbid it.
- Conditioner is not a cleaner. Apply a dedicated leather conditioner like Lexol or Saphir only after the surface is clean and fully dry.
- Pet saliva and certain cosmetics contain acids and solvents that break down leather finishes; blot them immediately, don’t rub.
- Position your recliner at least 12–18 inches from the wall for full recline access and keep it 2 feet from direct heat sources to prevent fading and drying.
The 3-Step Leather Cleaning Protocol
Forget the “spray and wipe” method you see on TV. That’s how you get a sticky, residue-laden finish. The right approach is an escalation, moving from the gentlest possible action to stronger solutions only when necessary. Think of it like making a roux, you need low, patient heat and the right fat to build a stable foundation without turning it gummy. Rushing the process ruins the material.
Here’s the straightforward guide I use on every piece in my home and recommend to clients.
Step 1: Dry Brush Weekly. Use a soft horsehair or boar bristle brush (like those for suiting or drafting) to remove surface dust and grit. Brush in the direction of the grain. This alone prevents 80% of ground-in dirt that later requires harsh cleaners.
Step 2: Damp Wipe Bi-Weekly. Lightly dampen a clean, white microfiber cloth with distilled water. Wring it out until it feels barely damp to the touch. Wipe the entire surface following the grain, then immediately dry with a second, dry microfiber cloth. This lifts body oils and light soil.
Step 3: pH-Neutral Cleaner (Quarterly or as needed). If the damp cloth isn’t enough, apply a dime-sized amount of a dedicated, pH-neutral leather cleaner like Saphir Omni’Nettoyant or Lexol pH Leather Cleaner to a fresh microfiber cloth. Work in small, overlapping circles, then wipe off any residue with a clean, damp cloth. Let the area dry completely for at least 2 hours before using the chair or applying conditioner.
| Step | Tool | Frequency | What It Removes | Risk If Skipped |
|---|---|---|---|---|
| Dry Brush | Soft Horsehair Brush | Weekly | Dust, grit, loose debris | Grit grinds into finish, causing micro-scratches that dull the sheen. |
| Damp Wipe | White Microfiber Cloth | Bi-Weekly | Light body oils, surface soil | Oils build up, attracting more dirt and creating a sticky film. |
| pH-Neutral Cleaner | Dedicated Leather Cleaner | Quarterly / After Spills | Stubborn stains, ground-in dirt | Using stronger household cleaners risks stripping dyes and drying the hide. |
What You Need (And What to Avoid)
Your toolkit matters. Reaching for the wrong product is how a simple cleaning session turns into a costly refinishing job. Let me share what I’ve learned about building a shelf that works.
The Must-Haves:
- Soft-Bristle Brush: A horsehair detailing brush is ideal. The bristles are firm enough to dislodge dust but soft enough not to scratch.
- White Microfiber Cloths: White ensures you see the dirt you’re picking up and guarantees no dye transfer. Have at least three on hand, one for applying cleaner, one for rinsing, one for drying.
- Dedicated Leather Cleaner: Saphir Omni’Nettoyant is my top pick for finished leathers. It’s pH-balanced and leaves no residue. Lexol pH Leather Cleaner is a more accessible, workhorse alternative. Both are designed not to interfere with subsequent conditioning.
- Distilled Water: Tap water contains minerals that can leave white spots on the leather as it evaporates. A bottle of distilled water is cheap insurance.
The Avoid-At-All-Costs List:
- Household Cleaners: Windex, multi-surface sprays, bleach, anything containing ammonia, alcohol, or solvents. These will strip the protective topcoat and can bleach the dye.
- Vinegar Solutions: Despite popular DIY advice, vinegar is acidic and will degrade the leather’s finish over time.
- Saddle Soap: Fiebing’s Saddle Soap is a fantastic product, for saddles and heavy work boots. On a delicate recliner, it deposits too much wax and can oversaturate the hide, leading to a stiff, cloudy finish.
- “All-in-One” Cleaner/Conditioners: These are typically poor at both jobs. The cleaning agents can be trapped by the conditioning oils, leaving a greasy film that attracts dirt.
Where this goes sideways: Using a sopping wet cloth. The goal is to clean the surface, not saturate the hide. Leather is a skin; oversaturation weakens the fibers and can cause the backing to detach. Your cloth should feel cool and slightly damp, not wet enough to drip.
Decoding Your Recliner’s Cleaning Code
Before you put any liquid on your chair, find the manufacturer’s tag. It’s usually under a cushion or on the backside of the frame. Look for a cleaning code, usually a single letter. This isn’t a suggestion; it’s the manufacturer’s warranty-backed instruction. Ignoring it can void coverage and ruin the upholstery.
The most critical code to know is “X”. Found on some La-Z-Boy models (like the Luxury-Lift 93000485), this code means one thing: vacuum or brush lightly only. Do not use water or water-based cleaning agents. Period. Applying a damp cloth to a fabric with this code can cause shrinkage, staining, or finish breakdown that the manufacturer will not cover.
For most top-grain and protected leather recliners, you’ll follow the codes for “W” (water-based cleaner) or “S” (solvent-based cleaner, now rare). When in doubt, a dry brush and a soft cloth are always safe. If you’ve lost your manual, a quick search for your model number and “cleaning code” often turns up the official PDF.
Common mistake: Assuming “leather” is a single material. A bonded leather recliner has a thin veneer of leather scraps over a synthetic backing. It cannot handle the same cleaning intensity as a full-grain piece. Aggressive rubbing or solvent cleaners can peel the top layer right off.
How to Treat Common Stains and Spills
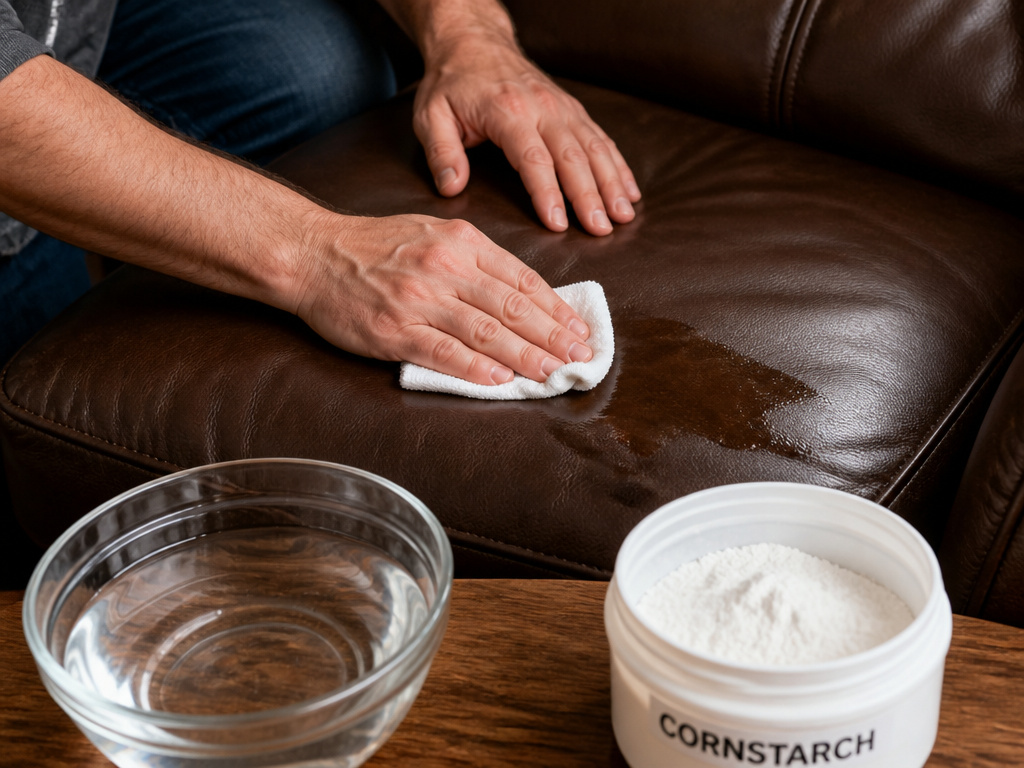 When a spill happens, your first move sets the outcome. Rubbing is the enemy, it grinds the substance deeper into the grain. Blotting is your best friend. Keep a clean, white cloth in a drawer near the recliner for this exact moment.
Here’s a quick-reference guide for the most frequent offenders:
| Spill Type | Immediate Action | Follow-Up | Timeline for Action |
|---|---|---|---|
| Water-Based (Coffee, Soda) | Blot with dry white cloth. | Dampen cloth with distilled water, blot area, then dry thoroughly. | Within 10 minutes. |
| Oil-Based (Grease, Butter) | Sprinkle cornstarch or baking soda to absorb. Let sit 1 hour. | Brush off powder, then use a tiny amount of Lexol cleaner on a cloth. | Slower is better—let powder work. |
| Ink | Dab (don’t rub) with a cotton swab dipped in high-proof rubbing alcohol on a hidden spot first. If safe, apply lightly to stain. | Blot with damp water cloth, dry. | Immediate. Ink sets fast. |
| Pet Accidents | Blot up liquid, then wipe area with cloth dampened with distilled water. | Let dry fully, then use leather cleaner to remove any residual enzymes. | Immediately. Saliva is acidic. |
Why the timeline matters: Leather is porous. A spill left for an hour isn’t just a surface stain; it’s a deep-seated one. The difference between a full removal and a shadow is often just a few minutes. For ink or red wine, you have a two-minute window before the dye starts to bond.
The part nobody mentions: After any wet cleaning, even from a spill, you must let the leather dry completely, away from direct heat or sunlight, before sitting on it or applying conditioner. Forcing the drying with a hairdryer or placing it near a vent can cause the leather to stiffen and crack. Let it air-dry for at least 4-6 hours.
Conditioning After Cleaning: The Non-Negotiable Step
like Magic Wipes Leather & Vinyl Wipes** (in the white package) for quick spot-cleaning. Condition regularly with a clear, non-darkening conditioner to prevent yellowing.
What’s the best product for cleaning a leather recliner?
For most homeowners, Lexol pH Leather Cleaner paired with Lexol Leather Conditioner is the most reliable, accessible system. If you have a high-end piece and want the best possible results, Saphir Médaille d’Or Omni’Nettoyant and Creme Universelle are unparalleled. Skip the all-in-one products.
Why is my recliner still sticky after cleaning?
Sticky feel means residue. You either used too much cleaner, didn’t rinse/wipe it off thoroughly, or used a product not designed for leather (like an all-in-one). To fix it, wipe the area down with a cloth lightly dampened with distilled water, then dry thoroughly. Avoid that product in the future.
How often should I clean my leather recliner?
Dry brush weekly. Wipe with a damp cloth every two weeks. Do a full clean (with pH-neutral cleaner) every 3–4 months, or immediately after any spill. Condition after every full clean, so every 3–4 months. This schedule matches the Roche Bobois guideline of quarterly maintenance.
Before You Go
Cleaning a leather recliner isn’t about making it look new for a day; it’s about preserving its character and comfort for a decade. The three-step protocol, brush, damp wipe, then cleaner, is your defense against the slow creep of dirt and drying.
Your single most important next step is to locate the manufacturer’s tag and note the cleaning code. That five-second check can save you from a catastrophic mistake. After that, invest in a good horsehair brush and a bottle of Lexol cleaner. With those two tools and the patience to let the leather dry fully between steps, you’ve covered 95% of what your chair will ever need.
Ignore the marketing copy for miracle sprays. The right care is simple, methodical, and always respects the material. Your recliner is a long-term investment; treat its skin with the same deliberate care you’d give your own.
