
How to Restore Leather Using Official Manufacturer Guidelines
This post contains affiliate links. As an Amazon Associate, we earn from qualifying purchases.
Restoring leather requires using the exact cleaning agents, tools, and conditioners listed in your vehicle or furniture manufacturer’s official service bulletins, and avoiding every household cleaner, silicone spray, and oil-based conditioner they explicitly ban. The 2017 Ford Super Duty manual specifies Motorcraft Premium Leather Cleaner for dye transfer; a 2013 NHTSA bulletin names the 3M Scotch-Brite Type T Scuff Sponge (Part No. 07439); a GM bulletin approves only water-based, neutral-pH conditioners and warns against solvents, wax, and degreasers.
Most restoration guides are guesswork. They recommend generic “leather cleaners” and conditioners filled with silicones and oils that the people who engineered your car’s seats. Ford, General Motors, Mercedes-Benz, have spent decades warning will alter the material’s finish, cause non-uniform gloss, and void warranties. Your leather’s needs are documented in technical service bulletins most DIYers never read.
What follows pulls those documents into the open: the certified products, the banned substances, and the physical consequences of ignoring both. By the end, you’ll be able to read any leather care label and know in ten seconds if it matches the engineering specs for your specific piece.
Key Takeaways
- Manufacturer manuals are your first source. Ford, GM, and Mercedes-Benz publish specific part numbers for approved cleaners and conditioners; using anything else risks gloss alteration, dye transfer setting, and warranty denial.
- Household cleaners are poison for leather. Alcohol, solvents, degreasers, and oil/petroleum-based conditioners are explicitly prohibited in multiple OEM bulletins because they strip natural oils and create a brittle, cracked surface.
- Dye transfer needs immediate, specific action. Lighter leathers show blue jean or fabric dye stains quickly; the approved method involves a designated cleaner (like Motorcraft Premium Leather Cleaner) and a specific abrasive pad (3M Scotch-Brite Type T).
- Conditioning is about chemistry, not shine. Approved conditioners are water-based, neutral-pH, and free of silicones and waxes. They nourish the leather fibers without clogging pores, especially critical for perforated seats.
- Tools matter as much as chemicals. A GM-approved soft bristle brush (P/N 88861425) works cleaner into the grain without scratching, while a heat gun for wrinkles is a last-resort substitute for a commercial steamer per a 2023 NHTSA bulletin.
The Official Rulebook: What Your Car’s Manual Actually Says
Forget the boutique leather care blogs for a moment. The most rigorously tested procedures for cleaning and conditioning leather exist in the automotive industry. Ford, General Motors, and Mercedes-Benz spend millions ensuring their interior materials withstand decades of sun, friction, and spills. Their technical service bulletins are non-commodity gold.
For routine cleaning, wipe the surface with a soft, damp cloth and a mild soap and water solution. Dry the area with a clean, soft cloth. For cleaning and removing spots and stains such as dye transfer, use Motorcraft Premium Leather and Vinyl Cleaner or a commercially available leather cleaning product for automotive interiors. Do not use oil and petroleum or silicone-based leather conditioners, household cleaners, alcohol solutions, or solvents or cleaners intended specifically for rubber, vinyl and plastics. Source: 2017 Ford Super Duty Owner’s Manual
That paragraph is your foundation. It gives you a routine method (damp cloth, mild soap), a specific product for a specific problem (Motorcraft cleaner for dye transfer), and a precise list of what not to do. The “why” is chemistry. Oil, petroleum, and silicone sit on top of the leather, blocking its pores and preventing it from breathing. Over time, this sealed environment traps moisture against the hide from the inside while the top coat dries out and cracks from UV exposure. It’s a guaranteed failure.
The NHTSA technical service bulletin from 2013 goes further, specifying tools. For stubborn stains, it recommends a diluted liquid soap (Ivory or Murphy’s Oil Soap) and a 3M Scotch-Brite Type T Scuff Sponge, Part No. 07439. Not a generic green scrubber, a specific grey pad designed to abrade without embedding particles in the grain. This is the level of detail the pros use.
The Products You Need (And The Ones You Must Avoid)
Based on the bulletins, your kit shrinks to a few certified items and expands with a long list of common household rejects. Let’s be clear about one thing: a “leather conditioner” from a big-box store is likely filled with the very silicones and waxes these documents warn against.
| Product Type | Manufacturer-Approved Examples | Common Household Bans (And Why) |
|---|---|---|
| Cleaner | Motorcraft Premium Leather and Vinyl Cleaner, diluted mild soap | Alcohol solutions, solvents, degreasers, all-purpose cleaners. These strip the leather’s natural oils and dyestuff. |
| Conditioner | Water-based, neutral-pH conditioners; Mercedes-Benz Leather Care Foam (A 001 986 59 71) | Oil/petroleum/silicone-based conditioners, shoe polish, waxes. These create a superficial gloss, clog pores, and cause cracking. |
| Abrasive Tool | 3M Scotch-Brite Type T Scuff Sponge (07439) | Green scrub pads, steel wool, stiff brushes. These scratch and leave embedded particles that grind into the leather. |
| Soft Brush | GM Soft Bristle Brush (P/N 88861425) | Stiff-bristle brushes, toothbrushes with hard bristles. These can fracture the leather’s top grain over time. |
| Stain Remover | Tested, inconspicuous spot application of approved cleaner | Acetone, nail polish remover, bleach, hydrogen peroxide. These can dissolve the finish and permanently discolor the leather. |
The Mercedes-Benz bulletin adds a crucial caveat: only use products officially approved by them; damage from other products isn’t covered under warranty. That’s the practical takeaway. If you’re dealing with a high-value automotive interior, the approved product list is your only safe path.
The Step-by-Step Clean & Condition (With Consequences)
Here’s the straightforward guide, synthesized from the primary sources. Every step has a “skip this and…” clause because the leather will tell you what it needs, often by failing.
- Vacuum thoroughly. Remove all dust and grit. Skipping this grinds particles into the leather during cleaning, acting like sandpaper and leaving fine, cloudy scratches.
- Test your cleaner. Apply your chosen cleaner (diluted soap or Motorcraft product) to a hidden area. Wait five minutes. Skipping this can darken the leather permanently, as some cleaners react unpredictably with certain dyes.
- Clean with the grain. Dampen your 3M Scotch-Brite pad or soft cloth with cleaner and wipe in straight lines following the leather’s natural grain. Scrubbing in circles can distort the grain pattern and create a visible “swirl” mark.
- Address dye transfer immediately. For fresh blue jean stains on light leather, apply the approved cleaner directly. Let it sit for a minute, then gently work with the grain using the scuff sponge. Letting dye transfer sit for weeks allows the dye to bond with the leather’s oils, making removal nearly impossible without damaging the finish.
- Rinse and dry completely. Wipe the area with a cloth dampened with clean water to remove soap residue. Dry with a separate, clean, soft cloth. Leaving soap residue attracts dirt and forms a sticky film that accelerates soiling.
- Apply conditioner sparingly. Use a nickel-sized amount of approved conditioner on a dry cloth. Rub into the leather in a circular motion until it disappears. Skipping this after a deep clean leaves the leather thirsty and susceptible to drying and cracking, especially in heated car interiors.
- Buff off haze. If a film appears after conditioning dries (usually in 15-20 minutes), buff gently with a dry, clean cloth. Leaving the haze creates a blotchy, uneven appearance.
Common mistake: Conditioning leather that isn’t fully dry. Trapped moisture under the conditioner can lead to mildew and a sour smell within days.
For perforated leather, the Mercedes bulletin warns to take extra care not to soak the material, particularly in the perforated areas. Excess liquid can seep into the cushion foam below, leading to odors and potential mold. The rule is damp, not wet.
Restoring Color and Fixing Scratches
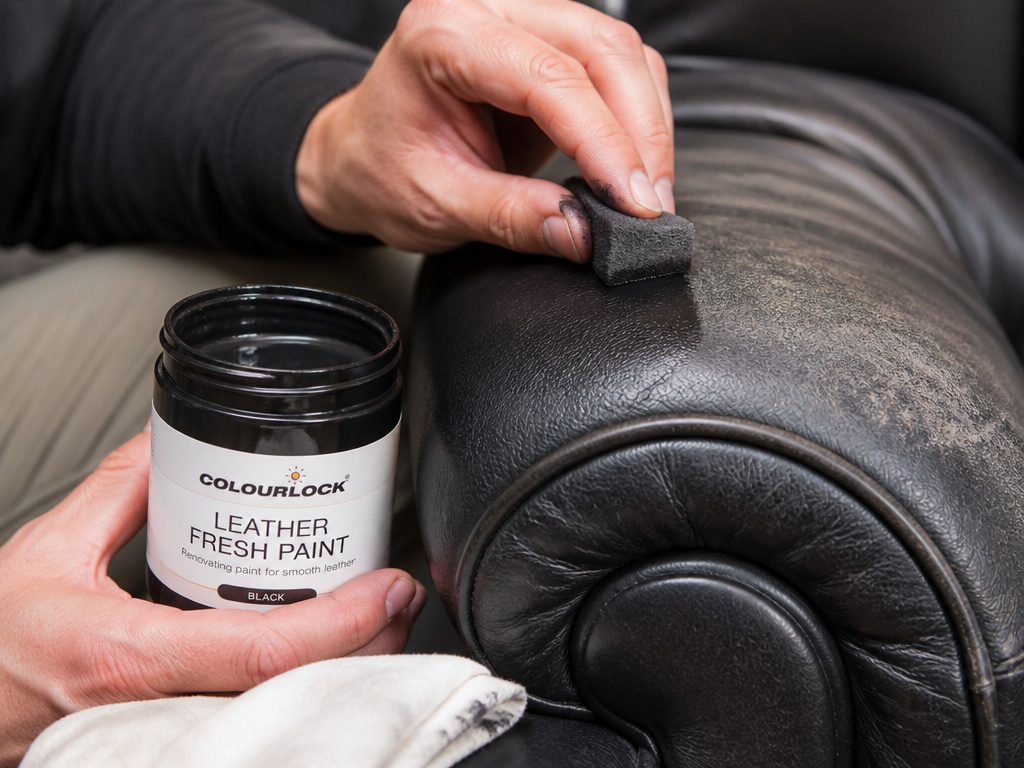 This is where the official bulletins end and craft knowledge begins. The manufacturer documents cover cleaning and conditioning, but they treat significant color loss and scratches as wear-and-tear. For true restoration, you’re moving to dyes and fillers.
Dye transfer is one thing; overall fading is another. If your black sofa is now charcoal grey, you’re looking at a re-dye. And here’s my strong opinion: attempting to ‘re-dye’ a scuffed black leather shoe to a lighter color is almost always a fool’s errand. Professional stripping is required, and it’s often cheaper to buy new. For recoloring like-with-like, a product like Colourlock Leather Fresh Paint is the tool I reach for. It’s a pigment, not a dye, and it sits on the surface. This has pros and cons.
Pros of pigment-based restorers:
- They’re user-friendly and don’t require stripping the original finish.
- They can dramatically improve the look of faded, scuffed areas.
- They come in a wide range of colors.
Cons of pigment-based restorers:
- They create a new top coat that can crack if over-applied or not flex-tested.
- They can change the hand-feel of the leather, making it less supple.
- Matching the exact original shade is difficult and often requires custom mixing.
For deep scratches that have broken the top grain, leather ‘filler’ pastes are popular but, in my view, overrated. They rarely bond well long-term and crack with flexing, making a leather patch a stronger, more durable solution. The better approach is often to embrace honest wear. As the Ford manual notes for its King Ranch leather, small scars and markings are proof of a genuine leather product and give character.
Why Your Leather Cracked (And How to Prevent It Next Time)
 Cracking is the leather’s final cry for help. It’s not a symptom of age alone; it’s a symptom of neglect. The main culprit is always the same: a lack of proper conditioning with the right materials.
Leather is skin. It needs its natural oils replenished as they are evaporated by heat and sunlight. When you use the wrong conditioner, one loaded with waxes or silicones, you’re not replenishing those oils. You’re putting on a plastic coat. The leather underneath continues to dry out and lose flexibility. One day, when you bend or sit, that brittle, dry hide fractures. The crack you see started months or years earlier.
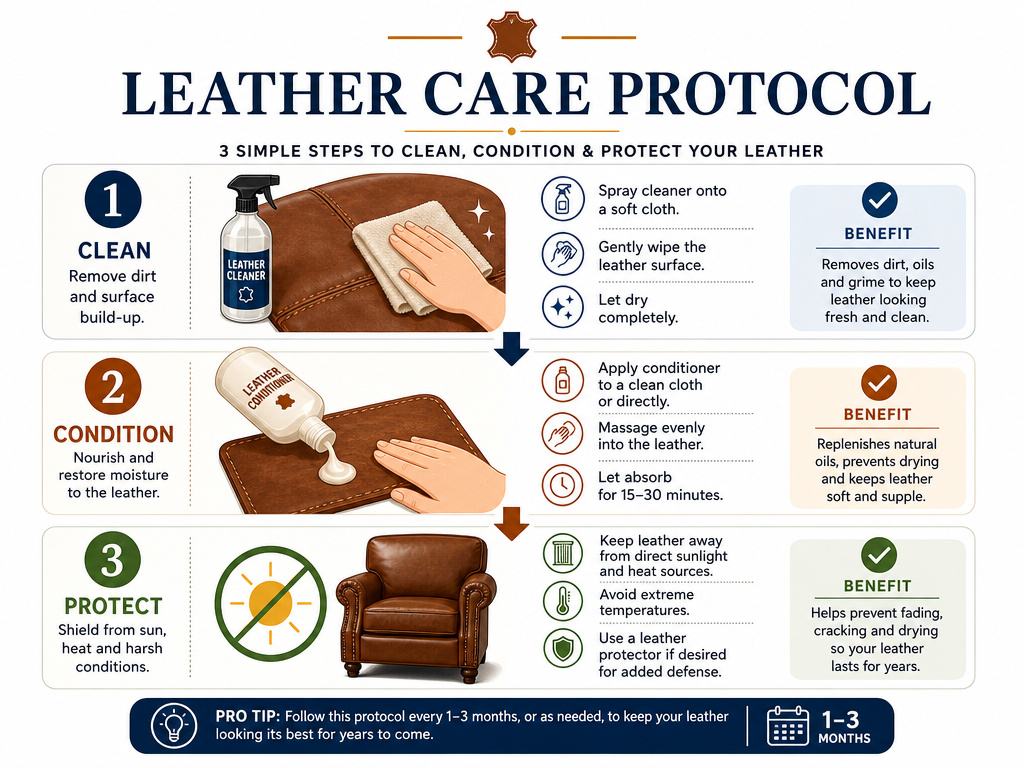
The prevention protocol is straightforward, if boring: 1. Clean every 3-6 months with a mild, approved cleaner to remove dirt and body oils that degrade the finish. 2. Condition every 6-12 months with a water-based, leather conditioner that can penetrate the grain. Frequency depends on climate and use. A car seat in Arizona needs it more than a jacket in a closet. 3. Keep it out of direct sunlight. UV radiation is the second-greatest enemy after poor chemistry.
If you’re restoring a piece that’s already cracked, understand that you’re performing cosmetic surgery, not a cure. You can fill cracks with a flexible resin, then color over them, but the flexibility of that area will never be the same. The goal shifts from perfect restoration to graceful aging.
Special Cases: Perforated, Suede, and Vegetable-Tanned Leathers
Not all leather is created equal, and neither is its care. The one-size-fits-all approach is how good pieces get ruined.
Perforated Leather (common in car seats and some furniture): – Risk: Over-wetting. Liquid pools in the holes and soaks into the underlying foam. – Care: Use minimal moisture. Spray cleaner onto your cloth, not the leather. Dry thoroughly with a dry cloth pressed into the perforations to wick moisture away.
Suede and Nubuck:
- Risk: Using any liquid cleaner meant for smooth leather. It will stain and mat the nap.
- Care: Use a dry suede brush or gum eraser for dirt. For stains, a dedicated suede cleaner and a very soft brush are mandatory. Never condition suede with standard leather conditioners.
Vegetable-Tanned Leather (common in high-end bags, belts, and furniture): – My opinion: Vegetable-tanned leather is almost always superior to chrome-tanned for any item meant to last a lifetime and develop character. Its care is different. – Care: It darkens naturally with oil and exposure. Use only pure, natural oils like neatsfoot or a best oil for leather like pure jojoba. Avoid any product with silicones or waxes, as they will block this natural patina process. Using saddle soap on anything other than a saddle or heavy work boot is a great way to prematurely age and dry out your vegetable-tanned leather.
The typical rule is to store leather in a cool, dry place. For a client in an arid climate, this led to excessive drying; we added a small humidifier to the storage room, showing that ‘dry’ doesn’t mean zero humidity. The leather needs to breathe, not desiccate.
Frequently Asked Questions
Can I use coconut oil to condition leather?
No. Coconut oil is a popular home remedy, but it can go rancid over time and attracts dust. More critically, automotive and furniture manufacturers explicitly warn against oil-based conditioners. They can go rancid, create sticky residues, and degrade certain leather finishes. Stick with manufacturer-approved, water-based conditioners.
How do I remove ink from leather?
Act fast. Dampen a cotton swab with rubbing alcohol (despite the general ban, some OEM guides approve it specifically for fresh ink in a controlled spot-test). Gently dab, don’t rub, the ink stain. Immediately follow with a damp water cloth to remove alcohol residue, then condition the area. For set-in ink, you likely need a professional.
Will mayonnaise really remove a water stain on leather?
This is an old wives’ tale with potentially disastrous results. Mayonnaise is an emulsion of oil and egg. The oil can clog leather pores and go rancid, while the egg protein can attract bacteria. The water stain, a white ring from displaced oils, is better treated with a commercial leather cleaner or a steamer used by a professional.
Can restored leather be as good as new?
Cosmetically, often yes. Structurally, no. A proper leather furniture restoration can make a couch look vibrant and supple, but the tensile strength of leather fibers decreases with age and wear. Restoration is about preserving what’s left and improving appearance, not reversing time. A well-restored piece should look respected, not necessarily newborn.
Is it worth restoring cheap “genuine leather”?
Usually not. The term “genuine leather” often refers to a thin veneer of leather bonded to a fabric backing. It lacks the thickness and durability to withstand deep cleaning and reconditioning. If your “genuine leather” wallet or sofa is cracking, it’s likely the bonded layer failing. Restoration efforts here are often more expensive than replacement.
Before You Go
The single most important sentence in any service bulletin is the warning. Ford’s “Do not use…” list isn’t legal padding; it’s a chronicle of every product that has ever returned a seat to the dealership with a ruined finish. Your first step in any restoration is finding the original manufacturer’s care guide.
If you can’t find that guide, default to the simplest chemistry: a pH-neutral leather cleaner, a water-based conditioner without silicones, and tools soft enough to protect the grain. That trio fixes ninety percent of problems. The other ten percent, deep dye, major cracks, structural damage, often crosses the line where professional intervention is cheaper than the DIY trial-and-error that ends with a permanently altered piece.
One rule most guides skip: if your leather has gone more than two years without any care and sits in direct sunlight, don’t start with a heavy conditioning. Clean it gently first and assess. Jumping straight to oil can overwhelm the parched fibers and create dark, blotchy spots that never even out. Patience is the final, unlisted ingredient in every successful restoration.
