
How to Break in Leather Work Boots Quickly and Comfortably
This post contains affiliate links. As an Amazon Associate, we earn from qualifying purchases.
This post contains affiliate links. As an Amazon Associate, we earn from qualifying purchases.
Break in leather work boots by confirming the correct size first, then following a strict, graduated wear schedule over 1–2 weeks, start with 20–30 minutes indoors, build to a half-shift, then a full day. Use a minimal amount of conditioner only on high-stress flex points, and never soak, heat, or force-stretch the boots.
The process is mechanical, not magical. Thick leather and stiff midsoles need time to soften and conform to the unique shape of your foot. Rushing it with shortcuts doesn’t just hurt your feet; it can permanently damage the boot’s structure, adhesives, and waterproofing.
What follows is the methodical approach that actually works, backed by bootmakers and years of hard lessons. We’ll cover the exact timeline, the right way to use conditioner, the critical fit checks most people skip, and the one-size-fits-all advice you should ignore.
Key Takeaways
- A proper break in timeline is non-negotiable: start with 20–30 minutes indoors, and only increase wear time when the previous session caused no new hot spots.
- Conditioning is a targeted aid, not a cure-all. Apply a thin layer of a product like Bickmore Bick 4 only to high-flex areas like the ankle collar and vamp, not the entire boot.
- Persistent, sharp pain is a fit issue, not a break-in problem. Numb toes, severe heel lift over half an inch, or pinching at safety cap edges mean the boot is wrong.
- Never soak, heat, or forcibly stretch modern work boots. These methods strip oils, melt adhesives, and void warranties for a false shortcut.
- The best leather conditioner for break-in is one that hydrates without darkening or over-softening; Lexol Leather Conditioner is a reliable, neutral choice.
Start With This, Not That: The Fit Foundation
Jack Teague from Ariat puts it plainly: you can’t break in a boot that doesn’t fit. The goal is to mold the leather to your foot, not to change the boot’s fundamental geometry. Before you even think about a wear schedule, run these two checks.
First, the thumbs-width test. With the boot on and laced snugly, you should have about a thumb’s width of space between your longest toe and the end of the boot. This is the baseline room your foot needs to move and swell during a long day.
Second, assess heel lift, especially for pull-on styles. A little movement is normal at first. More than half an inch of up-and-down travel, as Teague notes, means the size is wrong. That slop won’t tighten up; it’ll just grind blisters into your heel. For lace-ups, a secure heel is the anchor point everything else breaks in around. If your heel is swimming, the break-in process is sabotaged from step one.
Common mistake: Trying to break in boots that are the wrong size. A break-in can soften leather; it cannot shorten a boot that’s too long, widen a cap that’s too narrow, or correct an arch that lands in the wrong spot.
The Graduated Wear Schedule (The Only Safe Way)
Forget wearing new boots for a full shift on day one. That’s a blister factory. The safe method is a slow, progressive adaptation. Carl Murawski’s schedule, drawn from decades in the trades, is the one to follow.
Here’s the breakdown:
| Day / Stage | Wear Time & Activity | What You’re Assessing |
|---|---|---|
| Fit Check | 20–30 minutes indoors | Initial pressure points, heel slip, toe room. |
| Days 1–2 | 1–2 hours indoors | Do hot spots develop? Does flex feel easier? |
| Days 3–4 | 2–4 hours, light activity | How do ankles and tongue feel after prolonged wear? |
| Days 5–7 | Half a work shift | Can you complete a moderate period without changing your gait? |
| Week 2+ | Full shift, then regular use | Boot should now mold during actual work, not fight you. |
The rule is simple: only advance to the next stage if the previous one caused no new pain. A dull ache from new stiffness is normal. A sharp, pinpoint pain or a blister is a stop sign. Go back a stage or take a day off.
This schedule works because it allows the leather’s fibers to stretch and relax gradually under body heat and natural movement. It also gives the footbed, whether cork, leather, or foam, time to compress and form to your arch. Rushing this compresses the footbed unevenly, creating permanent pressure points.
Conditioning: Less Is More
Leather conditioner is a help, not a hero. Its job during break-in is to reduce friction in high-stress zones by keeping the leather supple. It is not for slathering over the entire boot.
The areas that need attention are where the boot bends: the vamp (over the forefoot) and the ankle collar. After your first short wear session, feel for those spots. Apply a tiny amount of a conditioner like Bickmore Bick 4 or Lexol Leather Conditioner just there. Rub it in thoroughly and let it absorb overnight.
I prefer conditioners that hydrate without darkening for this phase. You want to see the leather’s natural creases forming, not mask them under a dark, oily film. A little goes a very long way.
Why not the whole boot? Over-conditioning, as Red Wing warns, can oversoften leather, weakening its structure and trapping moisture against your foot. It can also saturate stitching and seams. Your goal is targeted support, not a total soak.
| Do Condition | Don’t Condition | Reason |
|---|---|---|
| Vamp (forefoot flex point) | Smooth, non-flexing quarters | Reduces cracking at primary bend; avoids unnecessary softening elsewhere. |
| Ankle collar | Waterproof membrane liners | Prevents chafing; conditioner can clog membrane pores. |
| Dry, stiff spots | The entire boot “to speed things up” | Addresses specific friction; full coverage wastes product and risks damage. |
What Never Works (And Why It Ruins Boots)
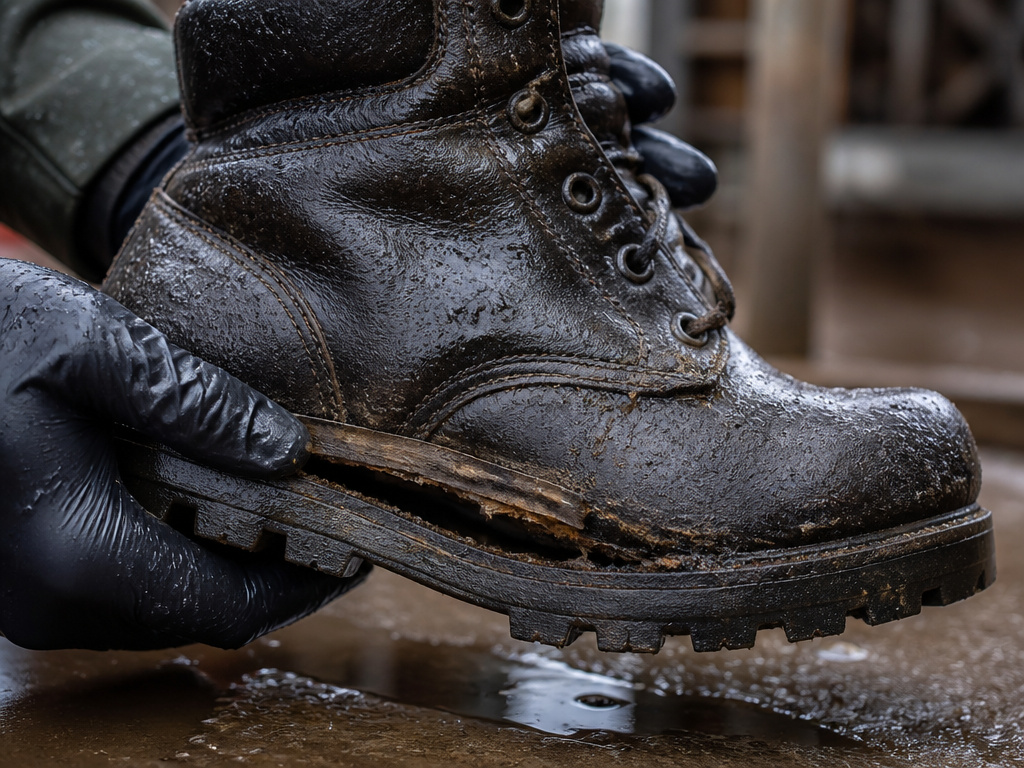 The internet is full of break-in hacks that are shortcuts to the trash can. Let’s be clear about this: these methods are dangerous for modern boots.
Soaking in Water: This is the fastest way to void a warranty. As 5.11 Tactical explicitly warns, water saturates and weakens adhesives, delaminates soles, and can destroy waterproof membranes like Gore-Tex from the inside out. For leather, it strips natural oils, leading to a stiff, cracked boot as it dries unevenly.
Applying Direct Heat: Danner’s Kyle Wanke says never dry boots by a fire, with a hair dryer, or in an oven. High heat bakes the leather, making it brittle and prone to cracking. It also melts the glues that hold the boot together. The result is a shrunken, misshapen, and structurally compromised boot.
Force-Stretching with Alcohol or Freezing: These are spot-stretching tricks for dress shoes, not break-in methods for structured work boots. They put immense, uncontrolled pressure on small areas, which can split seams, pop eyelets, or crack the midsole. They do nothing to gently mold the footbed or upper to your foot.
Where this goes sideways: Soaking a boot to soften it. You might gain a day of pliability, but you lose years of the boot’s life as the insole warps and adhesives fail. It’s a terrible trade.
The smell of wet leather drying is not the smell of success. It’s the smell of the tannins and oils leaving the hide.
Boot Type Breakdown: One Method Doesn’t Fit All
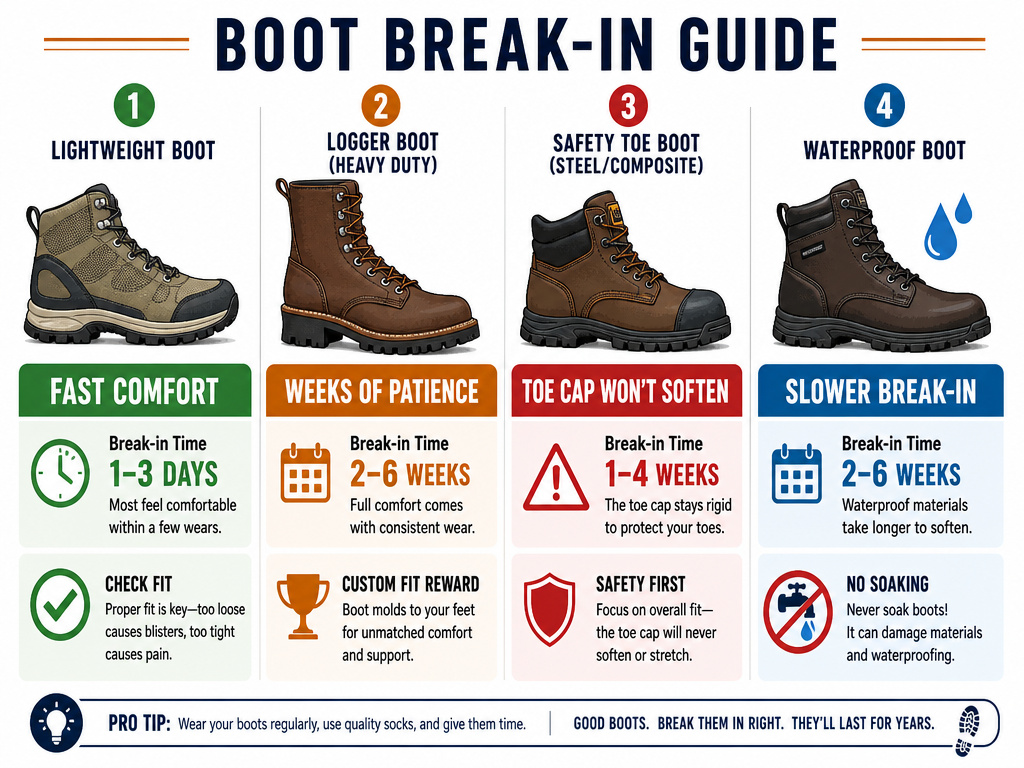 A lightweight cemented boot and a heavyweight stitchdown logger boot are different beasts. Your break-in expectations and focus must shift accordingly.
- Lightweight Cemented or Athletic Boots: These often have textile panels and foam cushioning. They should feel relatively comfortable quickly. Persistent pain here is almost always a fit issue, not a break-in requirement.
- Heavy Stitchdown or “PNW” Boots: Boots from brands like Nick’s or White’s, built with thick leather and structured arches, demand the full, patient schedule. The break-in here is real and can take weeks. The reward is a boot that becomes a custom fit.
- Safety-Toe Boots: Remember, the leather will soften, but the reinforced toe cap will not. Any direct pressure or contact between your toes and the cap is a sizing error. It will not improve.
- Waterproof/Insulated Boots: These feel stiffer and bulkier. The break-in is slower because membranes and insulation restrict flex. Never soak or over-condition them, as you risk compromising the waterproof barrier.
This is where choosing the right boot from the start pays off. A selection process that matches the boot’s last to your foot shape cuts the break-in time in half.
Troubleshooting Common Break-In Pains
Even with a perfect schedule, you might hit a snag. Here’s how to diagnose and address common complaints without reaching for destructive hacks.
Hot Spot on the Top of the Foot: This is often a lacing issue, not a leather one. Skip the eyelet or hook directly over the pain point. This “window lacing” relieves pressure across the instep without loosening the whole boot.
Heel Slip (in a properly sized boot): Ensure your heel is fully seated before tightening the laces. Tie a surgeon’s knot (an extra wrap before the bow) at the ankle hooks to lock the heel down. A small, padded heel grip insert can also take up minor volume.
Rubbing at the Ankle Collar: Wear a taller sock that covers the contact point. Before each wear, manually flex the stiff collar back and forth with your hands for a minute to soften it. Avoid conditioning this area excessively, it can oversoften and collapse the support.
Generalized Stiffness and Foot Fatigue: This is normal break-in discomfort. Stick to the schedule. Consider wearing the boots while relaxing at home in the evening to accumulate gentle flexing time without the stress of work.
If a problem persists after two weeks of gradual wear, it’s likely a fundamental fit flaw. No amount of breaking in will fix a boot built on a last that doesn’t match your foot. Knowing when to return a boot is as important as knowing how to break it in.
Frequently Asked Questions
Can I wear two pairs of socks to break boots in faster?
No, and this is a point of clear conflict between common advice and professional opinion. Jack Teague of Ariat advises against it. The logic is solid: if you stretch the leather to fit your foot plus a thick sock, once the leather breaks in, it will be too loose for your foot alone. You want the boot to form to your actual foot shape, not a temporary, padded version of it.
How long does it really take to break in leather work boots?
It depends entirely on the boot. A flexible, cemented-sole boot might feel good in 20-30 hours of wear. A traditional, all-leather Goodyear-welted or stitchdown boot, like a Red Wing Iron Ranger or a Thorogood moc toe, can take the full 80-100 hours. That translates to 2-4 weeks of following a graduated schedule. Patience is part of the process.
Is it okay to use a hair dryer on new boots to soften them?
Absolutely not. Direct, concentrated heat is one of the worst things you can do to leather. It rapidly dries out the natural oils, making the leather brittle and prone to cracking. It can also weaken or melt the adhesives binding the sole and midsole. Always let leather adjust through gradual mechanical flexing and body heat.
My new boots are killing my toes. Is this normal?
Toe pain is almost never a normal part of break-in. A feeling of snugness is expected, but sharp pain, numbness, or your toes pressing firmly against the end or sides of the boot is a red flag. This is especially critical with safety-toe boots, the cap does not give. Toe pain indicates a sizing issue, not a break-in one.
Can I just use mink oil to break my boots in?
You can, but you might not want to. Mink oil is a heavy conditioner that significantly darkens leather and can remain somewhat greasy. For the initial break-in phase, a lighter, non-darkening conditioner like Bickmore Bick 4 allows you to monitor the leather’s progress and is less likely to over-soften the material. Save mink oil for later, if you need heavy weather protection.
The Bottom Line
Breaking in leather work boots is a test of patience, not endurance. The single most important factor is the fit you start with, no process can correct a bad one. Commit to the graduated schedule, use conditioner as a precise tool, and treat all quick-fix hacks as threats to your investment.
If you remember one thing, make it this: stop at the first sign of sharp, specific pain. That’s your signal to reassess fit or rest, not to push through. That outcome is worth every careful step of the way.
