
The Right Way to Clean a Leather Sofa: Insider Techniques
This post contains affiliate links. As an Amazon Associate, we earn from qualifying purchases.
To clean a leather sofa, you need the right tools, the right technique, and the right cleaner for your sofa’s specific finish. Start by vacuuming with a soft brush, spot-clean spills with a damp microfiber cloth, and escalate to a pH-neutral leather cleaner only for stubborn dirt. Never use household cleaners, saddle soap, or oil-based products, as they can strip finishes or cause permanent damage.
The right process matters more than the right product. I’ve seen too many well-intentioned people ruin a hide by skipping the mechanical step and going straight for a chemical solution. Dirt gets pushed into the grain, cleaners strip the protective topcoat, and a simple cleaning job turns into a costly refinishing project.
What follows is a manufacturer-informed breakdown. This guide explains the four-step escalation protocol, the exact products brands specify (and which ones they forbid), and how to handle common stains without making them worse. By the end, you’ll know how to read your sofa’s care tag and translate it into action.
Key Takeaways
- Start with a dry, soft brush or vacuum attachment, physical removal is safer and more effective than liquid for dust and grit.
- Match your cleaner to your leather’s finish. Using a general-purpose product on a specialty leather like IKEA’s SEGLORA can stain it.
- Follow a strict escalation protocol: 1) Dry brush, 2) Damp cloth, 3) pH-neutral leather cleaner, 4) Specialist stain treatment.
- Keep your sofa at least 12 inches from heat sources to prevent the leather from drying out and cracking prematurely.
- Condition only after cleaning, and only if your leather type needs it. Over-conditioning creates a sticky, gummy surface.
The 4-Step Cleaning Escalation Protocol
Most cleaning guides jump straight to products. That’s backwards. The leather will tell you what it needs if you start simple and escalate only when necessary. This protocol is the single biggest mistake I see owners make, they reach for a bottle when a brush would do.
Here’s the practical takeaway: work from least invasive to most.
Start with dry, mechanical removal. A soft brush dislodges surface dust and grit without driving moisture into the leather’s pores, which can swell the fibers and spread any dissolved soils. Vacuuming with a soft brush attachment is the safest first step for any leather sofa.
Step 1: Dry Brush & Vacuum
Use a clean, soft-bristled brush (a horsehair detailing brush works) or your vacuum’s soft upholstery tool. Gently brush the entire surface, following the grain. This isn’t a deep clean; it’s a reset. You’re clearing the stage before the main act. Pay extra attention to crevices and piping where dust nests.
Step 2: Damp Microfiber Wipe
If brushing isn’t enough, move to a clean, white microfiber cloth dampened with distilled or filtered water. Wring it out thoroughly, it should feel barely damp to the touch. Wipe in straight lines with the grain, not circles. Let the area dry completely. This lifts fresh, water-soluble spills without chemicals.
Step 3: pH-Neutral Leather Cleaner
Only if a damp cloth fails should you introduce a dedicated leather cleaner. My default reach is Lexol pH Leather Cleaner or Saphir Omni’Nettoyant. Both are pH-balanced to match leather’s natural acidity, so they clean without stripping. Apply a small amount to a microfiber cloth, work into a lather in your hand, then gently massage the soiled area. Wipe away the residue with a second damp cloth immediately. Never let cleaner sit and dry on the surface.
Step 4: Specialist Stain Treatment
For specific stains like ink, grease, or dye transfer, you may need a targeted product. This is the last resort. We’ll cover those in a dedicated section next. The rule here is to test any treatment in a hidden spot first, under a cushion, along the back, and to understand that some stains, like certain dye transfers, may be permanent.
| Step | Tool | Goal | Risk If Skipped |
|---|---|---|---|
| 1. Dry Brush | Soft brush/vacuum attachment | Remove loose dust & grit | Grinding particles into the grain, causing micro-scratches |
| 2. Damp Cloth | Microfiber cloth, distilled water | Lift fresh, water-soluble spills | Unnecessary chemical use; potential for cleaner residue |
| 3. Leather Cleaner | pH-neutral cleaner (Lexol, Saphir), microfiber | Remove embedded dirt & oils | Using a harsh cleaner that strips the protective finish |
| 4. Stain Treatment | Targeted product (e.g., for grease) | Address specific, stubborn stains | Spreading the stain or setting it permanently |
Stain-Specific Treatments & What to Avoid
Not all spills are created equal. Water rings behave differently than grease, and ink is a whole other beast. The goal is to contain the problem, not amplify it.
Ink & Dye Transfer
This is the hardest category. Some denim dyes and pen inks will bond with the leather’s pigment. Roche Bobois flatly states that some transfers onto light leather may be “unfixable.” Your best shot is to act instantly with a dedicated leather-safe ink remover. Dabbing, not rubbing, is critical. Rubbing grinds the pigment in.
Grease & Oil
Grease is an emergency. As noted in manufacturer guides, grease can dissolve the protective finish on the surface. Blot up excess immediately with a clean paper towel. Then, sprinkle a small amount of cornstarch or talcum powder over the spot to absorb the oil from the leather. Let it sit for several hours or overnight, then vacuum it away. Repeat if needed before a very gentle cleaning with a pH-neutral product.
Common Water-Based Spills (Coffee, Wine, Soda)
Blot, don’t wipe. Wiping spreads the liquid and pushes sugars or tannins deeper. Use a clean, absorbent cloth to soak up as much as possible, then follow the damp cloth step from the protocol. For sticky residues, a slightly stronger cleaner may be needed, but always return to a damp cloth to rinse.
Where this goes sideways: Using a solvent like rubbing alcohol or nail polish remover on a finished leather. These can permanently cloud or strip the topcoat, leaving a bleached, blotchy patch that only a professional can fix.
The Universal “Don’t” List
- Household Cleaners: Glass cleaner, dish soap, multi-surface sprays. Their alkaline pH and additives will dry out and crack leather over time.
- Saddle Soap: Formulated for thick, vegetable-tanned work leather. On a modern sofa’s thin, finished hide, it leaves a waxy, cloudy residue that attracts more dirt.
- Oil-Based Conditioners as Cleaners: Mink oil, neatsfoot oil, olive oil. These are for conditioning dry leather only. Using them to clean will saturate the leather, clog pores, and eventually turn rancid.
- Vinegar & Baking Soda: Home remedy favorites that are too abrasive or acidic for delicate leather finishes.
Matching Your Cleaner to Your Sofa’s Leather Type
This is the part most generic guides miss. Throwing the wrong product at your sofa isn’t just ineffective, it can void warranties and cause physical damage. Plush’s care guide explicitly states that failing to use their Plush Shield® kit on their Performance leather can result in embedded dirt causing the leather to peel or crack.
Let me share what I’ve learned from digging into OEM manuals. The manufacturer’s recommendation isn’t a suggestion; it’s a specification based on their finish chemistry.
Aniline & Semi-Aniline Leather
These are the most porous, natural-feeling leathers. They have little to no protective pigment coating, so they absorb liquids, and cleaners, deeply. You must use the mildest possible option. A damp microfiber cloth is often sufficient. For cleaning, a dedicated aniline cleaner like Saphir Omni’Nettoyant is designed to clean without leaving a residue on the unprotected surface.
Pigmented (Corrected-Grain) Leather
This is the most common sofa leather. It has a painted-on pigment layer and a protective clear topcoat (usually polyurethane or acrylic). This topcoat is what you’re actually cleaning. PH-neutral cleaners like Lexol pH are safe here. Avoid anything abrasive.
Specialty & Coated Finishes
This is where you must read the manual. IKEA SEGLORA leather is a prime example. Their guide explicitly says not to use their own IKEA ABSORB cleaner on it, as it will stain. For SEGLORA, only vacuuming and a slightly damp cloth are permitted. Similarly, many white or vintage leathers have specific product requirements to avoid yellowing.
| Leather Type | Finish | Best Cleaning Approach | Product Example | Critical Warning |
|---|---|---|---|---|
| Aniline | Unprotected, porous | Damp cloth first, mild aniline-specific cleaner only | Saphir Omni’Nettoyant | Easily stained; never use all-in-one cleaner/conditioners |
| Pigmented | Protective polymer topcoat | Follow the 4-step protocol; pH-neutral cleaner is safe | Lexol pH Leather Cleaner | Avoid saddle soap & oil-based products; they cloud the topcoat |
| Specialty (e.g., IKEA SEGLORA) | Unique coated finish | Vacuum & damp cloth only; no creams or cleaners | Distilled water, microfiber cloth | Using IKEA’s own ABSORB cleaner on SEGLORA will cause stains |
| White/Light Colored | Often a delicate pigmented coat | Immediate blotting; cleaner for white leather only | Leather Master Strong Cleaner | Dye transfer (from jeans) may be permanent; keep away from direct sunlight |
Tools & Products: Building Your Kit
You don’t need a cabinet full of potions. A focused kit built around the escalation protocol is all you need. Let’s be clear about one thing: more products usually means more problems.
The Non-Negotiables
- Soft-Bristled Brush: A horsehair or boar bristle brush for clothing works. It’s for dry work only.
- White Microfiber Cloths: You need several. Color can transfer, and terry cloth can be too abrasive.
- Distilled Water: Tap water minerals can leave spots as it evaporates.
The Cleaner Decision
This is based on years of practical experience. If you have a standard pigmented sofa and want one reliable cleaner, get Lexol pH Leather Cleaner. It’s widely available, correctly formulated, and won’t damage the topcoat. For aniline leathers or if you want a top-tier option, Saphir Omni’Nettoyant is my preference. It cleans beautifully without any residue.
I stopped using aggressive, all-purpose cleaners on finished furniture after seeing one strip the color from a chair arm. I now use a strict escalation protocol and match the product to the leather’s needs. The difference in long-term preservation is not subtle.
What About Wipes & All-in-Ones?
Pre-moistened leather wipes are convenient for very quick touch-ups on pigmented leather, but they are not a deep cleaning solution. They often contain silicones that leave a shiny film. As for “all-in-one” cleaner/conditioners, they are typically poor at both jobs. Cleaning and conditioning are separate chemical processes. A product that claims to do both usually does neither well.
Conditioner is a Separate Step
Conditioning replenishes the leather’s natural oils, which can be depleted by cleaning or dry environments. It is not part of the cleaning process. Apply a conditioner like Lexol Leather Conditioner only after the sofa is completely clean and dry, and only if the leather feels stiff or dry. Over-conditioning creates a sticky surface that attracts dirt.
The Manufacturer Mandates You Can’t Ignore
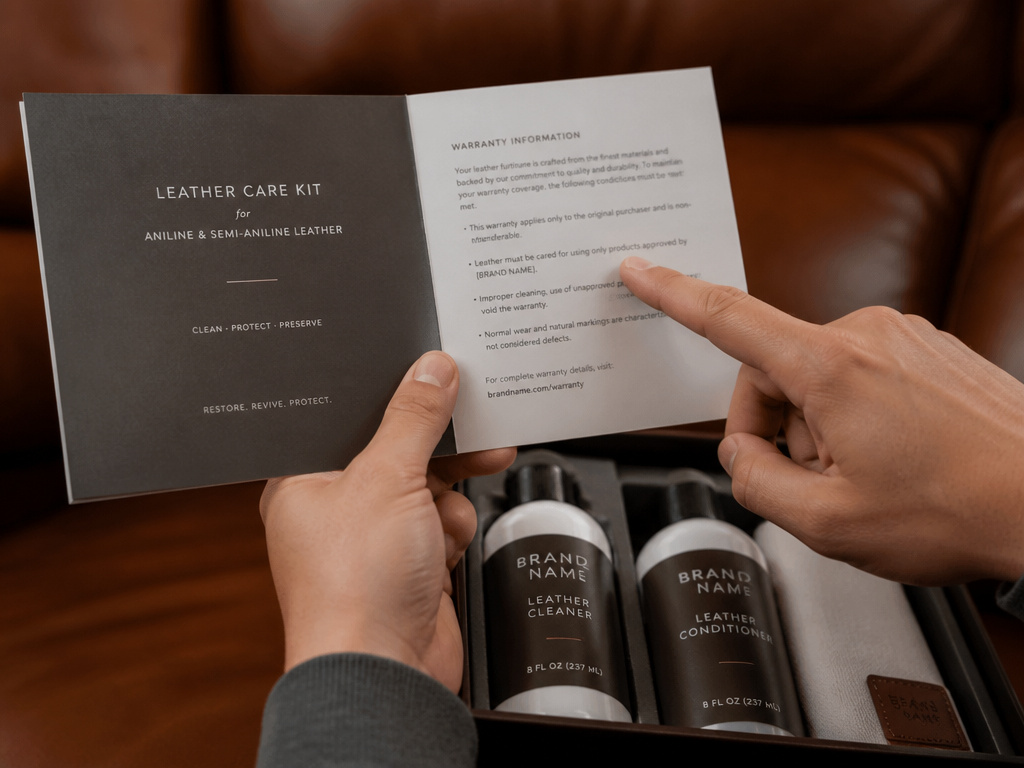
OEM care guides aren’t just advice. For warranties and long-term integrity, they are rules. Ignoring them has concrete consequences.
Heat & Sunlight Proximity
IKEA mandates at least 40 cm (12 inches) from heat sources. Plush says 50cm. This isn’t about fire risk; it’s about leather chemistry. Consistent heat dries out the hide from the inside, leading to cracks long before the surface shows wear. Similarly, direct UV light will fade dyes, especially on aniline leathers.
Brand-Specific Care Kits
When a company like Roche Bobois or Plush sells you a Leather Care Kit or Plush Shield® kit, they’ve formulated it for their specific finish. Using a generic product may not clean effectively, and more importantly, it can void the warranty. Plush’s guide is explicit: dirt embedded from improper cleaning can cause peeling.
The “Character” Clause
Some high-end makers, like Cassina, have a fascinating stance. Their guide states that ageing, color variations, and marks “attest to the natural beauty of the leather and should be viewed as an added sign of quality.” This reframes your goal. You’re not cleaning to make it look new; you’re maintaining to let it age gracefully. Your protocol should be gentle enough to preserve that patina.
Frequently Asked Questions
Can I use soap and water?
You can use water, but not soap. Dish soap and hand soap are designed to break down oils, which is the last thing you want to do to leather’s natural oils. A damp cloth with water only is the maximum safe “soap and water” equivalent.
How often should I clean my leather sofa?
For light maintenance, a dry brush or vacuum weekly. A full clean with a damp cloth or cleaner should only happen when needed, typically every 3-6 months for active households. Over-cleaning is as harmful as neglect.
What’s the best home remedy for leather?
The only safe home remedy is a microfiber cloth and distilled water. Forget vinegar, baking soda, coconut oil, or mayonnaise. They will alter the leather’s pH, leave residues, or clog pores. Modern leather finishes are more complex than old-time saddles.
Will conditioner soften my stiff leather sofa?
Conditioner can help, but stiffness is often a sign of the leather’s internal structure or the backing fabric, not just dryness. Conditioning a stiff, low-quality leather may not restore suppleness. It’s better to prevent stiffness by keeping the sofa away from heat and hydrating the air in the room.
Can I use car leather cleaner on my sofa?
Maybe, but check the label. Many automotive leather cleaners are formulated for coated, durable “leather” that is often vinyl or heavily finished. They can be harsh. If your sofa is a delicate aniline leather, stick to furniture-specific products. When in doubt, the pH-neutral cleaners mentioned here are safe for both car and home interiors.
Before You Go
Cleaning a leather sofa isn’t about making it sterile. It’s about preserving a material that’s meant to last. The one threshold that changes everything: if your sofa has a specific, named finish like IKEA SEGLORA or requires a brand-specific kit like Plush Shield®, throw out the generic advice. Your first step isn’t to buy a cleaner; it’s to find the OEM care guide online.
Understand leather better to make confident choices. Start with the dry brush. Escalate only when the leather tells you to. And remember, the best thing you can do for your sofa’s longevity isn’t a deep clean, it’s keeping it 12 inches from the radiator and out of the direct afternoon sun. That simple habit does more than any bottle ever will.
