
The Right Way to Clean Leather Furniture: A Complete Guide
This post contains affiliate links. As an Amazon Associate, we earn from qualifying purchases.
This post contains affiliate links. As an Amazon Associate, we earn from qualifying purchases.
To clean leather furniture, always start dry. Vacuum with a soft brush attachment or wipe with a dry microfiber cloth to remove surface dust. For general cleaning, use a damp cloth with distilled water. For deeper cleaning or stains, apply a dedicated, pH-neutral leather cleaner like Lexol pH Leather Cleaner or Saphir Omni’Nettoyant with a microfiber cloth, working in small sections, then wipe dry. Never soak the leather or use household cleaners, saddle soap, or polish.
That sequence is the whole game. Skipping the dry step is how dirt gets ground into the grain, and using the wrong product is how finishes get cloudy.
What follows is the full breakdown: why you start dry, the four products that actually work, and the exact steps for different leather types, including what to do when you see a stain. You’ll also learn the one cleaning tool you already own that most guides ignore.
Key Takeaways
- Always begin with a dry clean, dust is abrasive and grinding it in with a wet cloth scratches the finish.
- Use a dedicated, pH-neutral leather cleaner; household soaps, saddle soap, and “all-in-one” products often damage or leave residues.
- Work in small, manageable sections (like one arm or cushion) and dry the leather completely before moving on or applying conditioner.
- Spot cleaning can cause visible rings; when using any liquid, treat the entire panel (e.g., the whole seat cushion) for uniform results. Specialty finishes like suede, nubuck, or certain coated leathers (like IKEA SEGLORA) have strict, mandatory rules.
The Leather Cleaning Steps in Order
Cleaning leather isn’t complicated, but it is sequential. Jump a step and you usually create a new problem. This isn’t a gentle suggestion, it’s the difference between maintaining a patina and creating a permanent dull spot.
I learned this the hard way early on. I was helping a friend revive a mid-century chair. We saw a smudge and went straight for a damp cloth. That ground a fine layer of grit into the arm’s surface, leaving a faintly scratched area that never quite polished back up. The leather was fine, but the topcoat was marred. Now I treat dust like sandpaper.
The goal is to lift contaminants, not drive them deeper. Dry methods remove particulates; damp methods dissolve oils and sugars; specialized cleaners tackle set-in stains. Always escalate in that order.
Follow this escalation protocol every time. It works for everything from a dusty sofa to a juice-stained recliner.
| Step | Tool / Product | Goal | Risk If Skipped |
|---|---|---|---|
| 1. Dry Removal | Soft-bristle brush, dry microfiber cloth | Lift loose dust, pet hair, crumbs | Grinding dirt into finish, causing micro-scratches |
| 2. Damp Wipe | Microfiber cloth damp with distilled water | Remove light surface soils, body oils | Using stronger cleaner than needed, over-drying leather |
| 3. PH-Neutral Clean | Dedicated leather cleaner (e.g., Lexol pH) | Deep clean, dissolve set stains, refresh surface | Ineffective cleaning or chemical damage from improper products |
| 4. Stain Treatment | Specialist product (e.g., gum eraser, suede cleaner) | Address specific, stubborn stains | Spreading stain, setting it permanently, discoloration |
The One Tool You Already Own
Forget fancy kits for a moment. The most effective tool for the first, and most important, step is a soft-bristle brush. A horsehair detailing brush, a clean makeup brush, or even a new paintbrush with soft bristles will work.
Why a brush? Because dust isn’t just sitting there. It settles into the leather’s grain and the crevices of stitching. A cloth pushes it around; the bristles of a brush lift it out. Run the brush gently along the grain, then vacuum up the dislodged dust with the soft brush attachment on your vacuum cleaner.
You’ll hear the difference. A dusty piece has a faint, gritty sound under a cloth. After a brush with natural bristles, it’s silent. That silence means you’ve removed the abrasive layer and can safely move to damp cleaning without fear of scratching.
Common mistake: Going straight to a damp cloth. The leather looks clean after you wipe it, but you’ve just polished a thin layer of grit into the topcoat. That haze shows up six months later as a dull patch that won’t shine.
Choosing (and Using) a Leather Cleaner
This is where most advice goes sideways. You don’t need a bespoke kit from your furniture brand. You need a pH-neutral cleaner formulated for leather.
Let’s be clear about one thing: household cleaners, dish soap, vinegar, and baking soda are off the table. Their pH is wrong, they contain salts or additives that linger in the leather, and they strip natural oils. Saddle soap is for saddles, its high wax content clouds modern furniture finishes.
My go-to is Lexol pH Leather Cleaner. It’s mild, effective, and doesn’t leave a residue. For higher-end or more delicate aniline leathers, Saphir Omni’Nettoyant is exceptional. Both are available in standard sizes.
Where this goes sideways: Using an “all-in-one” cleaner + conditioner. These products are typically poor at both jobs. The cleaning agents are weak, and the conditioning oils sit on top of dirt. You get a superficially shiny, slightly greasy surface that attracts more grime.
Here’s how to use a dedicated cleaner correctly: 1. Shake the bottle well. 2. Apply a small amount to a clean, colorfast microfiber cloth, not directly onto the leather. 3. Work on one section at a time: an arm, a cushion, the seat of a chair. 4. Use gentle, circular motions to work the cleaner into the surface, paying attention to stained or dirty areas. 5. Before the cleaner dries, use a separate, damp section of your cloth to wipe away the residue. 6. Dry the area thoroughly with a third, dry microfiber cloth.
The leather should feel clean, not slick or tacky. If it feels sticky, you used too much or didn’t rinse/wipe thoroughly enough.
How to Handle Different Leather Types
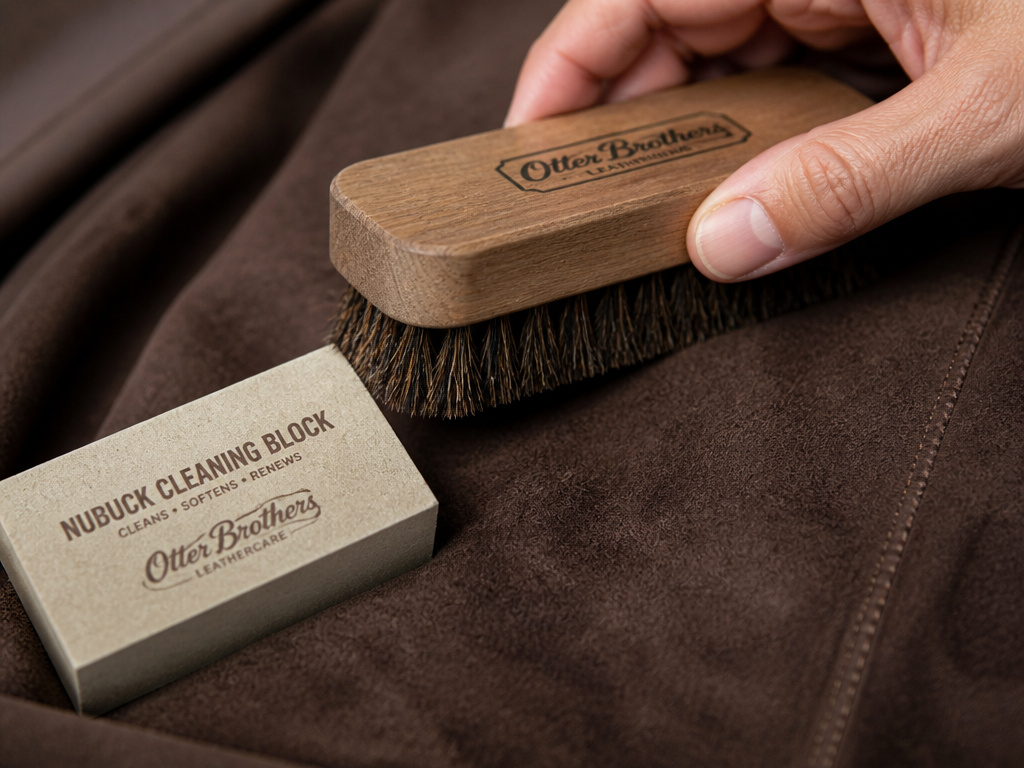 Not all leather is cleaned the same way. The finish dictates the rules. Get this wrong, and you move from cleaning to damaging.
Finished / Protected Leather
This is the most common type on sofas and recliners. It has a clear polymer or pigment topcoat. It’s durable and stain-resistant. The cleaning steps above are designed for this leather. You can safely use a dedicated cleaner. Always test in a hidden spot first, inside a skirt or behind a cushion, to check for any color transfer or finish clouding.
Aniline & Semi-Aniline Leather
These premium leathers are dyed without a thick topcoat, so they are more absorbent and show natural markings. They are also more vulnerable. * Dry brushing is even more critical. You can’t afford to grind anything in. * Use the mildest cleaner possible, like Saphir Omni’Nettoyant. * Never spot clean. The cleaner can leave a slight difference in sheen or color. If you need to clean a stain, clean the entire panel (the whole seat cushion, the entire back) to maintain a uniform appearance.
Suede & Nubuck
These are buffed surfaces with a nap. Water is the enemy. * Your primary tool is a suede brush or a nubuck cleaning block. Brush regularly with the grain to lift the nap and disperse soil. * For stains, use a specialist suede cleaner and follow its instructions to the letter. * Never use a wet cloth or standard leather cleaner. It will mat the nap and create a permanent dark spot.
Coated / Bonded Leather & Specific Warnings
Some lower-cost or specific furniture uses specialty finishes with strict rules. * IKEA SEGLORA leather is a notable example. IKEA explicitly states not to use any cleaning agents or creams, including their own ABSORB set, as it will stain. Clean it only with a soft brush vacuum attachment and, if absolutely necessary, a slightly damp cloth. * For any leather you’re unsure about, find the manufacturer’s care tag (usually under a cushion) and follow it verbatim. If it says “clean with damp cloth only,” listen.
What to Do When You See a Stain
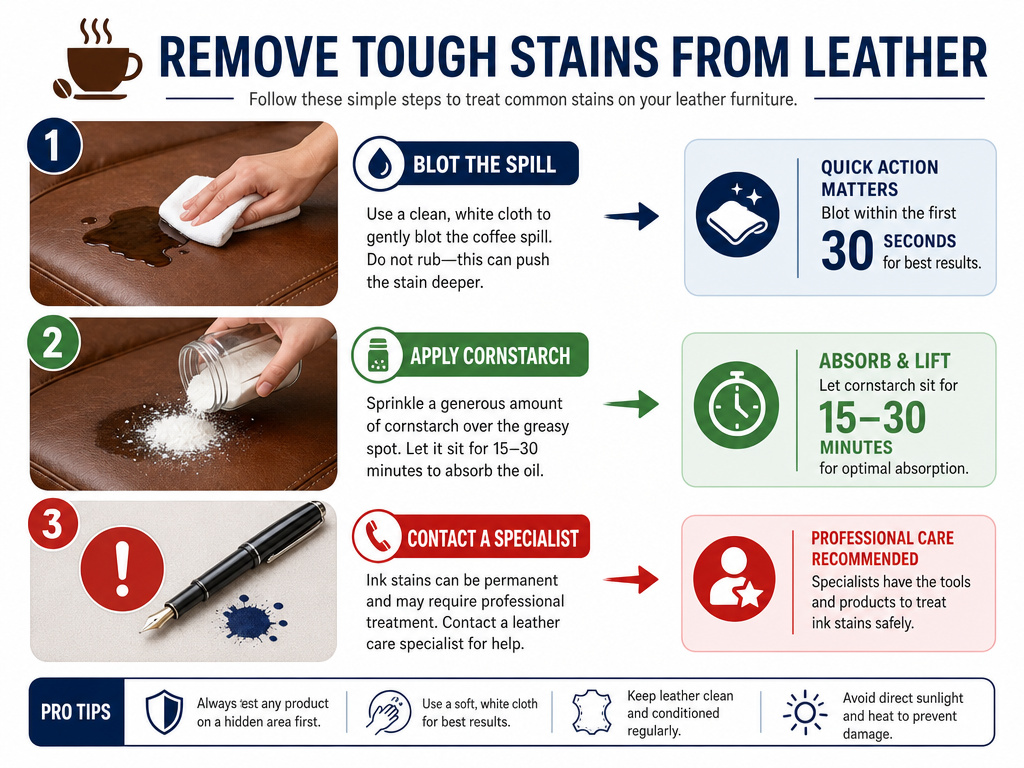 Panic is the wrong move. Blotting is the right one.
For a fresh liquid spill (water, juice, coffee): 1. Immediately blot, don’t rub, with an absorbent cloth or paper towel to pull up as much as possible. 2. Let the area dry fully. 3. Often, the stain will be gone or minimal once dry. If a mark remains, proceed with the full cleaning steps on that entire panel.
For grease or oil: 1. Sprinkle a small amount of cornstarch or talc on the spot to absorb the oil. Let it sit for several hours or overnight. 2. Brush it away thoroughly. 3. The stain may be gone. If a shadow remains, a dedicated leather cleaner is your next step.
For ink or dye: This is a professional job. Do not experiment with alcohol or acetone. You’ll likely set the stain or strip the color. Contact a leather repair specialist.
The part nobody mentions: Many “stains” are actually just a disturbance in the leather’s finish or a pile of dirt. A proper, full clean of the entire piece often makes them disappear completely. Try the full process before you declare a spot ruined.
Frequently Asked Questions
Can I use baby wipes on leather furniture?
No. Most baby wipes contain alcohols, mild solvents, or moisturizers that can break down the leather’s finish over time or leave a sticky residue. Stick to a cloth damp with water or a cleaner like Lexol.
How often should I clean my leather sofa?
For light maintenance, a dry brush or vacuum every two weeks keeps dust down. A full clean with a damp cloth can be done every 1-3 months. A deep clean with a dedicated cleaner is only needed every 6-12 months, or when you notice soiling.
Why is my leather sticky after cleaning?
Sticky feel usually means you used too much cleaner or didn’t remove the residue properly. It can also mean you used a product not meant for leather, like an all-in-one or a household cleaner. Wipe the area again with a cloth dampened with distilled water, then dry thoroughly.
Can I use olive oil or coconut oil to condition after cleaning?
Absolutely not. These kitchen oils will go rancid, attract dirt, and degrade the leather. They do not penetrate correctly and will create a gummy, smelly mess. Always use a conditioner formulated for leather, like Lexol Leather Conditioner or Bickmore Bick 4.
Is it okay to use a hair dryer to dry leather faster?
No. High, direct heat can dry out the leather’s natural oils, cause the hide to shrink or stiffen, and crack finishes. Always air-dry at room temperature, wiping away excess moisture with a dry cloth to speed up the process.
Before You Go
Leather care is less about heavy scrubbing and more about consistent, gentle removal.
If you take away one thing, let it be this: always start dry. That single habit prevents most cleaning disasters. Your brush and vacuum are the first line of defense; the cleaner is the cavalry you call in only when needed.
For the large majority of homes, a soft brush, a stack of microfiber cloths, and a bottle of Lexol pH Leather Cleaner will handle everything your furniture throws at you. The fancy techniques are for the edge cases you’ll likely never encounter. Keep it that simple, and your leather will keep looking right for years.
