
How to Condition Leather Boots | The Oil vs Wax Trade-Off
This post contains affiliate links. As an Amazon Associate, we earn from qualifying purchases.
This post contains affiliate links. As an Amazon Associate, we earn from qualifying purchases.
To condition leather boots, start with a clean, dry surface. Apply a product formulated for your boot’s leather type in a thin, even layer, massaging it into the grain and seams. Let it absorb for about 20 minutes, then buff off any excess with a clean cloth. The product you choose, oil, cream, or wax, depends on whether you prioritize leather nourishment or water resistance.
Let’s be clear about this: the word “conditioning” gets tossed around to sell everything from oily sprays to thick waxes. But physically, conditioning is about replacing the natural oils that wear, weather, and time pull out of the leather fibers. A dry leather boot feels stiff, looks pale, and will crack at the flex points. A conditioned one stays supple and resists water intrusion because the plumped-up fibers swell to close the microscopic gaps. The trick is knowing which oils to use and when a wax sealant is the better, or worse, choice.
What follows is the straight-line process, the gear you actually need, and the one mistake that ruins more boots than anything else.
Key Takeaways
- Never condition dirty leather. You’ll seal in grit that acts like sandpaper, grinding down the fibers from the inside.
- The 20-minute soak-in window is real. Buffing too soon wastes product; waiting too long leaves a sticky film.
- Oils nourish but darken; waxes seal but block future conditioning. Pick your priority.
- Your wear schedule dictates the frequency: casual boots every 3 months, work boots every 4 weeks.
- Shoe trees aren’t optional for wet boots. They hold the shape so the leather dries without distorting.
The Two Goals That Fight Each Other
Here’s the thing. People want their boots to be soft and waterproof. Leather is a porous skin. To keep it supple, you feed it oils that sink in. To make it waterproof, you seal it with waxes that sit on top. Doing both in the wrong order is like putting a raincoat over a sunburn, you trap the wrong thing.
Obenauf’s Heavy Duty LP is a classic example of this conflict. It’s a beeswax and oil blend. The oil tries to sink in and condition; the wax tries to form a seal on the surface. It works for extreme, wet-weather protection, but it fundamentally changes the leather’s breathability. After a few applications, it becomes nearly impossible to condition the leather underneath that wax barrier. This is why many work boot manufacturers, like Danner for their full-grain lines, recommend a pure oil or cream for regular upkeep and reserve heavy waxes for specific, harsh conditions.
Apply conditioner to the stitching to keep the threads lubricated & reduce premature wear. Once conditioner has been applied to the leather and stitching, allow it to set for about 20 minutes. This allows enough time for the leather to absorb the conditioner. – Danner Full-Grain Leather Care Guide
The 6-Step Conditioning Process
You can have the best conditioner in the world and still wreck your boots by missing a single step. This isn’t theory. I learned it the hard way with a pair of hiking boots I was too eager to “save.” The leather was caked in dried mud. I figured a heavy dose of oil would both clean and revive it. All it did was turn that dirt into a permanent, abrasive slurry inside the leather’s pores. The boots were never the same.
The sequence below is required. You can’t skip to the fun part.
1. Strip Down & Clean
Remove the laces and footbeds. This isn’t just for thoroughness. Laces hide dirt at the eyelets, and a damp insole trapped against the leather lining is a one-way ticket to mildew city, a problem I’ve seen all too often with boots stored in damp basements. Use a soft brush to remove dry dirt. For stubborn grime, a damp cloth with a drop of mild soap (like a castile soap) works. R.M.Williams advises removing mud when it’s still wet to prevent it from grinding into the leather as it dries. Rinse the soap off and let the boots dry completely, away from any direct heat source. This can take a full day.
2. Diagnose & Choose Your Product
Is the leather just dry, or is it actually cracked? Dry leather feels stiff and may look chalky. Cracked leather has visible fissures. Conditioner can fix dry; it can only mask cracked. Now, look at the leather type. Is it a polished, dress leather? A rugged full-grain? A nubuck? Your choice here matters more than the brand.
3. The Test Patch
This is the part everybody skips. Every. Time. Take your chosen product and apply a dime-sized amount to a hidden spot, under the tongue, inside the shaft. This tells you two things: how much the leather will darken (all conditioners darken, some more than others) and whether the product absorbs or just sits on top. Wait the full 20 minutes. If it’s still tacky or has drastically changed the color in a way you hate, you’ve just saved the visible parts of your boots.
4. Apply in Thin, Even Coats
Warm the product in your hands if it’s a solid wax or thick cream. Using your fingers or a soft cloth, apply it in circular motions, working it into the leather’s grain. Pay special attention to the flex points around the toes and ankles, these areas lose oils fastest. Don’t forget the stitching and the welt (where the sole meets the upper). These seams are high-wear zones that dry out and fail.
5. The Waiting Game
Set the boots aside. Let the product absorb. Danner’s guideline of 20 minutes is a threshold to follow. This is not a suggestion. Buffing too early just wipes off what you just paid for. The leather needs this time to drink.
6. Buff & Reassemble
After 20 minutes, take a clean, dry cloth (an old T-shirt is perfect) and buff the entire surface. You’re removing the excess that didn’t absorb, leaving a soft, matte finish. If the leather still feels tacky, you used too much. Re-lace the boots, insert the footbeds, and you’re done.
Which Conditioner Should You Use?
This is where most guides give you a list of five “best” products without telling you why one beats another for your specific boot. Let’s untangle that.
| Product Type | Best For | Primary Action | Biggest Drawback |
|---|---|---|---|
| Pure Oil (e.g., Mink, Neatsfoot) | Dry, thirsty work boots & heritage leathers. | Deeply penetrates to replenish lost oils. | Significant darkening; can over-soften thin leather. |
| Conditioning Cream (e.g., Saphir, R.M.Williams Stockman’s) | Dress boots, polished & finished leathers. | Nourishes with less oil, often contains pigments for color. | Less water resistance; not for saturated workwear. |
| Wax-Based Protector (e.g., Obenauf’s LP, Sno-Seal) | Extreme wet conditions, waterproofing priority. | Forms a physical barrier on the leather surface. | Seals pores, inhibits future conditioning; alters breathability. |
| Hybrid Spray (e.g., Nikwax) | Lightweight, convenient maintenance for outdoor boots. | Water-based formula conditions and adds water-repellency. | Light conditioning only; not for severely dried leather. |
For general cleaning and conditioning leather boots, a dedicated cream is the safest starting point. If you’re dealing with roughout or nubuck, you need a specific conditioner designed for those naps, a standard cream will ruin the texture. The R.M.Williams guide states that over-conditioning is a real risk; leather needs to breathe. Their recommendation? Casual wear gets conditioned every 3 months, dress boots every 8 weeks, and outdoor work boots every 4 weeks. That’s a schedule based on evaporation and friction, not marketing.
Common mistake: Applying a wax-based sealant to a boot that’s already dry. You lock the dryness in place, and the next time the boot gets wet, the leather underneath can’t flex properly and is more likely to crack.
The “Why” Behind the Wait and the Wax
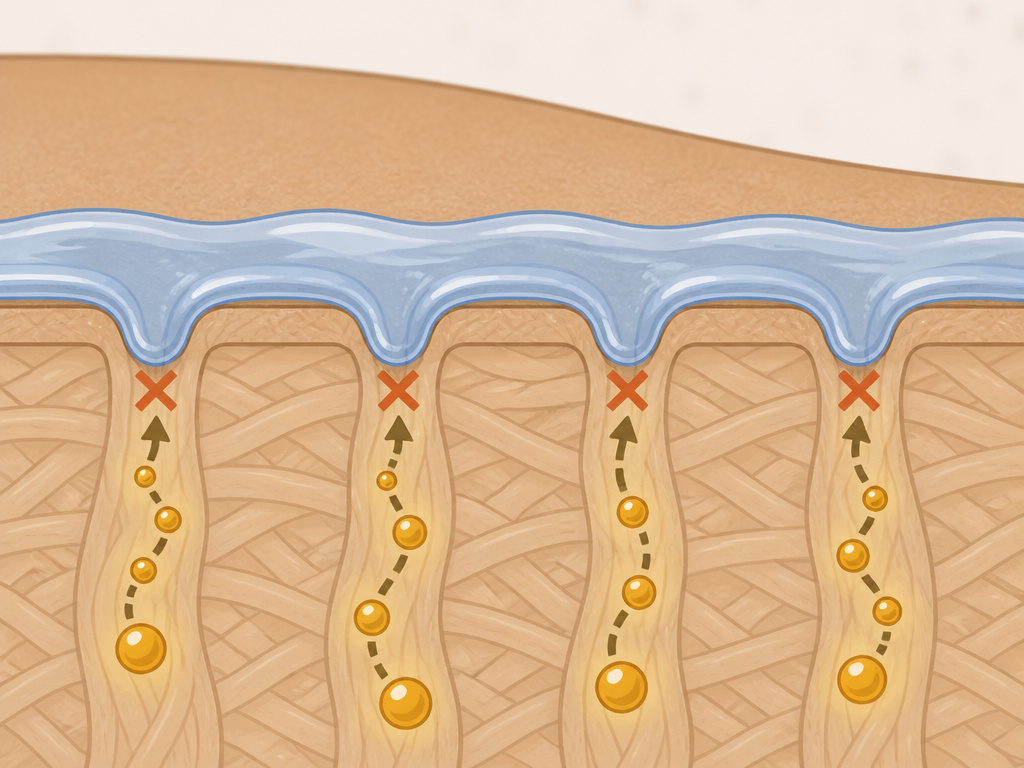 So why 20 minutes? And why does wax ruin conditioning?
Leather fibers absorb oils slowly, through capillary action. Imagine dipping the edge of a paper towel in water, it takes time for the moisture to travel up. The 20-minute window is the sweet spot where the carrier solvents evaporate and the oils have migrated into the top layers of the dermis. Buffing before that pulls the oil back out. Buffing long after can leave a polymerized, gummy residue.
Wax, by its nature, is hydrophobic and forms a film. That film clogs the very pores the oil needs to travel through. This is why the sequence is always clean, condition, then protect. If you want to waterproof leather boots, you apply a wax or silicone-based product after conditioning, accepting that it will change the leather’s hand and breathability. LOWA’s guide is explicit: their new boots are pre-treated, and you should only reapply their Water Stop waterproofing when water no longer beads on the surface, about every 3-4 months with regular use.
Troubleshooting: When Conditioning Goes Wrong
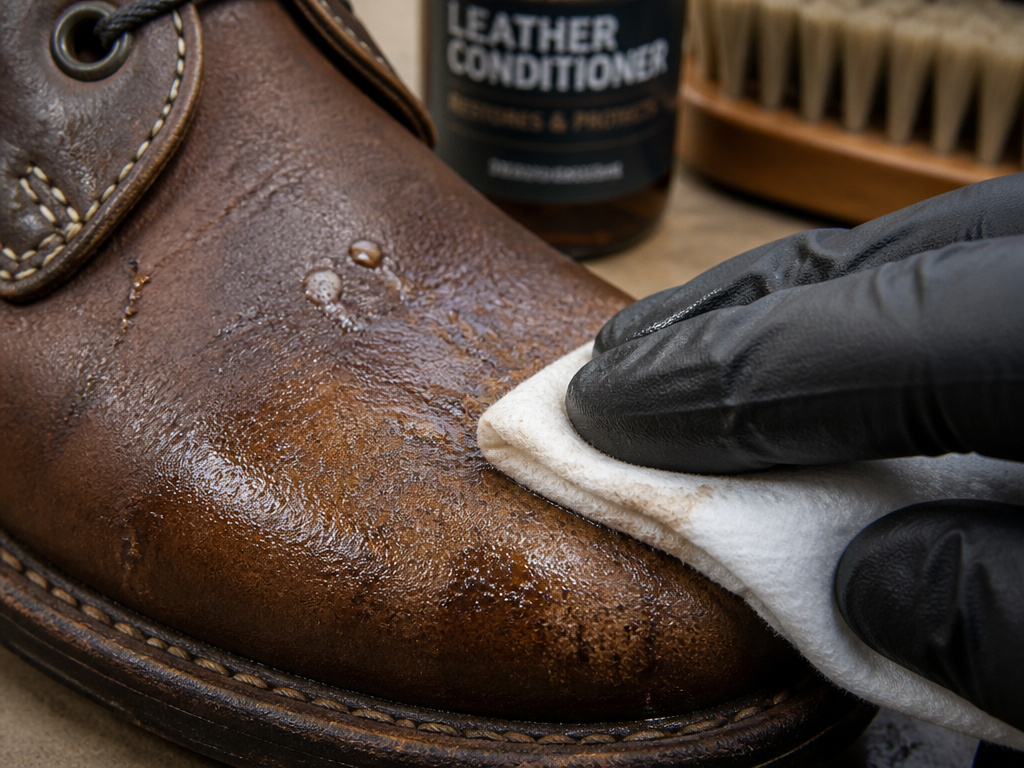 Even with the right steps, things can look off. Here’s what to do.
- Sticky residue after buffing: You used too much product or buffed too soon. Wipe the surface with a barely-damp cloth, let it dry, and lightly buff again. Next time, use half as much.
- Uneven darkening: This is often due to uneven application or pre-existing dirt. It’s hard to fix. Your best path is to clean the boots thoroughly again and apply a very even, light second coat, which may help even out the color over time.
- White, hazy bloom after drying: This is common with some waxes and oils in cold, damp conditions. It’s excess product crystallizing on the surface. Gently warm the leather with a hairdryer on low from a distance and buff vigorously with a soft brush. It’s cosmetic.
- Leather feels harder, not softer: You might have used a product incompatible with your leather type, or you sealed it with a wax when it needed oil. A correctly chosen oil, applied to a clean surface, will always soften. If it didn’t, re-evaluate your leather diagnosis.
Where this goes sideways: Conditioning suede or nubuck with a standard cream. You’ll flatten the nap and create ugly, dark patches that are impossible to brush out. Use a dedicated nubuck conditioner spray.
The Bottom Line
Conditioning isn’t a mystery. It’s a mechanical process: clean fibers, add oil, let it soak, remove the excess. The complications come from the thousand products shouting for your attention and the very human desire to fix things quickly.
Pick your goal. If you want your boots to last for decades, feed them with oils and creams. If you need them dry at all costs, seal them with wax. You can’t truly have both in the same pair. Start with a simple cream like R.M.Williams Stockman’s or a pure neatsfoot oil for your rugged boots. Do the test patch. Follow the 20-minute rule. That’s it.
Everything else, fancy brushes, heated applications, seven-step rituals, is refinement, not foundation. A horsehair brush and a $15 tin of conditioner will out-perform a cabinet full of specialized products used incorrectly. Your boots don’t need you to be an expert. They just need you to be consistent.
Frequently Asked Questions
Can I use olive oil or coconut oil to condition my boots?
You can, but you shouldn’t. Vegetable oils go rancid. They oxidize and can smell foul, attract pests, and degrade the leather over time. Animal-based oils (mink, neatsfoot) and synthetic conditioners are formulated for stability. Stick with products made for leather.
How often should I condition new leather boots?
Most new boots from quality makers come with a factory finish that lasts a while. LOWA states their new boots are pre-treated and don’t need immediate waterproofing. For conditioning, wait until the leather no longer feels supple from the box or after the first few weeks of wear. Then start your regular schedule.
Will conditioning make my boots waterproof?
No. Conditioning plumps the fibers, which can improve water resistance, meaning light rain will bead up for a short time. For true waterproofing, you need a separate, dedicated product like Sno-Seal or Nikwax that creates a surface barrier. Remember, this is the trade-off: waterproofing often reduces breathability.
What’s the difference between conditioning and polishing?
Conditioning feeds the leather underneath. Polishing adds a cosmetic and protective layer on top, usually with waxes and pigments. You should almost always condition first, then polish if you want a shine. Some products, like pigmented creams, do a bit of both.
Can over-conditioning damage my boots?
Absolutely. R.M.Williams warns that leather needs to breathe. Over-conditioning can saturate the fibers, make them overly soft and weak, and attract dirt. It can also clog pores if using heavy waxes. Follow the manufacturer’s frequency guidelines, every 3-6 months for casual wear is a safe standard.
My boots got soaked. Should I condition them right away?
No. This is critical. Never condition wet leather. First, stuff them with newspaper or use shoe trees to draw out moisture and maintain shape. Let them dry naturally, completely, away from heat. Heat causes leather to shrink and crack. Only when they are fully dry should you clean and condition them to replace the oils that were washed out.
