
The Correct Way to Condition Your Leather Furniture at Home
This post contains affiliate links. As an Amazon Associate, we earn from qualifying purchases.
This post contains affiliate links. As an Amazon Associate, we earn from qualifying purchases.
To condition leather furniture, you clean it, apply a small amount of specific conditioner with a soft cloth in even circles, let it absorb, and buff off the excess. The right conditioner depends on your leather type, oil-based creams for dry vegetable-tanned leathers, lighter water-based lotions for aniline, and nothing for nubuck.
The ‘absorbs’ part is what people get wrong. Leather isn’t a sponge; it’s a dense, fibrous matrix. The conditioner hydrates the leather by replenishing the natural oils in the top grain, which wear away from sunlight and friction. Slather too much on and you clog the pores, leaving a greasy residue that attracts dirt.
What follows is the routine that works on nine out of ten pieces I see. The guide explains the six essential steps, the three products that work for most households, and the few leather types where the usual advice does not apply.
Key Takeaways
- Never condition dirty leather. Oil and dirt mix into a paste that grinds into the grain, causing permanent discoloration.
- Oil-based conditioners like Obenauf’s are for dry, thick leathers only. Using them on a delicate aniline sofa will oversaturate and darken it within a week.
- Test every new product on a hidden spot (like the back or underside of a cushion) and wait 48 hours before proceeding. This reveals darkening or texture changes.
- Buffing is mandatory. Leaving unabsorbed conditioner on the surface creates a tacky film that collects dust and skin oils.
- Conditioning is maintenance, not repair. It keeps supple leather supple; it won’t reverse deep cracks or restore leather that’s already dried to a crisp.
The Simple Truth: What Conditioning Actually Does
Let’s be clear about one thing. [Leather conditioning](https://leathergenesis.Conditioning leather focuses on oil replenishment rather than feeding or moisturizing.
Think of the top layer of leather as a network of collagen fibers with natural oils woven through them. Sunlight, heat, and friction slowly pull those oils to the surface and evaporate them. The fibers get brittle and start to separate, that’s the cracking you see on old car seats and neglected sofas. A conditioner replaces those lost lubricants.
A conditioner’s job is to restore the supple barrier between the leather’s fibers. It’s a surface treatment that prevents the internal breakdown that leads to cracking, not a deep-penetrating cure.
This is why the leather type dictates the product. A dense, wax-rich conditioner designed for a work boot would drown the fine pores of an aniline leather jacket. The result is a dark, stiff patch that never fully absorbs.
Before You Start: The Non-Negotiables
This isn’t complicated, but skipping one step guarantees a subpar result. The whole process hinges on two things: a clean surface and the right conditioner for your specific leather.
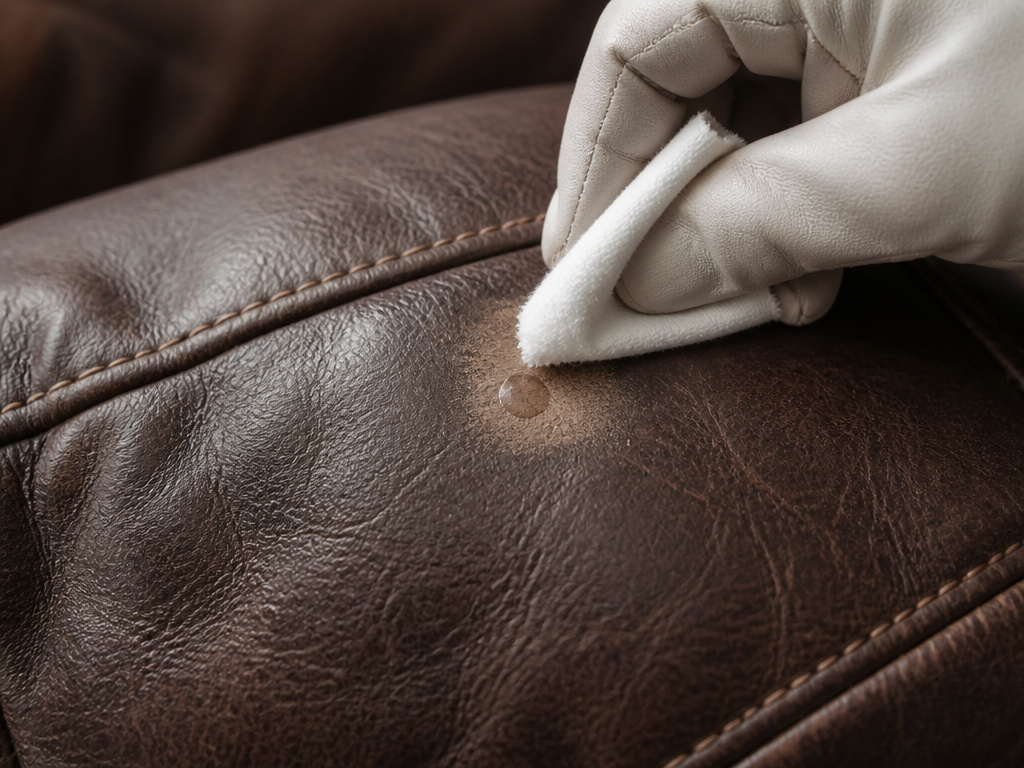
**First, identify your leather.Check for a tag that states the manufacturer and model number. Words matter here: “Full Aniline,” “Semi-Aniline,” “Pigmented,” “Corrected Grain,” or “Bonded Leather” tell you what you’re working with. If there’s no tag, do a drop test. Place a single drop of water on an inconspicuous spot. If it beads and sits on top, you likely have a pigmented or protected leather. If it darkens and absorbs quickly, you’re dealing with an aniline or more porous type. This test decides your next move.
Second, gather your tools. You need a soft-bristle brush (a horsehair detailing brush is perfect), several clean, white microfiber cloths, a vacuum with an upholstery attachment, and your chosen conditioner. Have a timer handy, the dwell time matters.
The 6-Step Leather Conditioning Method (Tools First)
Follow this sequence. Changing the order is how you end up with uneven spots or a greasy film.
Step 1: Vacuum and Brush
Use the upholstery attachment to remove all loose dust and grit from seams, tufting, and crevices. Then, gently go over the entire surface with the dry brush. This lifts embedded dust from the grain so it doesn’t turn into mud when you clean. Skipping this grinds particulates into the leather during the next step.
Step 2: Clean with a Leather-Specific Cleaner
Dampen a microfiber cloth with a product like Bickmore Bick 4 (a cleaner/conditioner combo) or a dedicated leather cleaner. Wring it out so it’s barely damp, you should not see water dripping. Wipe the surface in smooth, overlapping strokes, rinsing and wringing the cloth frequently. Change the water if it gets dirty. The goal is to lift oils and dirt, not soak the leather.
Step 3: Dry Completely
Let the piece air-dry naturally for at least 2-4 hours, or until it’s cool and dry to the touch. Applying conditioner to damp leather traps moisture underneath, which can lead to mildew or a cloudy bloom in the finish. A fan can speed this up, but never use direct heat from a hair dryer or heater.
Step 4: Apply Conditioner Sparingly
Shake your conditioner bottle well. Put a dime-sized amount on a fresh, dry microfiber cloth. Rub your cloths together to distribute the product, you want an almost dry cloth. Apply in small, even circular motions over a 2×2 foot section, following the natural grain of the leather. You should not see a thick, white layer; the leather should just darken slightly as it absorbs the oils.
Common mistake: Applying conditioner directly from the bottle onto the leather. This almost always leads to over-application, resulting in a sticky residue that’s difficult to buff off completely.
Step 5: Let It Absorb
Walk away. Let the conditioner sit for the time recommended on the bottle, usually 15 to 30 minutes. This dwell time lets the oils penetrate the top grain. If you buff immediately, you’ll wipe away 80% of the product you just paid for.
Step 6: Buff to a Matte Finish
Take a clean, dry microfiber cloth and buff the entire treated area vigorously. You’re removing any excess conditioner that hasn’t absorbed. The leather should feel supple and dry, not slick or greasy. If your cloth grabs or you see a haze, keep buffing.
| Step | Tool | What Happens If You Skip It |
|---|---|---|
| 1. Vacuum & Brush | Soft brush, vacuum | Dirt becomes abrasive paste during cleaning, scratching the finish. |
| 2. Clean | Microfiber, leather cleaner | Conditioner seals dirt into the grain, causing permanent shadows. |
| 3. Dry | Time, airflow | Trapped moisture causes mildew or a cloudy, blotchy finish. |
| 4. Apply Sparingly | Microfiber cloth | Excess product won’t absorb, leaving a tacky, dirt-attracting film. |
| 5. Dwell Time | Timer | Conditioner sits on surface, wipes away easily, wasting product. |
| 6. Buff | Clean microfiber cloth | Un-absorbed oils attract dust and skin oils, creating a grimy layer. |
Choosing Your Conditioner: Oil, Cream, or Lotion?
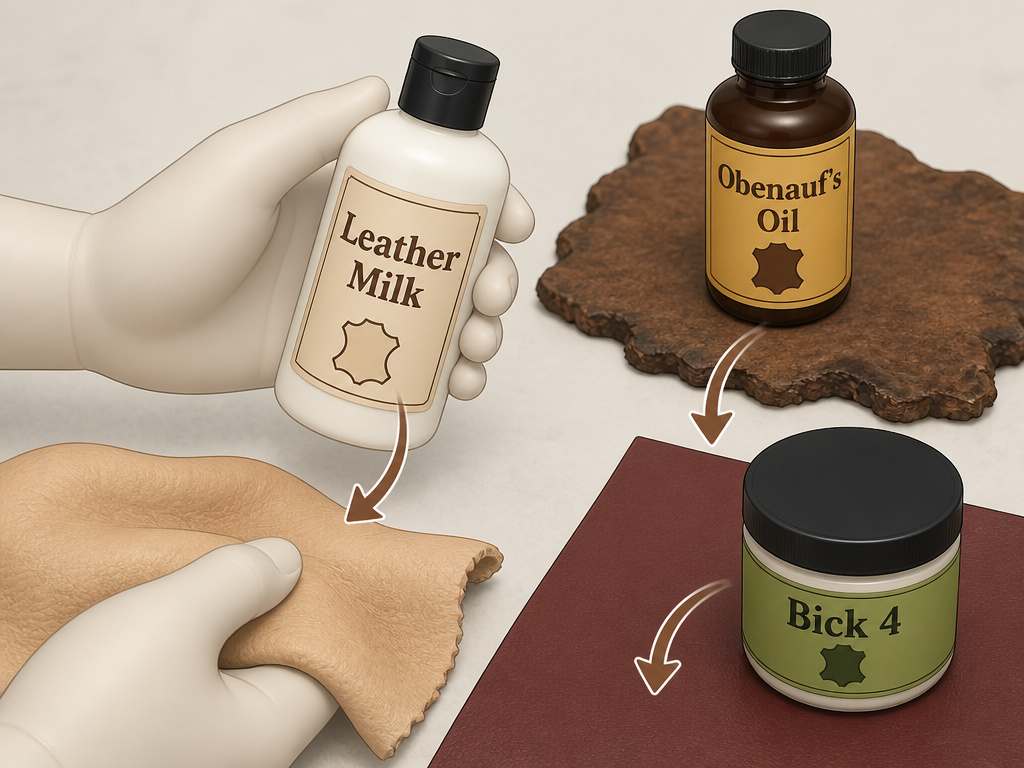 Your leather’s type determines the correct product to use. Using the wrong one doesn’t just fail to help, it actively damages the material over time.
For vegetable-tanned leathers (often found in rustic or heirloom furniture), you want an oil-based conditioner like Obenauf’s Leather Oil. These leathers are thick, dry, and meant to darken with age. The oil penetrates deeply to keep the fibers flexible. They can handle it.
For aniline or semi-aniline dyed leathers (soft, natural-feeling, often expensive), use a light, water-based lotion like Chamberlain’s Leather Milk. These leathers have minimal surface coating, so a heavy oil will oversaturate, darken unevenly, and potentially cause staining. The lotion hydrates without altering the color.
For pigmented or protected leathers (the majority of modern sofas, with a uniform color and slight sheen), a balanced cream like Bickmore Bick 4 or Uniters Leather Conditioning Cream is ideal. These have enough oil to nourish but enough emulsifiers to prevent over-absorption. They’re the safe default.
Where this goes sideways: Using a silicone-based “conditioner” that only creates a superficial shine. It sits on top, doesn’t nourish, and over time the leather underneath dries out and cracks while the surface still looks “shiny.” You won’t know there’s a problem until the cracks appear.
What about mink oil? Save it for your heavy-duty work boots. On furniture, it darkens dramatically, can go rancid, and turns into a dirt magnet. It’s the wrong tool for a living room.
Nubuck, Aniline, and Other Special Cases
 Not all leathers follow the standard script. Some have rules that flip the process.
Nubuck and Suede have a raised, velvety nap. You do not condition these with a standard cream, it will mat the fibers and create dark, greasy spots. Uniters Leather Conditioning Cream explicitly states it is not for these types. For these, you use a dedicated nubuck/suede brush and protector spray. Conditioning in the traditional sense isn’t part of their care.
Split Leather is the fibrous underside of the hide, often used on the sides or back of furniture. It’s more absorbent and less durable. Schneeweiss recommends treating it with a product for smooth leather every 3-6 months, but it will always drink up more conditioner and may darken more than the top-grain face.
Aniline Leather is the most vulnerable. It has no pigment topcoat, so everything absorbs directly. Stains are permanent, and oil-based conditioners will dramatically and unevenly darken it. This is where the “test on a hidden spot for 48 hours” rule is non-negotiable. A drop of conditioner on the back of a cushion will show you the final color before you commit the whole piece.
How Often Should You Do This?
The conditioning schedule depends on the leather’s environment and use, not the calendar.
A sofa in a sunny, south-facing room next to a heating vent needs conditioning every six months. The same sofa in a shaded, climate-controlled den might go 18 months between treatments. Your hand is the best gauge. If the leather feels dry, slightly stiff, or looks paler in high-wear areas (armrests, seat cushions), it’s time.
I learned this the hard way with a client’s aniline chair. They followed a strict “once a year” schedule, but the chair sat two feet from a radiator. By month nine, the side facing the heat had started to crack and lighten. The schedule failed because it ignored the actual conditions. Now I teach clients to judge by feel, not by date.
Inspect your leather furniture every spring and fall. Run your hand over it. Does it still feel supple? Does it recover quickly from a light pinch? If yes, you can wait. If no, plan a conditioning session.
Frequently Asked Questions
Can I use olive oil or coconut oil to condition my leather sofa?
No. These kitchen oils are not formulated for leather preservation. They can go rancid, attract pests, and permanently darken the leather in an uneven, blotchy pattern. They also lack the emulsifiers in proper conditioners that allow for even absorption and buffing.
Will conditioning remove scratches or cracks from my leather?
No. Conditioning is a preventive maintenance step. It keeps soft leather soft and can make fine, superficial scuffs less visible by darkening the leather slightly. It will not fill in or repair a deep crack or scratch. That requires a full leather furniture restoration.com/how-to-restore-leather-furniture/) process.
How do I know if I’ve over-conditioned my leather?
The leather will feel persistently tacky or greasy to the touch, even days after application. It may also show dark, oily spots and attract lint and dust more quickly. To fix it, wipe the surface with a barely damp cloth (water only) to remove excess product, then buff vigorously with a dry towel. You may need to repeat this.
Is it necessary to use a brand-specific cleaner before the conditioner?
While not always mandatory, it is highly recommended. A cleaner like Bickmore Bick 4 is pH-balanced for leather and designed to lift dirt without stripping natural oils. Using a harsh general-purpose cleaner can damage the finish, making the subsequent conditioner less effective or even harmful.
The Bottom Line
Conditioning leather furniture is straightforward once you match the product to the material. For the large majority of homes, that means a balanced cream like Bickmore Bick 4, applied to a clean, dry surface every 6 to 12 months.
The one rule that overrides everything else: test first. That hidden spot behind the cushion or under the arm is your insurance policy. It shows you the final color and feel before you touch the visible surfaces. If your test spot darkens more than you like, you’ve just saved your sofa from a costly mistake.
Everything above assumes your leather is still in good condition. If it’s already cracked, stiff, or stained, conditioning is just a bandage. In that case, you’re looking at a different project, one that starts with a professional assessment or a detailed study of leather furniture restoration.com/how-to-restore-leather-furniture/) guides. But for maintenance? Clean it, condition it sparingly, buff it dry. That’s the routine that adds a decade.
