
How to Make a Leather Wallet | The 3-Step Build That Lasts
This post contains affiliate links. As an Amazon Associate, we earn from qualifying purchases.
To make a leather wallet, you need three things settled before you cut: a dimensioned pattern that fits your cards and cash, 2-3 oz. Vegetable-tanned leather for structure, and the tools for cutting, punching, and hand-stitching. The process is design, cut, assemble, and stitch. Skip the pattern stage and you’ll fight misaligned pockets and a bulky final product.
That pattern is the whole foundation. Most first attempts fail there, not with the stitching. A wallet isn’t just a folded rectangle; it’s a layered system of pockets that must account for the thickness of your daily carry and the bend of the leather itself. Get the spatial math wrong, and the project feels off from the first stitch.
What follows is a breakdown of that spatial math, the one leather type that forgives beginner errors, and the hand-stitch that turns pieces into a heirloom. By the end, you’ll know how to translate a sketch into a pattern that works, not just looks right on paper.
Key Takeaways
- Draft your pattern from the actual items you carry. A standard bi-fold’s interior pocket should be 1/8″ narrower than the exterior piece so the outside leather can bend without stress.
- Use 2-3 oz. (0.8-1.2 mm) vegetable-tanned leather. It’s firm enough to hold a wallet’s shape but thin enough to hand-sew without a machine, and it develops a rich patina.
- Burnish the edges before final assembly. A slicked, polished edge seam won’t fray later and feels smooth in your hand, a detail that separates a homemade item from a professional one. The saddle stitch is essential for durability. If one stitch breaks, the rest stay locked. A machine stitch unravels in a line.
- Apply conditioner sparingly and let it absorb for 24 hours before judging the color. An over-oiled piece turns dark and waxy, and that darkening is permanent.
The Three Non-Negotiables Before You Cut
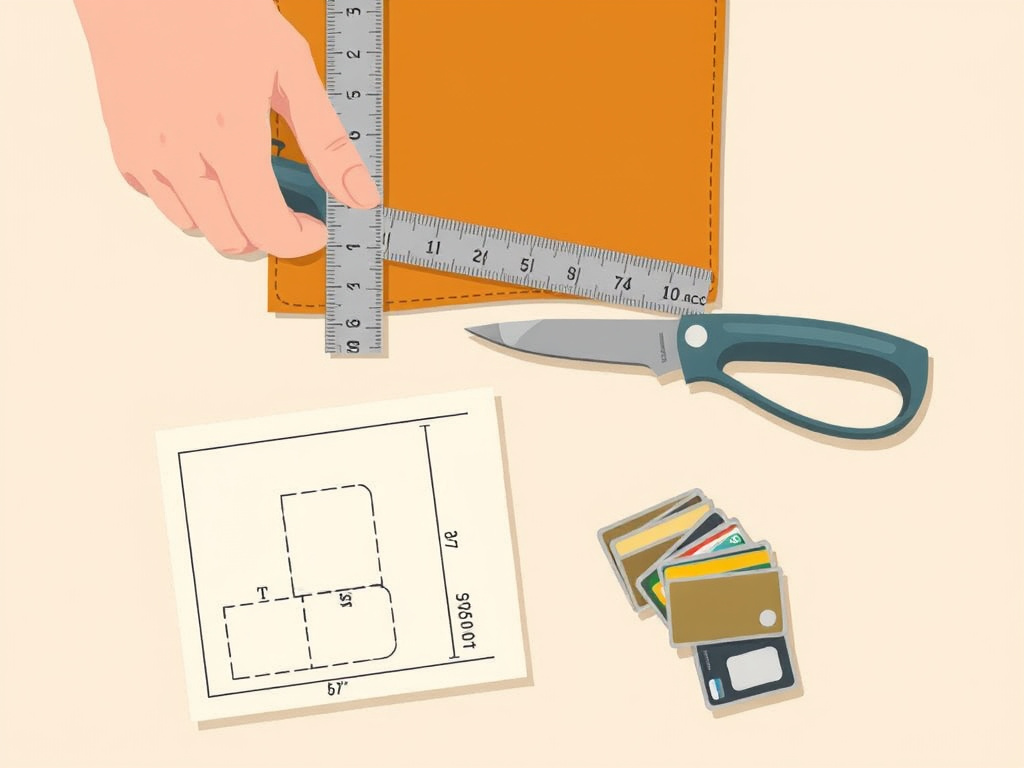
You can have perfect stitches and still end up with a wallet that’s awkward to use. The difference is in the three decisions you make before the blade touches leather.
First, the pattern. Don’t download a generic template and hope. Grab the cards you carry, a folded bill, and a ruler. A functional bi-fold interior panel, the piece that holds your cards, needs to be about 1/8″ narrower in width than the exterior body piece. This slack lets the outside leather bend around the contents without pulling the pockets out of alignment. A pattern that forces the leather to bend over a stack of cards with no room gives you a permanently bowed wallet.
Second, leather choice. This is where most guides say “use vegetable-tanned,” but they rarely say why. For a wallet, you need a leather that is firm yet workable. Vegetable-tanned cowhide in 2-3 oz. Weight (that’s 0.8 to 1.2 mm thick) is the sweet spot. It’s rigid enough to give the wallet structure but thin enough that you can punch stitching holes and pull a needle through it by hand. Chrome-tanned leather is softer and comes pre-finished, but it won’t hold a crisp edge or develop a personal patina the same way. Your first wallet should be a learning experience in material, not just assembly.
Common mistake: Using leather thicker than 3 oz. For a first wallet. By 4 oz., hand-punching stitching holes becomes a fight, and the finished product feels like a brick in your pocket. It’s a common reason projects get abandoned halfway.
Third, tool readiness. You don’t need a workshop, but you do need the right four items: a sharp cutting blade (a rotary cutter or utility knife), a metal ruler, a stitching awl or diamond chisel punch, and two harness needles. A wing divider for marking consistent stitch lines is worth its weight. Trying to eyeball straight cuts or uneven stitch spacing is how you end up with a wallet that looks homemade in the worst way.
Step 1: Design & Pattern Drafting
Ever wondered why some wallets bulge even when nearly empty? The pattern didn’t account for the leather’s own volume. Start by deconstructing the space.
Take a piece of paper and lay your cards on it. Mark a rectangle that gives each card about 1/8″ of clearance on all sides. For a standard credit card (3.375″ x 2.125″), that means a pocket roughly 3.625″ wide by 2.375″ tall. Now, for a bi-fold with two card pockets on each side, you’ll stack these rectangles vertically, leaving a 1/4″ gap between them for the stitch line that separates the pockets.
The main body piece is what everything gets attached to. Its width is your pocket width plus that crucial 1/8″ of bend allowance. Its length is twice the height of a card pocket, plus an inch for the fold, plus another inch if you want a cash pocket behind the cards. A classic simple bi-fold pattern rectangle might be 9.5″ long by 4.25″ wide before folding.
Here’s a quick reference for the spatial relationships:
| Pattern Piece | Key Dimension | Why This Specific Number |
|---|---|---|
| Card Pocket | 3.625″ W x 2.375″ H | Standard card + 1/8″ clearance |
| Main Body (Exterior) | Pocket Width + 1/8″ | Allows exterior leather to bend around filled pockets |
| Total Length (Unfolded) | (Card Height x 2) + 1″ (fold) + 1″ (cash) | Accommodates fold and bill storage without strain |
I strongly encourage making a mock-up from cheap craft vinyl or even stiff paper. Fold it, put cards in it, and feel the bulk. This one-hour step saves you from wasting a piece of full-grain leather. It’s the most underrated part of the process.
Step 2: Cutting & Preparing the Leather
Now transfer your paper pattern onto the flesh side (the rough back) of your leather. Use a wing divider or a ballpoint pen. The golden rule: measure twice, cut once. A rotary cutter against a metal ruler gives the cleanest line. A utility knife works, but you must use a fresh blade and steady pressure. A dull blade will tear the leather fibers, leaving a fuzzy edge that’s a nightmare to burnish later.
Once the pieces are cut, you prepare them for stitching. This means skiving, grooving, and hole-punching.
- Skiving (thinning the leather) at the seam allowances reduces bulk. You don’t need a head knife; a sharp utility blade held at a shallow angle can carefully shave down the area where pieces will overlap.
- Grooving is cutting a shallow channel where your stitches will sit. A stitch groover set to 1/8″ from the edge ensures every stitch sinks below the surface, protecting the thread from abrasion. Run it along all edges that will be sewn.
- Punching Stitching Holes is next. An awl lets you punch one hole at a time as you stitch, which is slow but allows perfect alignment. Diamond chisel punches let you punch several evenly-spaced holes at once. For a beginner, a 4-prong diamond chisel with 3mm spacing is forgiving and looks professional. Always punch onto a dense cutting mat or a slab of scrap leather.
The leather will tell you what it needs. If your diamond chisel pulls and drags instead of punching cleanly, the leather might be too dry or your chisel is dull. A drop of neatsfoot oil on the back of the piece can make it punch like butter.
This is also the stage for any decoration, stamping, tooling, or dyeing. If you want to stamp, you must use vegetable-tanned leather and case it (dampen it evenly). Remember, any dye or finish must be completely dry before you move to gluing and stitching. A wet spot trapped under glue will never dry properly and can rot the leather from within.
Step 3: Assembly & The Saddle Stitch
Dry-fit all your pieces. Fold the main body, insert the pocket layers, and make sure everything aligns. This is your last chance to adjust. When satisfied, use a thin layer of leathercraft glue (like Aquilim 315) on the seam allowances only. Glue holds the pieces for stitching; it is not the primary bond. Let it get tacky, then press firmly.
Now for the stitch that defines quality leatherwork: the saddle stitch. It uses two needles, one on each end of a single waxed thread. Why is it superior? Each hole gets two threads passing in opposite directions, locking every stitch independently. If the thread breaks anywhere, the rest of the seam stays put. A machine-sewn lockstitch will unravel.
Let me share what I’ve learned. My first wallet used a running stitch with a single needle. It looked okay for a month, then the thread wore through at a stress point and the whole side seam opened up. The saddle stitch takes longer, but it’s the difference between a temporary object and a permanent one.
- Thread two needles onto a length of waxed thread (about 3 times the perimeter you’re stitching).
- Start from the inside of the wallet, pushing one needle through the first hole. Pull through until the thread is even on both sides.
- Take the needle in your left hand and pass it through the next hole from the front. Simultaneously, take the needle in your right hand and pass it through the same hole from the back.
- Pull both threads tight, ensuring the pull is straight and even. You’ll feel a satisfying snug click when it’s set correctly.
- Continue this “one needle from each side” motion. The rhythm is what gives you consistent, angled stitches.
Keep your tension even. Pulling too hard can warp the leather or break the thread; too loose and the seam looks sloppy. When you finish, backstitch through the last three holes, tie a knot on the inside, and trim the thread.
Finishing: Edges & Conditioning
The edges are what your fingers feel every time you use the wallet. A rough, unfinished edge shouts “amateur.” A slicked, burnished edge whispers “craft.”
First, sand the stacked edges flush with 400-grit sandpaper. Then, dampen the edge lightly with a sponge and rub vigorously with a wooden burnisher or a piece of canvas. The friction heats up the leather fibers and the water, melting them slightly to create a smooth, sealed surface. You’ll feel the edge go from gritty to glassy. This process, done correctly, makes the edge nearly as durable as the leather itself.
Finally, conditioning. Use a light, natural conditioner like pure neatsfoot oil or a dedicated leather balm. Apply a tiny amount to a cloth and rub it into the leather, focusing on the flesh side and edges. The leather will darken slightly as it drinks it in.
Where this goes sideways: Applying too much conditioner at once in an attempt to speed up the process. The leather can’t absorb it, leaving a greasy surface that attracts dirt and never fully dries. The darkening is also permanent. Less is more. Let it sit for a full day, then assess if it needs more.
Conditioning isn’t a one-time event. It’s the first step in a lifetime of care for a wallet. A well-made wallet will outlast its first owner if treated with respect.
Choosing Your Leather Type & Weight
Not all leather is created equal for this job. Your choice between vegetable-tanned and chrome-tanned leather fundamentally changes the project’s difficulty and the final product’s character.
| Leather Type | Best For | Handling Note | Final Character |
|---|---|---|---|
| Vegetable-Tanned (2-3 oz.) | First projects, tooling, patina development | Firmer, easier to get crisp edges. Requires finishing. | Starts pale, ages to a rich amber. Develops a unique story. |
| Chrome-Tanned (2-3 oz.) | Quick builds, pre-finished colors, soft feel | Softer, can be stretchier. Often has a finished surface. | Color is consistent. Will not darken or tool like veg-tan. |
For a wallet that breaks in with you and gains character, vegetable-tanned is the only choice. Brands like Hermann Oak are the gold standard. If you just want a functional item quickly, a chrome-tanned leather from Weaver Leather Supply will work. But understand the trade-off: you’re trading longevity and personalization for speed.
The debate between vegetable tanned leather and chrome tanned leather isn’t academic. It’s about what you want the object to become over the next decade.
Frequently Asked Questions
What is the easiest leather wallet to make for a beginner?
Simple card holder or a minimalist “front-pocket” wallet. These involve 2-3 pieces of leather, straight cuts, and a single stitching line around the perimeter. Mastering a small, clean project builds the skills and confidence for a full bi-fold.
Can I make a leather wallet without a sewing machine?
Absolutely. In fact, you should. Hand-stitching with the saddle stitch is stronger and more appropriate for leatherwork than most household sewing machines, which struggle with thick material. All you need are two needles and waxed thread.
How long does it take to make a leather wallet?
For a first-timer following all steps carefully, pattern, cutting, punching, stitching, finishing, set aside 4 to 6 hours spread over two days. Rushing leads to mistakes in alignment or stitching. The second wallet will take half that time.
What kind of thread should I use for a leather wallet?
Use a waxed polyester or linen thread, sized between 0.6mm and 0.8mm (roughly Tex 135 to Tex 200). The wax coating helps the thread glide through the holes, locks stitches tighter, and adds water resistance. Avoid regular cotton sewing thread; it will fray and break.
How do I fix a mistake in my stitching?
If you catch a missed stitch or a loose loop immediately, you can carefully back the needles out to that point and re-stitch. If the mistake is in a finished section, you’ll need an awl to carefully pick the knot, undo the stitches back to the error, and re-sew. This is why consistent tension and focus during stitching are critical.
Before You Go
The real test of your first wallet isn’t how it looks on day one. It’s how it feels and functions on day one hundred. The leather will soften, the edges will wear smooth, and the color will deepen where your hands touch it most. That’s the patina, the record of use that makes it uniquely yours.
If you remember one thing, let it be this: start with a proven leather pattern for your first attempt. Inventing the geometry while also learning to stitch is too much. Perfect the craft on a known-good design, then innovate on your second one. The satisfaction of pulling a finished, durable, self-made wallet from your pocket never gets old. It’s a small, daily reminder that some things are still worth making well.
