
The Complete Guide on How to Polish Leather Shoes Correctly
This post contains affiliate links. As an Amazon Associate, we earn from qualifying purchases.
This post contains affiliate links. As an Amazon Associate, we earn from qualifying purchases.
To polish leather shoes, you follow three distinct stages: clean the surface, condition the leather, then apply a thin, even layer of colour-matched polish and buff. Polish adds shine and a protective layer; it does not replace conditioning, which feeds the leather’s internal fibres.
That distinction is the whole game. Polish sits on top. Conditioner soaks in. Confusing the two leads to shoes that look glossy for a week but feel stiff and crack along the creases within a season.
What follows is a breakdown of the tools that matter, the four-step process that works on everything from oxfords to work boots, and the one mistake that traps dirt under a shiny surface.
Key Takeaways
- Polish is for shine and a light protective coat; it does not nourish leather. Always condition first.
- Strip old, built-up polish annually with a product like Saphir Renomat to prevent a dull, cracked finish.
- Use a colour-matched cream polish (like Saphir Pommadier) for most shoes; reserve hard wax for a high-gloss finish on the toe and heel only. A horsehair brush and soft cotton cloth are essential tools; electric shoe shine machines can damage leather if used incorrectly.
- Let each product absorb fully before moving to the next step, rushing creates a gummy, uneven surface.
Tools You’ll Need (And Ones to Skip)
You can spend a fortune on specialty tools, but you only need a few. The rest is marketing.
Start with a horsehair brush. The bristles are firm enough to lift dirt but gentle enough not to scratch. A second, dedicated brush for applying wax is a luxury, but a clean, soft cloth works just as well. For applying cream polish, a small, dense applicator cloth or a dedicated spreading brush, like the one Saphir sells, gives you more control than your fingers.
Where this goes sideways: Using a stiff synthetic brush on delicate calfskin. It leaves fine micro-scratches that fill with polish, creating a cloudy, blotchy shine within two or three polishes.
Shoe trees are not optional if you care about shape. Cedar ones absorb moisture and help maintain the shoe’s form between wears. A soft cotton cloth, like a chamois, is your final buffing tool. It should be clean and reserved for this job.
Now, what to skip. Avoid any “all-in-one” clean-and-shine products. They deposit silicones and acrylics that seal the leather surface, preventing proper conditioning and leading to premature drying and cracking. Electric shoe shine machines, like those from HEUTE, have a specific use case but come with warnings. Their operating manuals specify they are not for continuous use and that excessive pressure can damage leather. They’re built for speed in a commercial setting, not for the careful, nourishing care your best shoes deserve.
The 4-Step Polish Process (Cleaning, Conditioning, Polishing, Buffing)
Forget the ten-step routines. Polish properly by applying product, letting it haze, buffing it off, and then repeating the process after a waiting period.
1. Clean the Surface. Insert shoe trees and remove the laces. Brush the entire shoe firmly for a full minute with your horsehair brush. This isn’t a light dusting, you’re removing grit that would otherwise grind into the finish during polishing. If there’s old wax build-up or stubborn stains, this is where you use a dedicated cleaner. A product like Saphir Reno Cleaner can strip old polish and grime without being as aggressive as a full stripper like Renomat.
2. Condition the Leather. This is the most skipped and most important step. Polish sits on top; conditioner feeds the hide. Apply a small amount of a dedicated leather conditioner with a soft cloth, using circular motions. Focus on creases and flex points. Let it absorb for at least five minutes, you’ll see the leather darken slightly as it drinks it in. Brush off any excess. The shoe should look revived and supple, not shiny.
A conditioner gently cleans, hydrates, and nourishes the leather to prepare the skin to receive the polish. Those two creams will enable the pores of the leather to be dilated in order to increase penetration. . Saphir Médaille d’Or on the role of their Renovateur cream
3. Apply Polish. Here’s where you choose your finish. For a healthy, satin glow that also adds a bit of colour, use a cream polish like Saphir Médaille d’Or Pommadier. Dip your applicator into the cream, then apply it to the shoe in small, circular motions, working it into the leather. Pay extra attention to the welt, the seam where the upper meets the sole, as this area sees a lot of wear. Let it dry to a hazy matte finish. This takes a few minutes.
4. Buff to a Shine. Take your horsehair brush and brush the entire shoe vigorously. The friction and heat generated will melt the waxes in the polish and bring up the shine. Follow with a final pass using a clean, soft cotton cloth, buffing in straight lines. For a deeper luster, you can slightly dampen a section of the cloth for the final buff.
| Step | Tool | Goal | Time |
|---|---|---|---|
| Clean | Horsehair Brush | Remove grit & old polish | 1-2 min |
| Condition | Applicator Cloth | Nourish & hydrate leather | 5-10 min (plus dry time) |
| Apply Polish | Applicator/Dedicated Brush | Add colour & protective wax layer | 2-3 min (plus dry time) |
| Buff | Horsehair Brush, Cotton Cloth | Generate shine through friction | 2-3 min |
Cream Polish vs. Wax Polish: Which Should You Use?
This isn’t a minor choice. It dictates the final look and the shoe’s flexibility.
Cream polish, such as Saphir Pommadier or Collonil 1909 Leather Cream, contains more pigment and conditioning agents alongside wax. It’s your go-to for general maintenance. It provides a rich, satin finish that nourishes while it shines and is flexible enough for the entire shoe, including high-flex areas like the vamp.
Wax polish, like Kiwi Parade Gloss or Saphir Pâte de Luxe, is almost pure hard wax. It’s used to build a high-gloss, mirror-like “patina” on specific, non-flexing parts of the shoe, namely the toe cap and heel counter.
Common mistake: Applying hard wax over the entire shoe, especially over flex points. When the leather bends, the thick wax layer cracks like dried paint, creating a network of ugly white lines. It also suffocates the leather, preventing it from breathing.
So, which one wins? For daily wear and the health of the leather, cream polish wins. Use it all over. If you want a dramatic mirror shine on the toe, apply a few thin layers of hard wax only over your already-polished toe box, using the “drop of water” technique. Never let wax be the only thing between your leather and the world.
How Often Should You Polish (And When to Strip It All Off)?
 Frequency depends on wear, not the calendar.
For shoes worn in an office setting 2-3 times a week, a light polish every 4-6 weeks is plenty. Condition them at the same time. For boots or shoes exposed to the elements, you might need to condition and polish after every few wears, especially if they get wet. The rule is to address scuffs when they appear and never let the leather look parched.
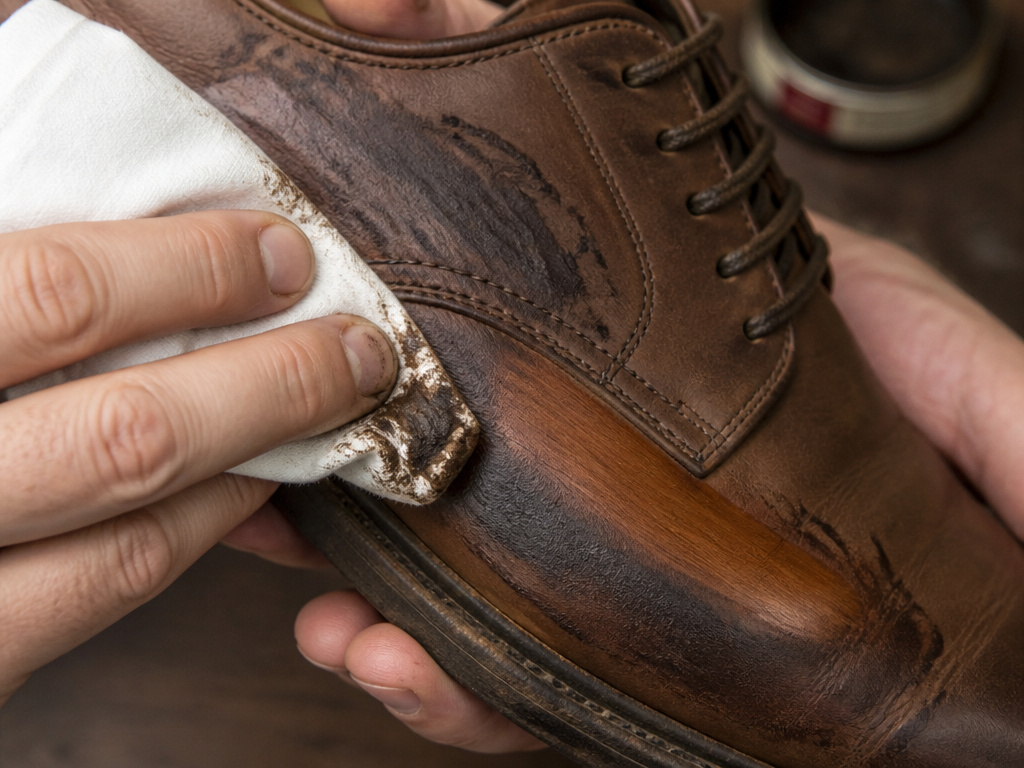
But here’s the part most guides gloss over: old polish must be removed. Annually, you should perform a deep clean. Layers of polish, dirt, and sweat build up into a crust that dulls the finish and prevents new conditioner from penetrating.
I learned this the hard way. I used to just add more polish on top of old polish. After about a year, my favourite pair of derbies developed a dull, almost plastic-like haze, and the leather underneath the toe cap started to feel stiff. The problem wasn’t the leather; it was the six-month cake of old product I’d sealed it in.
A product like Saphir Renomat is designed for this. You apply it to a cloth and gently wipe away the old layers. It’s a reset button. After stripping, you go back to step one: condition, then polish. Your shoes will look revitalized because the leather can actually breathe again.
Frequently Asked Questions
Can you use the same polish on different colour shoes?
You can, but you shouldn’t. Using a dark polish on light shoes will visibly tint them. Using a light polish on dark shoes often won’t cover scuffs. For best results, match the polish colour to the shoe colour as closely as possible. Neutral polish is safe for all colours but offers no colour correction.
Does polishing waterproof leather shoes?
Polish adds a layer of wax that provides a degree of water resistance, but it is not waterproofing. For serious wet weather protection, you need a dedicated leather protector applied before you polish. However, many protectors contain silicones that can hinder future conditioning, so choose carefully.
How do you fix a blotchy or uneven polish job?
Blotchiness is usually caused by too much product applied too quickly. The fix is to strip it back. Use a cleaner like Saphir Reno Cleaner to remove the uneven polish layer. Let the shoes dry completely, then re-apply a very thin, even layer of cream polish, allowing ample drying time before buffing.
Is it bad to polish new shoes right away?
New shoes often have a factory finish that can be enhanced. Give them a light conditioning first to nourish the leather, then apply a single thin coat of matching polish to add a protective layer from day one.
Can you over-polish shoes?
Yes. Over-polishing means applying too many thick layers without ever stripping the old ones back. This leads to a thick, inflexible cake of wax and pigment that cracks, dulls, and ultimately damages the leather underneath by trapping moisture and dirt. Polish should be a thin, renewing topcoat.
Before You Go
Polishing isn’t about chasing a magazine-cover shine. It’s about applying a renewing, protective layer after the real work, cleaning and conditioning, is done.
If you take away one action, make it this: before your next polish session, ask if your shoes truly need a new coat, or if they need the old coats removed first. That single question reframes the entire ritual from one of covering up to one of caring for.
And if you’re staring at a collection of tins and bottles, simplify. A horsehair brush, a tin of Saphir Pommadier cream in the closest colour match, and a clean cloth will do more for 95% of your shoes than a cabinet full of specialty products. The goal is a healthy patina that comes from within the leather, not a plastic shell glued on top.
