
How to Protect Leather Car Seats and Keep Them Looking New
This post contains affiliate links. As an Amazon Associate, we earn from qualifying purchases.
To protect leather car seats, you must do three things consistently: clean spills immediately with a pH-neutral leather cleaner, condition the leather every 3-6 months with a product free of silicone and petroleum, and shield the surface from UV rays and physical abrasion using a dedicated protectant or ceramic coating. Automotive leather is coated and requires different care than furniture leather, so household products often cause more harm than good.
That “coated” part is the whole game. The leather in your car isn’t raw hide; it’s finished with pigments and polymers to resist stains and wear. This finish changes what it can absorb and what will damage it. Most of the advice you find for a sofa or a jacket will actively shorten the life of your car’s interior.
This guide walks through the process. We’ll look at what automotive leather actually is, why the wrong products crack it, and how to build a routine that stops damage before it starts. You’ll know which products to reach for, which to avoid forever, and the one mistake that costs more than a repair bill.
Key Takeaways
- Automotive leather is coated. Using oils and conditioners meant for raw, vegetable-tanned leather can leave a greasy film on the coated surface, attracting more dirt and accelerating wear.
- Cleaning always comes first. Applying any protectant over dirt or body oils creates a seal that traps grime against the leather, leading to permanent staining and accelerated breakdown.
- UV light, not just heat, is the real enemy. Prolonged exposure to sunlight bleaches and dries the leather’s topcoat, leading to fading and cracking long before the material underneath fails.
- Conditioner nourishes; protectant shields. A conditioner replenishes oils in the leather substrate, while a protectant forms a barrier on the surface. You need both, in that order.
- The seams and stitch lines are your weakest points. Water, cleaners, and conditioners can wick along threads, so apply products carefully and avoid soaking these areas.
What You’re Actually Protecting: Automotive vs. Furniture Leather
Automotive leather is a different animal from what you find on a sofa or a jacket. Car makers use top-grain leather that is almost always pigmented and coated. The pigment provides uniform color, and the clear polyurethane or acrylic topcoat, what the industry calls the “finish”, provides resistance to scuffs, spills, and UV fading. Ford’s manual for its premium King Ranch editions calls this out directly, noting the leather is “extremely durable, but still requires special care.”
This coating means the leather is less absorbent. A conditioner meant for a raw, pull-up leather belt won’t penetrate; it will just sit on top, feeling greasy and attracting dust. More critically, many household cleaners contain solvents or alcohol that this topcoat is not designed to handle. A Kia owner’s manual warns that high-alcohol solutions can strip the surface, leading to color fade. The Volkswagen/Audi technical service bulletin put it bluntly: such products “will likely damage the finish, affect the color, and lead to premature aging.”
The short version: Your car’s leather has a plastic-like skin. Treat it like raw hide and you’ll gum up or crack that skin.
The Golden Rule of Protection: Clean, Then Shield
Every solid protection strategy rests on a perfectly clean foundation. Dirt, skin oils, and salt act as abrasives, grinding into the leather’s topcoat with every sit and shift. Applying a protectant over this grime just locks it in place, creating a sandpaper-like layer that accelerates wear.
Step 1: The Vacuum
Before any liquid touches the seat, vacuum thoroughly. Use a soft brush attachment to lift dust and grit from the grain and especially the perforations in heated or ventilated seats. This isn’t just tidying up; it’s removing the particles that will turn your cleaning cloth into a scratch pad.
Step 2: The Clean
Use a cleaner formulated for automotive coated leather. Check for a label specifying a pH between 6.5 and 7.5. My go-to is Chemical Guys Leather Cleaner. It’s designed to lift body oils and dirt without breaking down the protective topcoat.
Dampen a soft microfiber cloth with the cleaner, never spray directly onto the seat, as overspray can stain adjacent plastics or fabrics. Work in sections with gentle, circular motions. For stubborn grime on bolsters, a soft-bristled detailing brush can help agitate the cleaner without scratching.
Where this goes sideways: Soaking the leather, especially at the seams. Water can seep through stitch holes and into the foam padding underneath, leading to mold and a musty smell that’s nearly impossible to eradicate. The Nissan manual explicitly says “Do not soak the leather.”
Step 3: The Dry
Wipe the cleaned section with a second, clean, damp microfiber cloth to remove any cleaner residue. Then, buff it dry with a third, dry towel. Any leftover moisture under a conditioner or protectant can cause clouding or poor adhesion.
What Most People Get Wrong: Conditioner Isn’t Armor
Here’s the classic mistake. Someone buys a nice bottle of leather conditioner, applies it faithfully every few months, and thinks they’ve done the job. The seats feel supple, so protection must be working. But that conditioner is doing almost nothing to shield against daily assaults from blue jeans, seatbelt buckles, or sunscreen.
A conditioner’s job is to replenish the natural oils in the leather substrate beneath the coating. This maintains flexibility and prevents the leather from drying out and shrinking, which can cause the coating on top to crack. A product like Lexol Leather Conditioner is excellent for this. However, it offers little to no protection against spills, UV rays, or dye transfer from new jeans.
The shielding comes from a separate product: a leather protectant or ceramic coating. These products are designed to bond to the surface of the coated leather, creating a hydrophobic barrier. Think of conditioner as feeding the leather, and protectant as putting a raincoat on it. You need both.
| Product Type | Primary Job | Good For | Frequency |
|---|---|---|---|
| Leather Cleaner | Removes surface contaminants & oils | Prepping for conditioning/protection | Every 1-3 months |
| Leather Conditioner | Replenishes oils in leather substrate | Preventing dryness & substrate cracking | Every 3-6 months |
| Leather Protectant | Creates a surface barrier against spills & UV | Defending against stains & fading | Every 6-12 months |
| Ceramic Coating | Forms a semi-permanent hydrophobic layer | Maximum spill & UV resistance; ease of cleaning | Every 1-2 years |
Your Defense Lineup: Choosing the Right Products
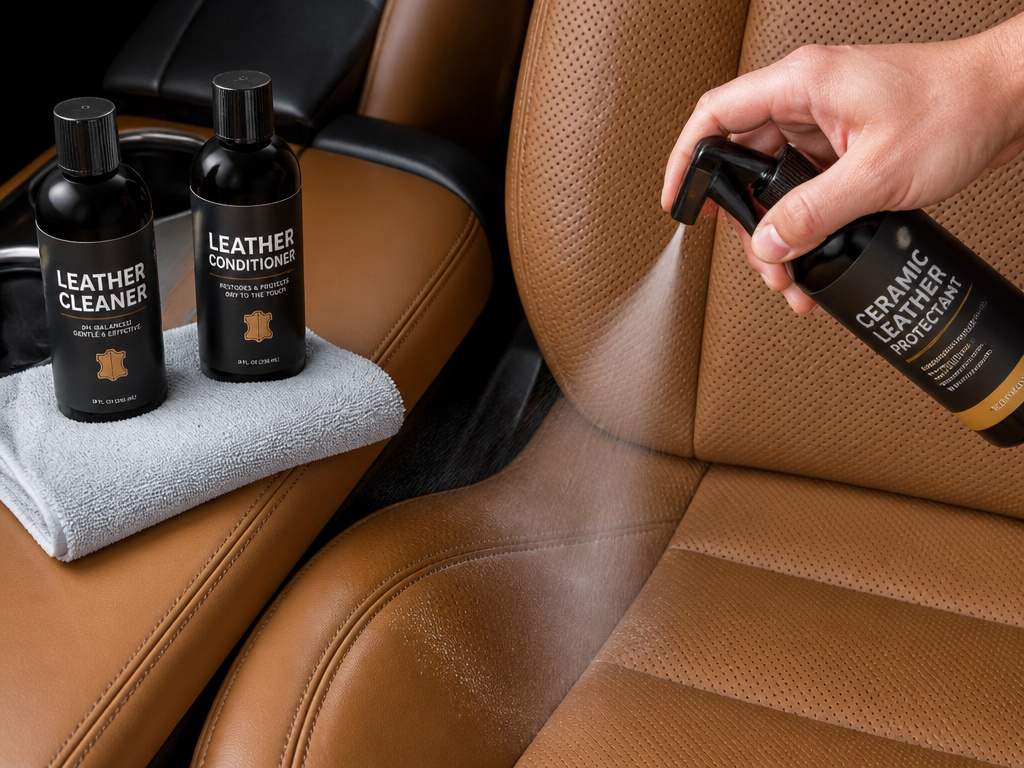 You don’t need a garage full of bottles, but you do need the right three. Let’s break down what to look for.
The Cleaner: As mentioned, pH-neutral is key. Avoid anything labeled as a “strong degreaser” or that contains alcohol as a primary ingredient. The goal is to clean, not strip. A solid all-rounder like the Chemical Guys Leather Cleaner or a dedicated cleaner and conditioner combo from a brand like Lexol works well for maintenance washes.
The Conditioner: Steer clear of products loaded with silicone or petroleum distillates. They can create a slick, artificial shine and may degrade certain leather coatings over time. Look for conditioners based on natural oils like lanolin or mink oil (in a blend). Lexol is a benchmark here. For a deeper treatment on non-perforated seats, Leather Honey can be effective, but use it sparingly, it’s potent.
The Protectant: This is your true shield. Options range from spray-on sealants like 303 Automotive Protectant to more advanced ceramic coatings formulated for interiors, like Gyeon LeatherShield. The ceramic options are more expensive and require meticulous application, but they last longer and provide a superior barrier. For a balance of performance and ease, a solid spray protectant applied every few months is your best bet.
Common mistake: Using a “all-in-one” cleaner + conditioner + protectant for every job. These are fine for a quick refresh, but they don’t provide enough concentrated power for a deep condition or a durable protective layer. Think of them as a quick dusting, not a deep clean and wax.
The Silent Killer: Sun Protection is Non-Negotiable
!Sun-damaged leather car seat bolster next to protected area with sun shade. Protecting leather car seats from the sun is essential.jpg) Heat makes leather feel dry, but ultraviolet (UV) radiation is what does the structural damage. UV rays break down the chemical bonds in the leather’s dye and topcoat, leading to fading, chalkiness, and eventual cracking. Parking in the shade helps with heat, but UV rays still bounce around.
Your first line of defense is a protectant with UV inhibitors. Most quality leather protectants and all ceramic coatings include them. Your second line is physical blocking: window tint that meets local legal standards and a WeatherTech windshield sun shade. This combo reduces the interior’s overall UV exposure dramatically.
The driver’s seat bolster and the top of the dashboard are the usual failure points. They get the most direct, prolonged sun. If you start to see a slight color difference or a rough, dry feel there, the UV damage has begun. At that point, you’re in restoration mode, not protection mode.
The Three-Step Application Protocol
Let’s translate the theory into action. Here’s the sequence that actually works.
- Deep Clean (Quarterly): Vacuum seats. Apply your pH-neutral leather cleaner with a microfiber cloth, working section by section. Wipe with a damp cloth to remove residue, then buff dry. Let the seats air dry for 30 minutes.
- Condition (Every 3-6 Months): Apply a small amount of conditioner to a fresh microfiber cloth. Rub it into the leather using circular motions, focusing on dry, high-wear areas like bolsters. Allow it to absorb for the time specified on the bottle, usually 15-20 minutes, then buff off any excess with a clean, dry towel. The surface should feel nourished, not slick or sticky.
- Protect (Every 6-12 Months): After conditioning and ensuring the seat is completely dry, apply your chosen protectant or ceramic coating. Follow the product instructions to the letter. Most spray protectants need to be applied to an applicator pad first, then thinly spread over the leather. Ceramic coatings require an absolutely pristine surface and precise curing times. This step forms the final, defensive barrier.
Damage Control: Addressing Spills and Stains Immediately
Protection isn’t just about routine; it’s about reaction time. The moment a spill happens is when your strategy is tested.
- Water-Based Spills (Coffee, Soda): Blot, do not rub, with a clean, absorbent cloth. Follow with a quick pass of your leather cleaner on the affected area, then dry.
- Oil-Based Stains (Sunscreen, Grease): Blot to remove excess. Use a tiny amount of leather cleaner on a cloth to gently work the edges of the stain, moving inward to avoid spreading. You may need multiple passes. Oil can be stubborn.
- Dye Transfer (New Jeans, Colored Fabric): This is a common issue with light-colored leather. Act fast. A dedicated leather dye remover, like from the brand Colourlock, is often necessary. Always test any stain remover in an inconspicuous area first, as emphasized in the Ford Owner’s Manual.
The universal rule is speed. The longer a contaminant sits, the deeper it penetrates and the harder it is to remove without damaging the finish.
The Proactive Layer: Physical Barriers
Even the best chemical protection can be overwhelmed. For ultimate peace of mind, especially with pets, children, or heavy tools, a physical barrier is the answer.
High-quality seat covers designed for leather seats are an investment. Look for soft, non-abrasive materials like neoprene or custom-fit cloth covers that don’t trap moisture against the leather. They take the brunt of daily abuse and can be removed and washed. For pet owners, a dedicated dog seat cover with a waterproof backing is essential to block claws and accidents from ever reaching the leather.
Similarly, a car seat protector mat under a child’s car seat will catch crumbs and spills and prevent the hard plastic base from imprinting on and compressing the seat foam. These are one-time purchases that prevent thousands in potential repairs or reupholstery costs.
Frequently Asked Questions
Can I use furniture leather conditioner on my car seats?
You should not. Furniture conditioners are often formulated for raw, uncoated leather and contain oils and waxes too heavy for automotive finishes. They can leave a permanent greasy film, attract dirt, and potentially soften the adhesives used in your seat’s construction.
How often should I really condition my leather seats?
For daily-driven cars, every 3-4 months is sufficient. For garage-kept vehicles or those driven seasonally, every 6 months is fine. Over-conditioning is a real risk, it can clog the leather’s pores and lead to a sticky surface. Let the feel of the leather guide you; if it starts to feel dry or stiff, it’s time.
Are ceramic coatings for leather seats worth it?
Yes, for the long-term. A proper ceramic coating for leather forms a semi-permanent, ultra-slick layer that resists stains, makes cleaning far easier, and provides superior UV protection. The upfront cost and effort of the perfect application are higher, but it can last over a year, making it cost-effective over time.
Will protecting my seats make them slippery?
Well-applied protectant should not make seats dangerously slippery. The key is a thin, even application and thorough buffing to remove any residual slickness. If your seat feels like a plastic slide, you’ve used too much product. Wipe it down with a damp cloth to remove the excess.
What’s the one product I should never use?
Household cleaners, especially anything with bleach, ammonia, or citrus-based solvents. As outlined in the NHTSA technical service bulletin for Volkswagen/Audi, these “will likely damage the finish.” Also, avoid any product not explicitly labeled for use on coated automotive leather.
The Bottom Line
Protecting leather car seats isn’t about a single magic bottle. It’s a system: clean the surface, nourish the material beneath, and shield the top from the world. Skip any step, and you’re inviting wear.
Start with the cleaner you already own, just make sure it’s right for the job. Add a 303 Aerospace Protectant conditioner to your next order, and commit to a UV-blocking protectant. The difference after that first full cycle isn’t just visual; the leather will feel more resilient. That’s the coating doing its job, and the leather underneath staying healthy.
The seats are one of the largest leather surfaces in the car. Get this right, and the rest of the interior follows the same rules.
