
How to Condition Leather Car Seats | The Step Makers Avoid
This post contains affiliate links. As an Amazon Associate, we earn from qualifying purchases.
This post contains affiliate links. As an Amazon Associate, we earn from qualifying purchases.
Condition leather car seats by first cleaning them thoroughly with a pH-neutral leather cleaner, then applying a small, nickel-sized amount of a dedicated automotive leather conditioner to a dry microfiber cloth and rubbing it into the leather in a circular motion until it disappears, repeating this process only every 4 to 6 months.
Let’s be clear about one thing. The single biggest mistake is using too much product, not the wrong product. A car’s leather is coated, and that coating only absorbs so much.Dumping a cup of conditioner onto the seat just leaves a greasy film that attracts dust and can eventually clog the leather’s pores. The leather will tell you what it needs, and it’s never a flood.
What follows is a straightforward guide that pulls directly from OEM service bulletins most owners never read. We’ll cover the one cleaning step you can’t skip, the exact motion that matters, and the three products I actually reach for after seeing what works on everything from a decade-old Toyota to a new Ford King Ranch.
Key Takeaways
- Automotive leather is coated. It’s not the same as your leather jacket or sofa; it has a protective top layer that requires specific, gentle cleaners.
- Clean before you condition, every time. Dirt acts like sandpaper, grinding into the leather’s finish when you rub conditioner over it.
- Use a nickel-sized dab. More is not better. Over-application leads to a sticky film that attracts dirt and never fully absorbs.
- Frequency is key. Conditioning every 4 to 6 months is plenty for most climates; over-conditioning softens the leather excessively and can weaken the seams.
- Skip the household products. As a NHTSA Technical Service Bulletin notes, solvents, oils, and furniture polishes will damage the finish and void some warranties.
Why Automotive Leather is Different
Automotive leather is typically finished with coatings which protect the surface from the sun’s damaging rays as well as making it resistant to soiling. The finishes used in automotive upholstery are unique; very different to furniture, garment or shoe leathers. That’s the official word from a 2023 Nissan owner’s manual, and it’s the most important fact you’ll read today.
This material is a substrate, often split leather, topped with a polyurethane or acrylic coating, rather than raw, vegetable-tanned leather that drinks up oil. Your conditioner maintains the flexibility and appearance of that plastic-like topcoat instead of feeding bare hide.Use something too heavy or oil-based, like mink oil, and it will just sit on top, turning gummy and darkening the color unevenly.
The Practical Takeaway: Your car’s seats are more like a high-tech laminate than a traditional hide. Products designed for saddles or boots are mismatched. Stick to conditioners formulated for coated automotive leather.
The Non-Negotiable First Step: Cleaning
You cannot condition dirty leather. It seems obvious, but I’ve watched people rub expensive balm over seats streaked with sunscreen and road grit. That grit becomes lapping compound, microscopically scouring the finish with every pass of your cloth. A clean surface is non-negotiable.
First, vacuum. Get every crumb and grain of sand out of the perforations and seams. Then, use a dedicated, pH-balanced leather cleaner. A drop of glycerin saddle soap in a quart of water works for heavy grime, but for most seats, a ready-made product like Motorcraft Premium Leather and Vinyl Cleaner is safer. Apply the cleaner to your microfiber cloth, never directly onto the seat, and wipe in sections.
This is based on years of practical experience. The first time I conditioned a set of seats without a perfect clean, I ended up with a hazy, smeared finish that took another full clean to fix. The leather simply can’t absorb anything through a layer of filth.
What “Clean” Actually Looks and Feels Like
Run your bare hand across the seat after you’ve wiped it down and let it dry. It should feel smooth, with no gritty drag. There should be no visible streaks or residue. If you see a faint white line where a seam creases, you have leftover cleaner. Wipe it again with a cloth dampened only with water, then dry thoroughly.
Here’s a straightforward test. If the leather feels tacky or cool to the touch after drying, it’s not ready. Wait until it feels room temperature and dry. That usually takes 20 to 30 minutes in a warm garage. Conditioning onto damp leather traps moisture under the product and can cause mildew.
Choosing the Right Leather Conditioner
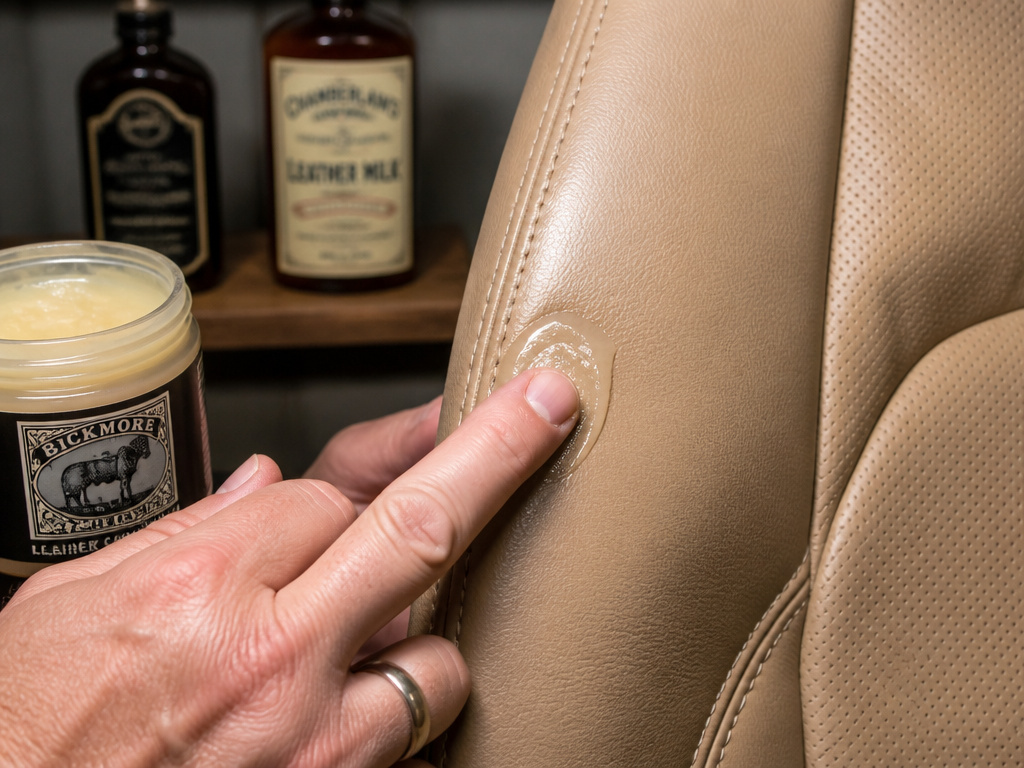 This is where marketing noise drowns out signal. You don’t need a miracle-in-a-bottle with twenty “natural” oils. You need a product that hydrates the coating without breaking it down. I keep three on my shelf for different jobs, and one is my default for 90% of car interiors.
| Conditioner | Best For | Why It Works |
|---|---|---|
| Bickmore Bick 4 | Modern coated automotive leather (Toyota, Honda, Nissan, etc.) | Non-oily, won’t darken leather, absorbs completely without a greasy feel. |
| Obenauf’s Leather Oil | Older, dry, or uncoated leather (vintage car interiors, classic truck seats) | Pure oil blend that deeply penetrates dry, thirsty leather to restore suppleness. |
| Chamberlain’s Leather Milk | Light maintenance on lightly worn seats | Water-based, fast-absorbing; good for a quick refresh between deeper conditions. |
My go-to for any car built after 2000 is Bickmore Bick 4. It’s a light, non-greasy lotion that disappears into the leather without altering the color. It doesn’t contain silicone or waxes that build up a fake shine. For a dedicated cleaner and conditioner in one step, a two-in-one product can be effective, but I prefer the control of separate steps.
The Ingredients That Red Flag a Product
Ignore the front label. Turn the bottle around. If the first ingredient is silicone (dimethicone) or a petroleum distillate, put it back. Silicone creates a superficial slickness that blocks the leather’s ability to breathe. Petroleum solvents can dry out the natural fibers beneath the coating over time. Look for a conditioner with lanolin, beeswax, or natural oils like emu or neatsfoot.
The Right Way to Apply Conditioner
 This is the whole game. Get this wrong, and even the best product creates problems.
First, ensure the seat is clean, dry, and at room temperature. Heat causes the conditioner to absorb too quickly; cold makes it sit on top. Squeeze a nickel-sized amount onto a clean, dry microfiber cloth. Fold the cloth to work the product into the fibers.
Start on the seatback, not the sitting surface. Rub the conditioner into the leather using a gentle, circular motion. You’re not polishing or scrubbing. You’re working the product into the grain. The goal is to have it disappear as you rub. If you still see a wet-looking film after 30 seconds of rubbing, you’ve used too much. Wipe the excess off with a dry part of the cloth.
Apply a nickel-sized amount of conditioner to a clean, dry cloth. Rub the conditioner into the leather until it disappears. Allow the conditioner to dry, then repeat the process for the entire interior. If a film appears, wipe it off with a dry, clean cloth.
. Direct excerpt from a Ford Owner’s Manual
Work in sections, about two square feet at a time. Pay extra attention to high-wear areas: the driver’s seat outer bolster, the headrest, and the edge of the bottom cushion. These spots lose their protective coating first and need the most care.
Once you’ve covered the entire seat, walk away. Let it cure. This takes at least an hour, ideally two. You’ll know it’s done when you can run your hand over the leather and feel no transfer or slickness, just a slightly richer, softer version of the original texture.
How Often Should You Condition?
This is the most over-prescribed part of leather care. You do not need to condition your seats every month, or even every other month. The coating can’t absorb it that fast.
For a daily driver in a temperate climate, once every 4 to 6 months is perfect. If you live in a desert with intense sun, move that to every 3 months. In a humid climate, you can stretch it to 6 or even 8 months. Over-conditioning is a real problem; it oversoftens the leather and can make stitching weak.
Think of it like seasoning a cast-iron skillet. You build up thin, even layers over time. A single thick pour just makes a mess. Your overall leather care routine should be measured and patient.
The Timeline Your Seat Actually Feels
After conditioning with a product like Obenauf’s, you won’t feel a dramatic difference the next day. The real change happens over the following week. The conditioner fully integrates, and the leather becomes subtly more supple and less prone to creaking. If your seats feel dramatically different immediately, you probably used too much product.
Common Conditioning Mistakes (And How to Avoid Them)
Most damage happens with good intentions. Let me share what I’ve learned from fixing other people’s well-meaning errors.
Mistake 1: Using household cleaners. Glass cleaner, dish soap, and all-purpose sprays are far too harsh. They strip the protective coatings and leave the leather vulnerable to UV damage and cracking. This is why manufacturers explicitly warn against them in their vehicle interior materials guide.
Mistake 2: Applying conditioner to dirty or wet leather. This traps contaminants and moisture, leading to a hazy finish or, worse, mold spots in the perforations.
Mistake 3: Over-conditioning. This is the big one. More is not better. A sticky, greasy film left behind attracts dust, clogs the leather’s pores, and can cause the surface to become tacky. It also makes future cleaning steps harder.
Mistake 4: Using the wrong cloth. Paper towels and old t-shirts can scratch. A soft, high-quality microfiber cloth is the only tool you should use for both cleaning and conditioning.
| Mistake | What Happens | The Fix |
|---|---|---|
| Household Cleaners | Strips protective coating, leads to rapid fading and cracking. | Use only pH-neutral, automotive-specific leather cleaners. |
| Conditioning Dirty Leather | Grinds dirt into finish, creates permanent micro-scratches. | Always vacuum and clean thoroughly before applying any product. |
| Too Much Product | Leaves a greasy film, attracts dust, never fully absorbs. | Use a nickel-sized dab per two square feet; buff off excess immediately. |
| Poor-Quality Cloth | Leaves lint and can scratch the finish. | Invest in a pack of dedicated, soft microfiber cloths. |
Special Cases: Perforated, Heated, and Light-Colored Leather
Not all seats are created equal. A few specific types need a tweak to the standard process.
Perforated Leather: The tiny holes are dirt traps and can tear if you’re rough. When cleaning, use a soft-bristled brush (like a detailing brush) to gently agitate cleaner in the holes. When conditioning, be extra careful not to glob product into the perforations, as it’s very difficult to remove. Use less product and buff well.
Heated Seats: Always ensure the seats are completely cool to the touch and turned off before you start. Applying conditioner to a warm seat accelerates absorption unevenly and can lead to blotchiness.
Light-Colored Leather (Beige, White, Grey): Test your conditioner on a hidden spot like under the seat cushion or behind a headrest. Wait 48 hours. Some conditioners, even those labeled “non-darkening,” can cause a slight yellow or dark tint on very light leather. Bickmore Bick 4 is typically safe here.
For these delicate jobs, a curated selection of leather care products designed for automotive use removes the guesswork.
Frequently Asked Questions
Can I use olive oil or coconut oil on my leather car seats?
No. Do not use cooking oils. They will go rancid, smell bad, attract pests, and permanently darken the leather. They also break down the synthetic coatings. Stick to products engineered for automotive interiors.
How do I know if my leather seats are too dry and need conditioning?
Dry leather loses its suppleness and starts to develop small, fine cracks that look like crow’s feet, especially on bolsters. It may also feel stiff and creak when you sit down. If you see a whitish, chalky appearance in the creases, that’s severely dried-out coating and needs immediate, careful attention.
Will conditioning my seats make them slippery?
Not if you do it correctly. A conditioner that absorbs and leaves a matte, natural finish will contain oils and waxes, not silicones. If your seats feel slippery after conditioning, you used too much product or the wrong type (likely one high in silicone). Buff the seats vigorously with a dry microfiber cloth to remove the excess film.
Can I use a leather conditioner that also cleans?
You can, but I don’t recommend it for a thorough job. Combination cleaner-conditioners are good for light, routine maintenance. For a deep clean or if the seats are visibly dirty, a dedicated cleaner followed by a separate conditioner gives you more control and a better result. It ensures the cleaning agents are fully removed before you add protecting oils.
How do I protect my leather seats after conditioning?
The best protection is regular maintenance, keeping them clean and conditioned on schedule. For added defense against UV rays, which are the primary cause of fading and cracking, use a sunshade when parked outdoors. Some conditioners contain UV inhibitors; check the label. For a dedicated shield, look into a method to protect like fabric seat covers for extreme sun exposure.
Before You Go
Conditioning is a seasonal ritual, like changing your wiper blades or checking tire pressure, rather than a monthly chore. The rhythm matters more than the product.
If you take away one thing, let it be this: use less. A nickel-sized dab per section, a clean cloth, and patient, circular rubbing beats any expensive, over-applied treatment. Your seats don’t need to be fed; they need to be maintained. Do that every four to six months with a product like Bickmore Bick 4, and you’ll avoid the stiff, cracked leather that sends people searching for techniques to keep leather from cracking.
Everything above assumes you’re working with coated automotive leather in decent shape. If your seats are already cracked with the coating fully gone, the calculus changes, you’re now dealing with the raw hide beneath, and a heavier product like Obenauf’s Oil might be the only thing that can bring some life back. But for the vast majority of cars on the road, gentle, minimal, and consistent is the way.
