
The Correct Way to Restore Leather Shoes | Repair Damage
This post contains affiliate links. As an Amazon Associate, we earn from qualifying purchases.
To restore leather shoes, follow this exact sequence: clean with the correct product for the leather type, condition with a wax-free nourisher, then address specific damage (scuffs, cracks, sole wear) with targeted repairs. Skipping the first step locks in dirt; reversing the order can seal dryness into the leather.
That sequence is the whole game. It flips the common “just polish it” reflex into a restoration process that actually works on a chemical level. Leather isn’t plastic; it’s a porous skin that absorbs and releases moisture. A crack is a structural failure where the dried-out fibers have snapped, not merely a visual flaw. Polishing over it is like painting over rotted wood.
What follows: the one cleaning product you actually need, the conditioners that don’t just sit on top, and how to spot the point where DIY restoration stops and a cobbler begins. By the end, you’ll know why the 3,000-hour material fatigue rule changes the math on repairs and how to get another thousand hours out of a pair you thought were finished.
Key Takeaways
- Restoration is a three-step chemical process: clean first (to open pores), condition second (to replace lost oils), repair third (seal, color, resolve). Reversing steps seals in damage.
- Never use saddle soap on dress shoes or dry, cracked leather; it’s for filthy, oiled work boots. For most shoes, a dedicated leather cleaner like Saphir Reno is the correct start.
- “Material fatigue” is a real spec: after roughly 3,000 hours of wear, leather fibers lose resilience. Post-fatigue, conditioning can maintain but not fully reverse stiffening.
- Waterproofing and conditioning are opposing goals. A true sealant (wax, silicone) blocks subsequent conditioning. Decide the shoe’s purpose before applying anything.
- Know your repair limits. Some manufacturers (like Manolo Blahnik) advise against sole replacement as it alters shoe structure; on Goodyear-welted shoes, it’s a standard service.
What “Restoration” Actually Means Versus a Quick Clean
Let’s be clear about this. Cleaning removes surface dirt. Restoration repairs the leather’s internal structure after damage has set in. This difference determines whether a shoe merely looks better for a week or lasts another season.
You restore when you see dry cracks in the vamp, deep scuffs that show a lighter layer beneath the dye, or when the leather feels stiff and cardboard-like. A quick polish handles light scuffs and dullness. A restoration addresses why the leather got dull and stiff in the first place. The goal is to return flexibility and strength, not just apply a shiny topcoat.
This is a timeless material, but it has a lifespan. The Ludwig Reiter care guide mentions that “material fatigue can be expected after about 3,000 ‘operating hours'” for the upper leather. That’s a published number from a manufacturer. It means that after 125 days of 8-hour wear, the leather fibers themselves begin to lose their natural elasticity, regardless of care. Restoration done before that point can often return the shoe to near-new suppleness. After that threshold, you’re managing a graceful aging process, conditioning to prevent further breakdown, not expecting a full reversal.
The Exact Three-Step Sequence for Restoration
Every cobbler and quality manufacturer like Cheaney or Saphir follows the same order. Deviating from it is the most common reason home restoration fails.
| Step | Primary Goal | Tool / Product | Risk If Skipped or Reversed |
|---|---|---|---|
| 1. Deep Clean | Remove all dirt, old polish, and silicone sealants to open the leather’s pores. | Horsehair brush, Saphir Reno Cleaner or damp cloth. | Conditioner cannot penetrate; you seal dirt and dryness into the leather. |
| 2. Condition & Nourish | Replenish lost natural oils to restore flexibility and prevent further cracking. | Wax-free conditioner (Saphir Renovateur Crème, Obenauf’s Leather Oil). | Leather remains brittle; subsequent polish or protectant sits on a weak base. |
| 3. Repair & Protect | Address visual damage, restore color, and apply a protective layer if needed. | Colored cream polish, edge dressing, sole protector, wax (optional). | The shoe looks restored but remains vulnerable to immediate re-damage. |
The technical rule: Cleaning must precede conditioning because leather conditioner bonds with the leather’s fat content, not with surface debris. A conditioner applied over dirt creates a barrier that traps the debris and blocks further treatment penetration. This is why Saphir specifies Reno Cleaner for shoes “encrusted with dirt or have been treated with a polish from another brand.”
The first step is a deliberate stripping. Begin by using a horsehair brush to knock off dry dirt.For ingrained grime or old, waxy polish, you need a dedicated cleaner. Here’s where most guides get it wrong.
Common mistake: Reaching for saddle soap on dry, cracked dress shoes. Saddle soap is a degreaser designed for oily, filthy work leather. On dry leather, it strips the remaining natural oils, accelerating the cracking you’re trying to fix. Use it for actual saddles and work boots, not your Oxfords.
For probably 90% of restoration jobs, a product like Saphir Médaille d’Or Reno Cleaner is the right start. It’s formulated to remove silicones and old polish without harsh drying. Apply it with a cloth, work it in, and let it dry completely. That “dry completely” part is essential. Moving to step two while the leather is damp dilutes your conditioner and leads to spotty absorption.
Choosing Your Weapons: Cleaners, Conditioners, and When to Use Them
Not all leather is the same, and neither are the products to fix it. A one-bottle-miracle claims to clean, condition, waterproof, and polish. It does none of those things well. Here’s the straightforward breakdown.
- For General Cleaning & Stain Removal: A damp cloth and horsehair brush work for light dust and fresh mud. For stubborn stains, watermarks, or built-up polish, a dedicated leather cleaner like Saphir Reno Cleaner is your next step. It’s pH-balanced to clean without stripping.
- For Conditioning Dry, Cracked Leather: You need a nourisher, not a sealer. Look for conditioners built on natural oils (lanolin, mink oil, neatsfoot oil) or beeswax emulsions. Saphir Renovateur Crème is the benchmark, it cleans, conditions, and prepares the leather for polish. For extreme dryness on work boots or outdoor gear, Obenauf’s Heavy Duty LP (a beeswax and oil blend) penetrates deeply.
- For “Waterproofing” (Which Usually Means Water-Resisting): Understand the trade-off. A true waterproofing agent like a heavy wax (Sno-Seal) or silicone spray seals the surface. This is great for keeping water out but also locks conditioning oils out. Use it only on boots meant for wet conditions, and never apply it over a dirty surface.
Where this goes sideways: Applying a wax-based “waterproofer” over a dirty or unconditioned surface. You’re literally sealing the problem in. The leather can’t breathe, the embedded dirt abrades the fibers from the inside, and the dryness is now permanent. Always clean, condition, then decide if a protectant is needed.
My own hard-learned rule ties directly to this: always let leather return to room temperature before working on it. Cold leather is brittle. Applying conditioner or trying to flex it to work in a cleaner can cause micro-cracks you won’t see until later. If your wet shoes have been in a cold entryway, bring them inside for a few hours first. The material needs to be pliable to accept treatment.
The Hands-On Repair Guide: From Scuffs to Sole Replacement
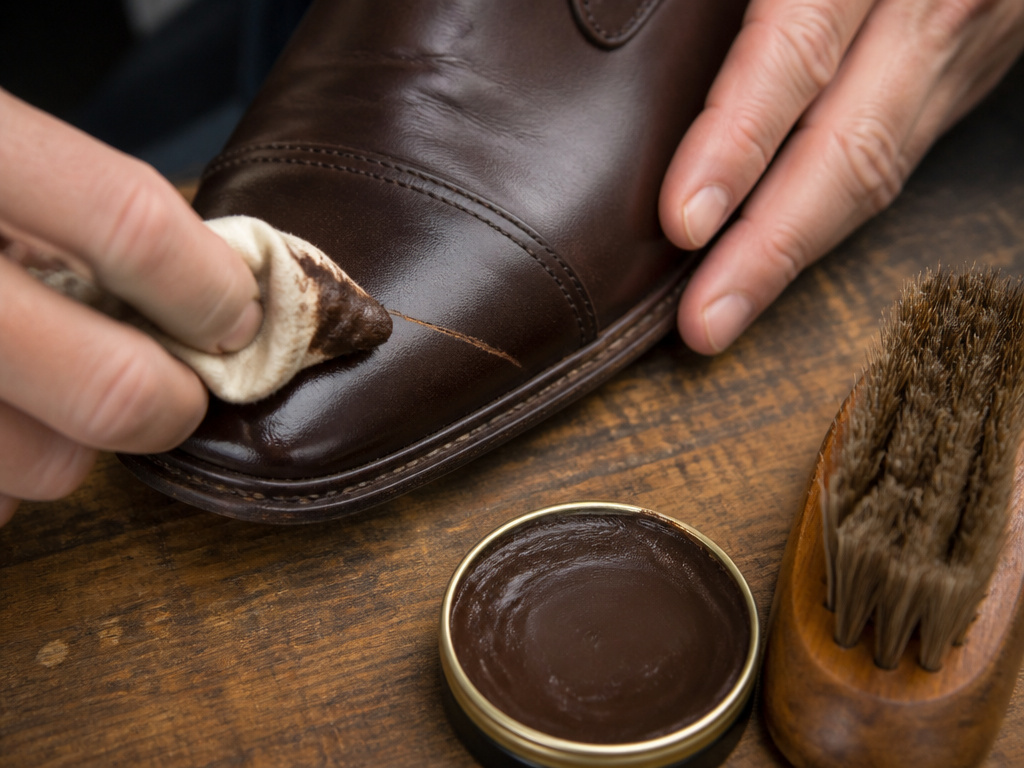
Once the leather is clean and supple, you can fix what’s broken.
Fixing Scuffs and Scratches:
A scuff that hasn’t broken the dye layer can often be buffed out with a polishing brush after conditioning. A deeper scratch that shows a lighter under-layer needs color. Use a colored cream polish that matches the shoe. Apply it sparingly to the scratch, let it dry, then buff. For a perfect blend, apply a light coat of the same cream over the entire shoe. This is where a dedicated guide on how to remove scuffs gives you the nuance, whether to use a wax stick, cream, or dye.
Addressing Dry Cracks:
Small surface cracks can be minimized but not erased. After cleaning, apply conditioner liberally to the area, letting it soak in over several hours. The goal is to rehydrate the surrounding fibers so they swell and close the gap visually. Severe cracks that go deep often mean the leather is fatigued beyond economic repair; conditioning becomes maintenance, not a fix.
Heel and Sole Wear:
Heel tips are consumable items. Replace them before the metal nail wears through. It’s a five-minute job for a cobbler and costs very little. Sole wear is trickier. * Goodyear Welted Soles: These are made to be replaced. A cobbler can strip off the worn sole and stitch a new one onto the existing welt. It’s standard. * Cemented or Fashion Soles: Here, manufacturers disagree. Manolo Blahnik’s care guide explicitly states, “We do not recommend replacing the soles as this may alter the structure of the shoes.” Contrast that with Cheaney, which promotes its refurbishment service for sole replacement. The takeaway: check the manufacturer’s stance. On a cemented dress shoe, a full resole might compromise the intended flex and balance.
Easy to miss: Loose threads on new or repaired shoes. NPS Solovair’s guide warns: “DO NOT pull them as this may result in seam damage.” Instead, contact the maker or your cobbler. A pulled thread can unravel a seam in seconds.
Why the “Final Shine” is Actually the First Sign of Health
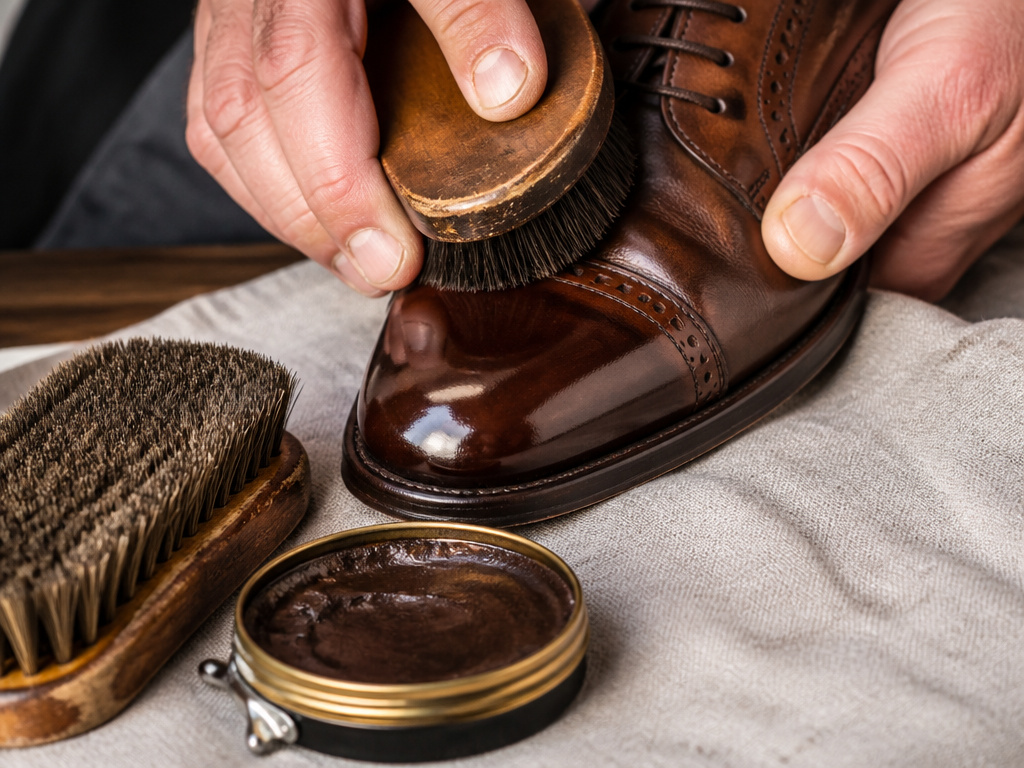
A high, deep shine on restored leather demonstrates that the leather underneath is smooth, hydrated, and the polish is lying flat on a solid base. If you follow the clean-condition-polish sequence, the final buff with a polishing brush will produce a glow that comes from within the wax layers, not a superficial glaze.
That’s the part people skip. They apply polish to dirty shoes and get a thin, shiny film that cracks within a week. When you do it right, the shine develops over several polishing sessions, building up a protective shell of wax that actually flexes with the leather. It’s the difference between a coat of paint and a hand-rubbed oil finish on wood.
So: clean to the bare leather, feed it until it’s supple, then protect it. That’s the cycle. Everything else is a variation.
Frequently Asked Questions
Can I restore leather shoes that are already cracked?
You can improve them, but you cannot fully erase deep cracks. The process will moisturize the surrounding fibers, making the cracks less visible and preventing them from worsening, but the broken fibers won’t re-fuse. Prevention is always better than restoration.
Is it worth restoring cheap leather shoes?
Usually, no. The cost of quality products (cleaner, conditioner, polish) and potentially a cobbler’s time often exceeds the value of the shoe. Reserve restoration for well-made shoes with good construction, like Goodyear-welted footwear, where the upper is designed to outlast multiple soles.
How often should I condition my leather shoes?
There’s no universal schedule, it depends on wear. Check the leather: if it looks dry or feels stiff, it needs conditioning. For shoes worn weekly, a light conditioning every 2-3 months is sufficient. Always condition leather shoes after they’ve been thoroughly cleaned.
What’s the difference between polish and conditioner?
Conditioner (like Saphir Renovateur) nourishes the leather with oils. Polish (like Saphir Cream 1925) adds pigment and a protective wax shine. Always condition first to address the leather’s health, then polish for aesthetics and a light protective layer. Using one without the other is like moisturizing your skin but never applying sunscreen.
Can I use the same products on suede?
Absolutely not. Suede has a nap and requires completely different care. Suede cleaners are liquid, and conditioning is done with specific sprays. Brushing is done with a suede brush to lift the nap. Using standard leather conditioner on suede will stain and mat it irreparably.
Before You Go
The one thing I want you to remember is the 3,000-hour rule. It’s a quiet admission from a high-end maker that leather, for all its durability, has a finite service life. Your job isn’t to fight that fatigue, but to manage it. Every proper cleaning, every thoughtful application of a recommended conditioner, every timely resole buys you another few hundred hours.
Start with the shoes you wear most often. Clean them properly, really clean them, with the right product. Then condition them. Don’t just look at them; feel the difference in flexibility. That tactile change is the restoration happening. The shine you put on top is just the receipt.
And if you’re ever tempted by a bottle that says it does all three steps at once, remember the woodworking analogy. You don’t stain, seal, and varnish in one coat. You prepare the surface, you apply the stain, you let it cure, you seal it, you sand it, you varnish it. Layers. Time. Patience. That’s how you restore anything built to last.
