
Master How to Sew Leather on Your Home Sewing Machine Today
This post contains affiliate links. As an Amazon Associate, we earn from qualifying purchases.
You can sew leather on a domestic sewing machine, but you must change three things: the needle, the presser foot, and the tension settings. Use a leather needle (Schmetz 130R 90/14 or 100/16), a Teflon or roller foot, and lengthen the stitch to at least 3mm with increased presser foot pressure.
That gap between “can” and “should” is where most attempts fail. A home machine has limits—it’s built for cotton and polyester, not dense, sticky animal hide. The wrong needle point pushes leather fibers apart instead of piercing them. The wrong foot drags. The wrong tension jams the bobbin.
What follows is the setup that bridges that gap. This section details the three mandatory adjustments, the machines that can handle it, and the specific trouble you’ll face if you skip any step.
Key Takeaways
- Use a leather needle (Schmetz 130R) every time. A universal needle will push, tear, or break the leather.
- Swap the standard presser foot for a Teflon or roller foot. A walking foot attachment is the best upgrade for feeding multiple layers evenly.
- Lengthen your stitch to at least 3mm (8-10 stitches per inch). A short stitch perforates the leather like a tear-off coupon.
- Increase the presser foot pressure. Leather is thick; the foot must hold it firmly against the feed dogs without crushing it.
- Teflon-coated thread (like Ritza Tiger Thread) or heavy-duty polyester is essential. All-purpose cotton thread will shred.
The Three Critical Adjustments: Needle, Foot, and Tension
The job here isn’t sewing. It’s getting the machine to behave like a leather tool. That starts with the hardware.
A Schmetz 130R leather needle has a chisel point. It slices through the leather fibers. A universal needle has a rounded point designed to slip between woven threads. On leather, it just pushes down, stretches the hide, and often snaps. For leather under 4 oz (1.6mm), a 90/14 size works. For 4-7 oz leather, move to a 100/16.
Common mistake: Using a universal needle. The rounded tip doesn’t cut; it blunts against the hide, and the shaft heats up from friction. You’ll smell a faint burning plastic scent before the thread starts breaking.
The standard plastic foot creates too much friction. Leather sticks to it. A Teflon-coated foot glides. A roller foot uses little wheels. If you’re feeding two layers, a walking foot is the real answer—it has feed dogs on top that match the ones below, so the layers move together without slipping. This prevents the top layer from stretching out longer than the bottom, a telltale sign of a bad seam.
For thread, think thick and slick. Teflon-coated linen thread like Ritza Tiger Thread or a heavy-duty polyester (Tex 40 or thicker) is standard. Cotton thread abrades against the leather hole and snaps. Your thread tension needs to be balanced, but you’ll likely need to increase the top tension slightly. Leather is unforgiving; a loose stitch looks sloppy and holds nothing.
Matching Leather Weight to Machine and Settings
Not all machines are equal, and neither is all leather. This table maps leather weight (in ounces and millimeters) to the minimum machine you’ll need and the corresponding settings.
| Leather Weight | Thickness | Machine Type | Needle Size | Stitch Length |
|---|---|---|---|---|
| Light (2-3 oz) | 0.8–1.2 mm | Robust Domestic | 90/14 | 3.0–3.5 mm |
| Medium (4-5 oz) | 1.6–2.0 mm | Heavy-Duty Domestic | 100/16 | 3.5–4.0 mm |
| Heavy (6-8 oz) | 2.4–3.2 mm | Semi-Industrial | 110/18 | 4.0–4.5 mm |
| Very Heavy (9+ oz) | 3.6+ mm | Industrial | 120/19+ | Hand-stitch recommended |
A “Robust Domestic” means something like a Janome HD-3000 or a Singer Heavy Duty 4432. These have metal frames and stronger motors. A “Heavy-Duty Domestic” is the ceiling for most home workshops—the Singer 4452 or a Janome HD-5000. Beyond 6 oz, you’re in semi-industrial territory (like the Juki TL-2010Q) because the presser foot lift simply isn’t high enough to fit the leather under a standard domestic machine.
The stitch length rule is simple: thicker leather needs a longer stitch. A 2mm stitch on 5 oz leather creates a perforated line that will tear under stress. Aim for 3 to 4.5 mm. You’re making a row of strong anchors, not a dotted line.
Step-by-Step Setup for Your Machine
Follow this sequence. Skipping a step usually means the next step won’t work.
- Install a new leather needle. Always start with a fresh one. Leather dulls needles fast. Insert it with the flat side facing the back of the machine.
- Replace the presser foot. Screw on your Teflon, roller, or walking foot. Check that it sits level.
- Thread with heavy-duty thread. Use Tex 40 polyester or a bonded nylon. Wind the bobbin with the same thread. Mismatched threads cause tension havoc.
- Increase presser foot pressure. Your machine has a dial or wheel for this, usually on the top. Turn it to a higher number. Leather needs downward force to stay gripped by the feed dogs.
- Set stitch length to 3.5 mm. Use the longest straight stitch. No zigzag, no decorative stitches.
- Test on scrap leather. Use the same piece you’re sewing. Adjust tension until the stitches look identical on top and bottom. The bobbin thread should not pull to the surface.
The “test on scrap” step isn’t optional. It’s your calibration. If you skip it, your first seam on the good leather will be the test—and it will be wrong.
If the fabric isn’t feeding, the presser foot pressure is too low. If the needle bends or breaks, the leather is too thick for the machine or the needle is too small. Stop and reassess.
Troubleshooting Leather Machine Stitching
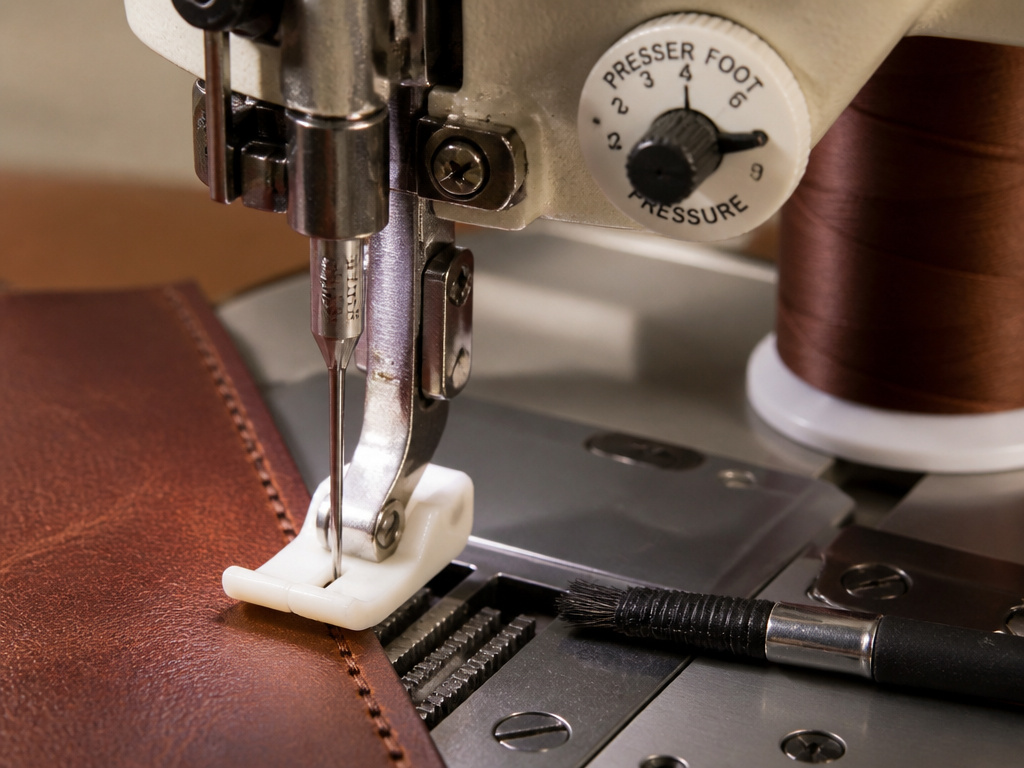 Leather introduces problems fabric doesn’t have. Here’s the quick diagnosis.
| Symptom | Likely Cause | Immediate Fix |
|---|---|---|
| Thread keeps breaking | Wrong needle (universal point) | Switch to a leather needle (Schmetz 130R). |
| Stitches skip | Presser foot pressure too low | Increase pressure dial; ensure clean feed dogs. |
| Leather not feeding | Foot friction or dull feed dogs | Switch to Teflon foot; clean feed dogs with brush. |
| Top thread loops underneath | Top tension too loose | Increase top tension incrementally. |
| Puckered seam | Stitch length too short | Lengthen stitch to 3.5mm or more. |
| Needle breaks | Leather too thick for needle/machine | Use larger needle (100/16); assess if machine can handle the thickness. |
Skipped stitches are the most common headache. The needle deflects off the tough hide instead of piercing cleanly to form the loop for the bobbin hook. The fix is almost always a combination of a fresh, correct leather needle and more presser foot pressure. If that doesn’t work, slow down. High speed gives the needle less time to penetrate and the hook less time to catch.
Thread bunching under the leather means the top tension is too loose. Turn the tension dial up a notch and test again. If the problem persists, re-thread the machine completely, making sure the thread is seated in the tension discs.
Essential Tools Beyond the Machine
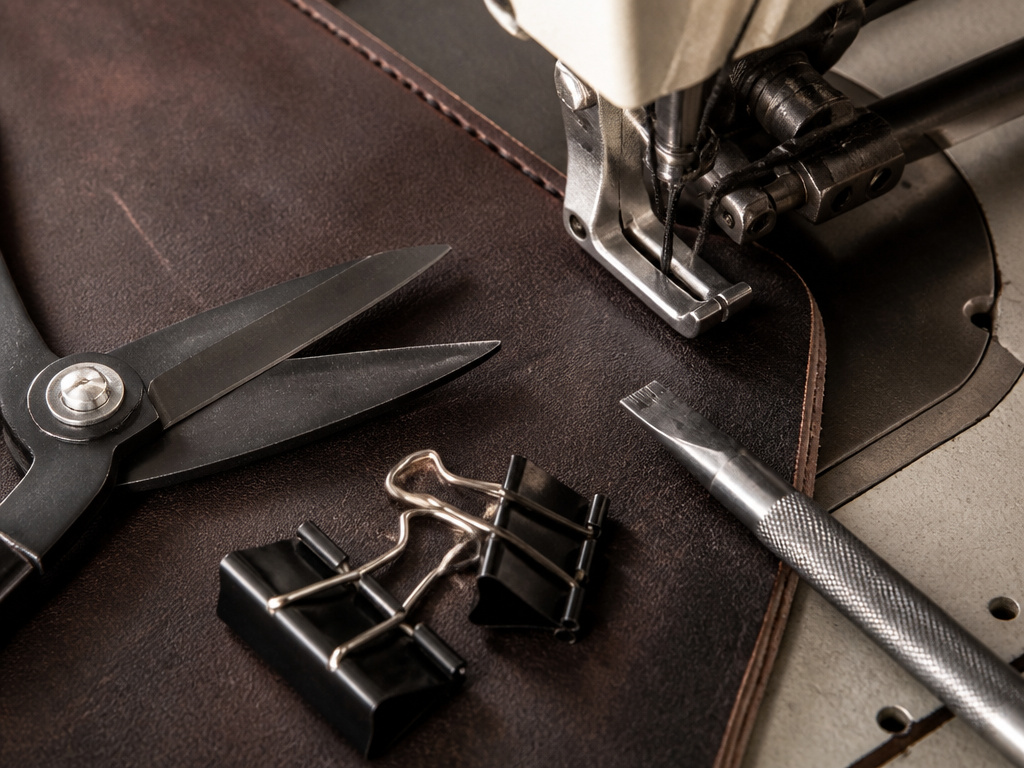 Your machine is one tool. These others make the job possible.
- Leather Shears or Rotary Cutter: Fabric scissors will hack at leather and ruin the blade. Use dedicated, sharp shears.
- Clips or Double-Sided Tape: Pins leave permanent holes in leather. Use binder clips, quilting clips, or a thin strip of double-sided tape to hold seams.
- A Maul and Punch (or Chisel): For pre-punching stitch holes on heavier leather. This takes the strain off the needle and guarantees even spacing.
- Edge Beveler: To round off the sharp cut edges of the leather before sewing. This gives a professional finish and reduces bulk in the seam.
- A Seam Roller: To flatten seams after sewing without marring the leather. A bone folder works too.
A walking foot attachment deserves its own mention. It’s the single best upgrade for a domestic machine doing leatherwork. It solves the layer-slippage problem that causes uneven seams.
Walking Foot vs. Regular Foot: When You Need the Upgrade
Let’s settle the foot question. A regular Teflon foot is fine for a single layer or very light work. The moment you sew two pieces together, you need a walking foot.
The feed dogs only pull the bottom layer. The top layer is dragged by the needle and the friction of the presser foot. With leather, that drag is inconsistent. The top layer stretches or moves slower. The resulting seam is uneven, and one piece will be longer than the other when you’re done.
A walking foot has its own set of feed dogs that move in sync with the machine’s cycle. They grip the top layer and walk it along at the same pace as the bottom. The seam stays even. For any project like a wallet, bag gusset, or strap, a walking foot isn’t a luxury. It’s what makes the project work.
If your machine doesn’t have a walking foot option, your workaround is meticulous clipping and going very slow. It’s a compromise.
Recommended Machines for Leather Sewing
I’ll name names. For a home crafter, the Singer Heavy Duty 4423 or Janome HD-3000 are the starting line. They have the metal guts and motor to push a leather needle through medium-weight hides.
When you start hitting thicker stuff or sewing for hours, you step up to a Juki TL-2010Q. It’s a semi-industrial straight-stitch machine with a higher lift and more power. It’s the consensus next step.
For true heavy-duty work, you’re looking at industrial machines like the Juki DNU-1541 or a used Consew. These are belt-driven, powerful, and built for all-day production on thick materials.
Where this goes sideways: Buying a lightweight plastic-body machine because it says “heavy-duty” on the box. Check the frame. If it’s not all metal inside, it’s not for leather.
My default pick for most people getting into leather is the Janome HD-3000. It’s accessible, widely supported, and can handle 90% of the projects a hobbyist will throw at it. The Singer Heavy Duty is a close second, but the Janome’s stitch quality is a touch more consistent under load.
Frequently Asked Questions
Can any sewing machine sew leather?
No. The machine needs a strong motor, an all-metal frame, and a high enough presser foot lift to accommodate the leather’s thickness. Lightweight, plastic-body machines will struggle or break.
What is the best thread for machine sewing leather?
Use a heavy-duty polyester thread (Tex 40 or heavier) or a bonded nylon thread. Teflon-coated linen thread like Ritza Tiger Thread is excellent but can require more tension adjustment. Avoid all-purpose cotton thread.
Why does my machine skip stitches when sewing leather?
This is usually caused by the wrong needle (not a leather needle) or insufficient presser foot pressure. The needle deflects off the dense material. Switch to a fresh Schmetz 130R needle and increase the pressure setting.
Do I need a special foot to sew leather?
Yes. Replace the standard foot with a Teflon-coated foot or a roller foot to reduce friction. For sewing two layers together, a walking foot attachment is highly recommended to prevent the layers from shifting.
Before You Go
Leather doesn’t forgive a setup error. Your first test seam on scrap tells you everything: if the thread breaks, change the needle. If the leather sticks, change the foot. If the stitches skip, add pressure.
The line between success and a jammed, frustrated mess is usually one adjustment. Make that adjustment on the scrap, not on your project piece. That’s the whole game.
If your machine groans, bogs down, or the needle deflects visibly, listen to it. That’s the signal you’ve hit its limit—either the leather is too thick or the needle is too small. Pushing past that limit breaks things. Recognize the limit, and you’ll get clean, strong seams every time.
