
A Complete Guide on How to Sew Leather for Durable Projects
This post contains affiliate links. As an Amazon Associate, we earn from qualifying purchases.
Sewing leather requires matching three things: the leather’s weight, a sharp needle with a triangular point, and a heavy-duty, waxed thread. The strongest, most repairable seam comes from a hand-done saddle stitch with two needles; machine lockstitches skip and snap on anything thicker than lightweight garment leather.
That’s not just a preference, it’s a mechanical reality. A machine lockstitch loops two threads inside a fabric, putting lateral stress on the thin upper thread. Leather doesn’t flex and give like cloth. Under load, that upper thread cuts against the stiff leather hole, and the entire seam can unravel. The saddle stitch locks each stitch independently within the leather itself, so a single broken stitch doesn’t domino into a full seam failure.
What follows is a breakdown of why that stitch works, exactly how to execute it, and when a specialized sewing machine becomes a viable alternative. You’ll leave knowing which needle system matches your leather’s thickness, why you need to wax your thread, and the one tool that makes hand-sewing ten times easier.
Key Takeaways
- Use a triangular-point leather needle (system 134/135) sized for your leather’s thickness; a universal needle will tear holes and fray edges.
- A hand-sewn saddle stitch with two needles and waxed thread creates a seam stronger and more repairable than any machine lockstitch for leather over 3 oz (1.2mm).
- Wax your thread with beeswax before stitching, it reduces friction, helps the thread lay flat, and seals the stitch holes against moisture.
- For machine sewing, a heavy-duty walking-foot machine with a topstitch needle (size 18-21) and bonded nylon thread is the bare minimum; thin domestic machines will break.
- Glue before you sew, a thin contact cement holds layers in perfect alignment, preventing shifting that causes skipped stitches and ugly puckering.
Why Your Regular Sewing Advice Fails on Leather
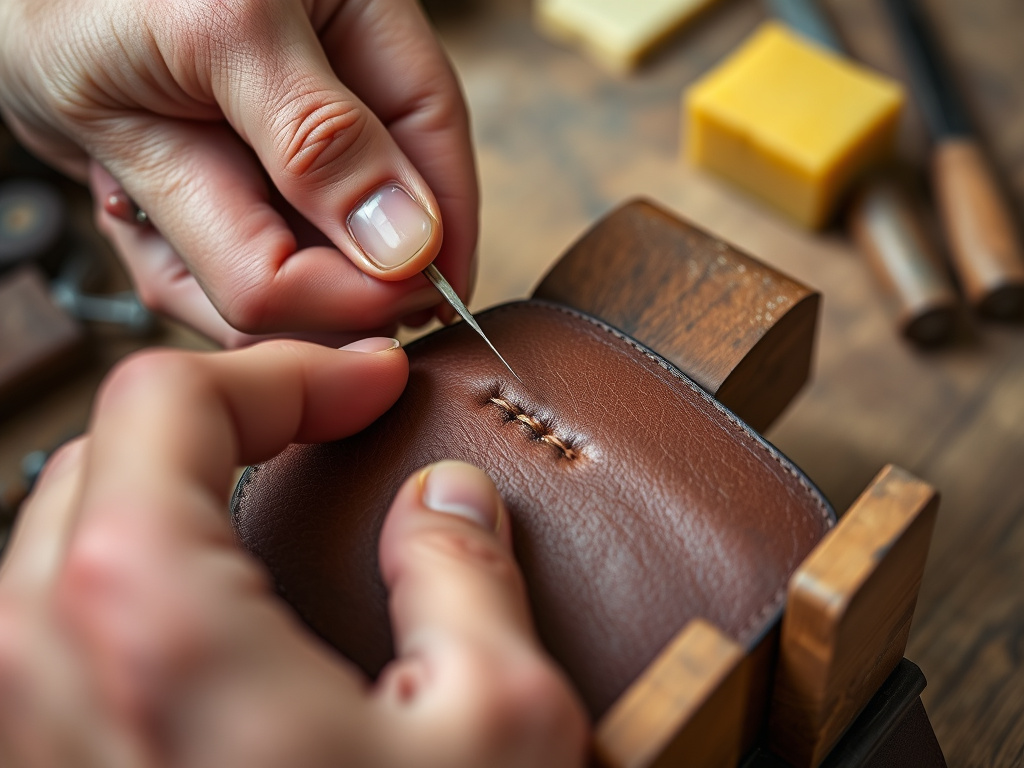
Leather behaves like a dense, fibrous board, not a woven textile. A cotton shirt yields and stretches around a thread. Leather doesn’t. The hole you punch or pierce is permanent, and the thread sits under constant abrasive pressure against its edge.
Machine lockstitches form by interlocking a bobbin thread loop with the upper thread inside the material. In leather, the rigid hole wall acts like a tiny blade against the upper thread’s lateral motion, causing fray, breakage, and skipped stitches on anything beyond light garment weight.
This is why most “how to sew” guides fall apart when leather enters the picture. They assume a flexible substrate. The friction, the tension, the needle, even the thread, all need recalibrating for a material that fights back. A domestic sewing machine set for denim will sound like it’s chewing rocks and snap its needle on 4-5 oz leather.
The part nobody mentions: The moment you hear a rhythmic thump-thump-thump instead of a smooth whirr, the needle is blunting against the leather with every plunge. Within a dozen stitches, a dulled universal needle tears rather than pierces. That’s what causes the ugly, frayed holes that ruin a clean seam line.
The Hand-Stitch Technique That Machines Can’t Beat
For centuries, the answer has been the saddle stitch. I’ve seen clients who swore they were all thumbs produce clean, professional seams once they used a stitching pony. It’s the tool that locks the work at a comfortable height, freeing both hands to manage the needles. Their first neatly stitched belt was a revelation, not because they suddenly gained skill, but because the right fixture removed the struggle.
The saddle stitch uses two needles, one on each end of a single length of waxed thread, working in opposite directions through the same hole. The threads cross and lock in the middle of the leather, creating a friction knot that can’t pull through. Even if one thread breaks, the other holds the stitch in place. A machine lockstitch? One break can unravel the whole seam.
Here’s the practical takeaway: A saddle-stitched seam distributes load across every independent lock. It’s also completely reversible, you can unpick it stitch by stitch for repairs. Try that with melted nylon thread in a machine seam.
Choosing Your Tools: Needles, Thread, and the Hole-Makers
For hand-sewing, John James Saddlers Harness needles in sizes 002 to 004 are the default. They’re sharp, strong, and have a long eye that fits thick thread. The needle size should match your hole: a 002 needle for fine work with 0.6mm thread, stepping up to a 004 for heavy belts with 1.0mm thread.
| Tool | Purpose | Why It Matters for Leather |
|---|---|---|
| Pricking Irons | Creates multiple perfectly aligned holes at once. | Ensures consistent stitch spacing and angle; an awl used freehand leads to wobbly lines. |
| Stitching Pony or Clamp | Holds the work piece firmly. | Frees both hands to control needle tension; prevents the leather from shifting and deforming the holes. |
| Beeswax Block | Coats thread before sewing. | Lubricates the thread, reducing friction and heat buildup; helps the thread lay flat and seals the hole. |
| Contact Cement (e.g., Barge All-Purpose) | Glues pieces before stitching. | Eliminates layer shifting; the seam becomes purely structural, not positional. |
Thread choice is essential. You need a continuous filament thread like Ritza Tiger Thread (linen-cores wrapped with polyester) or Meisi Superfine (synthetic). These don’t have a pile to abrade away inside the hole. Cotton-wrapped polyester will fray and fail. The thread thickness (0.6mm to 1.0mm) should be roughly half the thickness of the leather you’re joining.
Common mistake: Pulling each saddle stitch too tight. You’re locking the threads, not strangling the leather. Tighten until the thread just beds into the groove, any further and you’ll cut the thread against the leather and cause permanent puckering.
A Step-by-Step Guide to the Saddle Stitch
Let’s be clear about one thing: this is slow deliberately to create a permanent seam. Rushing it is how you get blisters and crooked lines.Set aside twenty minutes for your first six inches of seam.
- Punch Your Holes. Use a stitching wheel or pricking irons to mark your stitch line. Then, using a mallet, drive the pricking irons all the way through both layers of leather. This guarantees every hole aligns perfectly front to back. Skipping this and using an awl freehand is the single biggest cause of slanted, weak stitches.
- Cut, Wax, and Needle Your Thread. Cut a length about 3-4 times your intended seam length. Pull the entire length across a block of beeswax 3-4 times until it’s lightly coated. Thread a needle onto each end.
- Start the First Stitch. With your work secured in a stitching pony, take the right needle and pass it through the first hole from front to back. Pull it through until the thread is centered, with equal length on both sides.
- Create the Lock. For the second hole, pass the front needle (left) through from front to back, but don’t pull it tight yet. Immediately pass the back needle (right) through the same hole from back to front. Now pull both needles through. The threads have crossed and locked inside the hole.
- Repeat and Maintain Rhythm. Continue this pattern: left needle front-to-back, right needle back-to-front in the same hole, then pull through. Keep a consistent, moderate tension. The rhythm is push, cross, pull, not yank.
- Finish and Bury the Knot. On the last stitch, after crossing, run both needles back through the previous hole or two on the inside. Trim the threads flush. The wax will hold the ends in place.
Where this goes sideways: Using a single needle and trying to replicate a saddle stitch with a running stitch. That gives you a weak, abraded line on one side of the leather that will fail under stress within months.
When Machine Sewing Leather Makes Sense
The hand-stitch purist in me says always. The pragmatist knows time is a factor. For long, straight seams on production items, a specialized machine is viable, if you have the right one.
You need a true industrial walking-foot machine or a robust heavy-duty model like the Sailrite Leatherwork Sewing Machine. These have a higher presser foot lift (over 3/8 inch), a needle bar stroke powerful enough to punch through thick layers, and a feed mechanism that grips leather from above and below to prevent creeping. Your average home machine lacks the punch, the grip, and the torque.
Essential machine specs:
- Needle: Use a DBx1 or 135×17 leather needle (size 18-21). These have a sharp, triangular point to slice through hide.
- Thread: Bonded nylon (Tex 70 or 90) or polyester in the top and bobbin. Never use cotton thread.
- Stitch Length: Set between 3mm and 4mm. Longer stitches reduce the number of perforations in the leather, maintaining its strength.
- Tension: Must be balanced. Test on two layers of your project leather. The lockstitch should sit inside the layers, not on top.
A machine seam will never be as strong or repairable as a hand saddle stitch. But for internal linings, long decorative topstitching, or working with chrome-tanned leathers under 3 oz., it’s a fast, consistent alternative.
Frequently Asked Questions
What is the best stitch for sewing leather?
The saddle stitch is the best stitch for sewing leather by hand. It creates a locked, durable seam where each stitch is independent. For machine sewing, a straight lockstitch with a long stitch length (3-4mm) is the only appropriate choice, but it requires a heavy-duty machine.
Can you sew leather with a regular sewing machine?
You can sew thin, garment-weight leather (under 2 oz / 0.8mm) with a regular sewing machine if you use a leather needle (size 14/16) and heavy-duty polyester thread. However, the machine will be under high stress, and skipped stitches or broken needles are likely on anything thicker.
What kind of needle do you use to sew leather?
Use a triangular-point leather needle, designated as System 134 (DBx1) or 135 (135×17). These needles have a sharp, cutting point to slice through leather fibers cleanly, unlike a universal needle which pushes them aside and causes tearing.
Do you need special thread to sew leather?
Yes. You need a strong, continuous filament thread with low stretch. For hand-sewing, use waxed linen or synthetic threads like Ritza Tiger Thread. For machine-sewing, use bonded nylon (Tex 70/90) or heavy-duty polyester thread. Avoid cotton thread entirely.
How do you prevent leather from sticking under the presser foot?
Glue the seam first with a thin layer of contact cement and let it dry completely. This bonds the layers, preventing shifting. You can also use a Teflon or roller presser foot, which glides over the leather without grabbing.
Before You Go
The leather will tell you what it needs. If your needle is resisting, if the thread is fraying, if the seam is puckering, stop. Each is a sign of a mismatch between your tool and the material. Leatherworking rewards patience and correct fundamentals over speed.
For your first project, pick a small item like a key fob or a card holder in a medium-weight (3-4 oz) vegetable-tanned leather. It’s forgiving, marks easily for stitching, and develops a beautiful patina with use. Glue it, punch your holes with an affordable set of pricking irons, and take an afternoon to saddle-stitch it slowly. That first finished piece, with its crisp, locked stitches, teaches more than any guide can convey.
Then you’ll understand why a hand-stitched seam is a commitment to the object’s lifespan, not merely a method.
