
How to Soften Stiff Leather | Proven Methods & Expert Tips
This post contains affiliate links. As an Amazon Associate, we earn from qualifying purchases.
To soften stiff leather, first determine if it’s “new-stiff” or “dry-stiff.” For new, firm leather, manual flexing and light conditioning work. For dry, brittle leather, you need a deep-conditioning oil like pure lanolin for work gear or a lighter cream like Bickmore Bick 4 for fine garments. The key is matching the conditioner to the leather type and applying it in thin, buffed coats over several days.
That distinction between new stiffness and dryness decides your whole approach. New leather is often stiff by design, the fibers are tight and the finishes are fresh. Dry leather has lost its internal oils, and the fibers have literally shrunk and locked together. Treating one like the other wastes product and can cause damage.
What follows: a breakdown of why leather stiffens, the one tool that tells you it’s too dry, three conditioner types matched to their jobs, and the exact step-by-step process I use on everything from jackets to work gloves. You’ll also get the brands I reach for and the one popular oil I tell people to avoid.
Key Takeaways
- Leather stiffens either from new, tight fibers or from dried-out, shrunken fibers, the fix for each is different.
- Mink oil is a poor choice for most leather goods; it darkens heavily, can go rancid, and attracts dirt.
- Pure lanolin outperforms everything for reviving petrified work gloves and boots, but it’s too heavy for a dress jacket.
- Always test any new conditioner on a hidden spot (inside a belt loop) and wait 48 hours to check for darkening.
- The ISO standard for measuring leather softness uses a specific force and travel distance, proving softness is a measurable property, not just a feel.
Why Leather Gets Stiff in the First Place
It’s not a single problem. You have to know which one you’re dealing with, or you’ll use the wrong solution and maybe make things worse.
New leather is often stiff by design. Think about a thick, full-grain leather briefcase or a pair of sturdy Crazy Horse leather boots. The tannery infuses them with waxes and oils to build durability and water resistance. That initial firmness is a feature, not a bug. It softens predictably with heat from your body and the mechanical action of use. This is “new-stiff.”
Dry leather is a chemical problem. Leather is a network of protein fibers held in a matrix of natural oils. When those oils evaporate, thanks to dry winter air, air conditioning, or sitting near a heater, the fibers shrink. They pull closer together and bond. The leather loses flexibility and becomes brittle. If you hear a slight cracking sound when you bend it, you’re in dry territory. This is the stiffness that leads to permanent cracks in the grain.
ISO 17235:2011, Leather. Physical and mechanical tests. Determination of softness specifies a method using a cylindrical rod applying a force between 6.4 and 7.2 Newtons, lowered 11.5 mm in 1.5 seconds. The distension, measured to 0.1 mm, defines softness. This isn’t marketing. It’s a measurable property with a published standard.
Humidity is the silent variable. Leather wants a relative humidity between 40% and 50%. Below 40%, the air actively pulls moisture from the hide. Above 50%, you risk mold. A cheap hygrometer on your shelf tells you more about your leather’s long-term health than any conditioner bottle.
The Three-Step Process to Soften Any Stiff Leather
This isn’t a single trick. It’s a sequence. Skip a step, and you’ll get uneven results, greasy spots, or no improvement at all.
Step 1: Clean It (But Never With Just Anything)
Dirt isn’t just on the surface. Microscopic grit works its way between the leather fibers and acts like abrasive sandpaper, preventing them from flexing smoothly. You must remove this grit before any conditioner can penetrate.
Use a dedicated leather cleaner. Saddle soap is too harsh for anything but a saddle or heavy work boot, it strips too many oils. For a jacket, bag, or shoes, a pH-balanced leather cleaner like Lexol Leather Cleaner is the start. The rule from a Toyota service bulletin is solid: apply the cleaner to a microfiber cloth first, then wipe the leather. Never spray directly onto the hide. That avoids over-saturation in one spot, which can cause water spots or finish damage.
Let it dry completely. This takes longer than you think. Give it a full 24 hours at room temperature before moving to conditioning. Rushing this step means you’ll seal moisture under the conditioner, which can lead to mildew.
Step 2: Condition Based on Leather Type and Stiffness Cause
This is where most guides give vague advice. I don’t. Here’s exactly what to use and when.
| Leather Type & Scenario | Recommended Conditioner | Why It Works | What to Avoid |
|---|---|---|---|
| Dry, Vegetable-Tanned Work Leather (belts, tool holsters, work boots) | Pure neatsfoot oil or lanolin | Penetrates deeply, replaces lost oils, remains flexible. | Silicone sprays; they sit on top and dry the leather long-term. |
| Fine Garments & Accessories (jackets, handbags, dress shoes) | Light cream (Bickmore Bick 4, Chamberlain’s Leather Milk) | Absorbs completely without greasy residue, minimal darkening. | Mink oil (too darkening), heavy waxes. |
| New, Waxed Leather (Crazy Horse boots, waxed jackets) | Light conditioning cream + manual flexing | Cream adds slight moisture; flexing warms and moves the waxes. | Heavy oils that will oversoften and reduce water resistance. |
| Suede or Nubuck | Suede-specific conditioner spray | Nourishes without matting the delicate nap. | Any standard conditioner cream or oil—it will ruin the texture. |
The mink oil mistake. Let’s be clear about one thing: mink oil is a terrible conditioner for most leather goods. It darkens leather significantly, can turn rancid over time, and its greasy nature attracts dirt. Its only appropriate use is on rugged, outdoor work boots where darkening doesn’t matter and water resistance is the only goal.
My go-to brands: For fine leathers, Bickmore Bick 4 is almost invisible. For a balance of nourishment and protection on boots, Obenauf’s Leather Oil. For a light, fast-absorbing option, Chamberlain’s Leather Milk. I have a tin of pure lanolin in my workshop for one job: reviving work gloves.
Application is everything. Warm the conditioner in your palms first. For an oil like neatsfoot, this makes it thin and ready to penetrate. Apply a thin coat, so thin you almost can’t see it, with your fingers or a soft cloth. Rub it in until your hand feels dry. Buff off any excess with a clean cloth immediately. A second thin coat tomorrow is better than one thick, suffocating coat today.
Step 3: Buff and Break In Manually
Conditioner rehydrates the fibers, but you still need to convince them to move again. This is the manual break-in.
Empty the bag or put on the jacket. Gently roll, twist, and knead the stiffest panels. Don’t force it to the point of straining stitches. The goal is to gently work the newly conditioned fibers. For boots, wear them with thick socks around the house for an hour after conditioning.
Heat helps, carefully. A hairdryer on a low or medium setting, held 6-8 inches away, can warm the leather. It should feel warm to the touch, never hot. This mimics body heat and helps the conditioner migrate. Always apply conditioner before using mild heat, not after.
Common mistake: Using too much product. An over-conditioned piece turns sticky, feels clammy, and the excess product clogs the leather’s pores. This actually weakens the fibers over time. If you’ve overdone it, wipe the surface down with a slightly damp cloth and let it dry fully before wearing.
How to Soften Specific Leather Items
The core process is the same, but the devil is in the details for different items.
Softening a Leather Jacket or Bag
These are often made from thinner, more finished leathers. The fear is over-darkening and losing the drape.
- Clean with a dedicated leather cleaner.
- Pick a light conditioner like Bickmore Bick 4. Test on the inside of a hem or pocket flap.
- Apply a whisper-thin coat, focusing on high-flex areas like elbows on a jacket or the bottom of a bag.
- Let it absorb for 24 hours.
- Wear the jacket or gently manipulate the bag. The natural heat and movement from use will do more than any chemical in the long run.
Softening Leather Boots or Work Gloves
Here, durability and water resistance matter more than a perfect patina. You can use heavier products.
My documented experience with lanolin is the guide here. A pair of Wells Lamont work gloves had become nearly petrified, stiff enough to stand on their own. I warmed a dab of pure lanolin in my hands until it was soft, rubbed it thoroughly into every part of the gloves, and set them aside. Not for a day. For a full week. When I picked them up again, they were pliable. Not just slightly better, genuinely supple. They beaded water for months afterward. Warming the lanolin first was the trick; cold, it just sits on the surface.
For boots, the same logic applies. Neatsfoot oil or a heavy-duty leather oil is your friend. Condition the outside, but also unlace them and treat the interior lining if it’s leather. A leather conditioner needs to reach the fibers from both sides for a truly flexible boot.
What Not to Do: Methods That Damage Leather
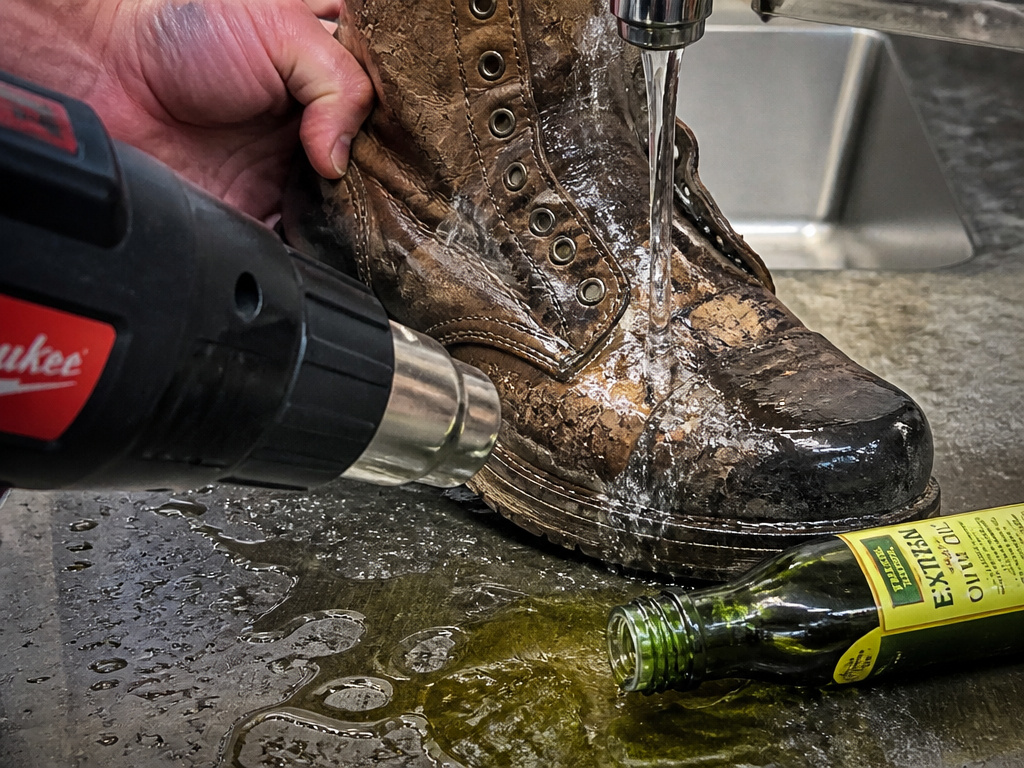 Good intentions ruin a lot of leather. Here are the practices to abandon immediately.
Soaking leather in water. This is a desperate, destructive move. As one expert noted, if leather gets wet and dries too quickly, the fibers can bond together and create a permanent rigidity. You’re trading temporary pliability for long-term damage. The NHTSA bulletin about using a steamer on leather seat wrinkles is a professional, controlled technique for a specific problem, it’s not a DIY softening method.
Using household oils or unproven balms. Olive oil, coconut oil, avocado oil, they might make the leather feel softer initially, but they oxidize over time. They can go rancid, smell bad, and don’t behave like stable leather conditioners. Stick to products formulated for the job.
Applying heat from a heat gun or high dryer setting. High heat bakes the moisture and oils right out of the leather. You’ll see the surface become shiny and hard, a sign the fibers are being cooked. Once that happens, the damage is irreversible.
Where this goes sideways: Using a silicone-based “conditioner” for a quick shine. It creates a plastic-like barrier that feels slick but does zero nourishing. The leather underneath continues to dry out, and within a year, it cracks because the fibers got no real sustenance. You’re left with a cracked, plastic-coated mess.
Frequently Asked Questions
Can I use water to soften leather?
No. Water displaces natural oils and, as it evaporates, can cause fibers to shrink and bond more tightly. If your leather gets wet and feels stiff, apply a high-quality conditioner while it is still slightly damp to lock in that moisture before it escapes.
How long does it take to soften stiff leather?
With the right conditioner, you’ll feel a difference after the first 24-hour absorption period. For deeply dry leather, multiple light applications over a week are standard. For new, waxed leather like a Crazy Horse leather bag, daily use will soften it noticeably within two to four weeks.
Will conditioning permanently darken my leather?
Quality conditioners like Bick 4 cause minimal, often imperceptible darkening. Heavy oils like mink oil or neatsfoot oil will darken significantly. This darkening is usually permanent but can mellow slightly as the oil fully absorbs over 48 hours. Always test first.
Can I soften coated, patent, or vegan leather?
Patent and heavily coated leathers have a plastic layer that conditioner cannot penetrate. You cannot soften them from the inside out. Vegan leather is a plastic polymer; conditioning it is useless and may damage the coating. For these, only gentle flexing and use will soften them slightly.
Why does my leather feel stiff only in winter?
Winter air has low relative humidity, often well below the 40% leather prefers. The dry air actively pulls moisture from the hide. Placing a small humidifier in the room where you store your leather goods can prevent this seasonal stiffening.
Before You Go
One threshold changes everything: if the leather grain is already cracked, the damage is structural. You can condition it to prevent further drying, but you cannot restore the broken fibers to a supple state. That’s the line.
Your first step this week isn’t to buy a conditioner. It’s to find a hidden spot on your stiffest leather item, the inside of a belt, the back of a collar, and do a gentle flex test. Listen. If it’s silent, you’re dealing with new stiffness. If it whispers or cracks, it’s dry. That one diagnostic tells you which column of the conditioner table to use.
The leather will tell you what it needs. Your job is to listen and match the solution to the problem, not to the marketing on the bottle. Start with a clean surface, a thin coat of the right stuff, and a lot of patience. That’s the recipe that works every time.
