
How to Make Leather Patterns | The Standard Plan Method
This post contains affiliate links. As an Amazon Associate, we earn from qualifying purchases.
To make leather patterns, you need a clear design, precise measurements, a durable drafting material like cardstock, and a methodical process that adds seam allowances and manufacturing marks. The goal is a template that translates your idea into a physical leather piece with minimal waste and predictable assembly.
That translation from sketch to hide is where most projects succeed or fail before a blade ever touches leather. A pattern drafted to a recognized industry standard isn’t just a shape; it’s a set of verified instructions that accounts for material behavior, construction sequence, and the inevitable drift of hand-drawn lines.
What follows is the method I’ve settled on after years of trial and error: the concept of a standard plan, the two pattern types you’ll actually use, and the seven steps that move an idea from your head to your workbench.
Key Takeaways
- Simple patterns define shape and size; detailed patterns include every hole, fold, and hardware mark. Starting with a detailed pattern for complex items prevents assembly confusion.
- Always draft on cardstock, not printer paper. The stiffer material holds its shape during tracing and withstands repeated use.
- A “standard plan” is your foundational template. It’s the mean form outline for a specific last and process, which you then adapt for different styles or materials.
- Add seam allowances consistently after the net pattern is perfect. Inconsistent allowances are the top cause of pieces that don’t fit.
- Test with cheap vinyl or craft felt before cutting leather. The material behaves more like leather than cardboard, revealing fit issues paper masks.
The 2 Pattern Types and Why They Matter
You have two paths: simple and detailed. A simple pattern is an outline. It might be a rectangle for a belt or an oval for a key fob. It says, “cut here.” A detailed pattern is a full set of assembly instructions rendered in ink: stitch lines, snap placements, fold lines, and the exact center point. The SICC Pattern Making and Engineering Manual frames this as the difference between a net pattern and a cutting pattern. The net pattern has no allowance; the cutting pattern adds the sewing and folding margins.
Where this goes sideways: Using a simple pattern for a multi-piece item like a bag. You’ll spend the assembly phase guessing where holes align, and the final seams will wander.
I learned this watching a student struggle with a bifold wallet. Their pattern was a single rectangle for the back panel. They had to measure and punch each stitch hole freehand during assembly. The result wasn’t bad, but the stitch spacing was visibly irregular on one side. This is a tell that betrays handmade-from-a-blank efforts. On their next attempt, they used a detailed pattern with pre-marked hole spacing. The stitches landed in perfect rows, and the wallet looked professional. The time “saved” on the first pattern was tripled during the frustrating assembly.
Which one should you use? For any project with more than two pieces or any functional hardware (snaps, zippers, buckles), go detailed. For practice pieces, tooling panels, or simple straps, a simple outline is fine. Most of your serious work will live in the detailed category.
The Professional’s Framework: Understanding the Standard Plan
Industrial patternmaking doesn’t start from scratch for every shoe or bag. It starts with a standard plan, which is a master template. The SICC manual defines it as a plan “established for a given last and a determined shoe manufacturing process” that serves “for all models which can be accommodated with the said plan.” In your shop, your “last” is your core design idea; your “process” is your chosen construction method.
Think of your first successful wallet pattern as your standard plan for wallets. You can tweak its pocket count or fold style without redrawing the fundamental proportions. This isn’t laziness; it’s efficiency and accuracy. The manual lists the advantages: increased pattern accuracy, higher efficiency, and the application of standardization.
The shoe last inside side is different from the outside and as a result the corresponding last copies are also different. Very often the outside length will be shorter than the inside, the forepart width will be greater on the outside than on the inside and the top and bottom lines will show different curves.
This single observation from the SICC manual is why mirroring a shape in software or with tracing paper often fails for 3D items. Your pattern must account for asymmetric curves. If you’re drafting a sheath that wraps a contoured handle, the inside and outside panels won’t be identical. A standard plan built from a careful mean form outline respects this.
| Plan Type | Best For | When It Fails |
|---|---|---|
| Standard Plan | Core product families (e.g., all clutch wallets) | When you switch to a radically different material (suede vs. Stiff bridle) or construction (hand-lasted vs. Machine-lasted). |
| Model-Specific Plan | One-off art pieces or radical new designs | When you try to reuse it for a similar-looking item; the small curve differences cause poor fit. |
| Adapted Plan | Iterating on a proven design (adding a gusset, changing a flap) | If the adaptation violates the original plan’s foundational geometry, the pieces won’t assemble. |
Your Pattern-Making Toolkit: Analog and Digital
Your tools dictate your precision. A ballpoint pen on a napkin is a valid start, but it won’t get you to a repeatable template.
The Analog Essentials:
- Cardstock: This is your drafting medium. Cereal box cardboard works in a pinch, but dedicated cardstock (like that used for scrapbooking) is thicker and won’t curl. It accepts pencil, survives a pricking wheel, and can be filed.
- Precision Measuring: A clear quilting ruler with a 1/32″ grid, a metal ruler for cutting, a French curve for organic shapes, and a compass for perfect circles and consistent seam allowances.
- Transfer Tools: A pricking wheel (a small wheel with sharp teeth) is the traditional way to transfer a paper pattern onto leather. You roll it along the pattern lines, and it leaves a dotted impression. A stylus or dry ballpoint pen also works for tracing.
The Digital Shift:
Software like Adobe Illustrator turns pattern making into a precision exercise. The pen tool draws perfect curves, the offset path tool adds consistent seam allowances in one click, and the align function guarantees symmetry. As one YouTube creator noted, it allows for neat, consistent, and mirrored designs effortlessly. The learning curve is real, but for anyone planning to make more than a few patterns, it’s a worthy investment. It turns a craft into a scalable design process.
Whether you choose hand-drawing or digital drafting, the next step is where the real work happens.
The 7-Step Pattern Process, Start to Finish
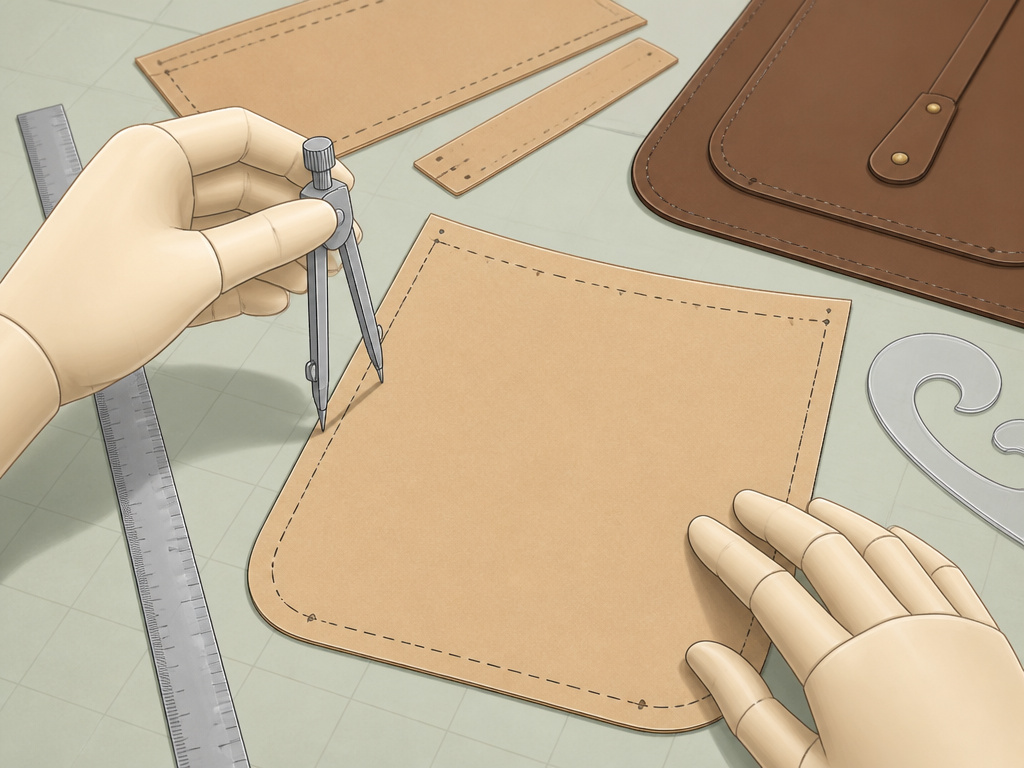
This sequence moves from a fuzzy idea to a tested template ready for leather.
1. Sketch and Deconstruct.
Don’t draw the final product. Draw its pieces. A bag isn’t a bag; it’s a front, a back, a gusset, a strap, and a closure. List every single component. If you’re stuck, practice reverse engineering. Buy a simple, well-made item from a thrift store, take it apart carefully, and press the pieces flat. You now have a physical example of how a professional pattern engineer solved the assembly puzzle.
2. Draft the Net Pattern.
Using your cardstock and tools, draw each piece at its exact final size. Do not include seam allowances yet. This is your net pattern. Accuracy is essential here. Use your French curve for smooth contours. If you’re digitally inclined, this is where you master the pen tool in Illustrator. The goal is a set of perfect, flush-fitting puzzle pieces.
3. Add Manufacturing Allowances.
Now, add your margins. The SICC manual states this is done “with the aid of compasses.” A seam allowance (typically 3/32″ to 1/8″ for hand-stitching) is added to every edge that will be sewn. A fold allowance (maybe 1/4″ for a hem) is added where leather will turn over. Consistency is everything. An uneven 1/8″ allowance will cause one side of a stitch line to pucker.
4. Detail the Pattern.
Mark everything. Center lines, stitch hole dots (using an overstitch wheel or calculated spacing), snap placement centers, fold lines (dashed), and grain direction arrows. This changes your shape into an instruction manual. For complex curves that wrap a 3D form, you may need to pivot. This means straightening a curve slightly so it lays correctly during construction. The manual calls this out as a specific technical problem to solve with ingenuity.
5. Cut and Test the Paper Prototype.
Cut out your cardstock pattern pieces. Assemble them with masking tape, literally building a paper version of your project. Does the gusset length match the perimeter of the front and back? Does the flap cover the opening? This step reveals geometry errors that are invisible in 2D.
6. Create a Fabric Prototype.
Paper lies. It has no thickness, no stretch, no drape. Before you commit to leather, make a prototype from a cheap material that behaves similarly. Many pros recommend craft felt or heavyweight vinyl from a fabric store. As the YouTube creator emphasized, for something like a shoe, craft felt behaves more like leather than cardboard. Stitch this prototype together. This test reveals tension issues, fit problems, and assembly sequence errors.
7. Finalize and Store.
Make any final adjustments to your cardstock master. Then, label it clearly with the project name, date, leather type intended, and any special notes. Store it flat in a portfolio or large folder. A good pattern is an asset you’ll return to for years.
The 3 Most Common Pattern Mistakes (And How to Fix Them)
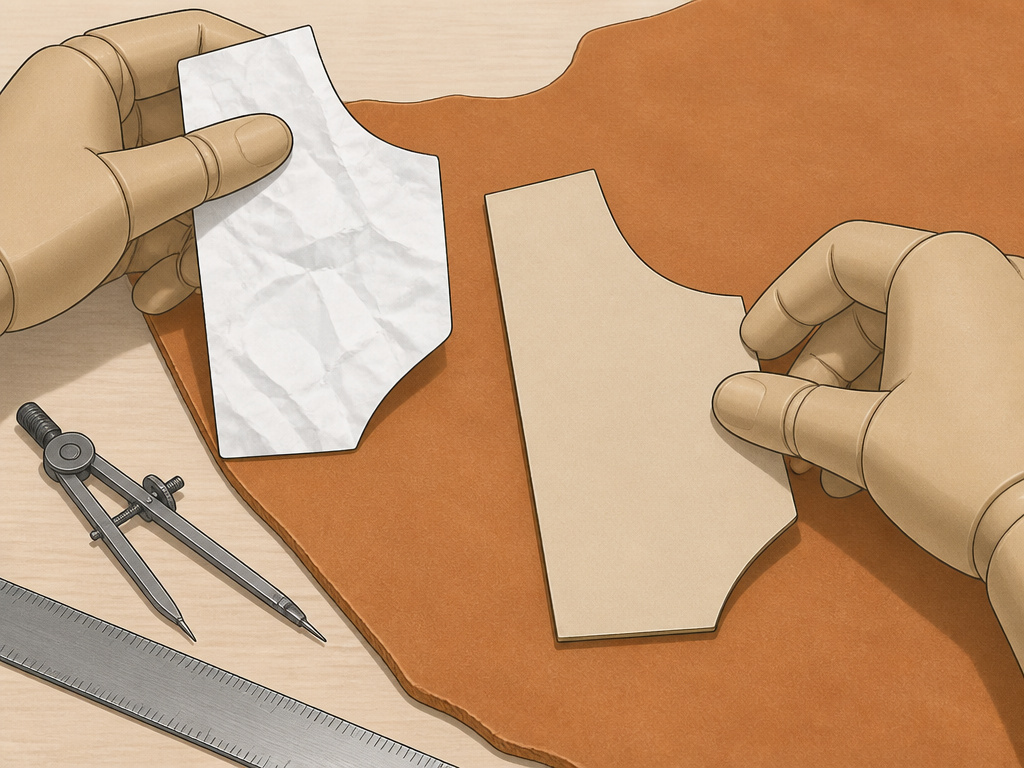
These errors waste more leather than any miscut.
Mistake 1: Drafting on Flimsy Paper.
Printer paper stretches, tears, and shifts during tracing. Your carefully measured curves distort.
Fix: Use cardstock from the start. It’s a trivial cost that pays off in accuracy every time you use the pattern.
Mistake 2: Inconsistent Seam Allowances.
Adding 1/8″ here and 3/32″ there means pieces won’t meet at the stitch line. The seam stretches or bunches.
Fix: Use a compass or the offset path tool in your design software. Apply the allowance in a single, measured action to the entire edge.
Mistake 3: Skipping the Fabric Prototype.
Confidence is not a substitute for a material test. A design that looks perfect in paper can collapse when asked to hold a 3D shape.
Fix: Always budget time and a few dollars for a craft-felt run. It’s cheaper than ruining a $80 square foot of shell cordovan. This step is the single biggest differentiator between a hobbyist and a serious maker.
From Pattern to Leather: The Transfer Methods
You have a perfect cardstock pattern. Now you need to get its lines onto the hide.
- Pricking Wheel & Powder: Place the pattern on the leather. Roll the pricking wheel firmly along all lines. Lift the pattern, and rub powdered chalk or pencil lead over the dotted impressions. The powder settles in the holes, revealing a dotted line. This is the classic, low-tech method praised for its accuracy.
- Stylus Tracing: Use a stylus or a dried-out ballpoint pen to trace heavily over the pattern lines, pressing an indentation into the leather underneath. Good for firm, vegetable-tanned leathers.
- Carbon Paper: Place dressmaker’s carbon paper (chalk side down) between the pattern and leather. Trace with a stylus. Can be messy but is very fast for simple shapes.
- Direct Adhesive: Spray a light coat of temporary adhesive (like Spray Mount) to the back of your cardstock pattern and stick it directly to the leather. Cut around it, then peel the pattern off. This is excellent for complex shapes with interior cutouts, but you must be certain of your placement.
Common mistake: Tracing with a sharp pencil or pen directly on the leather. It can leave a permanent stain or groove that won’t tool or finish evenly. Use an impression method, not an ink method.
Frequently Asked Questions
What’s the best software for making digital leather patterns?
Adobe Illustrator is the industry standard for vector-based pattern design due to its precision pen tool, offset path function, and powerful align/distribute tools. Affinity Designer is a capable, one-time-purchase alternative. For strictly geometric or parametric patterns, CAD software like Fusion 360 can be used, but it has a steeper learning curve.
How much seam allowance should I add?
For hand-stitching with a typical 3mm diamond chisel, a 3/32″ (2.4mm) to 1/8″ (3.2mm) allowance is standard. For machine stitching, follow the machine’s foot guide, often 1/4″. For folded edges (like a bag top), the allowance depends on the fold thickness; 1/4″ to 1/2″ is common. Always add the allowance outward from your net pattern line.
Can I use a pattern meant for fabric on leather?
You can use it as a starting point for shape, but fabric patterns include “ease” for drape and often have much smaller seam allowances. Leather doesn’t drape like cloth, and its seams are bulkier. You must critically adjust any fabric pattern for leather’s rigidity and thickness, and you should still create a physical prototype to test the modifications.
How do I scale a pattern up or down?
Digitally, you can scale artwork proportionally in your design software. By hand, use a photocopier with percentage scaling or employ a grading ruler. The crucial part is scaling all pieces uniformly and then re-testing the prototype. Scaling changes the relationship between curves, which can affect assembly.
Before You Go
The real secret isn’t in making one perfect pattern. It’s in building your library of trusted standard plans. Start with a simple card holder or a straight belt. Perfect that pattern, make it three times in leather, and note where your markings could be clearer. That pattern becomes your foundation. The next time you design a slim wallet or a tapered belt, you’re not starting from zero. You’re adapting a proven template.
Ignore the temptation to jump straight into a complex, 15-piece bag for your first project. Complexity is the enemy of learning. Master the fundamentals of measuring, allowance, and prototyping on a small scale. The confidence and material you’ll save is the best investment you can make in your craft. Now, take that first sketch, grab some cardstock, and start deconstructing your idea into its component parts. The leather is waiting.
