
The Complete Guide on How to Polish Leather Boots Properly
This post contains affiliate links. As an Amazon Associate, we earn from qualifying purchases.
This post contains affiliate links. As an Amazon Associate, we earn from qualifying purchases.
Polish leather boots by first cleaning them with a damp cloth and a dedicated leather cleaner to remove all dirt. Next, apply a leather conditioner and let it absorb fully. R.M.Williams recommends this every 2-3 months. Finally, apply a color-matched cream or wax polish in thin layers, buffing each to a shine with a soft cloth or brush.
Let me share what I’ve learned. A great shine starts long before the polish tin is open. The difference between a glowing patina and a cracked, cloudy finish isn’t the brand you use. It’s the prep work underneath.
What follows: a breakdown of the three products you actually need, a step-by-step walkthrough of the clean-condition-polish protocol, and the one mistake that ruins more boots than anything else.
Key Takeaways
- Polish adds shine and color but does not condition or nourish leather. Conditioning is a separate, essential step.
- Never polish dirty, wet, or unconditioned leather. You seal in grime and moisture, which leads to cracking.
- Match your polish type to your leather: cream polish for nourishing shine on pigmented leathers, wax polish for high gloss on dress boots.
- Suede, nubuck, and heavily oiled leathers like greasy kip should never be polished with traditional wax or cream.
- A quality horsehair brush and soft cotton cloths are more important than an expensive polish.
Why Polish at All? It’s Not Just About Shine
Here’s the thing. We polish boots for two reasons: aesthetics and a thin layer of protection. The wax or pigment in polish fills microscopic scratches, evens out color, and creates a sacrificial barrier against scuffs and light moisture. But this is cosmetic surgery, not internal medicine. Polish sits on top. The health of the leather, its flexibility and resistance to drying, comes from the conditioner you apply first.
I once thought you could buff out any scratch. Then I encountered a deep gouge that required filling with a leather cement compound before any polish could even be applied. That experience drove the point home: polish masks minor wear, but it cannot repair damage or replace lost oils. It’s the final step, not the first line of defense.
The Clean, Condition, Polish Protocol (Step-by-Step)
This is the required sequence. Skip a step, and you compromise the entire result.
Step 1: The Critical Clean
Start with a completely dry boot. Mud or dirt should be removed when still wet, according to R.M.Williams, but the final clean for polishing happens once the boot is dry. Use a damp cloth to wipe away any surface dust. For ingrained dirt, use a dedicated leather cleaner like the Tecovas Basics Foam Cleaner or R.M.Williams Leather Cleaner. Apply it to a cloth, not directly on the boot, and work in small circles.
Common mistake: Polishing over dust. The resulting slurry of polish and grit acts like fine-grit sandpaper, dulling the finish with every subsequent buff.
Let the boot dry fully. Leather needs a full day to dry from natural perspiration, so a post-clean drying period is non-negotiable.
Step 2: Condition – The Foundation of Health
Conditioning replaces the natural oils that cleaning strips away. My rule is to apply conditioner in small, circular motions with my fingers; the warmth helps it penetrate better than using a cloth alone. Use a product like Saphir Médaille d’Or Renovateur or Collonil 1909 Leather Cream.
Apply a thin, even layer over the entire boot, paying extra attention to dry areas like the flex points at the toe and ankle. Let it absorb. R.M.Williams advises letting conditioner penetrate for about an hour. Buff off any excess with a clean cloth. The leather should look nourished, not greasy.
Why this order matters: Conditioner needs open pores to sink in. Polish seals the surface. If you polish first, the conditioner cannot penetrate, leaving the leather to dry out underneath a shiny shell.
Step 3: Polish – Building the Shine
Now, and only now, do you reach for the polish. Here’s some straightforward advice: use a color-matched cream polish for most boots. Dab a small amount onto a soft cloth or applicator brush. Apply in tight, circular motions, covering one small section at a time.
Let it dry for a few minutes, you’ll see the finish turn from wet to a hazy matte. Then, buff with a clean, soft cloth or a dedicated shining brush. Use quick, straight-line strokes for heat and friction. That friction melts the waxes slightly, which is what creates the shine. Repeat with a second thin coat for a deeper luster.
The short version: Clean dirt, feed the leather, then top it with shine. That’s the whole game.
Choosing Your Polish: Cream, Wax, or Liquid?
Not all polishes are the same. Using the wrong type on your leather is a fast track to a bad result.
| Polish Type | Best For | What It Does | Risk If Misused |
|---|---|---|---|
| Cream Polish (e.g., Saphir Médaille d’Or Pommadier) | Pigmented, finished leathers (calfskin, yearling) | Adds slight pigment, nourishes with oils, gives a soft, healthy shine. | Can darken or stain porous leathers like suede or unfinished veg-tan. |
| Wax Polish (e.g., Kiwi Parade Gloss) | Dress boots, high-shine toes on any leather. | Builds a thick, protective, high-gloss layer. Excellent for capping a cream polish base. | Over-application creates a thick, crackable shell that inhibits breathability. |
| Liquid Polish | Quick touch-ups, covering scuffs. | Dries fast, offers convenient application. | Often contains solvents that can dry leather over time. Poor depth of shine. |
For your primary boot polish, a quality cream is the default pick. Wax is for the final mirror-like layer on a cap toe. I avoid liquid polishes entirely for routine care; they’re a temporary fix, not a care product.
The Leathers You Should Never Polish
This is a timeless material, but it’s not all treated the same. Applying standard polish to these leathers will ruin their character.
Suede & Nubuck: These have a raised nap. Polish will mat it down permanently, creating dark, ugly smears. Lucchese explicitly says to avoid polish or creams on suede. Clean them with a suede brush and eraser only.
Oily & Greasy Leathers (Greasy Kip, Vesta): Leathers like R.M.Williams greasy kip are tanned with oils and waxes for a rugged, self-conditioning finish. The manufacturer warns that using their Stockman’s Boot Polish on these “drastically changes the colour of the boots.” You’ll turn a matte, rugged finish into an unnatural, shiny mess.
Aniline & Vegetable-Tanned Leathers: These porous, unfinished leathers develop a patina through use and exposure. Polish will clog the pores, halting the patina process and creating an uneven, plastic-like coating. Condition them, but let them age naturally.
Tools of the Trade: You Don’t Need Many
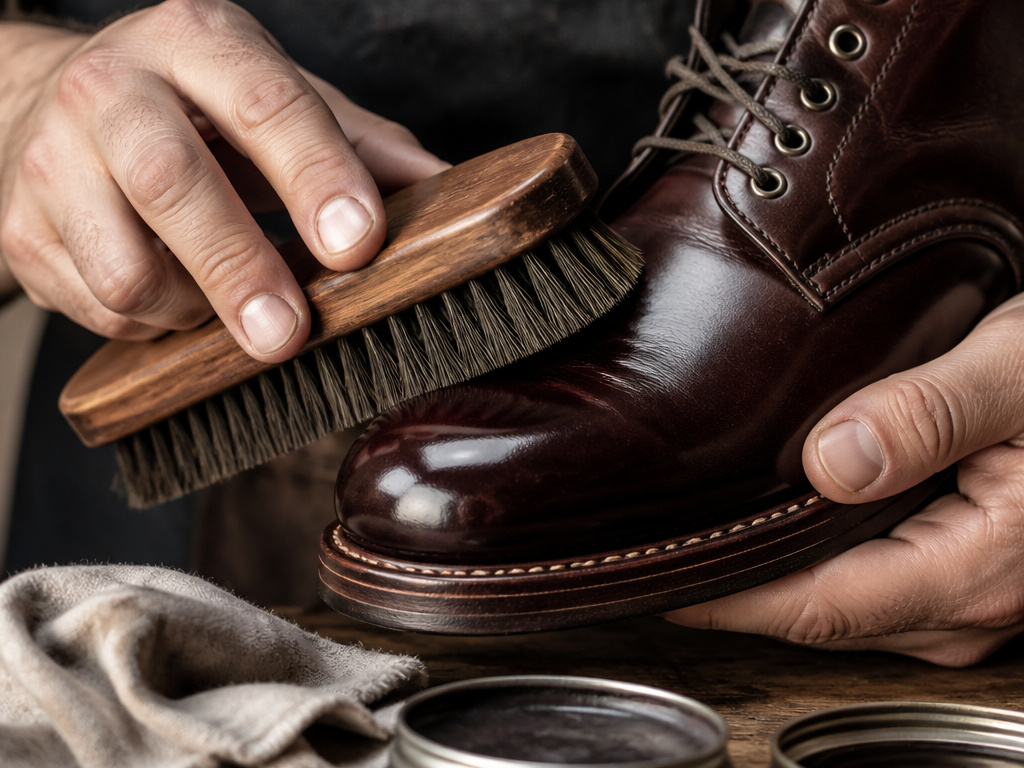
A complicated kit isn’t necessary. You need a few good items: – Soft Cotton Cloths: Old t-shirts work perfectly. Have several, one for applying conditioner, one for polish, one for final buffing. – Horsehair Brushes: Two are ideal: a stiffer brush for applying polish and a soft one for buffing. The horsehair is gentle on the leather. – Applicator Brushes (Optional): Handy for getting polish into welt stitching. – Shoe Trees: Cedar shoe trees absorb moisture and maintain shape. R.M.Williams calls them a “must” for boots that have gotten wet.
The brush does most of the work. A sixty-second vigorous buff with a quality horsehair brush can produce a warmer, deeper shine than ten minutes of hand-buffing with a cloth. The friction generates just enough heat to smooth the wax layer.
The One Step Everyone Rushes (And Why It Matters)
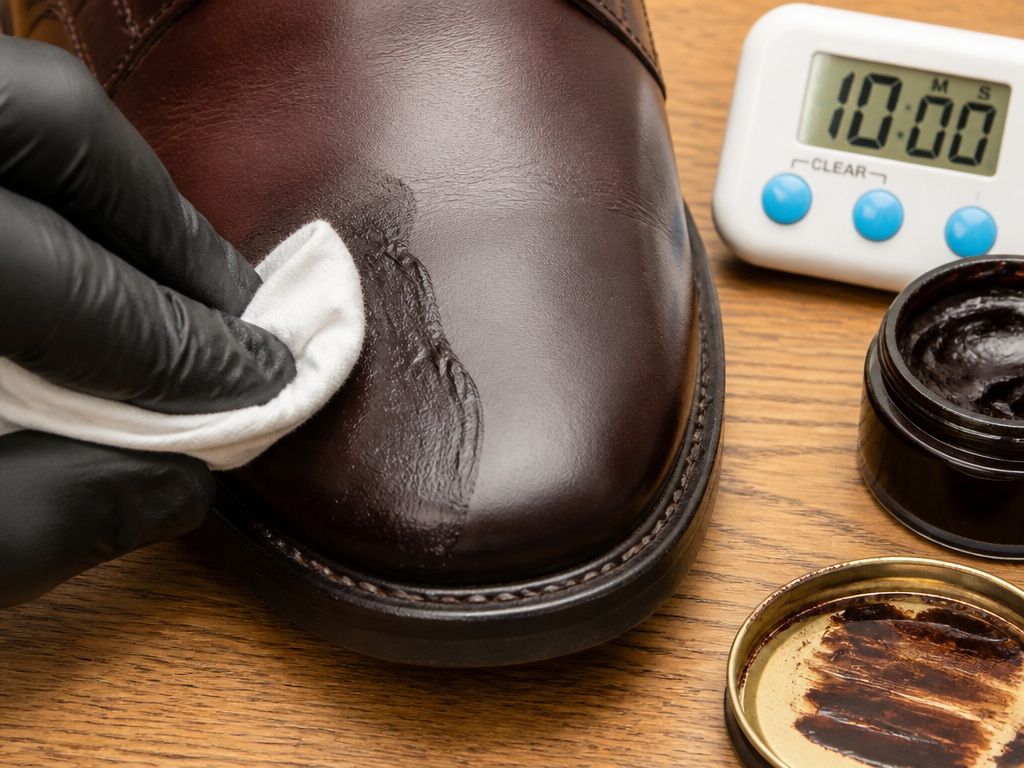
It’s the drying time. After applying conditioner, you must wait. After applying a coat of polish, you must wait. R.M.Williams recommends letting conditioner penetrate for about an hour. Polish needs at least five to ten minutes to dry to a haze before buffing.
What happens if you buff too soon? The polish is still wet. Instead of smoothing into a shiny layer, it smears, gums up, and creates a cloudy, uneven finish. You’ll work twice as hard for half the shine. Set a timer. Walk away. Let the products do their job.
This patience pays off in the long run, which is the core of any good leather boot care routine.
How Often Should You Polish Your Boots?
There’s no universal schedule. It depends entirely on wear and the look you want. – Dress Boots (Worn in Office Settings): A light polish every 2-4 weeks maintains a sharp appearance. – Casual or Work Boots: Polish only when they look scuffed or dull, perhaps every 2-3 months. Focus more on regular cleaning and conditioning. – High-Shine “Spit-Shine”: This is a specialized technique for parade gloss. It’s not routine maintenance and requires multiple thin layers built up over time.
The leather itself gives you signals. Does it look dry or faded? Condition it. Is it covered in fine scratches and scuffs? Time to polish. Let the boot’s condition guide you, not a calendar.
Frequently Asked Questions
Can you polish boots without conditioner?
You can, but you shouldn’t. Polish adheres best to a clean, conditioned surface. Applying polish to dry leather seals it in a dehydrated state, which can lead to cracking over time. Always condition first.
What’s the difference between shoe polish and boot polish?
Nothing substantial. “Boot polish” often comes in larger tins and may have slightly heavier waxes for durability, but a high-quality cream like Saphir Médaille d’Or works excellently for both polishing shoes and boots. The technique is identical.
How do you remove old, caked-on polish?
Use a leather cleaner or saddle soap (sparingly) to strip the old layers. Apply with a damp cloth, scrub gently, and wipe away the residue. Let the boot dry completely for 24 hours, then condition thoroughly to replace lost oils before applying new polish.
Does polishing waterproof boots?
No. Polish adds a slight water-resistant sheen, but it is not a substitute for a dedicated waterproofing product for leather. For true wet-weather protection, you need a silicone or wax-based protector applied after conditioning and before polishing.
Can you use the same polish on different colored boots?
No. Using a darker polish on a lighter boot will permanently dye it. Always match the polish color to the boot. For a family of brown boots, you might need two or three pots of the best leather shoe polish in varying shades.
Before You Go
Polishing isn’t a chore to rush through. It’s the final act of caring for a practical, durable material. The goal isn’t a plastic-perfect coat but a rich, deep luster that comes from layers of proper care.
Remember the order: clean, condition, then polish. Invest in a good cream polish like Saphir or Collonil and a set of horsehair brushes. And never, ever polish suede.
Your boots will tell you what they need. A faded toe needs color. A stiff ankle needs conditioner. Listen to them, apply the right remedy, and they’ll last for decades. That’s the real secret.
