
Methods for How to Remove Scratches from Leather Shoes
This post contains affiliate links. As an Amazon Associate, we earn from qualifying purchases.
This post contains affiliate links. As an Amazon Associate, we earn from qualifying purchases.
To remove scratches from leather shoes, first identify the scratch depth: surface transfer, color loss, or a deep gouge. Clean the area, then treat it with the right product, a cream polish for color, a leather filler for grooves, before conditioning and protecting the leather. The wrong product makes the damage permanent.
That depth check is the whole game. A black streak from a curb and a cut from a sharp edge are different injuries requiring different first aid. Treat them the same and you’ll lock the damage in place or create a shiny, obvious patch that’s worse than the original mark.
What follows is a walkthrough of the three scratch types, the specific products for each, and the one mistake that turns a simple fix into a cobbler’s bill. By the end, you’ll be able to diagnose any mark in ten seconds and know exactly what to reach for.
Key Takeaways
- Run your fingernail across the scratch. If it catches, you need a filler like Leather Hero Filler Paste before any color touch-up. If it’s smooth, a pigmented cream polish will do.
- Let leather filler dry for at least 30 minutes, and up to 24 hours for deep fills, before sanding or applying color. Rushing this step causes the filler to crack or shrink.
- Never use standard leather cream or wax on suede or nubuck, it flattens the nap permanently. Use a suede eraser and brush instead.
- Regular conditioning is the best scratch prevention. Supple, hydrated leather resists scuffing and makes minor scratches easier to buff out.
- For deep scratches on high-value or sentimental shoes, consider a professional. A botched DIY fill is often harder and more expensive to repair than the original damage.
The Three Scratch Types and How to Fix Them
You need a diagnosis before treatment. Wipe the shoe with a barely damp cloth to remove dust, then look at the mark under good light. Here’s how to tell what you’re dealing with.
Surface Transfer Scuff: This is a mark on the finish, not in it. Think of a black rubber streak from a car pedal or another shoe. The leather surface underneath is intact and smooth to the touch. The color often looks altered because a foreign substance is sitting on top.
Color-Loss Scratch: The finish has been abraded away, revealing a lighter, duller layer underneath. The surface is still smooth, your nail won’t catch, but the pigment is gone. This is common on shoe toes and heels from repeated friction.
Deep Gouge: This is a physical groove in the leather. Your fingernail will catch if you drag it across the mark. The leather fibers are cut or torn, and material may be missing. This requires building the surface back up before any color is applied.
Where this goes sideways: Using a colored cream polish on a deep gouge. The polish sits in the groove, creating a dark, obvious line that highlights the damage instead of hiding it. You must fill the texture first, then apply color.
| Scratch Type | Feels Like | Looks Like | First-Step Fix |
|---|---|---|---|
| Surface Transfer | Smooth, no catch | Often a black/grey streak | Horsehair brush & damp cloth |
| Color Loss | Smooth, no catch | Pale, dull patch | Pigmented cream polish |
| Deep Gouge | Catches fingernail | Obvious groove or cut | Leather filler paste |
The fix flows from that table. A transfer scuff might come off with just a brush. Color loss needs a pigment like Saphir Médaille d’Or Pommadier cream polish. A gouge needs a filler.
Tools You’ll Need (And What to Skip)
You don’t need a shelf full of potions. A few core items handle 95 percent of repairs. I keep mine in a small kit so I’m never searching when a new scratch appears.
- Soft, lint-free cloths (microfiber is perfect).
- Horsehair brush: For dusting and final buffing. The bristles are soft enough not to scratch.
- Leather cleaner: A pH-balanced, leather-specific formula. Avoid household soaps.
- Pigmented cream polish: This is your workhorse for color-loss scratches. Saphir Médaille d’Or Pommadier is the benchmark because its high pigment load and beeswax base feed the leather while coloring it.
- Leather conditioner: A non-pigmented product like Bick 4 or Lexol to restore suppleness after cleaning or repair.
- Leather filler paste: For deep gouges only. Leather Hero Leather Filler Paste Kit is a reliable option.
- 220-grit sandpaper: For leveling dried filler. Any coarser will scratch; any finer won’t cut.
I once thought you could buff out any scratch. Then I met a deep gouge across the toe of a boot. I kept applying polish, hoping it would fill. It just made a waxy canyon. The lesson was simple: color changes tone; filler changes texture. You need the right tool for the job.
What to leave on the shelf: Avoid magic erasers, toothpaste, nail polish remover, or silicone-based “conditioners” on quality leather. They are abrasives or solvents that strip the finish, creating a dull, damaged patch. They’re a last resort for synthetic materials only.
The Step-by-Step Repair Process
Here is the sequence for a complete repair, from cleaning to protection. Follow it in order. Skipping steps is how repairs fail in a month.
Step 1: Clean the Area Thoroughly
Every repair starts with a clean canvas. Dirt or old polish prevents products from adhering properly.
- Brush the entire shoe with a horsehair brush to remove loose dust.
- Apply a small amount of leather cleaner to a cloth. Work it into the scratched area and the surrounding leather using small, circular motions.
- Wipe away any residue with a clean, damp section of the cloth.
- Let the leather dry completely. This usually takes 10-15 minutes.
Skip this, and… you’ll seal dirt under your repair. Over time, it can darken unevenly or cause the filler to separate from the leather.
Step 2: Apply the Correct Repair Product
Now, match the product to your scratch diagnosis from the first section.
For Surface Transfer Scuffs: Often, the brushing and cleaning in Step 1 will have removed it. If a faint mark remains, a gentle rub with the conditioner-cloth during the next step usually takes care of it.
For Color-Loss Scratches:
- Select a cream polish that matches your shoe’s color as closely as possible.
- Using a cloth or your fingertip, work a small amount of cream into the scratch with circular motions. Feather the application slightly beyond the scratch’s edges.
- Let it dry for at least 10 minutes. The pigments need time to settle.
- Buff vigorously with the horsehair brush. Repeat with a second thin layer if the scratch still shows.
For Deep Gouges:
- Using a small spatula or the edge of a cloth, press leather filler paste into the groove. Overfill it slightly, as the paste will shrink as it dries.
- Let it dry for a minimum of 30 minutes. For a deep fill, let it dry for up to 24 hours. You’ll know it’s ready when it’s hard to the touch and no longer cool.
- Gently level the dried filler with 220-grit sandpaper. Use light, circular motions until it’s flush with the surrounding leather.
- Wipe away all dust with a dry cloth. Now you can apply colored cream polish as described above to blend the color.
Let the filler dry for at least 30 minutes. The drying time varies… Deep cracks with filler generally take about 30 minutes to solidify.
Step 3: Condition and Protect
The repair process, especially cleaning, can dry out the leather. This final step restores health and adds a protective barrier.
- Apply a thin coat of leather conditioner over the entire shoe, focusing on the repaired area. Let it absorb fully.
- For shoes that will see heavy wear (boots, work shoes), you can apply a thin layer of wax polish over the toe and heel for extra protection. Buff it to a shine after it hazes over.
This isn’t just a one-time fix. It’s the maintenance rhythm that keeps scratches at bay. A well-conditioned shoe is a resilient shoe.
Special Cases: Suede, Patent Leather, and White Shoes
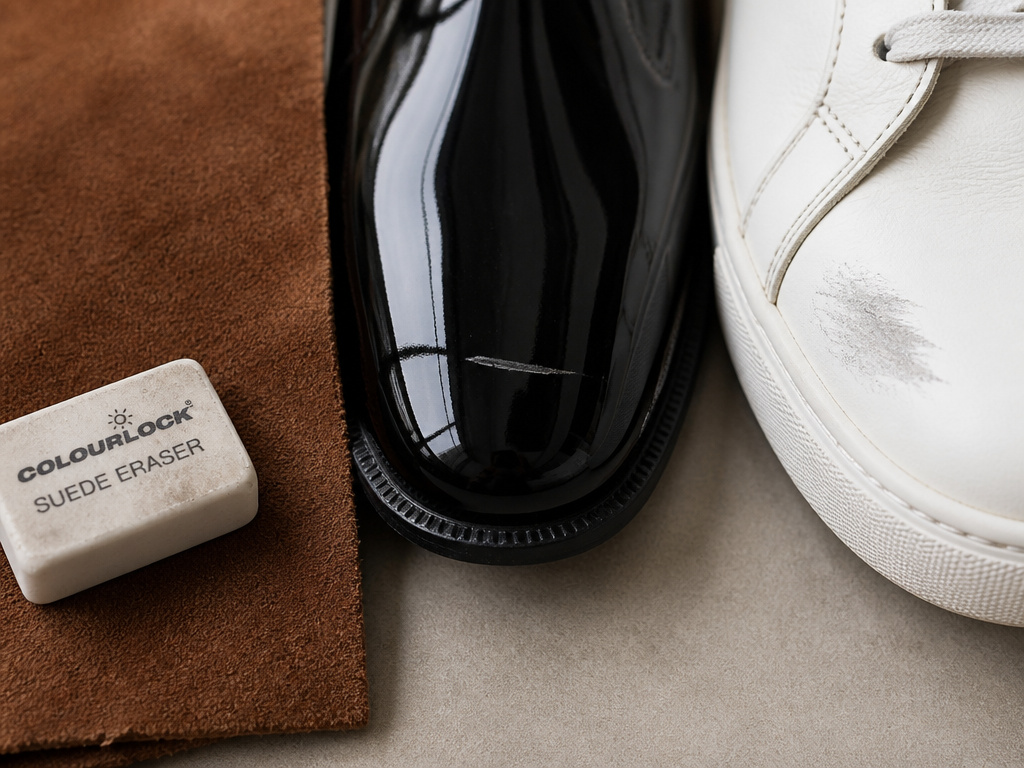 Not all leather is finished the same. The rules change for these materials.
Suede & Nubuck: These have a raised, napped surface. Never use cream polish or wax, it will mat the nap into a dark, shiny spot. * Fix: Use a suede eraser for scuffs. Brush the nap vigorously with a suede brush to restore texture. For color loss, use a spray-on suede dye specifically designed for napped leathers.
Patent Leather: This is leather with a high-gloss lacquer coating. Traditional polishes can cloud or stain this finish. * Fix: Wipe with a damp cloth. For fine scratches on the lacquer, a tiny amount of petroleum jelly rubbed in and buffed off can fill and re-gloss the surface.
White Leather: Scuffs show up as grey or black marks. * Fix: Use a dedicated white leather cleaner or a mild soap solution. Alcohol-free baby wipes can also work for minor marks. Always follow with a conditioner made for light-colored leathers to prevent yellowing.
Trying to force a “universal” repair method onto these leathers is a shortcut to permanent damage. When in doubt, find the product formulated for your specific material.
When to Call a Professional Cobbler
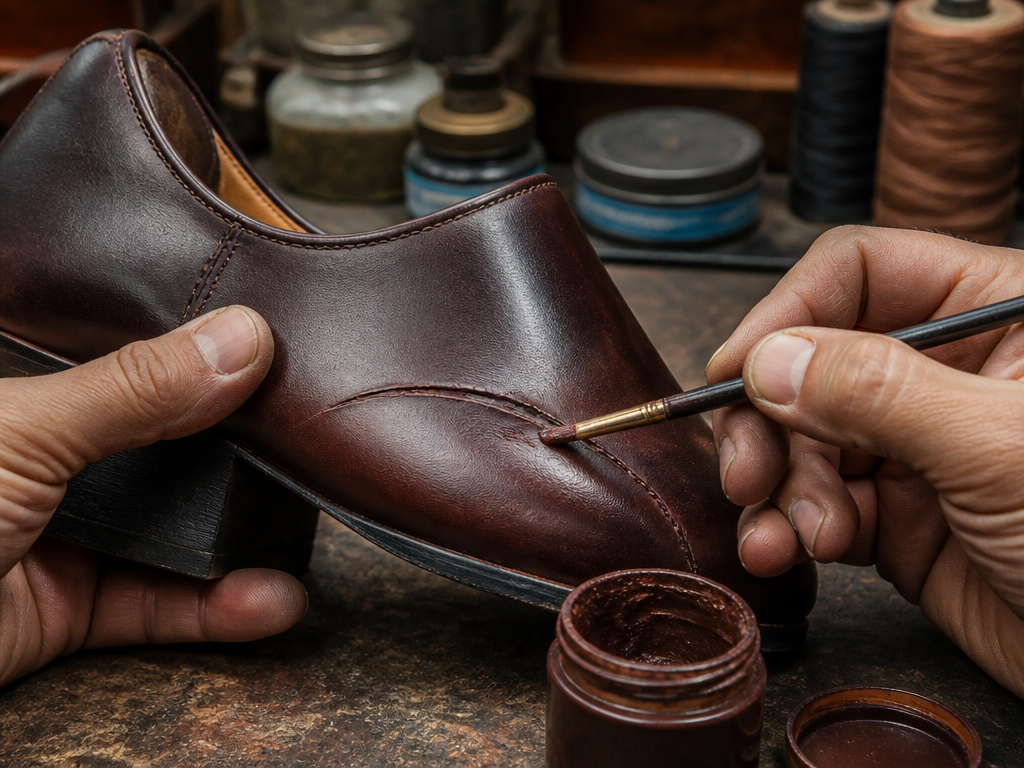 DIY has its limits. Knowing them saves you money and heartache.
Take your shoes to a professional if: * The scratch is a deep cut that has lifted a flap of leather. * The damage is on a large, seamless panel (like a wholecut shoe) where color blending is extremely difficult. * You’re dealing with a high-value, designer, or exotic leather item (alligator, ostrich, etc.). * The scratch is directly adjacent to a stitching seam, where filler could weaken the thread. * You’ve attempted a repair and made it more obvious.
A cobbler’s fee for a professional recolor or fill is often less than the cost of the specialized products you’d buy to attempt it yourself, and they guarantee the result. It’s the smart choice for shoes you truly care about.
Frequently Asked Questions
Can you really remove scratches from leather shoes?
You can significantly improve or completely hide most scratches. Surface marks can be removed; color loss can be recolored; deep gouges can be filled and blended. However, true cracks where leather fibers have split are permanent and can only be disguised, not reversed.
What household items can remove scuffs from leather?
I don’t recommend most household items. Toothpaste and magic erasers are mild abrasives that remove the scuff by removing the leather’s finish, leaving a dull patch. For a true emergency on a less-valuable item, a tiny dab of petroleum jelly on a patent leather scuff is the only semi-safe option.
How do you fix a deep scratch on a leather shoe?
Clean the area, then fill the groove with a leather-specific filler paste like the Leather Hero Filler Paste Kit. Let it dry for 30 minutes to 24 hours, then sand it smooth with 220-grit sandpaper. Once the surface is level, apply matching cream polish to restore color, then condition the leather.
Does shoe polish remove scratches?
Shoe wax polish does not remove scratches; it adds shine and a thin protective layer. Cream polish, which contains pigments, can effectively hide color-loss scratches by depositing new color into the abraded area. It does not fill physical grooves.
How can I prevent scratches on my leather shoes?
Regular conditioning is the best defense. Supple leather scuffs less deeply and is easier to buff clean. Use shoe trees to maintain shape, rotate your pairs, and store them in a cool, dry place. For toes and heels prone to scrapes, a light extra layer of wax polish acts as a sacrificial barrier.
The Bottom Line
Here’s the straightforward advice: match the fix to the feel of the scratch. Your fingernail is the best diagnostic tool you have. A smooth surface needs color; a rough groove needs filler. Let products dry fully between steps, rushing is how repairs fail.
And let’s be clear about prevention. The best way to deal with scratches is to stop them from digging in deep in the first place. A simple, consistent habit of care for leather shoes with regular brushing and conditioning makes your shoes more resistant and every future repair easier. It turns a frustrating chore into a quick five-minute refresh.
For the deep cuts and prized pairs, there’s no shame in calling for backup. A trusted cobbler can work miracles. But for the everyday marks that come with a life well-lived, now you have the kit and the knowledge to handle them yourself.
