
How to Remove Scratches from Leather: A Complete DIY Guide
This post contains affiliate links. As an Amazon Associate, we earn from qualifying purchases.
This post contains affiliate links. As an Amazon Associate, we earn from qualifying purchases.
To remove scratches from leather, you must first identify the leather’s finish. For light surface scuffs on pigmented or semi-aniline leather, a high-quality leather conditioner is often enough. For deeper scratches in pigmented leather, you’ll need a color-matched leather filler and topcoat. Aniline leather requires specialized, minimally invasive products, as its unprotected surface absorbs everything deeply.
That distinction between finish types is the whole game. Most guides talk about leather as one material. Treating a delicate aniline hide with the same filler you’d use on a pigmented car seat is like using a firehose to water a bonsai tree. The result is predictable: a blotchy, irreversible mess.
What follows is a methodical breakdown of the three main leather finishes, the tools that work for each, and the step-by-step repair sequences. You’ll also learn what most carmakers explicitly warn against in their official manuals, a list of common household cleaners that void warranties and accelerate cracking.
Key Takeaways
- The finish dictates the fix. Aniline, semi-aniline, and pigmented leathers each require different repair approaches. Using the wrong product can cause permanent damage.
- Most scratches don’t need filler. Surface-level scuffs often disappear with dedicated leather conditioner, which re-plasticizes the finish and reduces the scratch’s visual contrast.
- Manufacturers forbid abrasive cleaners. A NHTSA technical service bulletin specifically warns against using mechanical means like brushes or steel wool, which strip the protective topcoat.
- Always test first. Apply any cleaner, conditioner, or dye to a hidden area (like under a cushion) and let it dry to check for color change or texture issues.
- Deep color loss needs a system. Repairing a scratch down to the raw hide requires a leather filler, color-matched dye, and a flexible topcoat to restore protection and sheen.
The First Rule: Know Your Leather’s Finish
The leather will tell you what it needs. You just have to know how to listen. The first clue is its surface texture and sheen.
A true aniline leather feels soft and warm, absorbs water instantly, and shows natural grain variation. A pigmented leather feels uniformly smooth, has a consistent color, and water beads on its surface. Semi-aniline sits in the middle, with a light, translucent pigment layer.
You’re not just looking at a scratch. You’re looking at how the scratch interacts with the leather’s protective layer. That layer, or lack of it, determines your entire repair strategy.
| Leather Type | Surface Feel | Water Test | Scratch Repair Approach |
|---|---|---|---|
| Aniline | Supple, natural, shows grain | Absorbs quickly | Conditioner only; specialized color creams for severe cases. |
| Semi-Aniline | Soft, with light sheen | Absorbs slowly | Conditioner first; mild pigment creams if needed. |
| Pigmented (Corrected Grain) | Smooth, uniform, plastic-like | Beads on surface | Conditioner for scuffs; filler + dye + topcoat for deep scratches. |
Here’s the practical takeaway: if your leather has a shiny, uniform coating, you’re dealing with a pigmented finish. This is common on car seats, office chairs, and most modern sofas. The scratch is likely in that plastic coating. If the leather is matte, feels like skin, and shows natural markings, it’s aniline, think high-end designer bags or some vintage jackets. The scratch has gone into the dyed hide itself.
Why does this matter so much? Because the products that fix one will ruin the other. A pigmented leather filler is a viscous, opaque paste designed to sit on top of the coating. On aniline leather, that paste will sit on top of the pores, refusing to blend, and create a ugly, stiff patch. Conversely, an oil-based conditioner meant for aniline might not properly bond to a plastic pigmented topcoat, leaving a greasy residue.
What Most People Get Wrong (And What Carmakers Say)
Let’s be clear about one thing: your instinct to grab a household cleaner is probably wrong. A Toyota Technical Service Bulletin states bluntly that damage from unapproved cleaning methods is not covered under warranty. It names: many commercial cleaners damage factory coatings with solvents and propellants.
The bulletin goes further: “Do NOT: Use mechanical means of cleaning other than hand cleaning (e.g., brushes, sanders, or steel wool).” Abrasive cleaning exposes the top coat, removing its resistance to future stains and dye transfer.
In my early days, I learned a similar lesson about surface preparation. I tried to apply a water-based dye to a belt without first deglazing the factory finish. The dye beaded up into droplets, creating a streaky, uneven mess that took hours to strip and redo. The leather itself was fine, but my method was flawed. The same principle applies to scratches: if you don’t understand the surface you’re working on, your repair will fail.
So what should you use? For general cleaning of light soil around a scratch, the most universally approved method is a damp cloth. One manufacturer’s guide specifies a soft, non-pigmented cloth dampened with plain water, followed by a dry cloth. For dirtier jobs, they recommend a 3M Scotch–Brite Type T Scuff Sponge with diluted liquid soap like Ivory. The key is to apply the cleaner to the cloth, not directly to the leather, to avoid saturating and damaging the backing material.
Step-by-Step: Fixing Pigmented Leather Scratches
This is where the majority of repairs happen. The process is like building a miniature paint system: fill, color, seal.
You’ll Need:
- Leather cleaner (like Angelus Easy Cleaner)
- Lint-free cloths
- Fine-grit sandpaper (600+ grit)
- Plastic spatula or palette knife
- Leather filler (e.g., Fiebing’s Leather Fix)
- Leather dye or cream that matches your piece
- Leather topcoat or finisher (acrylic-based is common)
-
Leather conditioner (like Ford King Ranch Leather Conditioner for a car interior)
-
Clean the Area. Wipe the scratch and surrounding area with a cloth dampened with leather cleaner. Let it dry completely. This removes oils that would prevent the filler from adhering.
- Sand Gently. Lightly scuff the immediate area of the scratch with fine sandpaper. You’re not trying to remove material, just to give the filler a microscopic texture to grip onto. Wipe away all dust.
- Apply the Filler. Using the spatula, press the leather filler into the scratch, overfilling it slightly. Scrape away the excess so the filler is flush with the surrounding surface. The goal is a smooth, level patch.
- Let It Cure. Follow the product’s cure time, usually 1-2 hours. Don’t rush this.
- Re-Sand for Smoothness. Once fully dry, sand the cured filler with fine sandpaper until it is perfectly smooth and level with the leather. You shouldn’t feel a ridge with your fingernail.
- Apply Color. Shake your leather dye thoroughly. Using a small brush or a dedicated applicator, apply thin, even coats over the repaired area, feathering the edges into the surrounding leather. Let each coat dry. Two to three coats usually suffice.
- Seal the Repair. Apply a flexible leather topcoat over the dyed area. This replaces the protective layer you sanded off and prevents the repair from wearing differently.
- **Condition.After 24 hours, apply a conditioner containing mink oil or lanolin over the entire panel, not just the repair. This rehydrates the surrounding leather and helps blend the repair’s sheen.
Common mistake: Applying filler to a damp or dirty scratch. The filler will lift within weeks, leaving a crumbly mess and a more noticeable divot than the original scratch.
This method works for a defined gouge. But what if the scratch is just a surface scuff, with no depth?
The Simple Fix for Surface Scuffs
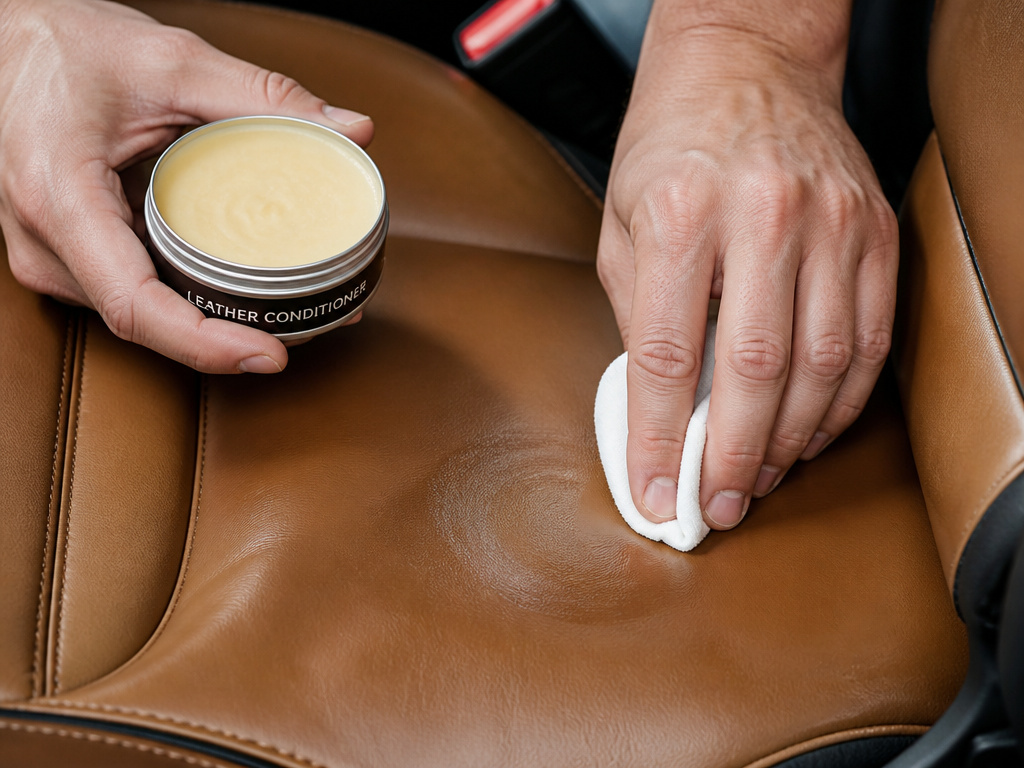
Not every mark needs the full filler-and-dye protocol. A surface scuff is often just a disruption of the topcoat’s texture, not its substance. In these cases, leather conditioner is your first and best tool.
Conditioner works by re-plasticizing the dried polymers in the leather’s finish. As these materials absorb the conditioner, they swell slightly, often reducing the visual contrast of a light scratch. It doesn’t “fill” the scratch so much as make it less obvious to the eye.
For a car interior, something like the Ford King Ranch Leather Conditioner is formulated for that specific type of coated leather. For a bag or jacket, a lighter conditioner like Bickmore Bick 4 is a safe bet.
The Process:
- Clean the area gently.
- Apply a nickel-sized amount of conditioner to a clean, dry cloth.
- Rub it into the leather in a circular motion over the scuffed area until it disappears.
- Let it dry completely, then buff with a separate dry cloth.
- Evaluate. Often, the scuff is greatly diminished. If it’s still visible, you can repeat the process after 24 hours.
This approach is also the only safe recommendation for aniline leather scratches. Because the dye penetrates the hide, a scratch often just removes some color. A deeply penetrating conditioner can sometimes darken the scratched area slightly, helping to minimize the contrast. For more significant color loss, you’d use a specialized aniline color cream, applied with a sponge and blended meticulously.
When to Call a Professional (And When to Embrace the Patina)
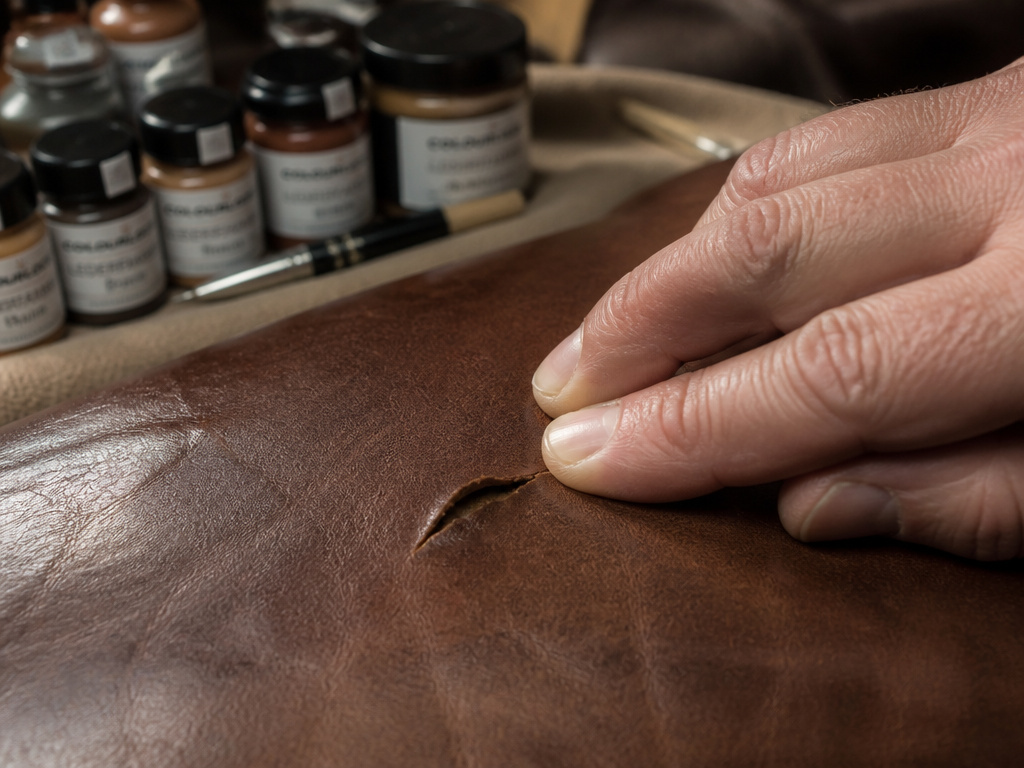
Some scratches are better left alone, and some are beyond a DIY fix. How do you tell?
Call a professional if:
- The scratch has torn through the leather’s surface grain, creating a flap or loose piece.
- The damage is extensive, covering a large area (like a cat’s entire scratching post route).
- The leather is a valuable antique or a unique aniline hide where color-matching is critical.
- You’ve attempted a repair and made it worse, a pro can often strip and redo it.
But here’s an honest stance most guides won’t give: many minor scratches, especially on aniline leather, should be embraced as part of the piece’s character. The Ford owner’s manual for its King Ranch edition notes that natural markings like small scars are proof of genuine leather. A well-maintained piece will develop a patina, a soft, darkened sheen from oils and use, that can beautifully absorb minor scratches into its story.
Constantly chasing perfection on a natural material is a fool’s errand. Focus instead on preventing further damage. Simple habits, like keeping pet nails trimmed and avoiding sharp objects in pockets, are more effective than any repair. Our guide on how to protect leather furniture from scratches covers these preventative measures in detail.
Frequently Asked Questions
Can scratches be completely removed from leather?
On pigmented leather, a skilled repair can make a scratch virtually invisible. On aniline leather, you can significantly reduce a scratch’s appearance, but completely erasing it is often impossible without re-dyeing the entire panel, as the dye is within the hide itself.
What household items remove scratches from leather?
For very light scuffs on pigmented leather, a small amount of unscented moisturizer or a paste of baking soda and water gently applied can sometimes lessen the mark. However, these are last-resort options and carry a high risk of staining or altering the finish. A dedicated leather conditioner is a far safer choice.
Does toothpaste remove scratches from leather?
No. Toothpaste is a mild abrasive designed for enamel. On leather, even the “non-gel” varieties can haze or dull the protective topcoat, making the area look worn. It’s one of those internet fixes that causes more problems than it solves.
How do you fix deep scratches on a leather car seat?
Follow the pigmented leather repair steps above: clean, fill, sand, color-match, and seal. The critical part for car seats is using a flexible filler and topcoat that can withstand temperature changes and flexing without cracking. For specific techniques, our article on repairing leather car seats provides a focused, step-by-step approach.
Can olive oil remove scratches from leather?
Do not use olive oil. It will go rancid, eventually smelling sour and attracting dust. It also overly softens leather, weakening its fibers over time. Use a product designed for the job, like a stable, non-staining leather conditioner.
Before You Go
One rule most guides skip: if a scratch on pigmented leather is shallow enough that you can’t catch it with your fingernail, try conditioner first. You’ll save yourself the multi-step repair 80% of the time. If the scratch is deep, the filler-and-dye system is your path.
Successful repair depends on correctly identifying your leather’s finish and having the patience to let products cure fully between steps. Rushing a coat of dye over a tacky filler is how you get a repair that peels in a month.
If you’re staring at a deep gouge on a cherished sofa, the process in our full restoration guide will walk you through not just the scratch, but any accompanying color loss or drying. And if the scratch is on a pair of boots, the approach shifts slightly, check the methods for scuffed leather shoes.
Start this week by identifying one scratched item and its finish type. That single act of diagnosis will tell you whether you need a $15 bottle of conditioner or a full $60 repair kit.
