
Step-by-Step Guide: How to Condition Your Leather Horse Saddle
This post contains affiliate links. As an Amazon Associate, we earn from qualifying purchases.
To condition a leather saddle, you must first clean it with a damp cloth and glycerin saddle soap, let it dry completely, then apply a thin, even layer of a leather-specific conditioner like Brooks Proofide, Passier Lederbalsam, or a pure neatsfoot oil blend. Work the product into the leather with your fingers, let it absorb for at least an hour, then buff off any excess. The entire process hinges on matching the conditioner to your climate and the saddle’s specific leather type.
That “dry completely” step is where most guides get vague. Leather isn’t dry when it feels dry to the touch. It’s dry when the moisture from cleaning has fully evaporated from within the fiber structure, which can take a full 24 hours in average indoor air. Applying oil or balm before that traps water inside, and that’s how mildew starts.
What follows is a breakdown of the three essential steps, the conditioner shortlist, and the climate-specific rules that keep a saddle from turning into a stiff, cracked relic or a soggy, moldy mess.
Key Takeaways
- Never condition a dirty or damp saddle. Trapped grit acts as sandpaper, and trapped water invites rot. Clean with glycerin saddle soap and wait a full day for it to dry inside and out.
- Match your conditioner to your climate. In high humidity, avoid pure neatsfoot oil; use a fast-absorbing balm like Passier Lederbalsam. In dry climates, an oil-based conditioner provides deeper replenishment.
- Over-conditioning is more harmful than under-conditioning. Leather needs replenishment, not saturation. One thin coat, fully absorbed and buffed, is almost always enough. A second coat is for parched, decades-old tack.
- Storage climate dictates care frequency. A saddle stored in a damp barn needs inspection every month. One kept in a climate-controlled room can go six months between conditioning sessions.
- Brands have specific rules. Brooks Proofide is mandatory for their saddles but must not be applied to the top of their Aged models. Using the wrong product can void warranties and damage the leather.
Why Your Saddle’s Leather Is Different
Not all leather is created equal, and a saddle’s hide is in a league of its own. It’s thicker, denser, and often vegetable-tanned for structural integrity over generations of use. This isn’t the same leather as your jacket or handbag. It’s a load-bearing component.
The seat, flaps, and panels endure constant pressure, flex, and sweat—both equine and human. This work dries out the natural oils that keep the fibers supple. Without replenishment, those fibers become brittle. They crack along stress points, usually behind the knee rolls or under the cantle, long before the surface shows any wear. Conditioning isn’t about making it shiny. It’s about replacing the lost oils so the structure doesn’t fail.
A saddle’s leather is a composite material under constant mechanical stress. Conditioning replenishes the lipids between collagen fibers, maintaining flexibility and tensile strength to prevent cracking at flex points. Properly conditioned leather has a water content of 12-18% and an oil content of 3-8% by weight.
The Golden Rule: Clean First, Condition Second
This is the step everyone wants to skip. You can’t. Conditioning a dirty saddle grinds that dirt deeper into the grain. Conditioning a damp saddle seals moisture inside the fibers.
Your process is always this order: 1. Remove dirt and sweat. Use a barely damp sponge or microfiber cloth with a drop of liquid glycerin saddle soap. Wipe in small circles, focusing on stained areas like the sweat patches under the flaps. Rinse the cloth frequently. 2. Let it dry naturally. No heat, no sun, no hair dryers. Place the saddle on a rack in a room-temperature space with decent airflow. This takes time. A surface may feel dry in an hour, but the water trapped in the core needs a full day to evaporate. 3. Apply conditioner. Only now, when the leather is clean and bone-dry, do you reach for the balm or oil.
Skipping the dry-out is the single fastest way to ruin good tack. The musty smell that follows is the first sign of mold growing in the leather’s core, and that damage is often irreversible.
Picking Your Conditioner: A Short Guide
The right product depends on your saddle’s make, your local climate, and how often you ride. Here’s the breakdown.
| Conditioner Type | Best For | Risk If Misused |
|---|---|---|
| Leather Balm (e.g., Passier Lederbalsam) | General maintenance in all climates, especially humid areas. English saddles. | Can build up a waxy film if over-applied and not buffed, attracting dust. |
| Specialized Dressing (e.g., Brooks Proofide) | Brooks bicycle saddles. Mandatory for warranty compliance. | Over-application on the top grain can over-soften leather, destroying rider support. |
| Neatsfoot Oil (Pure or Blend) | Restoring very dry, stiff western saddles or antique tack in dry climates. | Pure oil promotes mildew in humidity. Over-oiling saturates and weakens fibers, causing permanent darkening. |
| Glycerin-Based Conditioner | Quick touch-ups on slightly dry areas. Not for deep restoration. | Often contains silicones that sit on top of the leather, clogging pores and preventing future conditioning. |
For most riders, a quality leather balm is the default. Passier Lederbalsam is my go-to for English saddles because it absorbs quickly, doesn’t leave pants-staining residue, and contains beeswax for a light protective layer. It’s the workhorse.
If you own a Brooks bicycle saddle, you use Brooks Proofide. That’s not a suggestion. Their leather is tanned and tensioned specifically for that dressing. Substituting another product can alter the break-in curve and affect the tensioning system. Apply it sparingly to the underside and a whisper-thin layer to the top, buffing it to a matte finish after an hour.
Neatsfoot oil is a powerful tool for specific jobs. The UF/IFAS saddle care guide notes its drawback in humid climates: it mildews more readily. If you’re in Florida or Louisiana, use a neatsfoot oil blend or skip it entirely for a balm. In Arizona? A pure neatsfoot oil might be exactly what your sun-baked saddle needs.
Where this goes sideways: Using a silicone-based “protector” spray as a conditioner. These sprays coat the surface, blocking the leather’s pores. Real conditioners need to be absorbed to work; silicones prevent that. You’re left with leather that feels conditioned on the surface but is drying out underneath.
The Step-by-Step Conditioning Process
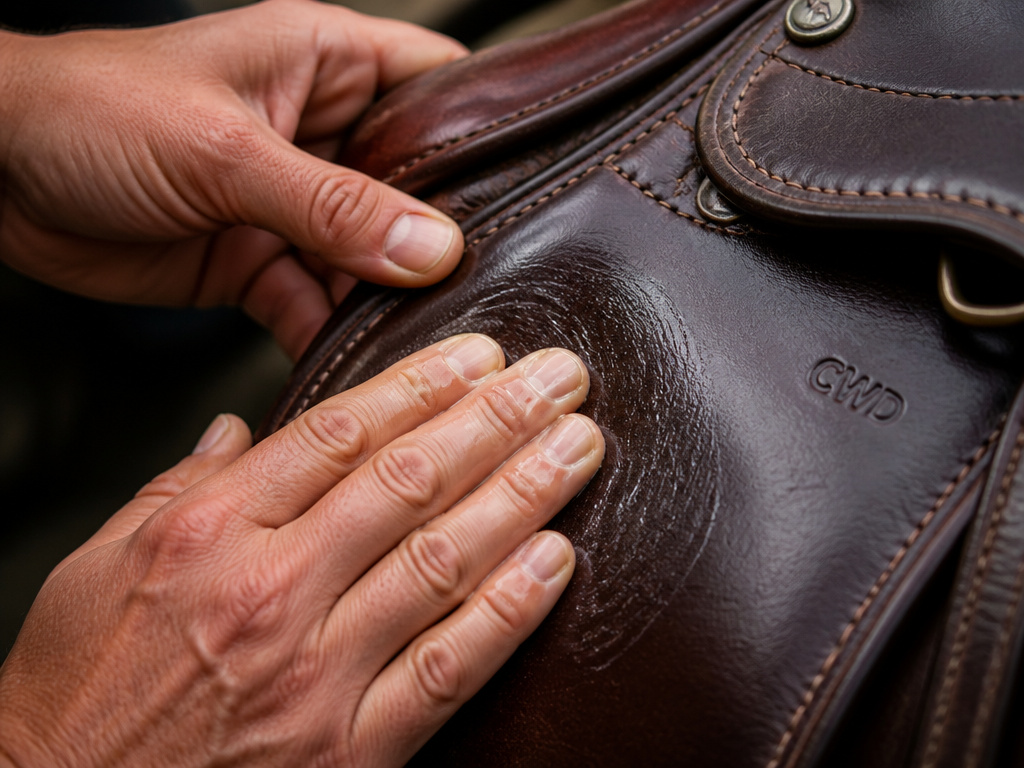 Once your saddle is clean and dry, and you’ve chosen your potion, the application is straightforward. The devil is in the thinness of the coat.
- Work with your hands. For balms like Passier Lederbalsam, scoop a pea-sized amount onto your fingertips. Rub your hands together to warm and soften the product. The heat from your hands helps it penetrate.
- Apply in thin, even circles. Start on the underside of the flaps and the seat’s underpanel—areas that lose oils fastest but are out of sight. Use a gentle, circular motion to work the conditioner into the grain. Then move to the seat and outer flaps.
- Let it absorb. Walk away for at least one hour. For very dry leather, leave it overnight. The leather should drink up the conditioner, turning from glossy to matte.
- Buff off the excess. After the waiting period, take a clean, soft cloth (an old t-shirt works perfectly) and buff the entire saddle. You’re removing any conditioner that didn’t absorb, which would otherwise attract dirt. The finish should be soft and matte, not sticky or slick.
- Wait before riding. Give the saddle another 12 hours if possible before putting it back on your horse or bike. This lets the conditioning fully stabilize within the fibers.
How do you know you used the right amount? After buffing, your saddle shouldn’t feel tacky or greasy. Run your hand over it. It should feel supple and rich, like the skin on the back of your hand, not like a buttered roll.
How Often Should You Condition a Saddle?
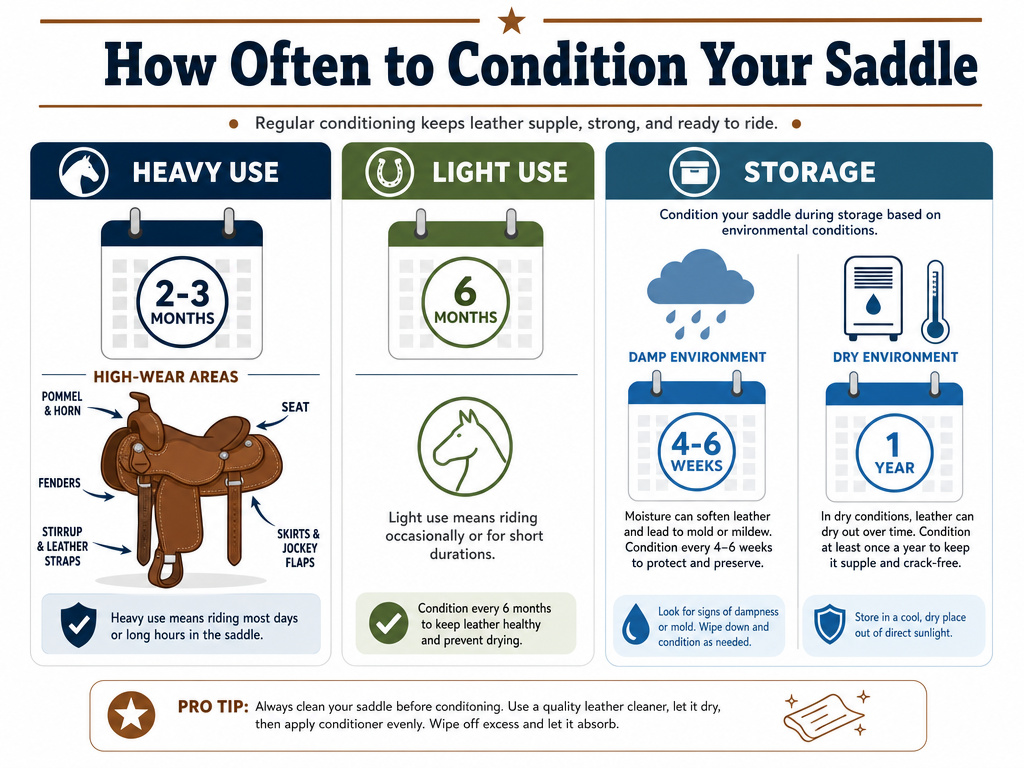 The six-month rule is a decent starting point, but it’s a placeholder. Your real schedule is set by three factors: use, storage, and climate.
- Heavy Use (Daily Riding): Sweat and friction pull oils out fast. Inspect monthly. You might need a light conditioning touch-up every 2-3 months, focusing on high-contact areas.
- Light Use (Weekly Riding): The classic six-month check is about right. Clean and condition at the start and middle of the riding season.
- Storage Conditions: This is the silent variable. A saddle stored in a damp, unheated tack room is under attack from humidity. It needs a protective coat of conditioner and should be checked every 4-6 weeks for mildew. A saddle in a climate-controlled space, like the conditions Schleese recommends (room temp, 30-40% humidity), is preserved in amber. It can go a full year between sessions.
Your eyes and hands are the best tools. If the leather looks dull and feels stiff or powdery, it’s time. If it’s still supple and has a healthy sheen, leave it alone. More product is not better.
Special Cases and Edge Conditions
Standard advice breaks down at the edges. Here’s what to do when your saddle isn’t average.
For Antique or Vintage Saddles: The university extension saddle maintenance guide flags this exception. Very old, dry leather should not be allowed to dry completely after cleaning. The shock of re-wetting and then fully drying can cause micro-cracks. After a gentle clean with saddle soap, blot it dry, then apply a light conditioner like neatsfoot oil while the leather is still slightly damp. This helps the oil absorb more evenly and reduces stress on the aged fibers.
For Brooks Aged Saddles: This is a hard rule from the manufacturer. Brooks Proofide must not be applied to the upper side of an Aged model. The leather is pre-treated and distressed; adding dressing on top alters the intended patina and character. Condition only the underside.
In Hot, Humid Climates: The goal is to condition without promoting mildew. This is where pure neatsfoot oil fails. Opt for a fast-absorbing balm. After conditioning, store the saddle with a dehumidifier in the room or in a breathable saddle cover with silica gel packs. Never store it in a sealed plastic bag.
The “Over-Conditioned” Saddle: You’ll know it by a persistent sticky or greasy feel, dark blotches, and a tendency to attract every piece of dust in the barn. The fix is patience. Place the saddle in a warm, dry, well-ventilated area for a week or two. The excess oils will slowly sweat to the surface. Wipe it down daily with a dry cloth. Do not apply more product for at least six months.
Frequently Asked Questions
Can I use coconut oil to condition my leather saddle?
You can, but you shouldn’t. Coconut oil can go rancid over time, leading to unpleasant odors. It also lacks the specific penetrating and stabilizing agents found in leather-specific conditioners like neatsfoot oil blends or leather balms. For a material that costs this much, use the product formulated for the job.
How do I know if my saddle is too dry?
Dry leather loses its suppleness. It will feel stiff and hard, not flexible. Visually, it may look pale, chalky, or have a network of fine surface cracks (not to be confused with deep structural cracks). When you press your thumb into it, the impression should slowly bounce back. If the dent remains or the leather feels brittle, it’s critically dry.
Is it okay to condition a new saddle?
Yes, but carefully. A new saddle often benefits from a single, very light conditioning to protect it from initial sweat and rain. However, many high-quality saddles come from the factory with a protective finish. Check the manufacturer’s instructions first. For a Brooks bicycle saddle, applying Proofide is part of the official break-in process.
What’s the difference between conditioning and waterproofing?
Conditioning replenishes internal oils to keep the leather fibers healthy and flexible. Waterproofing (with waxes or synthetics) coats the exterior to block moisture from entering. For a saddle, conditioning is essential; waterproofing is often detrimental, as it can block the leather’s breathability and prevent future conditioning. A well-conditioned saddle will naturally shed light rain.
Can I use the same conditioner on my saddle and my leather boots?
Maybe, but it’s not ideal. Boot leather and saddle leather often have different thicknesses, tannages, and finishes. A heavy oil meant for a work boot might over-soften a saddle flap. A light shoe cream might not penetrate a saddle’s thick hide. It’s safer to use products designed for equestrian or heavy-duty leather goods on your saddle.
The Bottom Line
Conditioning a leather saddle isn’t a cosmetic chore. It’s structural maintenance. The difference between a saddle that lasts a lifetime and one that cracks in five years comes down to a simple, disciplined routine: clean thoroughly, dry completely, and condition sparingly with the right product for your environment.
Forget the calendar. Let the saddle tell you when it needs care. Your hands will learn the difference between supple and thirsty. Start with a quality leather balm like Passier Lederbalsam for general upkeep, and only reach for the heavy oils like neatsfoot for a restoration project. One thin coat, fully buffed, does more than three glopped-on layers ever will.
Here’s the one action to take this week: run your hand over your saddle. If it doesn’t feel like warm, flexible skin, schedule a cleaning and conditioning session. Your future self—and your saddle—will thank you.
