How to Choose Leather Glue | The 3 Glues You Actually Need
This post contains affiliate links. As an Amazon Associate, we earn from qualifying purchases.
To choose leather glue, answer three questions: do you need a permanent or temporary bond, does the bond need to flex, and will the glue see heat or moisture? For a permanent, flexible seam, a contact cement like Barge All-Purpose Cement is the default. For a quick, rigid fix, a cyanoacrylate gel works. For a water-based, low-odor option, a polyurethane adhesive like Tandy Eco-Flo Leather Weld fills the gap.
The chemistry behind those answers decides whether your repair lasts a decade or fails in a season. A glue that stays flexible moves with the leather; a glue that cures brittle creates a stress point. The wrong solvent can stain or weaken the hide itself.
What follows: a breakdown of the three adhesive families, the one method that guarantees full contact, and the specific failure you get if you ignore the temperature on the tube.
Key Takeaways
- Contact cement (like Barge) is for permanent, flexible leather-to-leather bonds. It allows repositioning if you use the double-coat method.
- Cyanoacrylate (super glue) creates a rigid, instant bond. Use it only for small, non-flexing repairs or as a temporary hold before stitching.
- Polyurethane (PU) glue is a water-based alternative that dries clear and flexible. It’s less aggressive on delicate leathers but has a longer clamp time.
- Let the cement get tacky. Joining pieces before the solvent flashes off creates a weak bond and a messy squeeze-out that stains the grain.
- Heat is the enemy of traditional solvent cements. Applying a hairdryer to speed up other repair steps can re-soften the glue and ruin the bond.
The 3 Questions That Pick the Right Glue
What are you actually bonding? The answer isn’t in a marketing slogan. It’s in the physical demands you’ll place on the seam. Start with these three questions every time you reach for a bottle.
First, is this bond permanent or temporary? A permanent bond means the pieces are not intended to come apart, ever. Think a wallet gusset, a bag strap, or a repaired tear. A temporary bond just holds pieces in alignment for another step, usually stitching. The glue’s job is to stop the leather from shifting under the needle.
Where this goes sideways: Using a permanent contact cement for a temporary hold. You’ll struggle to pull pieces apart for adjustment, and you risk tearing the leather’s surface grain.
Second, will the bond need to flex? Leather moves. A jacket sleeve creases, a shoe bends, a bag expands. A rigid glue in a flexing area is a guaranteed failure point. The bond will crack, and the crack will propagate into the leather. For any item that isn’t a rigid sheet, you need a flexible adhesive.
Third, what environmental stress will it face? Is this a shoe that will see water? A car interior that will bake in the sun? A wallet that lives in a warm pocket? Heat and moisture are the two forces that defeat most glues. A standard solvent cement softens around 60°C (140°F), the temperature a dark car interior can reach on a summer day.
| Glue Type | Best For | Biggest Weakness |
|---|---|---|
| Contact Cement | Permanent, flexible leather-to-leather seams. | Softens with heat; strong solvent odor. |
| Cyanoacrylate (Super Glue) | Instant, rigid fixes on non-flexing areas. | Brittle; cannot be repositioned; can stain. |
| Polyurethane (PU) Glue | Low-odor, water-based flexible bonds on delicate leathers. | Longer clamp time (1-2 hours); less initial grip. |
Contact Cement: The Default for a Reason
For joining two pieces of leather where the seam must last, contact cement is the only serious choice. Brands like Barge All-Purpose Cement or Renia Aquilim 315 have been the workshop standard for decades. They work by applying a coat to each surface, letting the solvents evaporate until the film is tacky, then pressing the pieces together. The bond is immediate, strong, and, crucially, remains flexible.
Why does flexibility matter? Leather isn’t sheet metal. Its fibers stretch and compress with use. A rigid adhesive layer can’t follow that movement, so it separates. You’ll see the seam open up, usually right along the glue line. A flexible cement moves with the substrate, distributing stress across the entire bonded area.
The solvent is both its strength and its caution flag. These cements use powerful solvents like acetone or butanone to carry the adhesive resins. That gives them deep penetration and a fast dry time. It also means they need ventilation. More importantly, that solvent can permanently darken or damage certain finishes, especially on aniline or dyed-through leathers. Always test on a scrap.
I learned this the hard way on a vintage briefcase repair. I used a standard contact cement on a delicate vegetable-tanned panel. The solvent flashed off, the bond was perfect. Two weeks later, the client left the case in his car on a hot afternoon. The glue softened, the seam crept open, and I had to redo the entire repair with a heat-resistant formula. The leather will tell you what it needs, sometimes the hard way.
The Double-Coat Method That Actually Works
Most glue failures come from poor technique, not a bad product. The single biggest mistake is not letting the cement dry to the proper tacky stage before joining. If it’s still wet, the solvents get trapped, the bond stays weak, and excess glue oozes out to stain your work.
The professional method is the double-coat. It sounds simple, but the timing is everything.
- Prepare both surfaces. Lightly roughen the flesh side (the rough back) of the leather with 220-grit sandpaper or a stitching groover. This raises tiny fibers for the glue to grip. Wipe away all dust with a dry brush.
- Apply a thin, even coat to both pieces. Use a dedicated glue brush or a disposable chip brush. A thick coat takes longer to dry and increases squeeze-out. You want a uniform, translucent film.
- Wait for the flash-off. This is the critical window. The solvents need to evaporate until the glue is dry to a light touch but still sticky. Under typical room conditions (20°C/68°F), this takes 5-10 minutes. You’ll see the gloss disappear. Test by lightly tapping with a knuckle, it should not transfer.
- Join and press. Align the pieces carefully; the bond is instant and non-adjustable. Use a roller or bone folder to apply firm, even pressure across the entire seam. This ensures full contact without air pockets.
Skipping the wait is how you get a “stick-slip” bond that holds for a day and then lets go. The trapped solvent never fully cures, leaving a weak, greasy layer.
When to Use Super Glue (And When to Avoid It)
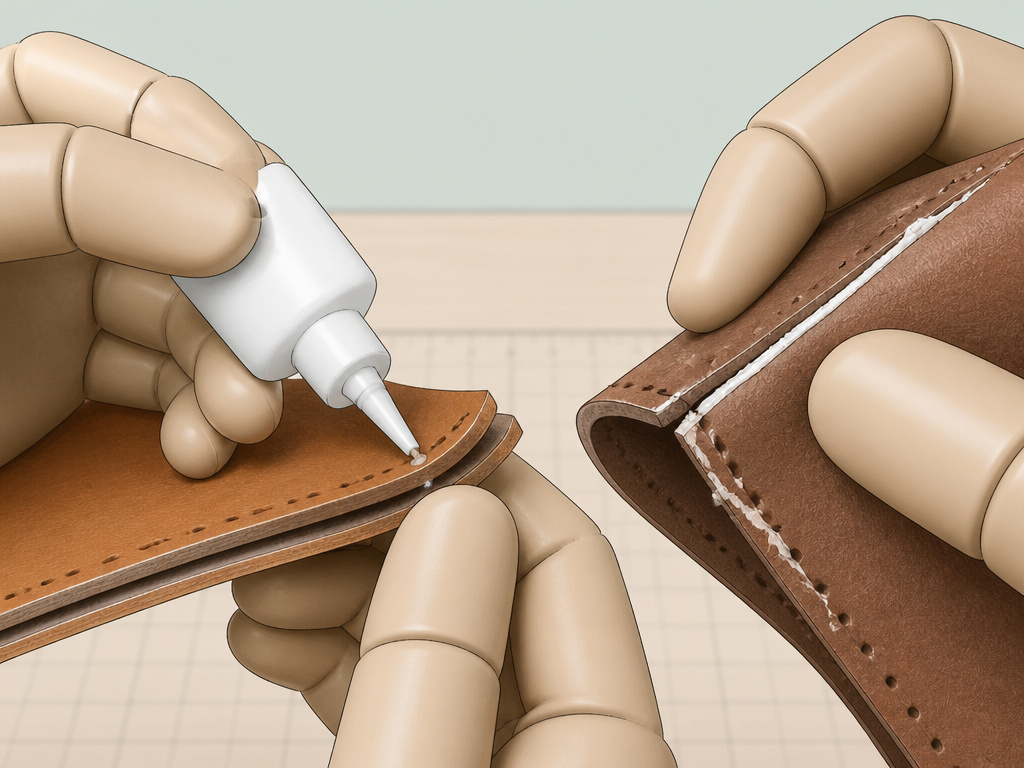
Cyanoacrylate, super glue, has its place. That place is very small, very specific, and almost never on a primary structural seam. Its virtue is speed. It polymerizes (cures) instantly in the presence of moisture, creating a hard, rigid bond.
Use it for: * Tacking pieces before stitching: A tiny dot can hold a complex alignment. * Fixing a non-structural trim piece: A glued-on decorative edge that won’t flex. * Temporary repairs in the field: When you need a “get home” fix on a bag strap.
Its flaws are significant. The bond is brittle and will crack under repeated flexing. It offers no gap-filling ability, the surfaces must mate perfectly. Most frustratingly, it’s impossible to undo without damaging the leather. It also has a nasty habit of wicking into the leather’s pores and leaving a white, frosted stain as it cures.
For a more controlled application, a gel formula like Loctite Super Glue Ultra Gel Control is better. It runs less and gives you a second to position. But the underlying chemistry is the same: rigid and permanent.
Common mistake: Using super glue to bond a shoe sole. The constant flexing will crack the glue line within a week. A flexible contact cement or a dedicated shoe adhesive is the only fix that lasts.
Polyurethane & Water-Based Options

If solvent fumes are a problem or you’re working with a sensitive leather, polyurethane (PU) adhesives offer a different path. Products like Tandy Eco-Flo Leather Weld are water-based, dry clear, and remain flexible. They’re also far easier to clean up, soap and water before they cure.
The trade-off is time. Where a contact cement grabs in minutes, a PU glue needs clamping for 1-2 hours to form a strong initial bond. Full cure takes 24-48 hours. They also don’t penetrate as deeply as solvent-based cements, so surface preparation is even more critical.
Their compatibility is a major advantage. Since they’re water-based, they play nicely with other water-based repair products like leather fillers and dyes. You don’t have to worry about a chemical reaction ruining your color work.
| Adhesive Property | Contact Cement | Polyurethane (PU) Glue |
|---|---|---|
| Base | Solvent (acetone/butanone) | Water |
| Dry Time (Tacky) | 5-10 minutes | 15-30 minutes |
| Clamp Time | 0 minutes (instant grab) | 1-2 hours |
| Flexibility | Excellent | Excellent |
| Clean-up | Mineral spirits (before cure) | Soap & water (before cure) |
| Best For | Most leather-to-leather construction | Delicate leathers, low-odor environments |
Gluing Leather to Other Materials
Sometimes leather needs to stick to something else. The rules change because the other surface isn’t porous.
For leather to wood, the key is creating a mechanical lock. Sand the wood thoroughly, apply a strong wood adhesive like a polyurethane construction glue to the wood, and clamp the leather firmly until fully cured. The glue needs to fill the wood’s grain and grip the leather’s flesh side.
For leather to fabric, flexibility is paramount. A flexible fabric glue or a very thin layer of contact cement works. Be warned: many fabric glues aren’t designed for leather’s oils and may fail. For a permanent bond, stitching through both materials is still the most reliable method for attaching leather to fabric.
For leather to metal or glass, you’re dealing with non-absorbent surfaces. Here, the procedure flips. Apply a thin film to both surfaces, wait 5-10 minutes for it to dry completely, then press together for an instant, non-adjustable bond. This is one case where following the manufacturer’s directions verbatim matters.
The Practical Takeaway
Ignore the marketing copy for “the world’s strongest glue.” Strength is the wrong metric. You need the right adhesive for the job’s specific physical demands.
For nine out of ten leatherworking projects, the answer is a contact cement with a high solids content applied with the double-coat method. Keep a gel super glue on hand for quick tacking, and a bottle of PU adhesive for delicate or odor-sensitive work. That trio covers everything from a wallet to a sofa repair.
Store your glue properly. Solvent cements dry out or thicken if the cap isn’t tight. Most have a shelf life of about 12 months at room temperature. If your cement is stringy or won’t dry tacky, it’s time for a new bottle. A fresh adhesive is cheaper than a failed repair.
Frequently Asked Questions
What’s the strongest glue for leather?
The strongest appropriate glue is a flexible contact cement like Barge All-Purpose Cement for leather-to-leather bonds. “Strongest” can mean a rigid super glue, but that strength is useless if it cracks when the leather flexes. Focus on bond type, not ultimate tensile strength.
Can I use Gorilla Glue on leather?
Original Gorilla Glue is a polyurethane foam adhesive that expands as it cures. It can work for filling gaps in a repair, but the expansion can distort the leather and the cured foam is difficult to sand or finish neatly. A dedicated leather adhesive is always a cleaner, more predictable choice.
How do you remove glue from leather?
Removal depends on the glue. For fresh, uncured contact cement, use a rag dampened with mineral spirits. For cured cement or super glue, you must carefully scrape it away with a blunt plastic tool, then use a specialized adhesive remover formulated for leather. Never use acetone or nail polish remover on finished leather, it will strip the dye and finish.
How long does leather glue take to dry?
“Dry” has two stages. Tack-free time (when you can join pieces) is 5-10 minutes for solvent cements, 15-30 minutes for PU glues. Full cure (maximum bond strength) is 24-48 hours for almost all adhesives. Avoid stressing the bond during the full cure period.
Is there a waterproof leather glue?
Many contact cements and all cyanoacrylate glues are water-resistant. However, “waterproof” often implies submersion, which few adhesives can handle indefinitely. For items like boots, a dedicated shoe glue like Renia Aquilim 315 offers the best combination of flexibility and water resistance.
Before You Go
Here’s the straightforward guide. If you’re building something meant to last, spend your time on surface prep and the double-coat method with a flexible contact cement. The glue is the foundation, not the decoration. A perfectly applied, appropriate adhesive disappears into the work, letting the leather’s character shine for years.
If you’re repairing a prized item and you’re unsure, practice the entire process on a scrap piece first. The confidence you gain is worth the extra ten minutes. And if the repair involves heat or moisture, read the technical data sheet for the glue, the temperature resistance rating is there for a reason. Your future self will thank you for checking it.
