
How to Glue Leather to Fabric for a Strong, Flexible Bond
This post contains affiliate links. As an Amazon Associate, we earn from qualifying purchases.
This post contains affiliate links. As an Amazon Associate, we earn from qualifying purchases.
To glue leather to fabric, you need a flexible, permanent adhesive like contact cement or a polyurethane-based fabric glue. Apply a thin, even coat to both clean, dry surfaces, let the adhesive dry to a tacky stage (3-10 minutes), then press the pieces together firmly. The bond becomes permanent on contact and cures fully in 24-48 hours.
The “tacky stage” clause is where most projects fail first. Join the pieces too soon, and the glue stays wet, oozes out, and never grabs. Join them too late, and the adhesive skins over, refusing to bond at all. That window is everything.
What follows is a breakdown of the three real adhesive options, the essential prep step for leather, and the exact pressure technique that prevents bleed-through on thin fabrics. By the end, you’ll know which glue to reach for and the one mistake that guarantees a re-do.
Key Takeaways
- Contact cement (like Barge All-Purpose) is the professional’s choice for a permanent, flexible bond between leather and fabric.
- You must lightly sand the leather’s surface with 250-grit sandpaper; glue cannot grip a smooth, finished grain.
- Always apply adhesive to both surfaces and wait for the “tacky” stage, when it’s dry to the touch but still slightly sticky, before joining.
- For delicate, thin fabrics like silk or lace, avoid clamping; the pressure can force adhesive through the weave and stain the front.
- A full cure takes 24-48 hours. The bond feels strong after an hour, but flexing or stressing it before full cure will weaken it permanently.
The 3 Adhesive Types You’re Actually Choosing From
Not every glue that sticks is the right glue. The wrong choice creates a rigid, brittle seam that cracks on the first bend or a weak spot that peels in a week. Your project’s lifespan depends on picking from one of these three categories.
Contact cement provides a permanent, flexible bond on contact. It’s applied to both surfaces, allowed to dry until tacky, then joined. Once the pieces touch, the bond is immediate and strong, ideal for seams that will flex.
Polyurethane-based fabric glue is your other main contender. This is a water-based adhesive that dries clear and flexible. Brands like Bostik Fabric Glue fall here. It’s less aggressive than contact cement, cleans up with water, and is excellent for larger areas or when you need more working time. The trade-off is a slightly longer full-cure time, often a full 24 hours before you can stress the bond.
Cyanoacrylate (super glue) is the one I tell you to avoid for seam construction. Yes, it bonds almost anything instantly. But it dries rigid and brittle. Leather and fabric move and flex; a rigid glue line cannot. It will crack, and when it does, the repair is a nightmare because you can’t separate the pieces without destroying them. Reserve super glue for tiny, non-structural fixes.
| Adhesive Type | Best For | Key Property | Biggest Risk |
|---|---|---|---|
| Contact Cement | Seams, structural bonds, items that flex | Flexible, permanent bond on contact | Joining before tacky stage = weak bond |
| Polyurethane Fabric Glue | Large surface coverage, delicate fabrics, water-based cleanup | Dries clear, remains flexible | Requires full 24-48 hour cure before stress |
| Cyanoacrylate (Super Glue) | Tiny, pinpoint repairs on non-flexing areas | Instant, ultra-strong grab | Dries brittle; cracks under flex; ruins materials on failed repair |
Surface Prep: Why “Clean and Dry” Isn’t Enough
Everyone says to clean the surfaces. That’s the commodity advice. Here’s the non-commodity, workshop truth: leather needs tooth. Fabric needs to be dumb-clean.
Your leather piece likely has a topcoat or a smooth, tight grain. Glue sits on top of that finish; it doesn’t penetrate. You need to scuff it. Take a piece of 250-grit sandpaper and lightly rough up the area where the glue will go. You’re not sanding it down, just breaking the glossy surface. The goal is a uniform, matte finish. Wipe away all the dust with a dry cloth, any grit left behind becomes a barrier.
For fabric, “clean” means free of sizing, fabric softener, or any oils. If it’s new, a quick pass with a lint roller might suffice. If it’s been stored or used, a gentle wash (if the material allows) and a thorough, complete dry is mandatory. Damp fabric will react with water-based glues and prevent solvent-based cements from curing properly.
Where this goes sideways: Skipping the sanding step on leather. The bond will feel secure for a day or two, relying on a superficial grip. The first real flex or tug will peel the glue, and often a layer of the leather’s finish, right off.
Step-by-Step Application: The “Tacky” Window is Everything
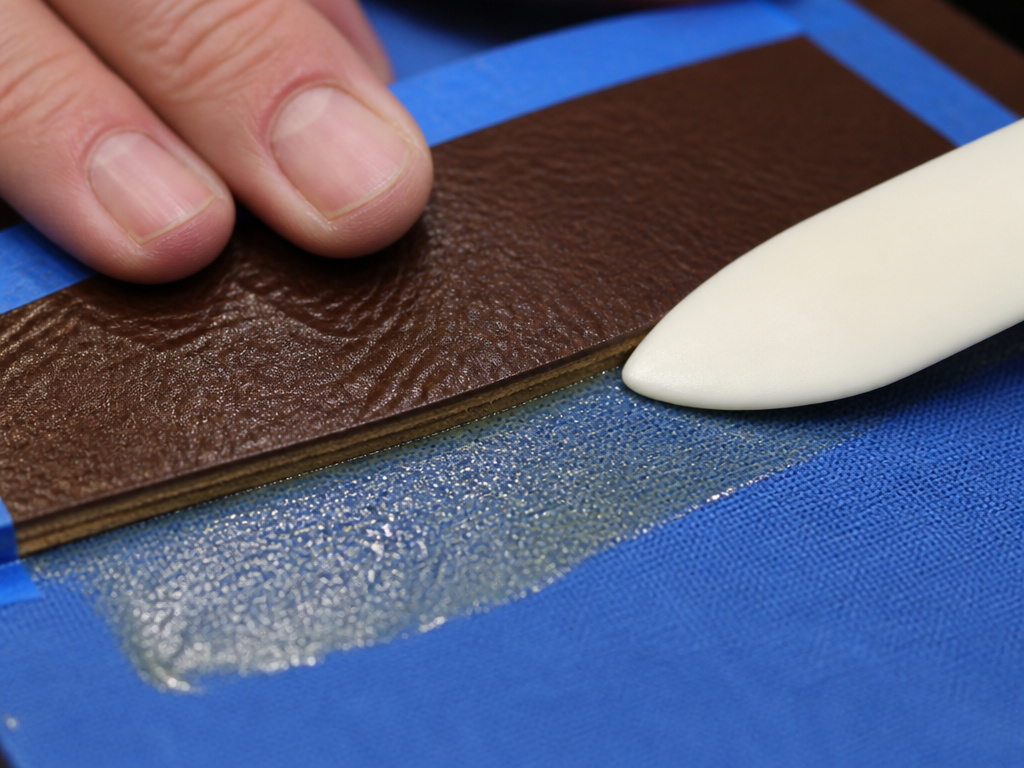 This is the sequence that separates a temporary fix from a lifetime bond. I use Barge All-Purpose Cement for 90% of these bonds, so I’ll frame the steps around a contact cement, but the principles hold for most adhesives.
- Mask and Protect. Use painter’s tape to mask off any areas of the leather or fabric you don’t want glued. Glue straying onto the right side of your fabric is usually a permanent stain.
- Apply a Thin, Even Coat. Using a brush, spreader, or the applicator tip, put a thin layer of adhesive on both the sanded leather and the back of the fabric. Thin is key. A thick coat takes forever to dry tacky and will ooze when pressed.
- Wait for the Tacky Stage. This is the critical wait. Set the pieces aside in a well-ventilated area at room temperature. Depending on your glue and humidity, this takes 3 to 10 minutes. The adhesive should be completely dry to a light touch, but still feel slightly sticky. If you press a knuckle to it and it comes away clean with a faint tack-tack sound, it’s ready. If it strings or feels wet, wait.
- Join with Precision and Pressure. Align the pieces carefully, contact cement bonds on contact, so there’s no sliding them around. Once aligned, press down firmly starting from one edge, working out to eliminate air bubbles. Use a roller or a bone folder for even pressure across the whole seam.
- Let It Cure Undisturbed. The bond is now permanent, but it’s not at full strength. Place the item somewhere flat and leave it alone. While it grabs in minutes, it reaches about 70% strength in a few hours. Full chemical cure and maximum flexibility take 24 to 48 hours.
I learned the importance of the cure time the hard way. A client needed a fabric-lined leather clutch repaired in a hurry. The bond felt strong after two hours, so I handed it over. A week later, it was back, the fabric had started to separate at a stress point because the glue never achieved its full, flexible cross-link. Rushing the cure is a loan against the bond’s future.
Common Pitfalls and How to Dodge Them
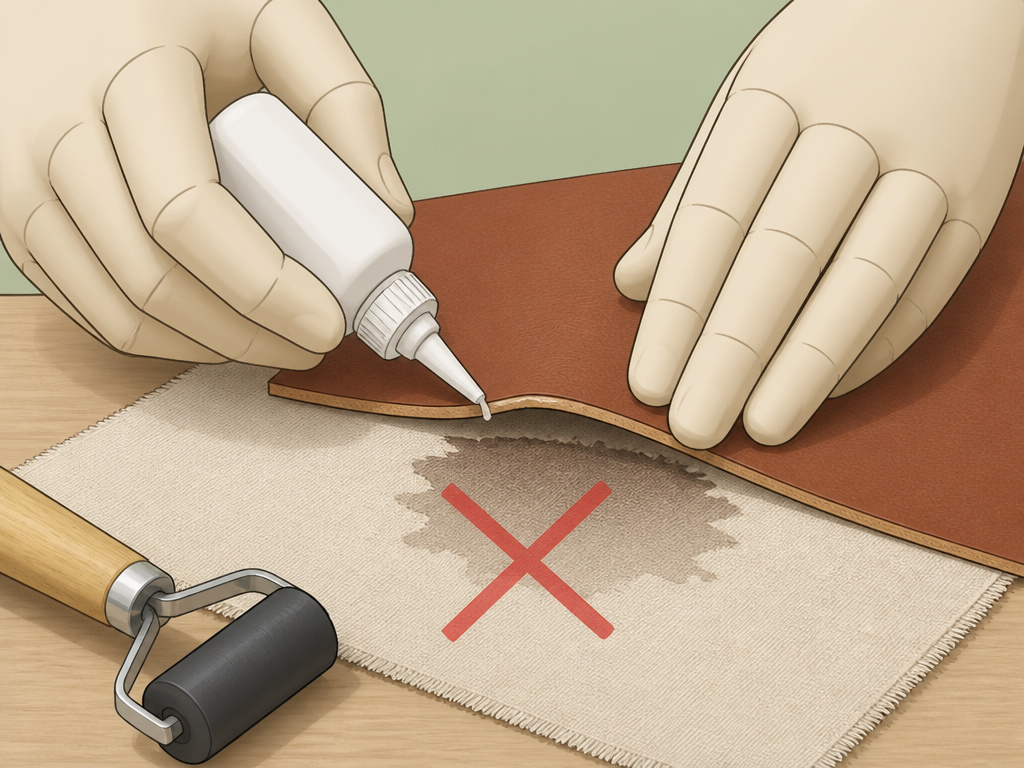 Even with the right glue and prep, small mistakes can ruin the work. These aren’t theoretical, they’re what I see come back to the bench.
Pitfall 1: Glue Bleed-Through on Thin Fabric. You followed the steps, but now there’s a dark, stiff spot on the right side of your silk. Pressure forced liquid adhesive through the weave. * The Fix: For delicate fabrics, skip the clamp. Use only hand pressure with a roller. If using a water-based glue, apply it even more sparingly. Sometimes, a lighter coat on the fabric side only is the answer.
Pitfall 2: The Bond Feels “Bubbly” or Incomplete. After pressing, you can feel spots that didn’t adhere. * The Fix: This is almost always an uneven application or joining before full tack. You can’t fix it post-join. Prevention is your only tool: ensure your glue layer is perfectly even and wait for that uniform tacky feel.
Pitfall 3: Adhesive Stains on the Leather Face. A stray drop or an over-enthusiastic application line has marred the good side. * The Fix: For contact cement, cleanup is nearly impossible once cured. You must carve it away delicately with a sharp blade, risking the leather. The real fix is meticulous masking with tape before you even open the glue bottle. For water-based glues, a damp cloth before it dries can sometimes work.
Easy to miss: Temperature and humidity. A cold, damp shop extends drying times drastically and can prevent proper curing. Aim for a room above 60°F with normal humidity. Don’t work near an open window or an AC vent.
Frequently Asked Questions
Can I use a hot glue gun to attach fabric to leather?
You can, but you shouldn’t for anything meant to last. The high heat can damage or warp certain leathers and synthetics. Hot glue also cools into rigid beads that create lumps under the fabric and provide a poor, brittle bond that fails with flexing. It’s a last-resort, temporary fix.
How do I remove glue if I make a mistake?
It depends on the glue. For uncured water-based fabric glue, a damp cloth can wipe it away. For cured contact cement, you need a dedicated adhesive remover like Citrusolve or Goo Gone, applied carefully to avoid soaking the leather. Always test any remover on a hidden area first. For a full guide, see our article on how to remove glue from leather.
Is there a glue that works on both real leather and faux leather (PU)?
Yes, but preparation changes. A flexible fabric glue or contact cement works on both. The bigger issue is the faux leather itself. PU leather has a plastic coating that glue can’t penetrate. You must scuff it even more aggressively than real leather to give the adhesive something to grip. The bond to PU will always be more superficial.
How long will a glued leather-to-fabric bond last?
With the correct adhesive and technique, the bond should outlast the materials themselves. I have pieces a decade old where the glue line is still perfect. The failure point is usually the fabric fraying or wearing out around the seam, not the adhesive letting go. Using a strong glue is the first step to that kind of longevity.
Can I sew through a glued seam?
Absolutely. In fact, that’s professional practice. Gluing first holds the pieces perfectly in place for stitching, acting as a “third hand.” The stitching then becomes the primary, mechanical bond, with the glue providing extra security and preventing fraying. This is the standard method for attaching linings in bags and wallets.
Before You Go
The single most important decision is the adhesive category. Forgetting everything else, remember this: if the seam will bend, you need flexibility. That means contact cement or a flexible fabric glue. The super glue in your drawer is for ceramics, not this job.
Your first step this week shouldn’t be to start gluing. It should be to test. Get some leather and fabric scraps, sand one, and try your chosen glue. Practice feeling for the tacky stage. See how the materials behave. That half hour of experimentation will teach you more than any article.
All the advice above assumes standard vegetable-tanned or chrome-tanned leather. If you’re working with a highly oiled leather or a modern synthetic-bonded material, the calculus shifts. In those cases, the glue’s chemical compatibility becomes the first question, not the last.
