
How to Clean and Condition a Leather Steering Wheel Safely
This post contains affiliate links. As an Amazon Associate, we earn from qualifying purchases.
This post contains affiliate links. As an Amazon Associate, we earn from qualifying purchases.
To clean a leather steering wheel, use a dry, soft brush to remove dust first. Then, wipe the surface with a clean, damp microfiber cloth. For stuck-on grime, spray a small amount of a pH-neutral leather cleaner, like Lexol pH Leather Cleaner, onto another microfiber cloth, wipe gently, and dry immediately with a third cloth. Never soak the leather or use all-in-one cleaner/conditioners.
This process works because you’re removing contamination in layers, from the lightest to the heaviest, without saturating the hide. Start with the gentlest method first, brushing, and only escalate to a wetter solution if you need to. Skipping straight to liquid cleaner pushes surface grit deeper into the leather’s grain.
What follows is a breakdown of why the leather on your steering wheel needs special care, the tools that actually work, and a detailed, step-by-step cleaning protocol that manufacturers like Hyundai and Mazda implicitly follow. I’ll also explain when you’ve crossed the line from cleaning into damage, how to spot a worn finish, and what to do about it.
Key Takeaways
- The leather on a steering wheel is coated for durability; using the wrong cleaner can strip this coating and lead to premature wear.
- Over-conditioning is a common mistake, a greasy, stiff feel means you’re clogging the leather’s pores, not nourishing them.
- For most daily grime, a dry horsehair brush and a slightly damp microfiber cloth are more effective and safer than a chemical spray.
- Mazda issued a technical service bulletin for peeling steering wheels on certain 2013–2021 models, citing “insufficient wear resistance” as a cause, improper cleaning can mimic or worsen this.
- Keep your hands clean before driving; perfumes, hand creams, and sweat are the top three contributors to a dirty, degraded wheel.
Why Your Steering Wheel Leather Is Different
It’s not the same as your favorite vintage jacket or a sofa. Automotive leather is almost always coated with a protective finish, usually a polyurethane layer, to resist UV rays, abrasion, and the constant friction of your hands. This coating is what gives it that uniform color and smooth feel. Clean the surface of this coating, and you preserve the leather underneath. Strip it away with harsh solvents or abrasive pads, and you expose the raw hide to every drop of sweat and swipe of sunscreen.
Cleaning a coated automotive leather steering wheel is about maintaining the protective finish, not deep-cleaning the hide. Think of it as washing a car’s clear coat rather than sanding down to the bare metal.
Automakers know this. They issue specific guidance, often contradicting each other, which tells you the stakes. One NHTSA technical service bulletin warns against general leather cleaners or waxes because they “may deteriorate the leather coating.” Another federal safety agency publication details approved materials and methods. The message is clear: this is a regulated component, not just a decorative trim piece.
The Tools You Actually Need (And One You Don’t)
Here’s the short list. A long list usually means you’re overcomplicating it.
| Tool | Purpose | What Happens If You Skip/Substitute |
|---|---|---|
| Soft-Bristle Brush (Horsehair) | Lifts dust and grit from seams and perforations without scratching. | Grit stays embedded, acts as sandpaper with every turn, accelerating glossiness and wear. |
| Clean, Lint-Free Microfiber Cloths (3-4) | One for damp wiping, one for applying cleaner, one for drying, one as a backup. A single cloth redeposits dirt and leaves streaks. | Cross-contamination; you spread grease from one area to another, creating a patchy, streaky finish. |
| pH-Neutral Leather Cleaner (e.g., Lexol pH) | Safely breaks down oils and grime without damaging the protective coating. | Alkaline or acidic cleaners break down the coating’s polymers, leading to a sticky or cracked surface within months. |
| Mild Soap & Water (Backup) | For a quick refresh if no dedicated cleaner is available. Must be thoroughly dried. | Soap residue attracts more dirt; water left to air-dry can leave mineral spots or, in seams, promote mold. |
The one tool you don’t need? An all-in-one cleaner and conditioner. They’re typically poor at both jobs. The cleaning agents don’t fully rinse, leaving a film that clogs pores, and the conditioning oils are often too light to penetrate the coating they just cleaned. It’s the leather care equivalent of a 2-in-1 shampoo, it gets you passable results but isn’t ideal for long-term health. For a dedicated, high-performance option, our resource on the best leather cleaner for this specific task breaks down the top choices.
The 3-Step Cleaning Protocol (Dry Brush, Damp Cloth, pH-Neutral Cleaner)
This is my escalation protocol. Start at Step 1 and stop as soon as the wheel is clean. Most wheels never need to go past Step 2.
Step 1: Dry Brush Thoroughly
With the car off and the wheel cool, use a dry horsehair brush. Brush in the direction of the grain (usually horizontal across the wheel) to loosen dust. Pay extra attention to the creases at the 10 and 2 o’clock positions and any perforated sections. You’ll hear a faint, sandy whisper as the grit comes loose. That’s the sound of preventative maintenance. * Skip this, and… You’ll grind that abrasive dust into the finish when you apply a damp cloth, creating micro-scratches that eventually turn the wheel glossy and slick.
Step 2: Damp Microfiber Wipe
Dampen a microfiber cloth with cool water, wring it out so it’s barely damp to the touch. Wipe the entire wheel surface, rinsing and wringing the cloth frequently. You’re not soaking the leather; you’re lifting the layer of soluble grime like salts from sweat. * Skip this, and… You’ll jump straight to chemical cleaner for simple salt deposits, wasting product and increasing the risk of residue.
Step 3: Apply pH-Neutral Cleaner
If grime persists, visible shiny patches or tackiness, move to a dedicated cleaner. Spray a tiny amount (one half-second spray) onto a clean, dry microfiber cloth. Never spray directly onto the wheel; overspray can hit other surfaces and concentrated product can soak in. Wipe the affected area with gentle, overlapping strokes. Immediately follow with a second dry cloth to buff off any residue before it dries.
I learned this the hard way with a different leather project. A recurring edge case is when someone conditions leather too often, based on a schedule rather than need. This leads to a buildup that can clog pores and make the leather feel stiff or greasy, not supple. The same principle applies with cleaner residue.
Work in sections if the wheel is very dirty, always drying a section before moving on. After the entire wheel is clean and dry to the touch, your job is done. This is not the time for conditioner, that’s a separate, occasional process. For related surfaces, the same careful approach applies to your leather car interior.
What NOT to Do: The Damage Checklist
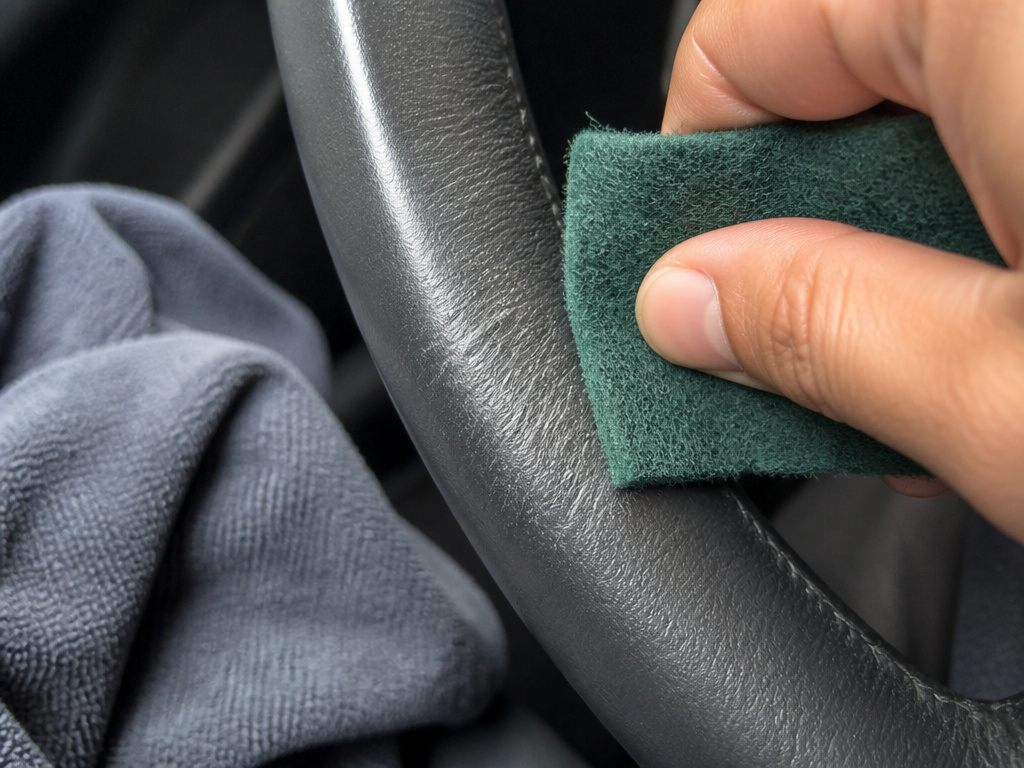 Cleaning can cause more harm than dirt if you follow bad advice. Here are the prohibitions, straight from manufacturer bulletins and ruined wheels.
- Don’t use general leather cleaners, saddle soap, or waxes. As the Hyundai bulletin states, these can deteriorate the specific coating on your wheel. Saddle soap is for uncoated, vegetable-tanned work leather.
- Don’t use rough towels, Scotch-Brite pads, or stiff brushes. These will scratch the coating, creating a hazy, dull appearance. That haze is thousands of tiny scratches.
- Don’t let the wheel stay wet or slippery. Any moisture, especially in seams, should be dried immediately with a clean cloth. “Not leaving the steering wheel wet” is a direct instruction from service procedures.
- Don’t use “protectants” like armor-all. These create a temporary, greasy shine that actually attracts dust and becomes slick over time.
- Don’t scrub aggressively at a single spot. You’re cleaning a surface coating, not sanding a deck. Pressure can delaminate the coating from the leather base.
The consequences aren’t theoretical. Mazda’s TSB for peeling wheels on models like the 2014-2016 Mazda3 cites “insufficient wear resistance.” Using the wrong cleaner directly attacks that wear resistance. If your wheel is already peeling, cleaning is a temporary fix; a permanent repair requires a steering wheel repair kit or professional rewrap.
Stains, Scuffs, and Shine: Problem-Solving
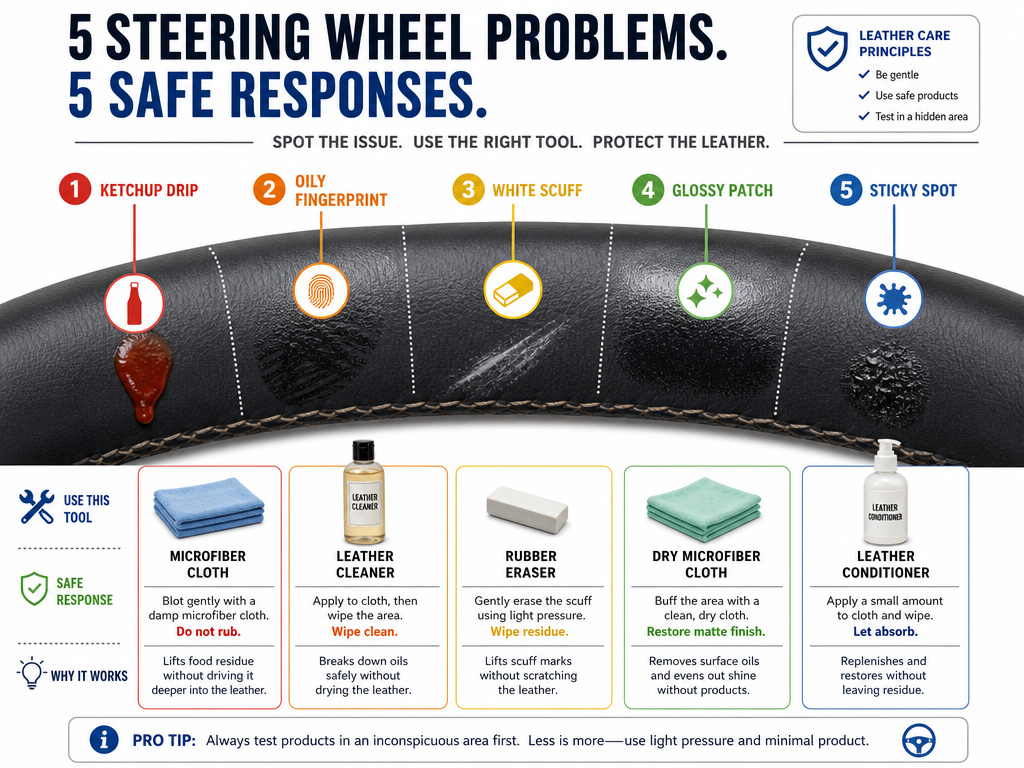 Not all contaminants are equal. Your response should match the crime.
| Problem | Safe Response | Aggressive (Risky) Response |
|---|---|---|
| Ink, Coffee, Ketchup | Damp microfiber cloth, blotting gently. Repeat. | Rubbing alcohol or acetone—these will dissolve the coating and stain the leather underneath permanently. |
| Grease/Oil from Hands | pH-neutral leather cleaner on a cloth, as per Step 3. | Degreasers or dish soap—they strip natural oils from the leather base, causing it to dry and crack. |
| White Scuff Marks | A pure gum rubber eraser, gently rubbed. Often lifts marks from the coating without liquids. | Abrasive magic eraser (melamine foam)—it works by micro-sanding, which will dull the finish. |
| Glossy, Shiny Patches | Thorough cleaning with pH-neutral cleaner. Gloss is often just polished-in skin oils and dirt. | Sanding or heavy-duty “gloss removal” products—they remove the coating entirely. |
| Sticky/Gummy Feeling | This is usually product buildup. Clean with a 10:1 water to isopropyl alcohol mix on a cloth, dry immediately. Test in an inconspicuous spot first. | Using more conditioner—this worsens the clog. The leather needs its pores cleared, not filled. |
For persistent issues on other leather surfaces, like car seats, the same diagnostic approach applies. Different stains demand different solvents.
Is It Dirt, or Is It Wear?
Before you deep-clean, diagnose. Run your fingernail lightly over a discolored spot. Does it catch on a ridge or feel like a chip? That’s wear or a peeling coating. Does the discoloration wipe away onto your finger? That’s built-up grime. – Wear/Peeling: You’re seeing the leather base or the layers of the coating separating. Cleaning won’t fix this. You’re looking at repair or replacement. A high-quality leather steering wheel cover can be a cosmetic and protective solution. – Grime: The color transfers. This is what the cleaning protocol above is for.
Mazda’s bulletin is specific: “Slight wear on a seam of the steering wheel is not applicable… It is inevitable since friction and force are applied while turning the steering wheel.” Know the difference between inevitable seam wear and a problem you can solve.
When to Condition (It’s Less Often Than You Think)
Conditioning is not part of cleaning. It’s a separate, occasional maintenance task for after the leather is perfectly clean. You condition maybe once or twice a year, if that.
Common mistake: Conditioning a dirty or damp wheel. The conditioner seals in the dirt and moisture, accelerating deterioration from within.
A coated automotive leather steering wheel has limited ability to absorb conditioner, the coating is a barrier. The goal is to apply a tiny amount of a product with a high concentration of polymers and UV inhibitors to keep the coating itself supple and to nourish any areas where micro-cracks might be forming. Use a product designed for automotive coated leathers. 1. Clean the wheel perfectly using the 3-step protocol. Let it dry completely, at least an hour. 2. Apply a drop of conditioner (like Lexol Conditioner) to a dry, clean microfiber cloth. 3. Rub the cloth vigorously into your palms to warm and distribute the product. 4. Wipe the cloth evenly over the entire wheel. There should be no visible residue, no greasy feel. 5. Let it cure for at least 4 hours, ideally overnight, before driving.
If the wheel feels greasy or slick after conditioning, you used too much. Wipe it down with a dry cloth. Over-conditioning creates that stiff, clogged feel I mentioned earlier. For a deep dive on the right product, see our guide to the best leather conditioner for your car.
Frequently Asked Questions
Can I use baby wipes on my leather steering wheel?
No. Most baby wipes contain moisturizers, mild soaps, and sometimes alcohols that can leave a residue on the coating. This residue attracts more dirt and can break down the coating over time. A plain, damp microfiber cloth is superior and leaves no residue.
How often should I clean my leather steering wheel?
Wipe it with a dry microfiber cloth once a week to remove surface dust. Give it a full clean with the damp cloth (Step 2) every month. Reserve the pH-neutral cleaner (Step 3) for every 3-4 months, or whenever the wheel looks or feels grimy. Frequency depends on your driving habits, hand cleanliness, and climate.
My steering wheel is peeling. Can I fix it myself?
For small areas of lifted coating, a quality automotive leather repair kit can be effective. These kits include adhesives, color-matched dyes, and sealants. For large areas of peeling or cracking, a DIY repair will likely look patchy. Professional reupholstery or a complete steering wheel replacement is the permanent fix.
Will a leather steering wheel cover protect it?
High-quality cover can protect the original wheel from UV damage and wear, especially if the existing coating is already compromised. However, a poorly fitted cover can rub and cause its own damage. Ensure it’s made for your specific wheel model and installed correctly.
Is it okay to use an all-in-one leather cleaner/conditioner?
I don’t recommend it. These products are a compromise. The cleaning agents often don’t fully rinse, and they leave behind a film that the lightweight conditioners then bind to. This film can clog the leather’s pores and create a sticky buildup. It’s better to use separate, dedicated products for each job.
Before You Go
The goal isn’t a sterile, showroom shine. It’s a wheel that feels solid and clean in your hands, year after year. The method here is simple: escalate gently, dry thoroughly, and condition sparingly. If you remember nothing else, remember this, your steering wheel leather has a plastic-like coating. Treat it like you would a high-tech synthetic fabric: clean the surface, protect it from solvents and abrasives, and never let it stay wet.
Most damage happens in the first six months of ownership, when enthusiasm outpaces knowledge. Go easy. Let the leather tell you what it needs. If it’s just dusty, put the spray bottle away and reach for the brush. That alone will save the finish more than any miracle product ever could.
