
How to Clean Leather Boots Properly | The Damp Leather Method
This post contains affiliate links. As an Amazon Associate, we earn from qualifying purchases.
This post contains affiliate links. As an Amazon Associate, we earn from qualifying purchases.
To clean leather boots, remove the laces and insoles, brush off dry dirt, wash with a mild cleaner and water, rinse thoroughly, and let them air dry away from heat. Conditioning and waterproofing treatments work best when applied to clean, slightly damp leather. This helps the products penetrate instead of sitting on the surface.
That last point about damp leather is the whole game. Most guides tell you to dry boots completely before treating them, which is backwards. Water inside the leather’s outer layer actively pulls conditioner and waterproofing spray deeper into the pores. If your boots are bone-dry after cleaning, you’ve missed the optimal window.
What follows is the difference between a basic wipe-down and actual boot care. This guide explains the right tools, the step-by-step clean, the counterintuitive damp-leather method, and the specific mistakes that crack soles and ruin leather in one season.
Key Takeaways
- Clean boots promptly after getting muddy; mud acts as a desiccant, pulling natural oils from the leather as it dries.
- Conditioner and waterproofing spray penetrate best when applied to clean, slightly damp leather, not dry leather.
- Never dry boots with direct heat (radiators, hair dryers, hot cars); heat cracks leather and can delaminate soles.
- If you don’t wear your boots often, use them or apply a conditioner at least every three months to prevent the PU midsole from degrading via hydrolysis.
- For salt stains, a 1:3 vinegar-to-water solution is more effective than soap alone at drawing out the corrosive minerals.
The Tools You Actually Need (Not a Marketing List)
Skip the fancy kits. You need a soft-bristle brush, a few lint-free cloths, a mild leather cleaner or saddle soap alternative, and your chosen conditioner. A horsehair brush for polishing is optional and only for aesthetics on smooth finishes.
The brush is for dry dirt. The cloths are for applying and buffing. The cleaner is for when water isn’t enough. That’s it. Investing in a specialized leather cleaner like LOWA Shoe Cleaner or a basic glycerin saddle soap makes the job easier, but dish soap diluted in water works in a pinch. The goal is to remove grime without stripping the leather.
The technical detail: Full-grain leather has a tight pore structure. Rough-out leathers like suede and nubuck have a raised, open nap. Cleaners and conditioners are formulated for one type or the other. Using a conditioner meant for full-grain leather on suede will mat the nap and create dark, greasy patches.
Step-by-Step Cleaning Process
Start by pulling the laces and removing the footbeds. This lets you clean the tongue and interior and allows everything to dry properly. Stored moisture under the insole is a fast track to mildew.
Brush off all loose dirt and debris. Use a dedicated boot brush or an old toothbrush for stitching and welts. This abrasive step is crucial. Rubbing a cloth over grit grinds it into the leather like sandpaper.
For general grime, use lukewarm water and a soft cloth. For heavier soil, add a small amount of a pH-balanced leather cleaner or a drop of mild dish soap to your water. Work it into a lather on the boot, not directly from the bottle onto the leather. Scrub gently in circles.
Rinse thoroughly with a clean, water-dampened cloth to remove all soap residue. Soap left in the pores will attract more dirt and can dry the leather. This is where most quick clean-ups fail—they don’t rinse.
| Step | Action | If You Skip It |
|---|---|---|
| Remove Laces & Insoles | Allows full access and airflow. | Trapped moisture leads to mildew; tongue remains dirty. |
| Dry Brush | Removes abrasive surface grit. | You grind dirt into the grain during washing, causing micro-scratches. |
| Wash & Rinse | Uses mild cleaner, followed by clear water rinse. | Soap residue remains, attracting dirt and drying the leather from the inside. |
| Air Dry | Places boots at room temperature with good airflow. | Heat sources cause leather to shrink, crack, and glue to fail. |
Let the boots air dry naturally, away from direct sunlight, heaters, or vents. Stuffing them with newspaper or paper towels helps absorb internal moisture and maintain shape. Change the paper when it feels damp. This process takes several hours. Be patient.
The Damp-Leather Waterproofing Trick (Why It Works)
Here’s the part most people get backwards. Your boots should be slightly damp when you apply conditioner or waterproofing spray. Not soaking wet, but tacky to the touch.
The science is straightforward. Leather is porous. When the outer layer is damp, the water inside creates a capillary action that draws oil-based conditioners and silicone-based waterproofing agents deeper into the material. Apply the same product to bone-dry leather, and it mostly sits on the surface. It might look treated, but the first deep flex or heavy rain will show the difference.
LOWA’s official guide states to apply their Water Stop PRO spray while boots are “slightly damp.” REI’s expert advice says if boots are too dry after cleaning, wrap them in a very wet towel for a couple of hours to re-hydrate the outer layer before treatment. This isn’t a niche tip; it’s manufacturer-recommended best practice that most summaries gloss over.
Apply waterproofing spray (e.g., LOWA Water Stop PRO) while the boots are slightly damp. Damp leather allows the treatment to penetrate more effectively. Full effectiveness is reached after approximately 24 hours.
I learned this the hard way after a season of treating perfectly dry boots. The waterproofing seemed to wear off after just a few hikes in wet grass. Now I time it so the boots are just past the dripping stage, and the treatment lasts through weeks of regular use.
Conditioning: It’s Not Optional, It’s Medicine
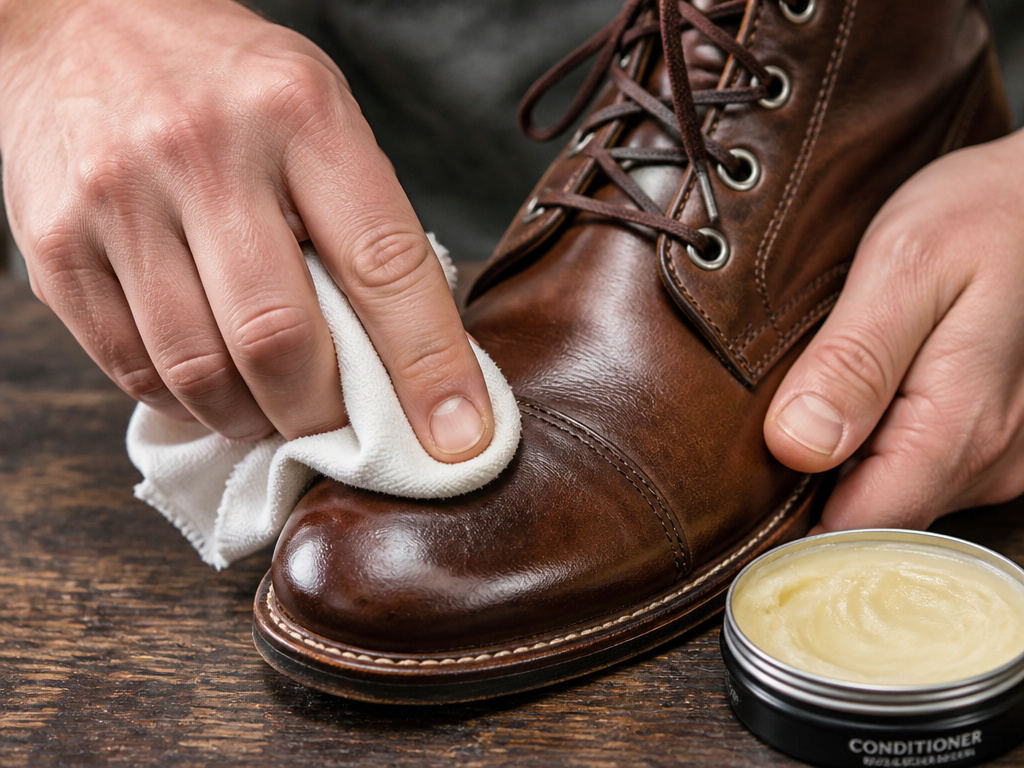 Cleaning strips away dirt and oils. Conditioning puts nourishment back. Think of it like moisturizing skin after washing with soap. A leather cream that meets the DIN EN 16165 standard for water resistance.amazon.com/dp/B07L5GF7TS?linkCode=osi&th=1&psc=1&tag=test-20) or Blundstone Renovating Cream, replaces lost lipids that keep the fibers supple.
Apply a small amount with your fingers or a cloth, working it into the leather in circular motions. Pay extra attention to high-flex areas like the forefoot and ankle collars. These spots dry out and crack first. Let the cream absorb for at least 20 minutes, then buff off any excess with a clean cloth. A thin, even coat is better than a thick, greasy one.
Common mistake: Using wax-based conditioners or oils on boots you may want to re-sole. Cobbler adhesives have a tough time bonding to a surface clogged with wax or heavy oil. For boots built to last decades, stick with water-based creams.
Conditioning frequency depends on use. Heavy, weekly use might call for a conditioning session every month. Occasional wear might only need it every season. Your eyes and hands are the best guides. If the leather looks dry, feels stiff, or has lost its subtle sheen, it’s time.
Special Cases: Salt, Suede, and Stored Boots
 Not all messes are created equal. Standard mud requires the standard process. These three scenarios need a tailored approach.
Salt Stains are corrosive. Don’t just wipe them. Blundstone recommends a cleaning solution of one part vinegar to three parts water. The acetic acid helps neutralize and draw out the salt crystals. Apply the solution with a cloth, rinse, and dry as usual. Stubborn stains may need a couple of treatments.
Suede and Nubuck require a gentler touch. Use a suede-specific cleaner and a soft suede brush. Never use standard leather conditioner on these surfaces. It will ruin the nap. Instead, use a spray-on protector designed for rough-out leathers. Brush the nap back up after it dries.
Boots in Storage face a silent killer: hydrolysis. This is the chemical breakdown of the polyurethane (PU) midsole found in many quality boots. LOWA states plainly that if boots are not used often, the care product should still be applied once every three months, and you should “take them out for a walk around the block.” Inactivity in a closet allows moisture to degrade the midsole foam, causing it to crumble. Your unworn boots can literally fall apart on a shelf.
| Problem | Cause | Fix |
|---|---|---|
| White, crusty rings | Salt from winter roads or sweat. | Clean with 1:3 vinegar/water solution; condition immediately after. |
| Stiff, cracked flex points | Leather dried out, lost natural oils. | Regular conditioning with a water-based cream; focus application on high-stress areas. |
| Crumbling midsole | Hydrolysis from prolonged storage in non-ideal conditions. | Use boots or condition them quarterly; store in a cool, dry place. |
What Not to Do: The Shortlist That Ruins Boots
Good boot care is as much about avoiding mistakes as following steps. These errors have permanent consequences.
First, never use direct heat to dry boots. A radiator, hair dryer, or hot car dashboard can raise the leather’s temperature past 50°C. This causes the leather to shrink and become brittle, and it can melt the adhesive bonding the sole. The damage is immediate and irreversible.
Second, don’t let mud dry on your boots. LOWA notes that mud acts as a desiccant, actively pulling moisture and oils from the leather as it dries. You’re not just cleaning off dirt; you’re stopping the leather from being sucked dry.
Finally, avoid universal “clean-and-shine” products. They are compromises. Cleaning and conditioning are separate chemical processes with different goals. A combo product typically cleans poorly and conditions inadequately, leaving a waxy buildup that clogs pores.
Where this goes sideways: Storing boots in a plastic bag or airtight container. Trapped moisture from ambient humidity has nowhere to go, creating a perfect environment for mildew. I made this mistake with a jacket once. A canvas storage bag or a shelf in a climate-controlled space is the only safe option.
Frequently Asked Questions
Can I use dish soap to clean my leather boots?
Yes, but sparingly. Use a single drop of mild dish soap in a bowl of lukewarm water to create a mild sudsy solution. The key is a thorough rinse with a clean water-dampened cloth to remove all soap residue. Soap left behind will attract dirt.
How often should I condition my boots?
There’s no fixed schedule. Condition when the leather looks dry, feels stiff, or loses its suppleness. For boots worn hard weekly, this could be monthly. For occasional wear, every 3-6 months is typical. High-flex areas will show you when they’re thirsty.
Does waterproofing spray work on already wet boots?
No. The spray needs to bond to the leather fibers, not bead up on standing water. Boots should be clean and slightly damp from the cleaning process, not soaking wet from a rainstorm. Dry the exterior with a towel first if they’re waterlogged.
Can I polish my boots after conditioning?
Yes, but only on smooth, full-grain leather where you want a shine. Polish is for aesthetics. Always condition first, let it fully absorb, then apply a thin layer of wax-based polish like Saphir Médaille d’Or if you want a luster. Polishing unconditioned leather seals in dryness.
Will cleaning remove the waterproofing?
Cleaning can diminish the durable water repellent (DWR) finish on the leather’s surface. That’s why re-applying a waterproofing treatment after cleaning and conditioning is part of the complete care cycle. The Gore-Tex® membrane inside, if present, is unaffected by surface cleaning.
The Bottom Line
Cleaning leather boots isn’t just about making them look presentable. It’s a maintenance cycle that replaces what the elements take away. The sequence is essential: clean, condition, protect. The damp-leather trick for treatment application is the critical point that makes everything else more effective.
If you take away one action, make it this: never store your boots dirty or damp. A quick brush-off and air-dry today prevents a deep clean or a repair tomorrow. Leather is resilient, but it remembers every mistake. Your job is to not give it any.
