
How to Clean Suede Shoes & Avoid Common Cleaning Mistakes
This post contains affiliate links. As an Amazon Associate, we earn from qualifying purchases.
This post contains affiliate links. As an Amazon Associate, we earn from qualifying purchases.
You can clean suede shoes by following a dry-first, water-last process: brush away dry dirt, use a suede eraser for scuffs, spot-clean stubborn marks with a specialist cleaner or a tiny amount of diluted dish soap on a cloth, then brush the nap and apply a protector. The whole job takes about 20 minutes of active work, but the shoes need a full 24 hours to dry away from heat.
That 24-hour window is where most attempts fail. Suede stiffens as it dries, and rushing it back onto your feet before it’s fully dry can permanently set a stain or leave watermarks that no amount of brushing will lift. The difference between a successful clean and a ruined pair isn’t the product you use; it’s the patience you show after you’ve used it.
What follows is the exact sequence that works, drawn from manufacturer instructions and the one mistake I’ve watched people make over and over. This section explains the tools, the five-step process, the debate about using water, and how to handle sticky residue or other tricky situations.
Key Takeaways
- Always start with a dry brush and eraser, most marks come off without any liquid at all.
- If you must use a cleaner with water, clean the entire shoe at once to avoid splotching and uneven color.
- Never, ever apply heat to dry suede. Let it air-dry naturally, stuffed with paper, for a full 24 hours.
- A suede protector spray is your best defense, but apply it from 25 cm away and let it dry for 15 minutes after cleaning.
- Different brands have different rules. Dr. Martens says use their damp-cloth method, while Giuseppe Zanotti warns against water entirely.
The Tools You Actually Need
You don’t need a cabinet full of specialty products. For 90% of suede cleaning jobs, three tools do the heavy lifting.
First, a suede brush. Look for one with brass bristles, like the Saphir Médaille d’Or MINI SUEDE & NUBUCK BRASS BRUSH. The brass is firm enough to lift dirt but gentle enough not to shred the delicate nap. A soft toothbrush works in a pinch, but it won’t restore the texture the same way.
Second, a suede eraser. This is just a block of textured rubber, but it’s magic for scuff marks. You can find them cheaply, and they last for years.
Third, a specialist suede cleaner. This is where opinions diverge. Brands like Dr. Martens and ECCO make their own (Dr. Martens Suede Cleaner, ECCO FOAM CLEANER). Saphir makes a well-regarded SUEDE & NUBUCK CLEANER. The key is to pick one and follow its instructions, mixing and matching can lead to chemical reactions that discolor the leather.
Common mistake: Using a leather conditioner or saddle soap on suede. These products are designed for smooth, full-grain leather and will clog suede’s porous surface, leaving a greasy, darkened patch.
The 5-Step Suede Cleaning Process (and the One Everyone Skips)
Here’s the sequence that gives you a fighting chance. The steps are simple. The discipline to follow them in order is what separates a clean pair from a clean-looking pair that falls apart in two months.
Step 1: Dry Brush Everything
Before you even think about moisture, take your suede brush and go over the entire shoe. Brush in one direction, following the nap of the suede, which is the direction the tiny fibers naturally lie. You’ll feel less resistance brushing with the nap.
This step alone removes loose dirt, dust, and dried mud. If your shoes are just dusty, you can stop here. The Wirecutter guide emphasizes this dry-first approach, and it’s correct. Most of the grime on suede shoes is dry and particulate.
Step 2: Attack Scuffs with the Eraser
For scuff marks, oil stains, or darkened spots, take your suede eraser. Rub it back and forth over the mark with moderate pressure. You’ll see a pinkish rubber dust lift away, taking the surface grime with it.
Don’t go crazy. Over-rubbing in one spot can wear down the suede’s fragile surface, creating a bald patch. If the mark persists after 30 seconds of erasing, move on to the next step instead of grinding away.
Step 3: Spot-Clean Stubborn Stains
This is the crossroads. If the stain remains, you need a cleaner. Here’s where you must decide whose advice to follow.
The Saphir deep cleaning guide says to pour their cleaner into a cup, dip a natural-hair brush into it, and scrub over a sink. Dr. Martens says to spray their cleaner on, then scrub with a damp sponge. The Wirecutter method suggests a solution of suede shampoo or dye-free dish soap and water, applied with a damp cloth.
Technical Snippet: For spot cleaning, apply a small amount of specialist suede cleaner to a damp cloth. Work the cloth in a rapid side-to-side motion over the stain, being careful not to saturate the leather. Allow the area to dry completely before assessing if a second pass is needed. This method minimizes water exposure while lifting set-in dirt.
My take? If you own a branded shoe, use the brand’s recommended cleaner. It’s formulated for their specific leather. For generic suede, the Saphir or Wirecutter method is reliable. The critical rule from all sides: if you use water, clean the entire shoe. Spot-cleaning with water leads to splotching because the cleaner can slightly alter the suede’s color.
Step 4: Dry, Shape, and Wait (The Skipped Step)
Once cleaned, stuff the shoes tightly with newspaper or undyed tissue paper. This absorbs internal moisture and holds the shoe’s shape as it dries. Then, walk away.
Place them in a well-ventilated area, away from direct sunlight, radiators, or heaters. Giuseppe Zanotti’s care guide explicitly warns against heat and light exposure, which can cause irreversible color changes and texture loss.
Where this goes sideways: Putting slightly damp suede shoes near a heat source to “speed up drying.” The outer layer dries and stiffens rapidly, trapping moisture deeper inside. This can cause the leather to crack as it contracts, and it sets any remaining stain permanently.
Let them dry for a full 24 hours. Yes, a full day. You’ll know they’re ready when the stuffed paper feels dry to the touch and the suede has lost that cold, damp feeling.
Step 5: Restore the Nap and Protect
After drying, the suede will feel stiff and look a bit flat. Take your dry suede brush and brush vigorously all over, again following the nap’s direction. This fluffs the fibers back up and evens out the color.
Finally, apply a protector. ECCO advises spritzing their ECCO REPEL from 25 cm away and letting it dry for 15 minutes. The protector doesn’t make suede waterproof, but it gives you a crucial few seconds to blot away spills before they soak in.
Water: The Great Suede Debate
Should you use water on suede? Even the experts can’t agree. This table lays out the conflicting advice, so you can see the stakes.
| Source | Stance on Water | Key Warning |
|---|---|---|
| Nike | Avoid. | “Suede absorbs water, so washing… With water can actually cause stains to set.” |
| Giuseppe Zanotti | Avoid. | “Prolonged contact with water… Can also cause staining.” |
| Dr. Martens | Use cautiously with their cleaner. | “Be careful not to get the suede too wet.” |
| Wirecutter (NYT) | Use for deep cleans. | “Clean the entirety of your suede item at once to avoid splotching.” |
The through-line is control. If water is involved, it must be minimal, applied evenly, and followed by a complete, slow dry. The Saphir guide for cleaning nubuck follows a similar principle, using a dedicated cleaner with water but rinsing the brush meticulously to avoid over-wetting.
For most home cleaners, the safest path is the driest path. Use water only as a last resort, and treat it as a whole-shoe commitment, not a spot treatment.
Handling Sticky Residue and Other Edge Cases
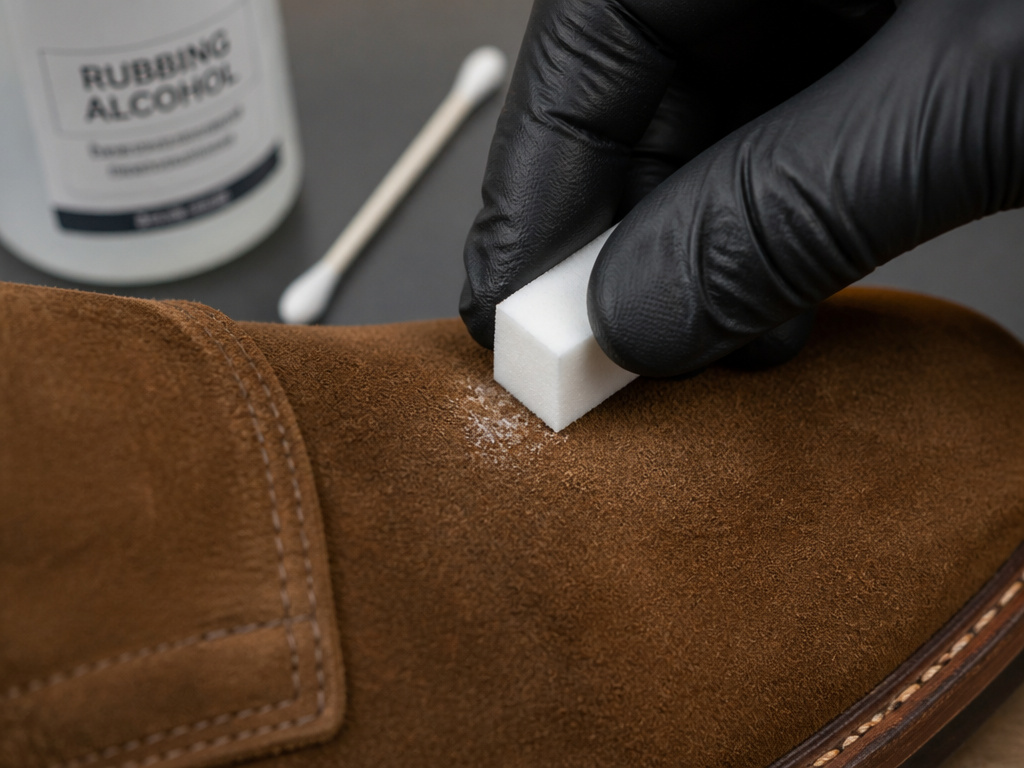 Sometimes, you face something worse than dirt. Gum, wax, or a spilled soda leaves a sticky film. Standard brushing just smears it.
For gum or wax, the old freezer trick works. Seal the shoes in a plastic bag and freeze them for a few hours. The gum hardens and you can usually pick or scrape it off without leaving a mark.
For sticky residue, Saphir’s guide says to pay particular attention when brushing. You need to break the residue’s grip without grinding it deeper. Try dabbing the spot with the corner of a suede eraser first. If that fails, a tiny amount of rubbing alcohol on a cotton swab can dissolve the stickiness, but test it on an inconspicuous area first, as alcohol can strip dye.
What about suede versus nubuck in these situations? Nubuck is even more delicate. Its sanded surface is more prone to flattening. Use a gentler touch and a dedicated nubuck brush if you have one.
Common Mistakes and How to Avoid Them
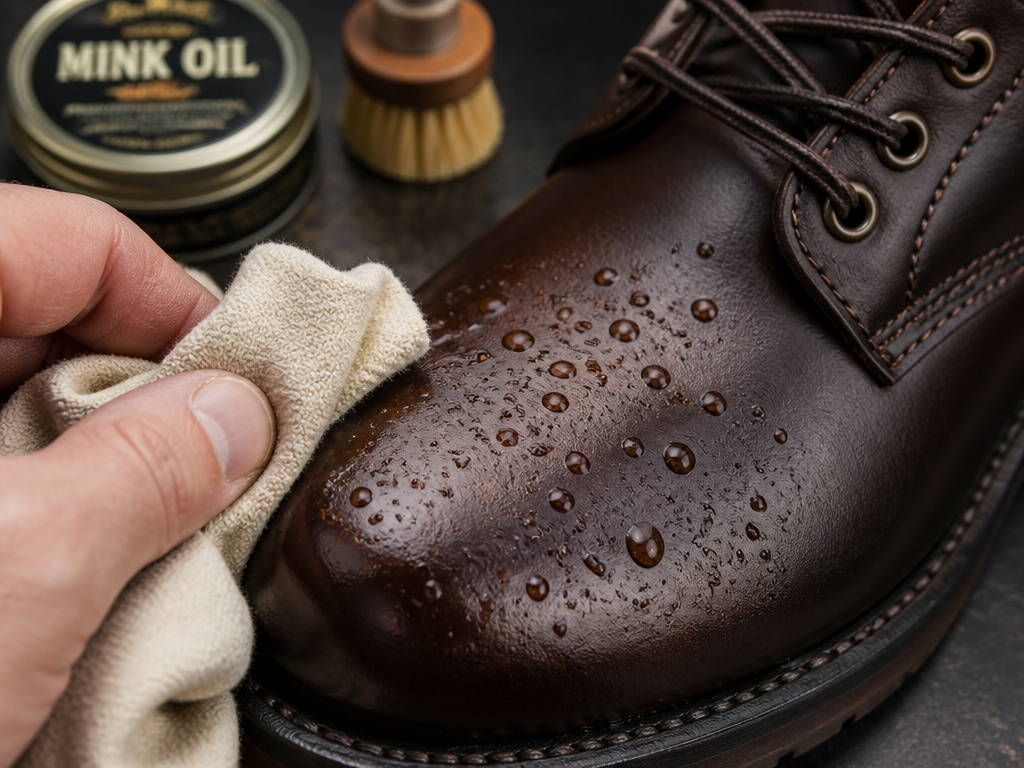 It’s easier to list what not to do. These aren’t minor slip-ups; they’re the difference between a successful clean and a trip to the cobbler, or the trash.
| Mistake | What Happens | The Fix |
|---|---|---|
| Cleaning wet suede | Brushing pushes moisture and dirt deeper, setting the stain. | Let mud or rain dry completely, then brush it off as dry dirt. |
| Using a “one-size-fits-all” leather product | Conditioners darken and grease suede; saddle soap dries it out. | Use products labeled specifically for suede or nubuck only. |
| Drying with heat | Causes irreversible stiffening, cracking, and color change. | Air-dry at room temperature for 24 hours, stuffed with paper. |
| Not protecting after cleaning | The next rainstorm or spill soaks in immediately. | Apply a suede protector spray as the final step, every few months. |
The worst mistake is assuming all leather is the same. The care routine for full-grain leather boots is fundamentally different. Suede needs a lighter touch and a more cautious approach to moisture.
Before You Go
Let me share what I’ve learned the hard way. I once ruined a pair of suede chukkas by being impatient. I’d cleaned a salt stain well, but I needed to wear them the next day. They were almost dry, just slightly cool to the touch. I wore them for a few hours, and by that evening, the cleaned spot had darkened into a permanent, water-stained ring. The trapped residual moisture from my foot heat had re-activated the salts and set them for good.
The bottom line isn’t a product. It’s a timeline. Give the process the full 24 hours it demands. If you can’t, don’t start the clean. A dirty shoe can always be cleaned later; a rushed cleaning job is often permanent.
Your best bet for maintaining any [suede leather](https://leathergenesis.A Kiwi suede brush and a regular protector spray are essential. Brush them after every few wears to keep the nap lifted and dirt from settling in. And keep them away from that plastic bag in the closet, trapped moisture is a one-way ticket to mildew.
Frequently Asked Questions
Can I use vinegar or rubbing alcohol on suede?
Yes, but with extreme caution. Both are drying agents and can strip color. Use only a tiny amount on a cotton swab for a specific stain, and always test on an unseen area first. For general cleaning, a dedicated suede cleaner is far safer.
How do I get salt stains out of suede?
Salt is tricky because it dissolves in water. Let the salt residue dry completely, then brush it off vigorously with a dry suede brush. If a white ring remains, use a suede eraser. Only use a damp cloth with cleaner as a last resort, and be prepared to clean the whole shoe.
Is it okay to use a suede protectant on new shoes?
Absolutely. In fact, it’s the best time. Applying a protector like ECCO REPEL or Kiwi Suede Protector to new, clean suede creates a barrier against the first stains. Just follow the application distance (usually 25 cm) and let it dry fully.
What’s the difference between cleaning suede and nubuck?
Nubuck is top-grain leather sanded on the outside, making it even more velvety and slightly more durable than suede, but also more prone to flattening. Use a softer brush, often called a nubuck brush, and avoid heavy scrubbing. The basic dry-first principle is the same. For a dedicated guide, see our process for cleaning nubuck shoes.
Can a cobbler fix suede I’ve ruined?
Often, yes. Cobblers have industrial-grade cleaners, dyes, and texture-restoration tools that can salvage shoes with set stains or discoloration. It’s more expensive than a DIY clean, but it’s cheaper than a new pair. If you’ve genuinely messed up, take them to a pro before you give up.
The Bottom Line
Cleaning suede isn’t about finding a magic potion. It’s about respecting the material’s limits. Stick to the dry tools first, commit to the full drying time, and use water only as a controlled, whole-shoe operation. Your shoes will thank you by lasting for seasons, not just a few more wears.
If you remember one thing, let it be this: a dry brush and 24 hours of patience will solve more suede problems than any bottle of cleaner ever will. Start there.
