
Learn How to Cut Thick Leather: The Multi-Pass Technique Guide
This post contains affiliate links. As an Amazon Associate, we earn from qualifying purchases.
To cut thick leather cleanly, you need a sharp blade, a stable work surface, and a methodical series of shallow passes rather than a single forceful cut. Attempting to slice through in one go deflects the blade, tears the grain, and leaves a ragged edge that’s impossible to burnish straight. The sharpness of your tool matters more than its type, whether a utility knife, rotary cutter, or dedicated round knife, and the process always involves scoring a guide line first, then deepening that groove with repeated, controlled strokes.
That gap between knowing you need a sharp blade and actually getting a clean cut is where most projects go sideways. It’s a mechanical problem with a very specific fix.
What follows is a breakdown of the three things that actually decide the cut: the tool’s edge, the leather’s resistance, and the technique that connects them. By the last section, you’ll be able to read a piece of leather and know exactly which blade to reach for and how many passes it will take.
Key Takeaways
- Sharpness beats blade type. A fresh utility blade will outperform a dull, expensive round knife every time. Plan to change or strop your blade after every two or three thick projects.
- The first cut is a score, not a slice. Your initial pass should only etch a shallow groove into the surface. This groove guides all subsequent passes and prevents the blade from wandering. A heavy straightedge is essential for straight lines.** A lightweight ruler will creep under pressure, guaranteeing a crooked cut. Clamp it down.
- Wet leather cuts easily but closes up. Dampening leather can help with intricate cuts, but the fibers swell and the cut seam will tighten as it dries, potentially distorting your piece.
- Listen for the mat. The sound of your blade tip scraping the self-healing mat underneath is your audible cue that the cut is complete.
The Right Blade for the Job
You don’t need a museum-piece tool, but you do need a sharp edge that suits the line you’re trying to make. The wrong blade forces a technique, and that’s when you start fighting the material.
Let me share what I’ve learned. Early on, I grabbed whatever was handy, craft knives, shears, even a fresh box-cutter blade. They worked, sort of, but the results were inconsistent. The real lesson wasn’t about buying better tools; it was about matching the tool’s action to the leather’s thickness. A rotary cutter glides on thin stock but binds on 8-ounce belt leather. A heavy round knife can pare through the same belt leather in three clean passes, but its curved blade struggles with tight interior corners.
A sharp snap-off utility knife and a heavy steel straightedge will cut everything cleanly while you learn, and a fresh blade segment costs almost nothing. Sharpness beats blade type every time.
This is based on years of practical experience. Here’s a straightforward guide to choosing.
| Tool | Best For | Where It Fails |
|---|---|---|
| Snap-Off Utility Knife | Straight cuts on all thicknesses; beginner-friendly. | Tight curves; the blade can snap under lateral torque on very thick, dense leather. |
| Rotary Cutter | Long, uninterrupted straight lines on leather up to 4-5 oz. | Curves and thick leather (over 5 oz); the blade can deflect and skip. |
| Round Knife (Head Knife) | Long straight cuts and sweeping curves on medium to thick leather. | Interior cutouts and tight radii; requires significant skill to master. |
| Craft/X-Acto Knife | Detailed patterns, tight corners, and intricate work. | Long straight lines; the thin blade flexes and wanders. |
If you’re making your first belt or strap, start with a heavy-duty utility knife like the Olfa SAC-1 or the Deco Cuir TB249. Their 30-degree angled blades are replaceable and strike a balance between control and penetration. For the craftsman ready to step up, a C.S. Osborne round knife is the lifetime investment. Its curved blade uses a slicing motion that parts fibers cleanly, but it demands regular stropping to maintain its rolled edge.
Where this goes sideways: Using fabric shears on thick leather. They might cut, but the crushing action between the two blades mashes the edge fibers. Your burnisher will later reveal a fuzzy, compacted edge that refuses to polish. For anything over 3 oz, put the shears away.
Your Workspace: The Foundation of Control
A clean cut is decided before the blade touches leather. The stability of your work surface and the leather itself is the unspoken half of the technique.
First, protect your table and your blade’s edge with a self-healing cutting mat. This isn’t just about scrapes; the slightly forgiving surface lets the blade tip penetrate fully through the leather without immediately dulling on hard wood or stone. You’ll hear the difference, a crisp snick when it hits the mat versus a muffled drag.
Second, flatten your material. Tooling leather, especially, can curl at the edges. A heavy object (a stack of books, a slab of granite) left on it overnight works. For stubborn pieces, a light mist of water on the flesh side before weighting can help, but let it dry completely before cutting. Leather that is too wet will take an impression easily, but the cut edges will swell and pinch together as they dry, leaving you with a seam that’s harder to stitch or finish.
Third, mark your line with something that won’t smear. A silver waterproof pen or a fine awl scratch is ideal. A ballpoint pen’s ink can bleed with applied moisture or heat later. Place your straightedge on the side of the line you’re keeping. This way, if the blade drifts, it chews into the waste scrap, not your keeper piece.
The part nobody mentions: Clamp your straightedge. Your hand pressure is not enough. Even a slight shift between passes, and you will make multiple passes, creates a stepped, jagged edge. A quick-grip clamp on either end of the ruler frees both your hands for the cut.
Scoring First: The Multi-Pass Method Explained
This is the core technique. Thick leather isn’t paper; you can’t punch through it. You have to persuade it.
The physics are simple: a blade meeting resistance wants to find the path of least effort. In a single, deep thrust, that path is sideways, following the leather’s natural grain. This is blade deflection, and it’s why your cut veers off the line. The multi-pass method eliminates this by using the first shallow cut to create a controlled channel of least resistance, a score line that all future passes must follow.
Step 1: The Scoring Pass
Hold your blade vertically at a 90-degree angle to the leather. Apply only enough pressure to etch a clear, continuous groove along your marked line. You should not cut more than one-third of the way through the leather. This isn’t about depth; it’s about creating a guide.
Step 2: The Deepening Passes
Without moving your straightedge, make a second pass along the exact same groove. Then a third. With each pass, the blade will naturally seat deeper into the channel it created. You’ll feel less resistance. For leather 8 oz and thicker, expect 4 to 6 passes.
Step 3: The Final Cut
The last pass should feel almost effortless. Listen for the sound of the blade tip gently scraping the cutting mat beneath. That’s your audible confirmation that you’ve cut completely through. If you pull the pieces apart and see a few clinging fibers, use a sharp craft knife to sever them, don’t tear them.
I learned the importance of this method the hard way on an early holster project. I was in a rush and tried to power through a piece of 9-ounce leather in two deep pulls. The blade deflected, following a slight grain variation, and the main panel was ruined. The waste piece showed a clean, straight cut for the first inch, then a clear, gradual curve off the line. Now, I build the time for multiple passes into every project plan. It’s not slower; it’s sure.
If the Cricut machine repeatedly stops at the same point during a cut, it may indicate imperfections in the material. The recommended procedure is to remove the material, discard it, and restart the cut with a new piece.
This manufacturer advice underscores the principle: the machine, like a hand blade, cannot power through a dense imperfection. It’s a limit of the material, not the tool. Your hand has an advantage, you can feel the inconsistency and adjust pressure or make an extra pass.
Cutting Curves and Interiors

Straight lines have a guide. Curves and interior cutouts require a different kind of control.
For external curves, a round knife is king. Its curved blade allows you to use a rocking, slicing motion, parting the fibers cleanly as you follow your traced line. For tighter radii that a round knife can’t handle, switch to a sharp craft knife. Work in short, connected strokes, never trying to complete the curve in one continuous pull.
Interior cutouts (like a belt hole or a pattern window) are where beginners snap blades. The method is the same, score first, but the approach changes. Start by punching a starter hole within the waste area using an awl or a drive punch. This gives your knife blade a place to enter without forcing the tip. Then, from that hole, score your interior line with light passes. The key is to never twist the blade. Let the score line deepen with each revolution around the shape.
Common mistake: Cutting a rounded corner in a single dragging motion. This almost always results in a tear or a jagged, faceted edge. Instead, use the “quarter-cut” technique: cut the two straight sides to meet at the corner point, then make a series of tiny, straight cuts to gradually form the curve, shaving off the sharp corner bit by bit.
When to Use a Machine (Cricut, Laser)
Hand tools give you feel and adaptability. Machines offer repeatability and precision for specific tasks.
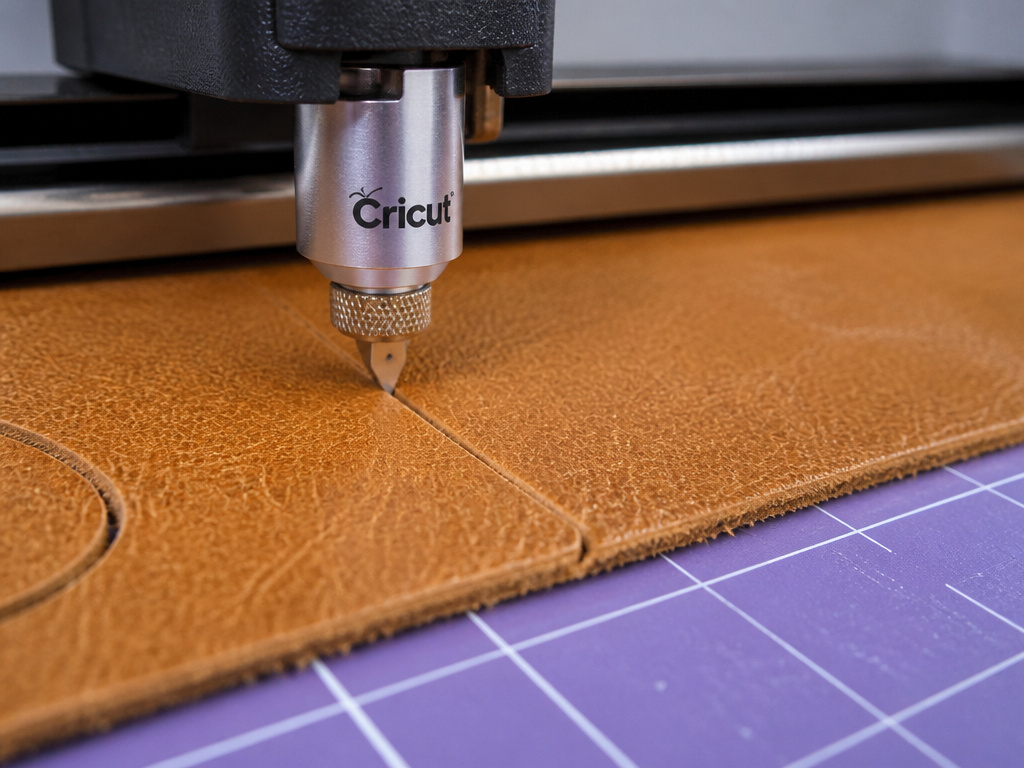
The Cricut Maker with a Knife Blade is capable, but within firm limits. Per Cricut’s official specs, the Knife Blade can cut garment and tooling leather up to 7 oz (about 2.8 mm). The cut area is maxed at 10.5″ x 11.5″, and cut widths must be “not smaller than the diameter of a pencil.” The process is still a multi-pass one, automated, the machine makes several gradually deeper passes, which can take a significant amount of time. It excels at producing multiple identical intricate shapes from leathers within its thickness range.
Laser cutters are a separate conversation. They offer incredible detail and repeatability. However, for the leatherworker, that precision comes with a trade-off: the laser burns the edge, creating a hard, carbonized crust. This sealed edge is difficult to burnish, will not accept edge paint or dye in the same way, and emits a distinct burnt odor. For prototypes or purely decorative elements where edge finishing isn’t critical, they’re powerful. For heirloom-quality goods where the edge is a featured part of the craft, the burned line is a dead giveaway of a shortcut.
This is where knowing your leather grades matters. A full-grain leather with a tight, dense fiber structure will laser more cleanly than a looser top-grain. However, that laser will still alter the very surface you’re often trying to preserve.
Finishing the Cut Edge
A clean cut is only half the job. The raw edge now needs to be finished to prevent fraying and to look professional.
- Bevel: Using an edge beveler (like those from Barry King), shave off the sharp 90-degree corner to create a slight rounded slope. This gives the subsequent finishes something to adhere to.
- Sand: With increasingly fine-grit sandpaper (start at 400, move to 800 or 1000), sand the beveled edge smooth and uniform. This removes any minor imperfections from the cutting process.
- Dampen & Burnish: Dampen the edge with a sponge or cloth, then apply friction. A wood slicker, a canvas rag, or a dedicated burnishing tool worked back and forth along the edge heats and compresses the fibers.
- Seal: Apply a finish. For a natural look, a coat of Tokonole or beeswax worked in during burnishing seals the edge. For a colored edge, use a dedicated leather edge dye before the burnishing step.
Understand leather better to make confident choices. A perfectly cut and finished edge is the hallmark of quality work. It tells the client you controlled the material from the very first step.
Frequently Asked Questions
Can I use regular scissors to cut thick leather?
You can try, but you shouldn’t. On thick leather, scissors crush and pinch the fibers between the blades rather than slicing them. This creates a compressed, ragged edge that will not burnish smoothly. For leather over 3 oz, use a knife.
How often should I change my utility knife blade?
Change it the moment you feel yourself increasing pressure to achieve the same cut. As a rule of thumb, a fresh blade should cleanly score 4-5 oz leather in two passes. If it takes three or four passes just to establish the groove, the blade is dull. For heavy work, plan on a new segment every other project.
Why does my blade keep getting stuck in the leather half-way through?
This is almost always one of two issues: a dull blade, or trying to cut too deeply in a single pass. A sharp blade glides; a dull one binds. Switch to the multi-pass method. Your first cut should only score the surface. Subsequent passes deepen the groove with progressively less resistance.
Is it better to cut leather wet or dry?
Cut dry for precision. Damp leather is more pliable and can be easier to cut, especially for intricate patterns, but the fibers swell. As the leather dries, the cut edges contract and can distort the shape of your piece slightly. For final, dimensionally critical cuts, always use dry leather.
Before You Go
One rule most guides skip: if your first scoring pass doesn’t produce a clean, continuous groove with moderate pressure, stop. Your blade is too dull. No amount of added force on the second pass will fix it; you’ll only deflect further off the line. Sharpen or replace the blade before you waste the leather.
The entire process hinges on a principle from traditional craftsmanship: let the tool do the work. A sharp blade, guided by a stable hand and a patient series of passes, doesn’t fight the material. It cooperates with it.
So your next step isn’t to buy a more expensive knife. It’s to take the one you have, put a fresh edge on it, and practice the score-and-repeat rhythm on a scrap piece. Listen for the sound of the mat, watch the groove deepen evenly, and feel the difference when the leather parts cleanly on the last stroke. That’s the feeling of a cut done right.
