
Repair Peeling Leather Correctly and Avoid Making It Worse
This post contains affiliate links. As an Amazon Associate, we earn from qualifying purchases.
Peeling leather gets one permanent fix: use a flexible adhesive like Barge All-Purpose Cement and follow a methodical three-step process of clean, glue, and clamp. The single biggest mistake is reaching for household super glue or general-purpose craft adhesive, which creates a hard, brittle repair that cracks again within weeks.** The correct adhesive flexes with the leather, preventing a recurring problem and avoiding a stiff, plastic-like feel on the repaired spot.
That initial rule about adhesive flexibility decides whether your repair lasts three weeks or three years. The leather itself, whether it’s a top-grain car seat, a bonded leather couch, or a vegetable-tanned jacket, dictates which specific product you need. Using the wrong one doesn’t just fail; it can seal the leather’s fate, making a subsequent professional repair impossible.
What follows is a breakdown of how to diagnose your peeling leather correctly, the short list of adhesives that work (and the long list of those that don’t), and the exact clamping and curing process used in professional shops. By the end, you’ll be able to look at any peeling spot and know the right path forward, or know definitively when to call in a specialist.
Key Takeaways
- The glue must flex. Household super glue (cyanoacrylate) dries hard and brittle, guaranteeing the peel will reopen. You need a flexible, leather-specific adhesive like Tear Mender or the urethane-based glues specified in OEM bulletins.
- Diagnosis is 90% of the cure. Peeling on a cheap bonded leather couch is a delamination of the plastic top layer from the fiber backing, a temporary fix at best. Pressure and patience are essential.A proper bond requires even, sustained pressure for at least 12 hours, often using specialized clamps or a vacuum bag. Rushing this step is the second most common reason DIY repairs fail.
- Match the solution to the value. It is rarely cost-effective to extensively repair a low-value bonded leather item; a leather patch or professional reupholstery is often a better investment. For a high-end bag, jacket, or car interior, the right materials and time are worth it.
- Conditioning comes last. Never apply conditioner or cleaner to the area before gluing, as oils prevent adhesion. A successful repair must be fully cured before any nourishing product touches it.
Diagnose Before You Glue: What’s Actually Peeling?
You can’t fix what you haven’t identified. The word “peeling” covers two fundamentally different failures, and the fix for one will ruin the other.
Bonded Leather Delamination is a manufacturing fault, not a repairable wear issue. Bonded leather is a composite: a thin polyurethane or vinyl top layer is laminated to a mesh of shredded leather fibers. When it peels, that laminate is separating from its backing. The fix is purely adhesive, you’re-gluing plastic to fabric. This is common in low-cost furniture, car seat bolsters, and mass-market accessories. The repair can be functional but will never be invisible, and the surrounding material remains prone to further delamination.
Full-Grain or Top-Grain Leather Finish Lifting is a surface problem. This can happen from heat, chemical exposure, or poor finishing at the tannery. The underlying leather is usually intact. Here, the repair involves re-adhering the finish or, if it’s too far gone, carefully removing the loose coating and applying a matching leather paint like Colourlock Leather Fresh Paint. This is a permanent, professional-grade fix.
Where this goes sideways: Gluing a lifting finish as if it’s a delamination. You’ll seal the finish down with adhesive, but it will dry stiff and show a visible, shiny patch that cracks with the first flex of the material. You’ve fixed the peel but killed the hand-feel.
The Golden Rule: Matching Your Leather to Your Glue
The adhesive is the whole game. It’s not a matter of “stronger is better.” It’s a question of chemistry and flexibility. A car seat bends, a jacket creases, a sofa cushion compresses. Your glue must do all that without hardening into a plastic shard.
Flexible Fabric & Leather Adhesives are your default for most repairs. Products like Tear Mender Instant Fabric & Leather Adhesive or Fiebing’s Leather Repair Kit adhesive are formulated to dry flexible. They create a bond that moves with the material, which is why they’re specified for garments and upholstery. They’re ideal for delaminating bonded leather, re-attaching seams, or securing a lifted edge on a bag flap.
Urethane-Based Contact Cements are the industry standard for high-stress, permanent bonds, like re-wrapping a steering wheel or securing leather to a door panel. These are the two-part adhesives or the specific products like Thermonex 063-05°/006B (supplied by HB Fuller) called out in Maserati technical bulletins. They require precise application and clamping, but they form a bond often stronger than the original. This is professional-tier gear.
Instant Adhesives (Cyanoacrylate) have one job: securing small, non-flexing trim. Loctite 454 is named in a BMW technical bulletin for spot-repairing tiny peeled sections on a steering wheel’s rear rim, a place that sees zero flex. Using it on a seat bolster or a jacket elbow is a guaranteed re-failure. The bond is rigid and will crack under movement.
| Adhesive Type | Best For | Feels Like When Dry | Common Mistake |
|---|---|---|---|
| Flexible Fabric Adhesive (Tear Mender) | Seams, bonded leather delamination, garment repairs | Soft, pliable rubber | Using it on rigid, non-flexing substrates where a stronger cement is needed |
| Urethane Contact Cement (Thermonex) | Steering wheels, permanent panels, high-stress automotive joints | Tough, flexible, almost invisible bond | Not clamping with enough pressure for the full 12+ hour cure time |
| Instant Glue (Loctite 454) | Only small, rigid trim spots with no bend | Hard, brittle plastic | Using it anywhere the leather needs to flex—which is almost everywhere |
The 3-Step Method: Clean, Glue, and Clamp Like a Pro
Once you have the right adhesive, the process is non-negotiable. Skipping or shortening any of these three steps is how a repair fails.
Step 1: Surgical Cleaning. Every speck of dust, oil, or old adhesive failure must go. Use a cotton swab dipped in isopropyl alcohol (at least 70%) to wipe the exposed surfaces. For a bonded leather delamination, you’re cleaning the frayed fabric backing and the underside of the plastic top layer. For a finish lift, you’re gently cleaning the exposed hide and the underside of the loose coating. Let the alcohol flash off completely, about five minutes. Any residual moisture or oil will kill the bond. Skip this, and your glue will stick to the dirt, not the leather. The bond will be weak and fail at the first stress point.
Step 2: Thin, Even Adhesive Application. Less is more. Apply the adhesive in a thin, even layer to both surfaces that will be joined. For a flexible adhesive like Tear Mender, use the brush applicator. For a contact cement, use a small, disposable acid brush. The goal is a uniform coat, not a gloopy pool. A thick layer increases dry time, creates squeeze-out, and can actually weaken the bond.
Step 3: Sustained, Even Pressure. This is where DIY repairs most often fall apart. You must hold the two surfaces in perfect contact with firm, even pressure for the adhesive’s full cure time. – For small repairs: Use binder clips, clothespins, or specialized leather clamps. – For large, flat areas (like a couch panel): Place a flat board over the repair, then weigh it down with books or sandbags. – For contoured areas (like a steering wheel): Use a vacuum bag or a tightly-wrapped bandage to apply uniform pressure.
The part nobody mentions: That cure time isn’t a suggestion. The 3M Leather & Vinyl Repair Kit instructions call for 4 hours. The Maserati bulletin mandates “at least 12 hours” before reassembly. Clamp it and walk away for a full day. Testing the bond after two hours will break the adhesive’s internal cross-linking and doom the repair.
When to Patch, When to Paint, When to Call It
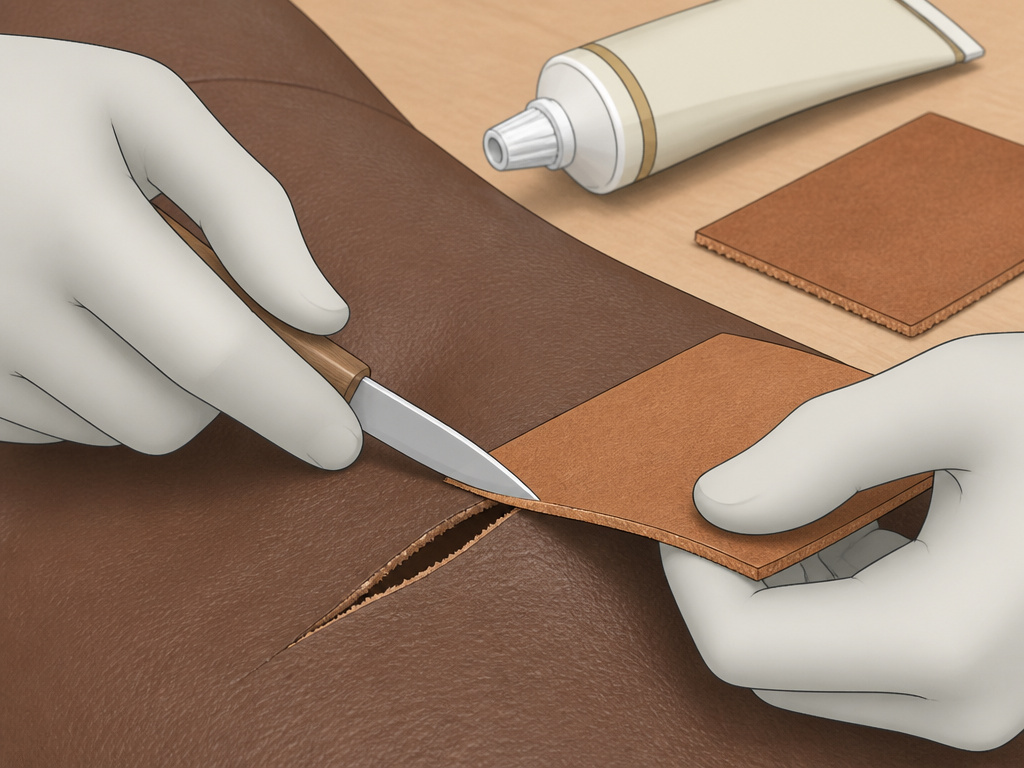 Not every peel is worth the fight. A $50 bonded leather office chair that’s delaminating across the entire seat isn’t a repair project; it’s a sign to upgrade. Your labor and materials have value. Here’s how to triage.
A Patch is the Answer when you have a clean tear or a hole, not just a peel. This is a structural fix. You’ll need a spare piece of similar leather (often salvaged from a hidden area), a sharp knife, and a strong, flexible adhesive. The patch should be skived (tapered) at the edges so it blends without a visible transition. This is a core leatherworking skill and, done well, adds character and years of life to a bag or jacket. It’s almost always superior to using a filler paste, which cracks.
Leather Paint is the Answer when the peel has taken the color with it, leaving a light or blotchy spot, but the hide underneath is sound. This is purely cosmetic. After ensuring the area is clean and stable, use a product like Colourlock Leather Fresh Paint matched to your item. Apply in multiple thin layers with a sponge, drying between each. This is the fix for scuffs on leather shoes or discolored wear on leather car seats.
Calling a Professional is the Answer in three scenarios: when the item has high sentimental or monetary value (a classic car interior, a designer bag), when the damage is extensive (an entire sofa arm), or when the repair involves safety components (a steering wheel where an airbag is nearby, as noted in technical bulletins). Their tools, industrial vacuum presses, professional-grade pigments and adhesives, justify the cost.
Frequently Asked Questions
Can I use super glue to fix peeling leather?
You can, but you shouldn’t. Super glue (cyanoacrylate) dries rigid and brittle. Leather flexes. That mismatch guarantees the repaired spot will crack open again, often making the peel worse. The only exception is a tiny, rigid spot like the very back of a steering wheel spoke, which is why a BMW bulletin specifies Loctite 454 for that exact scenario. For 99% of peeling leather, from a leather couch to a jacket, a flexible adhesive is mandatory.
Why does my leather keep peeling after I fix it?
Two reasons. First, you likely used the wrong adhesive, something that dries hard. Second, you probably didn’t clean the surfaces thoroughly or didn’t apply enough sustained pressure during the cure. Oils from your skin or residual old glue prevent a new bond from forming. Proper leather repair demands surgical cleaning and patient clamping.
Is it better to fix peeling leather or replace the item?
It depends on the leather type and the item’s value. Bonded leather is a laminate; once it starts delaminating, it’s a losing battle. Replacing a bonded leather sofa cushion or panel is often more sensible than a repair that will fail elsewhere. A high-quality vegetable-tanned or full-grain leather item with a small peel is absolutely worth repairing correctly, as the fix can last the lifetime of the piece.
How do I prevent leather from peeling in the first place?
The best prevention is buying quality leather to start with. Beyond that, proper care is key. Use a leather conditioner to keep the hide supple and prevent it from drying out and cracking. Avoid placing leather furniture in direct sunlight or against heat vents, as excessive heat is a primary cause of finish lifting. Clean spills immediately with a damp cloth, never harsh chemicals.
Before You Go
Let’s be clear about one thing: a successful repair hinges on one decision you make before you even open the glue bottle. You must correctly diagnose whether you’re dealing with a bonded leather delamination or a top-coat finish lift. Glue the wrong one, and you’ll create a new problem that’s harder to fix than the original.
The practical takeaway is this list, in order: 1. Identify the leather type and failure mode. 2. Select a flexible adhesive matched to that specific job (Tear Mender for fabrics and seams, a urethane cement for high-stress panels). 3. Clean with isopropyl alcohol until the surface is clinically clean. 4. Apply firm, even pressure for the full recommended cure time, overnight at a minimum.
If the item is cheap and the damage is widespread, consider patching or replacement. Your time has value. But for a cherished jacket, a well-worn bag, or your car’s interior, these steps will restore it for years of continued use. The leather will tell you what it needs; your job is to listen and match the solution to the problem.
