
Expert Tips: How To Fix a Scratched Leather Couch at Home
This post contains affiliate links. As an Amazon Associate, we earn from qualifying purchases.
This post contains affiliate links. As an Amazon Associate, we earn from qualifying purchases.
Fixing a scratched leather couch starts with three things: identifying the leather type, matching the repair product to the scratch depth, and factoring in drying time. Clean, fill, and color-match only when necessary; a conditioner with lanolin or beeswax can mask minor surface marks.
Let’s be clear about one thing. Leather is not indestructible. Its softness and organic structure make it inherently vulnerable. Understanding that vulnerability, why a cat claw leaves a white groove while a coin leaves a scuff, is your starting point for a repair that lasts. The wrong filler on aniline leather can turn a small problem into a permanent, shiny blotch.
What follows: a walkthrough of the materials you’ll actually need, a decision chart that sorts shallow scuffs from deep gashes, and the specific steps for each scenario. You’ll also learn what to skip and when the job belongs to a professional. By the end, you’ll be able to look at a scratch and know your exact next move.
Key Takeaways
- Leather type dictates your method, aniline leather is delicate and unforgiving, while fully-finished leather can handle more aggressive sanding.
- Always let the repair product dry longer than the label says, one hour often means two in a typical home environment, and rushing leaves a sticky, weak spot.
- Surface scratches can often be hidden with just a leather conditioner; skip the filler and dye if you can’t feel the groove with your fingernail.
- Clean with 70% isopropyl alcohol before any repair to remove body oils and prevent adhesion failure.
- A professional leather repair kit, like a Fiebing’s kit, is a better investment than piecing together craft-store supplies for color-matching.
Understand Your Leather First
Head into this with a general-purpose repair kit, and you risk making the damage worse. Leather type is the single biggest variable in your success.
Fully-finished leather has a protective polymer topcoat. It’s tough. Minor scratches often don’t penetrate this plastic-like layer, which is why they sometimes buff out with conditioner. Semi-aniline leather has a light pigment layer but shows more of the natural grain. Aniline leather is dyed but has no protective topcoat; every mark goes right into the hide. This is where DIY gets tricky.
The highest-quality leather furniture is fully finished leather that does not scratch easily. Its surface coating prevents minor surface scratches, often a problem on less durable types like semi-aniline or aniline leather. . Fibrenew Australia
So, what are you working with? Run a simple test. Put a drop of water on an inconspicuous spot. On fully-finished leather, it will bead up. On aniline leather, it will darken the spot almost immediately as it soaks in. Semi-aniline will absorb it slowly. This tells you how porous your surface is, and how carefully you need to handle liquids like cleaners and dyes.
Assess the Scratch Severity
Before you touch a product, diagnose the damage. Your fingernail is your best tool. Run it across the scratch.
If your nail doesn’t catch: You’re dealing with a surface scuff or discoloration. This is the best-case scenario. These are often just compressed leather fibers or a loss of surface oils. A conditioner with a pH between 4.5 and 6.5, worked in with a microfiber cloth, can rehydrate and darken the area, blending it away. No filler, no dye. It’s the easiest repair a couch you’ll do.
If your nail drops in: You have a true scratch or gouge. This needs filling. The depth determines your approach. A shallow groove might be filled with a leather repair compound. A deep cut that has severed fibers requires a patch or professional intervention. Trying to fill a deep cut with paste creates a weak spot that cracks every time someone sits down.
Let’s put this in a table. It separates the hopeful from the hopeless.
| Scratch Depth | Fingernail Test | Best DIY Fix | When to Call a Pro |
|---|---|---|---|
| Surface Scuff | Does not catch | Leather conditioner only | Never — this is maintenance. |
| Shallow Groove | Catches slightly | Clean, sand (320-500 grit), fill, color-match, seal | If color-matching fails repeatedly. |
| Deep Gouge | Drops in noticeably; leather is parted | Sub-patch with adhesive, then fill & color | If the cut is longer than 2 inches or leather is crumbling. |
| Claw Mark Cluster | Multiple shallow grooves & raised fibers | Trim fibers, fill each groove individually, blend color | If the cluster is larger than a credit card. |
That “shallow groove” row is where most DIY efforts live or die. The process isn’t complicated, but it requires patience. Each step has a purpose, and skipping one usually shows up a week later.
The Core Supplies You’ll Need
Don’t raid the kitchen or the garage. Use products formulated for leather. Here’s a straightforward guide to what works.
- Cleaning Agent: 70% isopropyl alcohol is the default. It evaporates quickly and leaves no residue, which is critical for adhesives and fillers to bond. For very delicate aniline leather, use a dedicated, pH-balanced leather cleaner.
- Sandpaper: Grit matters. 320-grit for smoothing genuine leather, 500-grit for finer finishes or between filler coats, and 1200-grit for final buffing. Never use coarse grits; they create new scratches.
- Adhesive/Filler: For reattaching flaps or filling, use a flexible product. Tear Mender Instant Fabric & Leather Adhesive is a solid choice for tears. For fillers, a product from a reputable leather repair kit is best, it’s designed to remain flexible.
- Color: This is the hardest part. Off-the-shelf dyes rarely match perfectly. A kit like Colourlock Leather Fresh Paint allows for custom mixing. You must test the color on a hidden area and let it dry fully before committing.
- Finishing Products: A good leather conditioner (not a cleaner/conditioner combo) to nourish the surrounding area, and a leather sealant if you’ve used colorant, to protect your work.
Common mistake: Using super glue on a tear. It creates a hard, brittle spot that prevents proper re-stitching later and will crack with the couch’s natural flex. A flexible leather adhesive is the only choice.
Gather these items before you start. The process goes smoother when you’re not running to the store mid-repair because your filler dried out.
Step-by-Step: Fixing a Shallow Scratch
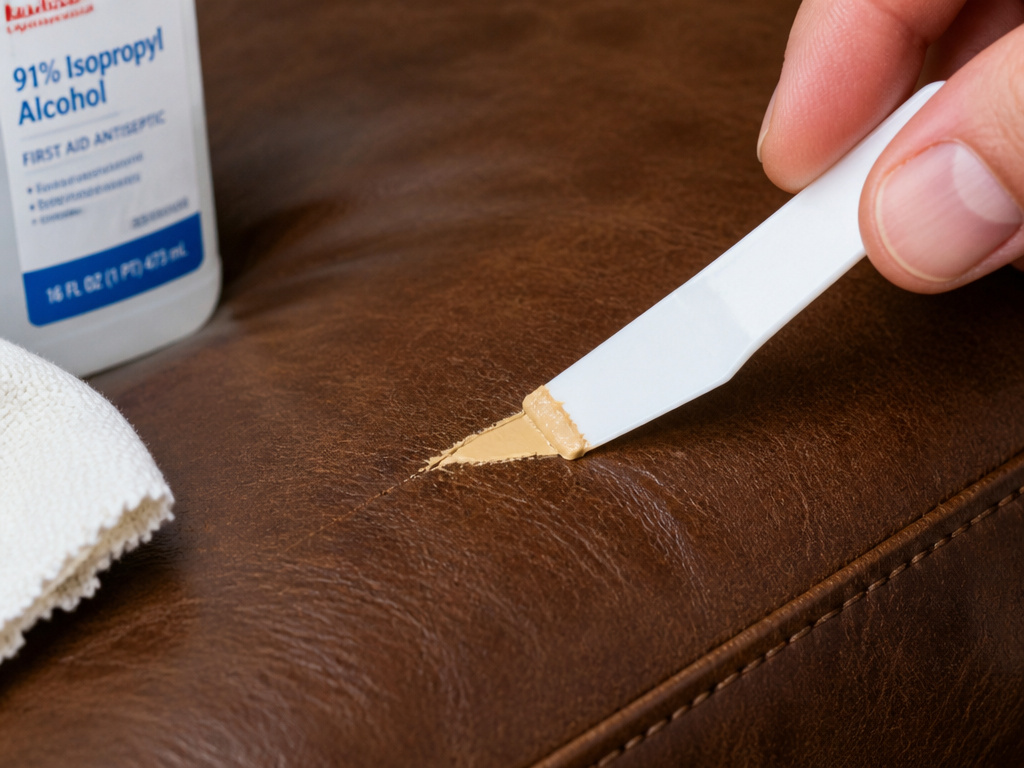
This is the most common repair. Follow the sequence. Rushing the drying steps is where 90% of failures happen.
1. Clean the Area Thoroughly
Dampen a lint-free cloth with 70% isopropyl alcohol. Wipe the scratch and a two-inch border around it. Use circular motions, but don’t scrub. You’re removing skin oils, dust, and any previous cleaning product residue. Let it air-dry completely. This takes two minutes. Don’t blow on it.
2. Sand the Scratch Gently (Optional)
This step is for shallow grooves to create a rough surface for the filler to grip. Wrap a small piece of 320-grit sandpaper around a fingertip. Sand along the length of the scratch, not across it. You’re just trying to abrade the groove’s edges and create a fine leather dust. One or two light passes is enough. Wipe the dust away with a dry cloth.
3. Apply the Filler
Use a plastic spatula or palette knife from your leather repair kits. Press the filler compound into the groove, overfilling it slightly. Scrape the excess flat so it’s level with the surrounding leather. This is not like spackling a wall; you want a minimal, smooth application.
4. Let it Dry. Completely
This is the patience test. The label might say “dries in 1 hour.” In a living room, that often means 2-3 hours, especially if humidity is above 50%. The filler must be totally dry to the touch, no coolness, no tackiness. Press it with your knuckle. If it gives at all, wait longer.
5. Sand and Repeat (If Needed)
Once bone-dry, lightly sand the filled area with 500-grit paper to make it perfectly flush. If you see pits or low spots, apply a second thin layer of filler. Let it dry again. The goal is a seamless surface, not a thick plug.
6. Color Match and Seal
This is where a quality leather repair kit pays off. Apply the colorant in thin, even layers with the included sponge or an airbrush. Let each layer dry before adding the next. It often takes 4-5 layers to build an opaque, matched color. Once done, apply a leather sealant per the product instructions to protect the new color from wear.
7. Condition the Entire Section
After the sealant dries, apply a leather conditioner to the entire cushion or panel. This blends the repaired spot’s sheen with the rest of the couch and nourishes the leather. Let the conditioner soak in for at least four hours, preferably overnight, before using the couch.
When Conditioner is Enough
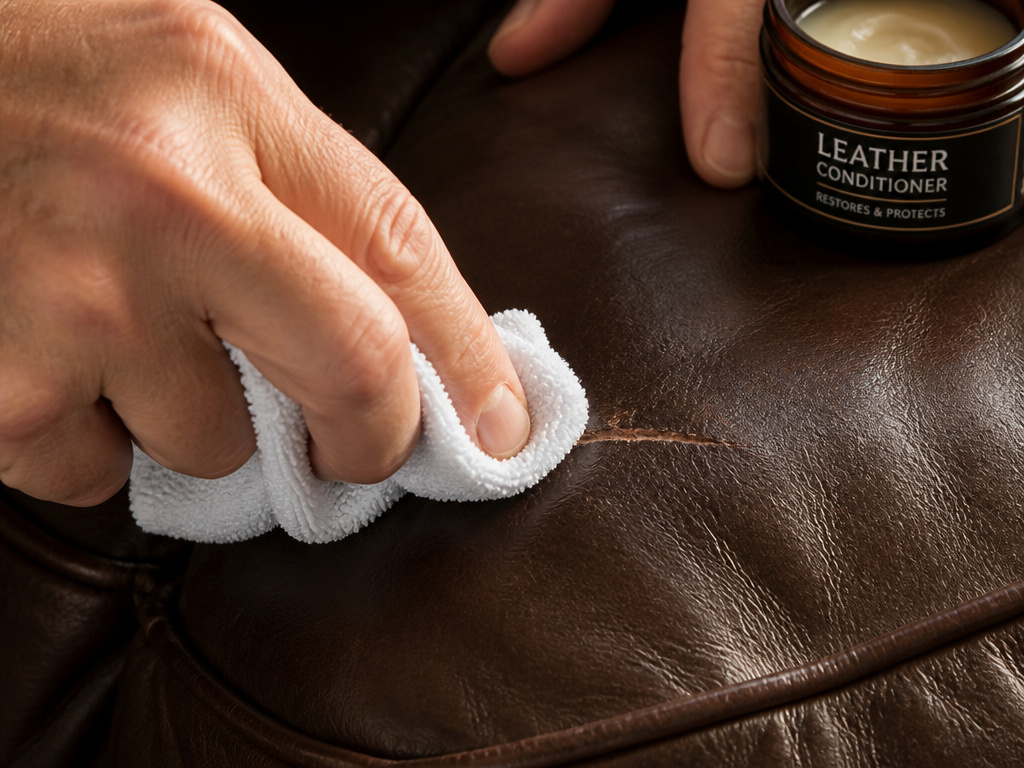
For those surface scuffs where your nail doesn’t catch, your tool is a conditioner, not a filler. A high-quality product like those in our guide to the best conditioner can work wonders.
The process is simple but effective. Apply a dime-sized amount of conditioner to a clean microfiber cloth. Rub it into the scuff using small, tight circular motions for 60-90 seconds. You’re generating a little heat and working the oils deep into the compressed leather fibers. Let it sit for 10 minutes, then buff off any excess with a dry part of the cloth.
Often, the scuff disappears. If a faint line remains, repeat the process the next day. Multiple thin applications are always better than one thick, greasy one. This is also the perfect time to condition a couch more broadly, keeping the entire piece supple and resistant to future scratches.
Why Some Scratches Should Stay
I learned this the hard way early on. A client was devastated by a single, deep claw mark on the arm of her beloved aniline leather sofa. I recommended a repair kit. We filled it, colored it, sealed it. It looked okay, not perfect, but okay. Two months later, she sent a photo. The repair had cracked along the edges, a shiny, obvious fault line in the otherwise matte, rich leather.
The leather had continued to flex and develop its patina. The repair compound hadn’t. It was a static patch on a living material. We had made the scratch permanent by trying to erase it.
Where this goes sideways: Filling a deep scratch on soft, aniline leather. The flexible hide moves, but the rigid filler doesn’t, leading to a cracked, shiny fault line within a few months.
Sometimes, the stronger move is to clean it, condition it, and let the scratch become part of the couch’s character. This is especially true for heirloom-quality pieces or leathers with a strong natural grain. A professional can sometimes work miracles, but for deep damage on delicate leathers, a perfect “like-new” result is often a myth. Your goal should be “stable and blended,” not “invisible.”
Prevent Future Scratches
Repair is reactive. Prevention is cheaper. The most effective strategy is a physical barrier.
Invest in a slipcover from a brand like Sure Fit.com/best-leather-couch-covers-for-dogs/) if pets are the culprits. These aren’t ugly throws; they are fitted, textured covers that protect the entire seating surface. For cats, provide appealing scratching posts right next to the couch and use double-sided tape on the corners as a temporary deterrent.
Regular maintenance is your second line of defense. A well-conditioned leather couch is more supple and resilient. A dry, neglected hide is brittle and scratches more easily. Establish a simple routine: every three months, give the couch a thorough clean with a cleaner free of detergents and solvents, followed by an application of conditioner. This keeps the surface nourished and less inviting to claws.
Frequently Asked Questions
Can I use olive oil to fix a leather couch scratch?
No. Please don’t. Olive oil will go rancid. It will smell, attract dirt, and can degrade the leather fibers over time. It’s a temporary darkening trick with long-term consequences. Use a product designed for leather.
How long does it take to fix scratches on a leather couch?
Timing depends entirely on the method. A conditioner-only fix takes 15 minutes of work and 4+ hours of drying. A full fill-and-color repair involves multiple steps, each with its own drying time (1-3 hours for filler, 30 minutes between color layers, 4 hours for conditioner). Budget for a full day, with the couch out of service overnight.
Will a scratched leather couch devalue my furniture?
Surface scratches that can be conditioned away have minimal impact on value. Visible, poorly executed repairs (cracked filler, mismatched color) can significantly devalue a piece. A professional, invisible repair may preserve most of the value. Honest wear (a patina) on a full-grain or top-grain leather piece is often seen as character and doesn’t hurt value like damage on synthetic materials.
Can all types of leather be repaired at home?
Not equally. Fully-finished leather is the most forgiving for DIY. Semi-aniline is moderate. Aniline leather, especially in light colors, is very difficult to repair invisibly at home due to its lack of a protective topcoat and pure dye penetration. Deep scratches on aniline leather are best left to professionals.
What’s the difference between a leather repair kit and a restorer?
Repair kit contains fillers, colors, and tools to fix physical damage like scratches and tears. A couch restorer or furniture restorer is typically a liquid product designed to rejuvenate faded color and restore shine to worn, but intact, leather surfaces. They don’t fill grooves.
Before You Go
The most practical thing you can do right now is identify your leather type and scratch depth using the table above. That tells you your next move. If it’s a surface scuff, order a good leather conditioner and tackle it this weekend. If it’s a deep gouge on aniline leather, take a photo and get a quote from a professional certified by the Leather Institute before you buy a kit.
Remember, the goal isn’t always perfection. It’s stability and preservation. A well-maintained leather couch with a few honest scars tells a better story than a neglected one, or one botched by an overzealous repair. Let the material guide you.
