
Master the Process of How to Oil Leather for Best Results
This post contains affiliate links. As an Amazon Associate, we earn from qualifying purchases.
To oil leather, you match the oil to the leather’s tanning method and condition, apply it to a clean, dry surface in thin layers, and then wait four to twelve hours for the oil to fully absorb before using the item. For oil-tanned leather, use a light oil like mink oil; for vegetable-tanned leather, reach for pure neatsfoot oil.
That rule exists because leather isn’t just one material. Putting mink oil on a classic leather jacket or neatsfoot oil on car seats is a direct path to a sticky, darkened mess. The leather will tell you what it needs if you know the two things to check before you even open a bottle.
What follows: how to spot the difference between thirsty leather and ruined leather, the simple test that proves an oil is working, and the one mistake in the first hour after oiling that guarantees a splotchy finish. This is based on years of practical experience, not marketing copy.
Key Takeaways
- Oil-tanned leather needs light, frequent conditioning. Its pull-up effect relies on internal oils, so drying out means stiffness and a faded look.
- Vegetable-tanned leather is oil’s best friend. It drinks in neatsfoot oil deeply, which will permanently darken it but also restore strength and flexibility.
- Modern automotive leather is a different beast. Most have a protective topcoat; oiling them can create a permanent, greasy residue that attracts dirt.
- The absorption window is four to twelve hours. Using the leather before the oil fully settles forces it to the surface, leaving a blotchy, uneven finish.
- Apply the oil to the cloth, not the leather. This gives you control over the amount and prevents over-saturation in one spot, which leads to dark patches.
The Four Signs Your Leather Needs Oil
Ever wondered why a once-buttery leather jacket now feels like a brown paper bag? The answer isn’t on the surface. Leather is a network of fibers, and certain tanning methods, like oil-tanning, pack those fibers with oils and waxes during production. Those oils don’t just sit there; they are what give the leather its flexibility and strength. Over years of use, UV exposure, and dry air, those oils slowly leave. What’s left is thirsty fiber, not dirty fiber.
The first warning is a change in feel. Healthy leather has a subtle, flexible stiffness. Dry leather loses all give. Bend a strap or the tongue of a boot and it should yield with a soft resistance. If it fights you and wants to snap back sharply, the internal oils are depleted. That stiffness is the leather’s fibers tightening up without their natural lubricant.
Then the color goes flat. Oil-tanned leather in particular does a trick called pull-up: bend it and the color lightens as the oils thin out across the stretched fibers. When those oils are gone, that effect fades. The leather looks uniformly pale and loses its depth, especially in the creases.
Common mistake: Applying oil to leather that is simply dirty. Dirt fills the grain and blocks oil absorption, leaving a greasy, grimy residue on top. Always clean first, then condition.
The third sign is a specific sound. Run your fingers over a dry leather surface. You’ll hear a faint, papery rustle. Healthy, oiled leather is nearly silent under the same motion, the fibers slide past each other with a quiet suppleness.
Finally, the water test doesn’t lie. Place a single drop of water on an inconspicuous spot. On well-oiled leather, the water beads up and sits there, a perfect dome. On dry leather, the water droplet will flatten and start to soak into the surface within thirty seconds. That means the protective barrier is gone and the leather is actively thirsty.
Leather Types: Which One Actually Wants Oil?
Here’s the practical takeaway: the best oil for your project depends entirely on what kind of leather you’re holding. Treating them all the same is the single biggest reason people ruin good gear. Let me share what I’ve learned.
Oil-Tanned Leather is the workhorse. Boots, work belts, tool bags. It’s tanned with oils (traditionally cod or neatsfoot) and often waxes, giving it that water-beading ability and the famous pull-up effect. The oils are inside the fibers. When it dries, those fibers need a replacement that mimics the original. A light oil like mink oil or a dedicated leather conditioner like Obenauf’s Leather Oil is perfect, it replenishes without oversaturating. Heavy waxes can clog the grain on these pieces.
Vegetable-Tanned Leather is the blank canvas. It starts pale and darkens with age and exposure. There are no oils baked in during tanning, so it’s naturally thirsty. This leather loves oil, especially pure neatsfoot oil. It will drink it in deeply, which provides fantastic protection and flexibility, but it will darken the leather permanently. That’s part of its character.
Chrome-Tanned Leather is the everyday leather in most jackets, gloves, and upholstery. It’s tanned for softness and colorfastness, and most pieces have a painted or pigmented topcoat. This topcoat is the barrier. Pouring oil onto it is like trying to water a plastic plant, the oil just sits on top. For these, you want a light, fast-absorbing cream like Bickmore Bick 4 that conditions the leather beneath the finish without compromising the topcoat.
Aniline and Semi-Aniline Leathers are the sensitive ones. They have little to no topcoat, so the dye and natural grain are exposed. They can absorb oil, but they do so unevenly. A 2022 study by the International Union of Leather Technologists and Chemists Societies found that repetitive application of care products on sensitive aniline leathers led to considerable color loss. This means if you oil it, use a vanishingly small amount of a very light product, and expect color shift.
| Leather Type | Best Oil/Conditioner | Absorbs? | Biggest Risk |
|---|---|---|---|
| Oil-Tanned | Mink oil, Obenauf’s Leather Oil | Deeply, into fibers | Using a wax-heavy product, which seals the surface and prevents breathing. |
| Vegetable-Tanned | Pure neatsfoot oil | Very deeply, changes color | Over-application, leading to a permanently soggy, dark feel. |
| Chrome-Tanned (Coated) | Bickmore Bick 4, light cream conditioners | Minimally, mostly conditions beneath topcoat | Oil sitting on topcoat, attracting dirt and creating a sticky film. |
| Aniline | Specialty aniline leather conditioner | Unevenly, can spot | Color loss and permanent dark patches from standard oils. |
Oil Selection: Navigating the Aisle
With the leather type identified, the oil choice becomes straightforward. You’re not just picking a brand; you’re choosing a tool for a specific job. Expensive, scented “designer” balms are often mostly petroleum byproducts and fillers, they sit on top and smell nice but do little conditioning. Here’s what actually works.
For reviving stiff, dry vegetable-tanned leather, pure neatsfoot oil is my first reach. It’s a traditional fat-based oil that penetrates deeply and restores flexibility. It will darken the leather, but that’s part of the process. For a lighter touch on oil-tanned gear like boots that still see flex, Obenauf’s Leather Oil offers a great blend of oil and beeswax for protection.
The part nobody mentions: Most commercial leather conditioners contain far more filler and silicone than actual nourishing oils. They create a temporary shine by coating the surface, not by feeding the leather underneath. The leather stays dry inside the silicone shell.
If you need to condition but fear darkening, Bickmore Bick 4 is the answer. It’s a light, fast-absorbing cream designed for finished leathers. It conditions without significantly altering color or leaving a residue, making it ideal for jackets, bags, and furniture where you want to maintain the original look.
For a natural alternative, pure lanolin is underrated. When melted and mixed with a light carrier oil (like almond or fractionated coconut oil), it makes an excellent conditioner for extremely dry leather that needs to remain supple without becoming greasy. It’s a project, but for a cherished heirloom piece, it’s worth the effort.
What about mink oil? It’s fantastic for oil-tanned work boots and outdoor gear. It’s a heavier oil that provides good water resistance. The catch is that it can darken leather and, over many applications, can build up a slight wax-like coating. It’s a tool for rugged use, not for delicate dress items.
Step-by-Step Process: Oiling Without Guessing

Once you’ve picked your oil, the process is about patience, not force. Rushing this is how you get dark spots and a tacky finish. Here is a straightforward guide.
Step 1: Clean the Leather Thoroughly
Remove all dust and dirt with a soft brush or vacuum with a soft upholstery attachment. Then, wipe the entire surface with a damp microfiber cloth. For stubborn grime, use a dedicated leather cleaner like Lexol Leather Cleaner, applying it to the cloth first, not directly to the leather. Let the leather dry completely, this usually takes one to two hours at room temperature. Oiling damp leather traps moisture and can lead to mildew.
Step 2: Perform a Spot Test
This is the step people skip, and it’s the most common reason for regret. Pick an inconspicuous area: the inside of a belt, the underside of a bag flap, the back of a boot tongue. Apply a small dab of your chosen oil with a cotton swab or your finger, rub it in gently, and let it sit for 24 hours. Check for unwanted darkening or any change in texture. If the test area looks good, proceed.
Step 3: Apply the Oil
Pour a nickel-sized amount of oil onto a clean, lint-free cloth like a microfiber towel or a piece of soft cotton flannel. Do not pour oil directly onto the leather, this avoids saturation pools. Rub the oiled cloth onto the leather using small, overlapping circular motions. Apply moderate pressure to work the oil into the grain. You’re aiming for a thin, even coat.
I learned this the hard way years ago. I was restoring a dried-out saddlebag and poured neatsfoot oil straight onto the center panel, thinking more was better. A dark, permanent blotch the size of my palm formed right there. It took weeks of gentle cleaning to even it out slightly. Now, the cloth gets the oil first, every single time.
Step 4: Wait for Absorption
This is the required window. Set the item in a cool, dry, well-ventilated area, away from direct sunlight and dust. The oil needs time to wick deep into the leather fibers through capillary action. This takes a minimum of four hours, and for thicker leathers or heavier oils, up to twelve. Using the item before this window closes forces unabsorbed oil to the surface, creating a blotchy, uneven finish.
Step 5: Buff and Assess
After the waiting period, take a fresh, dry microfiber cloth and buff the entire surface with firm, straight strokes. This removes any excess oil that didn’t absorb and brings up a soft sheen. Now, assess the leather. Does it still feel stiff and dry in places? If so, you can apply a second, even thinner coat following the same process, starting with another spot test.
Step 6: Final Cure and Maintenance
Allow the leather to rest for another full 24 hours before putting it into regular use. This final cure lets the oils fully stabilize within the fibers. For maintenance, a light conditioning every six to twelve months is usually sufficient for frequently used items. For gear in storage, applying a light coat of a corrosion-inhibiting oil like WD-40 before putting it away will protect it for the season.
The Mistakes That Leave a Permanent Mark
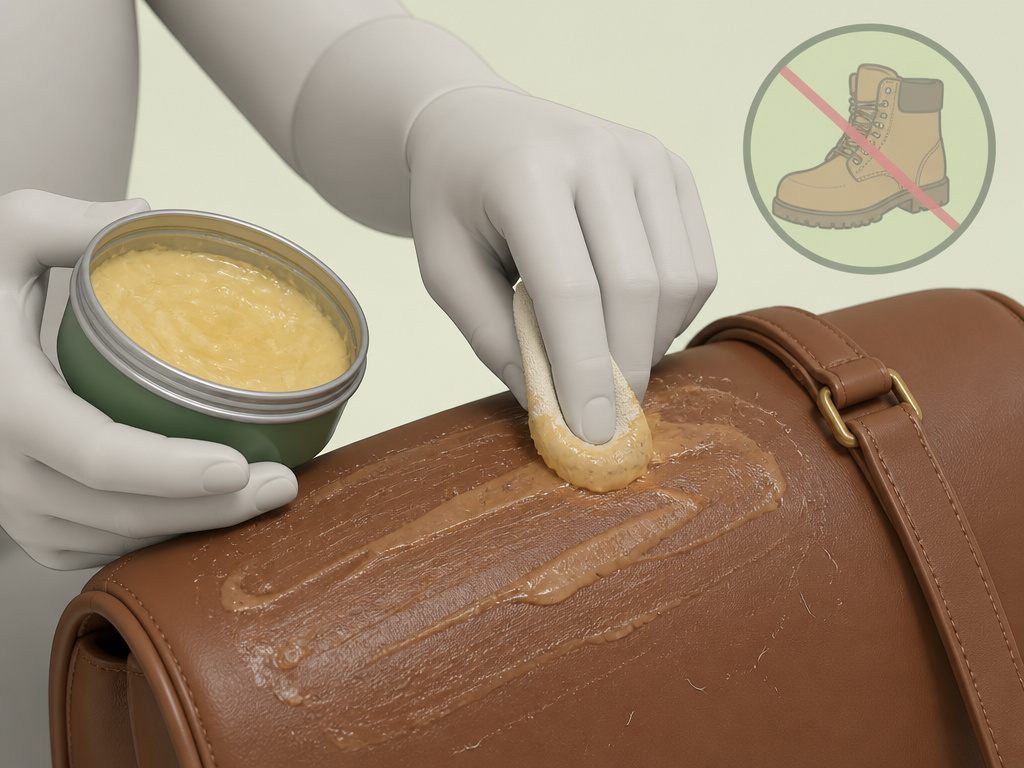
Understanding leather better means knowing what not to do. Here are the errors that change leather forever.
Using the Wrong Product for the Leather Type
Applying a wax-based polish or a heavy grease like Obenauf’s Heavy Duty LP to a leather jacket or a delicate bag. These products are designed for work boots and saddles; on flexible garments, they create a stiff, sticky surface that attracts every bit of lint and dirt.
Oiling Coated or Painted Leather
Most modern car seats, sofas, and fashion jackets have a protective polymer topcoat. As Ford’s owner manuals explicitly state, you should not use oil-based conditioners on these surfaces. The oil cannot penetrate and will sit on top, creating a greasy film that collects dust and degrades the finish.
Not Waiting for Full Absorption
Putting on boots or using a bag just an hour after oiling because it “looks dry.” The surface may feel dry to the touch, but the oil is still migrating inward. Flexing the leather at this point squeezes that oil out, leading to dark streaks along the bend lines and an uneven tone.
Over-Application
More oil is not better. Leather can only absorb so much. Excess oil sits on the surface, going rancid over time or forming a gummy residue that traps dirt. It also oversaturates the fibers, weakening them and making the leather feel soggy and limp instead of strong and supple.
Frequently Asked Questions
What is the best natural oil for leather?
For pure, deep conditioning of vegetable-tanned leather, neatsfoot oil is the best natural oil. For a lighter touch that conditions without heavy darkening on oil-tanned items, mink oil is a great natural choice. For a DIY project, a blend of lanolin and a light carrier oil can work wonders on extremely dry pieces.
Can I use olive oil or coconut oil on leather?
You should not use cooking oils like olive or coconut oil on leather. They are not stable, can go rancid over time, and may attract pests. They also lack the specific properties needed to condition leather fibers properly, often leaving a greasy, uncleanable residue.
How often should I oil my leather boots?
For heavy-use work boots, a light conditioning with a product like mink oil every three to six months is sufficient. For casual leather boots, once or twice a year is usually plenty. Over-conditioning can be as damaging as neglect, as it can clog the leather’s pores and oversaturate the fibers.
Why did my leather get darker after oiling?
Oils, especially pure ones like neatsfoot oil, darken leather by penetrating the fibers and altering how light reflects off the surface. This is a normal, expected, and usually permanent part of the conditioning process for vegetable-tanned and oil-tanned leathers. It’s a sign the oil is working, not a defect.
What’s the difference between oiling and conditioning?
Oiling typically refers to using a pure or blended oil (neatsfoot, mink) that penetrates deeply to restore internal flexibility. Conditioning often refers to using a cream or balm (like Bick 4) that contains oils, waxes, and emulsifiers designed to moisturize and protect, often with less penetration and color change. The oil selection process helps you decide which approach your leather needs.
Before You Go
Let’s be clear about one thing: leather care isn’t about making something look brand new forever. It’s about maintaining the material’s integrity so it ages with you, not against you. The goal is a rich, personal patina that tells a story, not a cracked, brittle relic.
If you take away one action, make it this: before you buy any product, do the water test on your item. That single drop will tell you if you’re dealing with a thirsty, oil-friendly leather or a sealed, coated surface that needs a different approach. That test alone prevents most of the permanent mistakes I see.
For most classic leather goods, boots, bags, belts, start with a light conditioner like Bick 4. It’s the safest, most effective all-rounder. If the leather is bone-dry and vegetable-tanned, then step up to neatsfoot oil. And remember, the leather will tell you what it needs. If it feels great, leave it alone. Constant tinkering with the wrong products does more harm than good.
