
How to Shine Leather Shoes | The Mirror Finish That Lasts
This post contains affiliate links. As an Amazon Associate, we earn from qualifying purchases.
This post contains affiliate links. As an Amazon Associate, we earn from qualifying purchases.
To shine leather shoes, you need three separate processes: cleaning with a brush, conditioning with a dedicated cream, and then applying either a cream polish for a soft luster or a hard wax polish for a high-gloss finish. The wrong product on the wrong leather, or applying polish before conditioning, guarantees a dull, cracked surface within weeks.
That distinction between cleaning, conditioning, and polishing is the whole game. Most people see a scuff and reach straight for the wax tin, which seals dirt into the leather’s pores and starves it of moisture. The shine might look good for a day, but the leather underneath is getting worse.
What follows is the step-by-step breakdown of both a simple weekly shine and the advanced technique for a glass-like mirror finish. You’ll learn which products to use when, the exact drying times you can’t skip, and the one place you should never apply a high-gloss wax.
Key Takeaways
- Shine is a surface effect; conditioning is what keeps the leather healthy. Always condition before polishing.
- For a daily shine, use a cream polish like Saphir Médaille d’Or Pommadier. For a hard mirror shine, switch to a hard wax like Saphir Mirror Gloss.
- A mirror shine should only be applied to stiff, non-bending areas like the toe cap and heel. It will crack if applied over flex points.
- Allow each layer of wax to dry completely, at least 10-15 minutes between thin coats, and 30 minutes for a base layer. A horsehair brush and a soft cotton cloth are essential tools. Synthetic brushes and cloths will scratch the finish.
The Weekly Care Ritual (The 15-Minute Shine)
This isn’t about a parade-ground finish. It’s the simple routine that keeps your shoes looking sharp and the leather supple for years. Skip this, and no amount of polishing will fix the dried-out hide underneath.
Start by brushing. A good horsehair brush is your first tool. Sweep off all surface dust and dirt, always following the grain of the leather. This takes 30 seconds but prevents that dirt from being ground into the finish during polishing. Next, apply a thin coat of leather conditioner. Let it absorb for 15 minutes, rushing this step means the polish sits on top of oil, not leather, and won’t bond correctly.
Now for the shine. For a standard, healthy glow, use a cream polish. Saphir Médaille d’Or Pommadier is my default here. Apply a tiny amount with a cloth or the included applicator, working it into the leather in small circles. Let it dry until it hazes over, about five minutes.
Common mistake: Buffing cream polish with a brush immediately. Let it dry first. Buffing wet cream creates a gummy, uneven layer that attracts dust and dulls within a day.
Finally, buff with a clean, soft cotton cloth. You can slightly dampen the cloth for the final passes, this creates friction that warms the wax and brings up a deeper, warmer luster than a brush alone. This whole cleaning process preserves the leather while giving you a respectable, classic shine suitable for any office or casual wear.
From Soft Glow to Glass Finish: Understanding Polish Types
All polishes are not the same. Using the wrong one is like using varnish on a suede jacket, it might work, but not how you want.
Cream polishes, like Saphir Pommadier, contain oils and pigments. Their primary job is to nourish the leather and restore color. The shine they provide is a soft, natural byproduct of the waxes they contain. This is the shine you want for 95% of your shoes. It’s durable, easy to maintain, and doesn’t alter the leather’s character.
Hard wax polishes, like Saphir Pâte de Luxe or Mirror Gloss, are a different beast. They contain a much higher concentration of hard waxes (like carnauba) and solvents. Their sole purpose is to build a thick, protective, and reflective layer on top of the leather. They offer negligible conditioning benefit.
| Polish Type | Primary Purpose | Best For | Shine Level |
|---|---|---|---|
| Cream Polish (e.g., Saphir Pommadier) | Nourish, color, light protection | Daily wear, all leather types | Soft, warm luster |
| Hard Wax Polish (e.g., Saphir Pâte de Luxe) | Build protective, shiny layers | Formal shoes, edges, soles | High gloss |
| Mirror Gloss Polish (e.g., Saphir Mirror Gloss) | Create a glass-like mirror finish | Toe caps & heels for special occasions | Reflective “mirror” |
The choice dictates your entire polishing process. Reaching for a hard wax when your leather is thirsty will lead to a brittle, cracking finish. You must condition first, every time.
Building a Mirror Shine: A Layer-by-Layer Approach
A mirror shine is an exercise in patience, not pressure. You’re not rubbing the leather; you’re carefully depositing microscopic layers of hard wax to fill the leather’s porous grain, creating a perfectly smooth, reflective surface.
First, the foundation. The leather must be impeccably clean and conditioned. If there’s old, built-up polish, use a product like Saphir Renomat to strip it away. Any debris trapped under your new layers will cloud the finish.
Now, apply your base coats. Using a cloth-wrapped finger, apply Saphir Pâte de Luxe in small, tight circles to the toe cap and heel only. Apply a liberal amount for this first layer. Then, you wait. Let it dry for at least 30 minutes, or until no polish transfers to your finger on a light touch. Buff lightly with a horsehair brush. Repeat this 3-5 times. You’re building a level foundation.
Where this goes sideways: Applying mirror gloss over a dirty or unconditioned base. The wax won’t adhere properly, and the finished shine will flake off within a few wears.
Next, the mirror layers. Switch to Saphir Mirror Gloss. Here, less is more. Put a drop or two of water on your cloth-wrapped fingertip, then pick up a minute amount of wax. Apply it with feather-light pressure in those same small circles. As you work, the friction will increase and the surface will turn cloudy. Add another drop of water as lubrication and keep going until the cloudiness disappears, revealing a clear shine. Let this layer dry for 10-15 minutes. Repeat. And repeat. A proper mirror shine takes 10-15 of these thin, patient layers.
TL;DR: Build a thick foundation with Pâte de Luxe, then apply countless whisper-thin layers of Mirror Gloss with water, letting each dry fully. The result is a reflection you can shave in.
The Tools That Make or Break the Shine
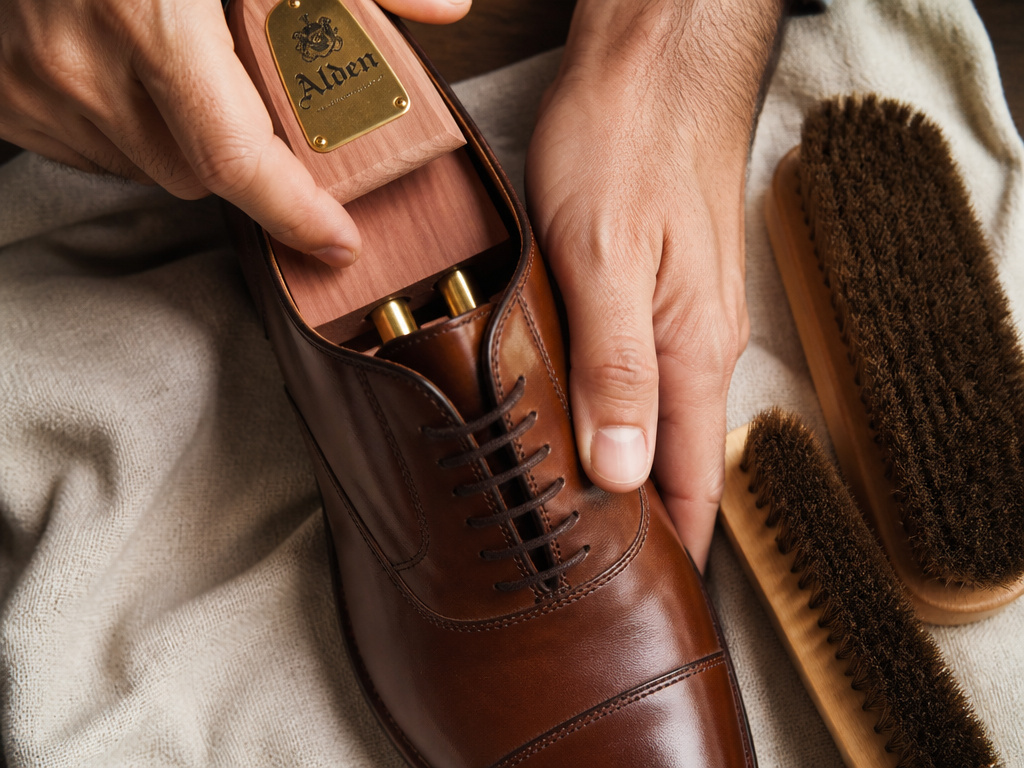
You can have the best wax in the world, but a bad brush will ruin it. The tools are not optional upgrades.
- Horsehair Brushes: You need two. A soft one for dusting before you start, and a stiffer one for buffing dried polish. Natural horsehair is soft enough not to scratch but dense enough to generate the friction needed to shine. Synthetic brushes are often too harsh and will leave micro-scratches in your wax layers.
- Cotton Cloths: Old, soft t-shirts are perfect. You need several, as they get gummed up with wax. The cloth must be 100% cotton, polyester or microfiber blends are too abrasive and will leave lint.
- Shoe Trees: Cedar shoe trees are non-negotiable during polishing. They hold the shoe’s shape, giving you a firm, stable surface to work against. They also absorb moisture from your hands and the environment, helping the wax layers dry faster and more evenly. This is a cornerstone of proper shoe storage and care.
- Dauber Brushes (Optional): For applying base coats quickly, a horsehair dauber brush is useful. It keeps your hands clean and can spread wax more evenly than a cloth for those initial thick layers.
Investing in these tools once is cheaper than replacing a pair of shoes ruined by a scratch from a plastic-bristle brush. They are the difference between a professional finish and a hobbyist’s attempt.
What Not to Do: The Fastest Ways to Ruin Your Shoes
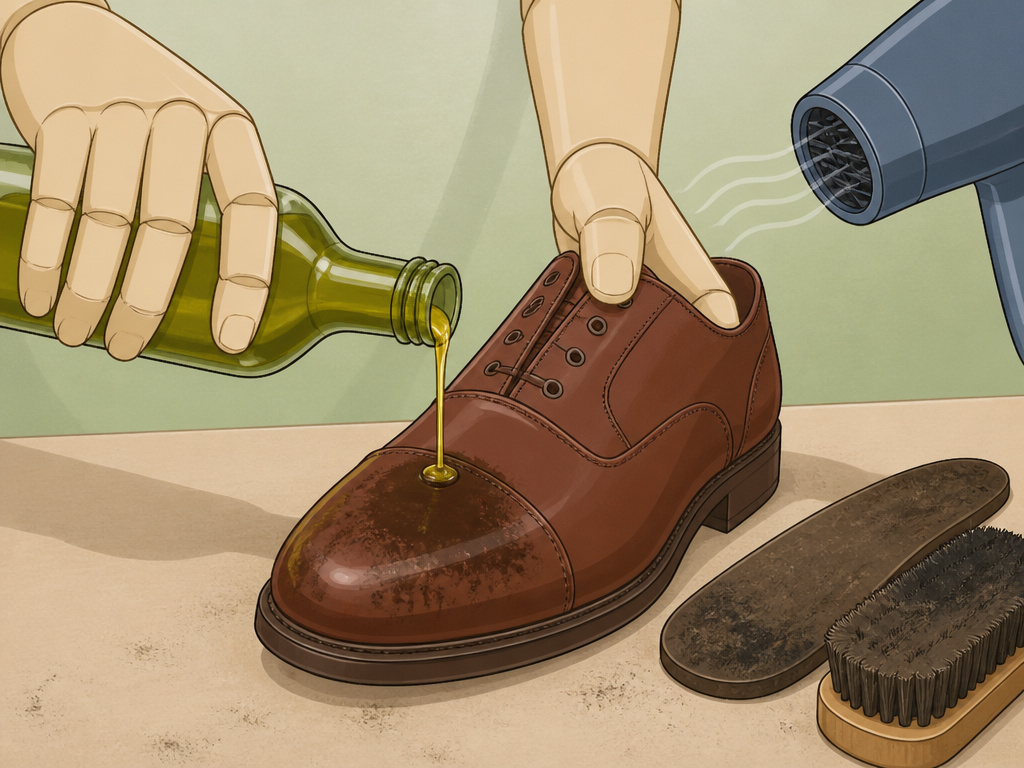
Let’s be clear about this. More shoes are damaged by well-intentioned “care” than by actual wear.
Using household products. Olive oil, Vaseline, furniture polish, these are not for leather. They go rancid, attract dust, and clog pores. They create a sticky surface that never properly dries. I’ve seen people recommend olive oil as a quick conditioner. It might look good for a week, but it eventually turns acidic and can degrade the leather fibers.
Applying heat. Never use a hairdryer, radiator, or direct sun to dry shoes or speed up polish drying. Heat causes leather to shrink, crack, and lose its natural oils. It also softens wax layers before they’ve set, causing them to slump and look uneven.
Polishing over dirt. This is the number one cause of a dull, lifeless finish. You’re just sealing grime under a shiny coat. Always, always brush first. A full cleaning process is needed if the shoes are truly dirty.
Over-conditioning. Leather needs to breathe. Slathering on thick coats of conditioner clogs its pores. This prevents subsequent polish from adhering and can make the leather feel perpetually greasy. Thin, absorbed coats are the goal.
Putting a mirror shine on flex points. The toe cap is fine. The vamp, where the shoe bends with every step, is not. A thick layer of hard wax there will crack like old paint, and there’s no fix except stripping it all off and starting over.
Frequently Asked Questions
Can you use Kiwi polish on good leather shoes?
You can, but I wouldn’t recommend it for fine calfskin or shell cordovan. Kiwi Parade Gloss is excellent for achieving a very hard, high shine on military or work boots. For delicate dress leathers, the synthetic solvents and lower wax content in standard Kiwi can be overly drying. For a daily shine on quality shoes, a dedicated cream polish like Saphir’s is a safer investment.
How often should I polish my shoes?
For a basic shine with cream polish, every 3-4 weeks is sufficient for shoes in regular rotation. For a hard wax mirror shine, you’re not “re-polishing” regularly. You maintain it by gently removing surface dust with a soft cloth and maybe adding a single maintenance layer of Mirror Gloss every few wears if you see minor scratches. A full mirror shine rebuild is only needed once or twice a year.
Why does my polish keep cracking?
Two reasons. First, you applied a hard wax polish (meant for mirror shines) over a flex point like the vamp. Second, you didn’t let each layer dry completely before applying the next. The solvents in the new layer re-dissolve the partially-set layer below, creating a weak, uneven cake that cracks under stress. Patience is the fix.
Is it necessary to strip old polish?
Yes, once a year. Old polish dries out, becomes brittle, and traps dirt. It creates a barrier that prevents new conditioner from reaching the leather. Using a gentle stripper like Saphir Renomat once annually lets you start fresh, ensuring your leather gets the nourishment it needs and your new polish adheres perfectly.
Can I shine suede or nubuck shoes?
No. Never apply wax or cream polish to suede or nubuck. It will ruin the nap and create permanent, greasy stains. These materials require completely different cleaning techniques and special erasers and brushes to restore their textured appearance.
Before You Go
Shining shoes is a simple act with a disproportionate payoff. A clean, cared-for pair speaks before you do. The real secret isn’t in the elbow grease; it’s in the separation of tasks. Clean. Condition. Then polish. Remember that a mirror shine is a beautiful but high-maintenance treat for the toe cap, not the whole shoe. For everything else, a well-applied cream polish after a thorough brushing will give you a lifetime of respectable wear.
One final, non-negotiable step: insert cedar shoe trees the moment you take them off. They pull out moisture, hold the shape, and make the next polish job infinitely easier. That single habit will do more for the longevity of your leather than any magic-in-a-tin polish ever could.
