
Learn How to Break In Leather Shoes Comfortably & Quickly
This post contains affiliate links. As an Amazon Associate, we earn from qualifying purchases.
This post contains affiliate links. As an Amazon Associate, we earn from qualifying purchases.
To break in leather shoes, you need a correct fit, a patient 2-3 week schedule of short daily wears, and selective use of conditioner on high-friction points, never soak them or use aggressive heat. This gradual method lets the leather fibers relax and mold to your foot’s shape without causing blisters or permanent damage.
The goal isn’t to conquer stiff leather through force. It’s to let a durable, natural material adapt. Rushing this process with water, extreme heat, or marathon wearing sessions might seem effective, but it often damages the leather’s structure and the shoe’s internal components.
What follows is a practical plan built on advice from shoemakers like Cheaney and Rieker, which prioritizes your comfort and the shoe’s longevity. This guide details the exact weekly schedule, the few products that actually help, and how to tell normal snugness from a size that’s just wrong.
Key Takeaways
A proper break-in takes 2-4 weeks of regular, short wears, not days. Cheaney Shoes notes it typically takes three to four weeks. * Pain is a warning, not a step. If new shoes cause sharp pain, numbness, or cramping, the size or last (shape) is likely wrong. * Conditioner is a targeted tool, not a soak.Apply a thin coat of a product like Bickmore Bick 4.amazon.com/dp/B001CS2Q4M?linkCode=osi&th=1&psc=1&tag=test-20) only to stiff areas like the heel collar, not the entire shoe. * Never use water or intense heat. Manufacturers like 5.11 Tactical and Freebird explicitly warn against soaking modern boots or using high heat on suede, patent, or exotic leathers. * Break-in adapts leather; it doesn’t resize the shoe.** The process can soften and mold leather, but it will not transform a narrow shoe into a wide one.
Why New Leather Shoes Feel Stiff
Leather is a skin, not a fabric. When you first get a pair, the fibers in the hide are tight and the tannins and oils used in processing are at their firmest. This initial stiffness is a sign of durability. Your foot, with its unique bumps and bends, is a new shape pressing into this organized structure.
The break-in process is mechanical. As you walk, the repeated flexing at the ball of the foot and the gentle pressure from your heel and toes slowly stretch and separate those fibers. Body heat helps soften the natural oils. Over time, the leather relaxes into a custom mold of your foot. This is why quality leather shoes get more comfortable with age, they’ve literally learned your shape.
A new leather shoe is stiff because the collagen fibers in the hide are tightly packed and the tannins are fresh. Walking and flexing gently separates these fibers, allowing the leather to become pliable and take a permanent set. This process cannot be rushed without risk of tearing the fiber matrix or damaging the shoe’s construction.
The Gradual Wear Method (Your 2-3 Week Plan)
This is the core method endorsed by shoemakers from Cheaney to Rieker. It’s simple, safe, and effective. The timeline isn’t a guess. Rieker suggests 2-3 weeks following their steps, and Cheaney confirms three to four weeks is typical.
Week 1: The Home Trial. Don’t wear them out. Put on the shoes with the socks you plan to always wear with them and walk around your house for 30-60 minutes each day. Do this after work or in the evening when your feet might be slightly larger. The goal is to generate warmth and initiate the flexing process in a controlled, low-friction environment. If a hot spot develops, you can stop immediately.
Week 2: Short Errands. If the shoes feel okay after the first week, wear them for a short, low-stakes outing. Think a trip to the grocery store or a coffee run. Keep it under two hours. This introduces varied surfaces and slightly longer wear times. Still bring a backup pair of shoes.
Week 3: Integration. By now, the major flex points should be softening. You can start wearing them for a half-day at work or on a weekend afternoon. Listen to your feet. If they start complaining, change shoes. The leather is still settling.
This gradual ramp-up gives the leather time to recover between wears. It also gives your skin time to toughen up slightly at potential friction points. Trying to do all 40 hours of break-in one weekend is a recipe for blisters and a distorted shoe.
Common mistake: Wearing new shoes for a full day right away. The sustained pressure can force the leather to stretch in the wrong places and cause deep, painful creases instead of gentle folds.
Tools and Products That Help (And Ones to Skip)
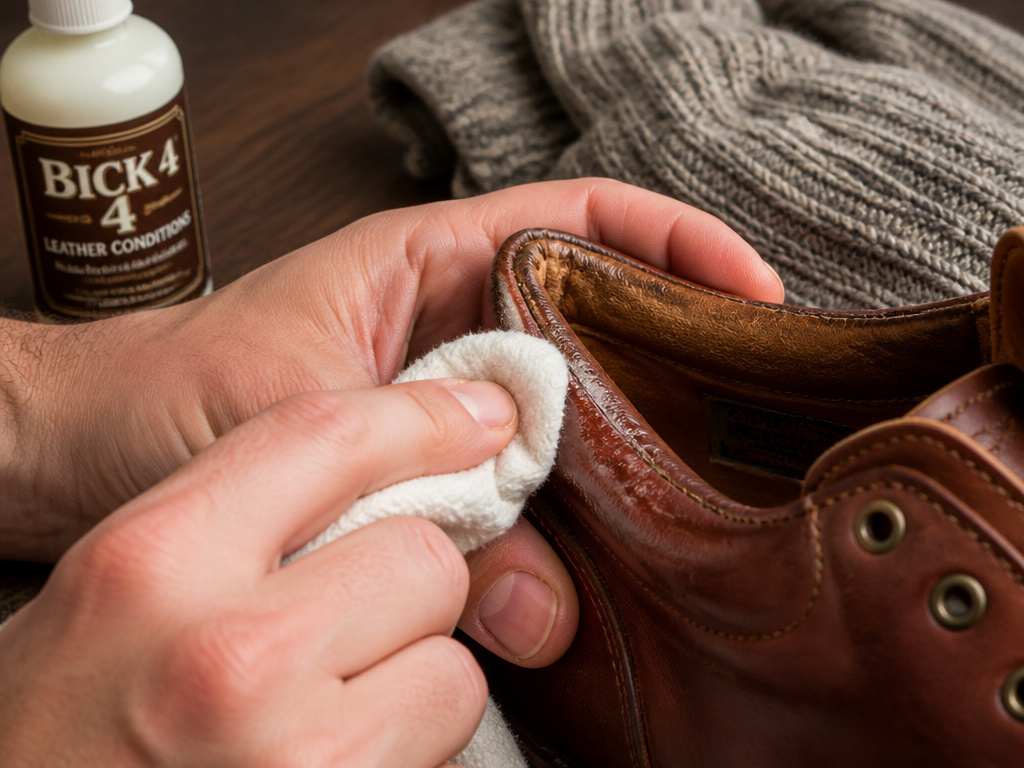 You don’t need much. In fact, using the wrong product can set you back. My rule of thumb, developed the hard way, is to always test any new cleaner or conditioner on a hidden seam or inside flap before applying it to the main surface. A suede disaster taught me that.
Conditioner is Your Main Aid. A light application of conditioner on the inside and outside of high-stress areas can lubricate the fibers. Focus on the back of the heel collar and the pinch point over your little toe. Don’t slather the whole shoe, you’re not seasoning a steak. * Reach For: Bickmore Bick 4 or Lexol Leather Conditioner. They soften without darkening leather dramatically or clogging pores. * Skip: “Break-in oils” or pure neatsfoot oil. They can over-soften, darken the leather, and attract dirt.
Thick Socks are a Tool. Wearing a thick pair of socks during your home-wear sessions creates gentle, even pressure from the inside. It also provides a cushioning layer that protects your skin from stiff seams. Some brands, like Dr. Martens, even sell their own padded socks for this purpose.
Shoe Trees are Essential.** Use them whenever you’re not wearing the shoes, especially during break-in. They hold the shoe’s shape as the leather is soft and vulnerable, preventing it from curling or developing deep wrinkles. A cedar shoe tree also absorbs moisture from your wear session.
| Product/Tool | What It Does | When to Use It |
|---|---|---|
| Leather Conditioner (Bick 4, Lexol) | Softens & lubricates leather fibers | Sparingly on stiff spots (heel, toe box) after Week 1 |
| Cedar Shoe Trees | Maintains shape, absorbs moisture, reduces odor | Insert immediately after every wear session |
| Thick Socks | Creates internal pressure, protects skin | During all break-in wear sessions at home |
| Shoe Stretch Spray | Relaxes fibers for targeted stretching | Only if a specific spot remains tight after 3 weeks |
| Heat (Hairdryer) | Temporarily increases pliability | Use with extreme caution on plain leather only; never on suede or exotics |
What to Avoid Entirely:
- Soaking in Water: As 5.11 Tactical warns, never soak modern boots. It can degrade adhesives, distort leather, and ruin waterproof membranes.
- The Freezer Trick: Stuffing wet bags into shoes and freezing them risks cracking the leather and separating soles.
- High, Direct Heat: A hairdryer on a low, warm setting held at a distance can be used gently, but high heat dries and shrinks leather. Freebird Stores explicitly says to avoid heat on suede, patent, or exotic finishes.
How to Spot a Bad Fit vs. Normal Snugness
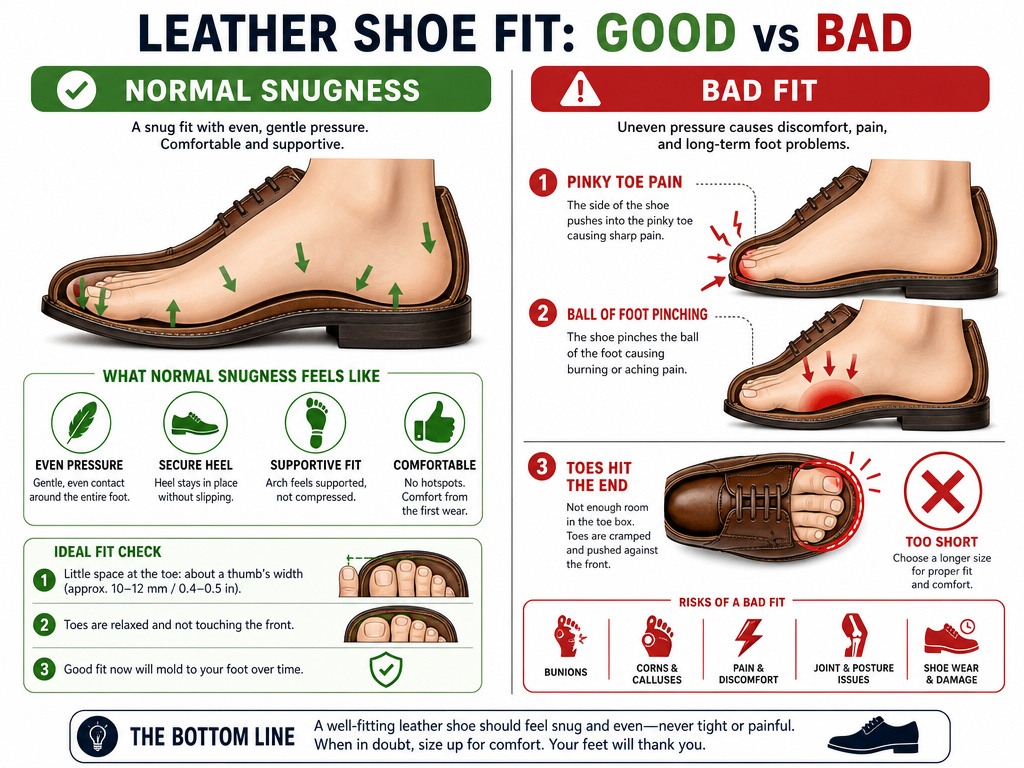 This is the most critical distinction. Break-in can soften leather; it cannot perform orthopedic miracles.
Normal Snugness (This Will Improve):
- A feeling of overall tightness, like a firm handshake.
- Slight pressure on the top of your foot or the sides.
- Minimal heel slippage (less than 1/4 inch) that decreases as the shoe molds.
A Bad Fit (This Won’t Get Better):
- Sharp pain or pinching in any one spot, especially the pinky toe or the ball of the foot.
- Numbness or tingling in your toes.
- The toe box is too short. Your toes should not press against the end of the shoe when standing. Reinforced toe caps will not stretch.
- The heel is too wide. If your heel lifts out significantly with each step, the last is wrong for you.
Steve Taffel, owner of the New York shoe shop Leffot, puts it plainly: “They can be stiff or snug, but not painful.” If you’re experiencing the symptoms of a bad fit, stop. Breaking them in will only break your spirit. The solution is a different size or a different shoe model.
Special Cases: Suede, Boots, and Tough Leather
Not all leather responds the same. Your method needs to adapt.
Breaking in Suede or Nubuck: Forget conditioners meant for smooth leather. They will mat the nap and stain it. For suede, the only safe softening method is gradual wear. Use a suede brush after each wear to revive the nap and keep it supple. Never apply heat or water.
Breaking in Leather Boots: The principles are identical, but scale matters. A tall boot has more surface area to soften. Pay extra attention to the ankle and shaft. Lacing is a powerful tool, skip the top hook or two during initial wears to reduce pressure on the front of your ankle. Our guide on how to break in leather boots goes deeper on lacing techniques for ankle comfort.
Very Stiff or Waterproof Leather (e.g., some work boots): These are designed to be tough. Patience is even more important. Conditioner is less effective if the leather has a heavy waterproof coating. Focus entirely on the gradual wear method, and expect the timeline to stretch to four weeks or more.
Frequently Asked Questions
How long does it really take to break in leather shoes?
Most quality shoemakers cite 2 to 4 weeks of regular, gradual wear. Rieker advises 2-3 weeks following their method, and Cheaney Shoes states three to four weeks is typical. Thicker leathers like those on heavy boots may take longer.
Can I use a hair dryer to speed things up?
You can, but be very careful. Use the lowest heat setting and keep the dryer moving at least 6 inches away from the leather. Only use it on standard, smooth leather, never on suede, patent, or exotic leathers, as heat can permanently damage their finish. It’s a marginal aid, not a shortcut.
Will leather shoes stretch a full size?
No. Quality leather will stretch and mold perhaps a quarter to a half size in width and will soften significantly, but it will not change its fundamental length or arch structure. If you need a full size more, you need a different shoe. For minor adjustments, learn the right way to stretch leather shoes at home.
What’s the best leather conditioner for breaking in shoes?
Use a light, non-darkening conditioner like Bickmore Bick 4 or Lexol Leather Conditioner. Avoid heavy oils like mink oil or generic “break-in” oils, as they can over-soften the leather, darken it unevenly, and attract dirt. The right shoe conditioner is applied sparingly.
My heels are getting blisters. What should I do?
First, let the blisters heal completely. Then, identify the cause. If it’s a stiff heel counter, apply a small amount of conditioner to the inside and outside of that area. Use a protective moleskin or blister bandage on your heel, not on the shoe, for your next few short wear sessions. Ensure your heel isn’t slipping excessively, which is a sign of poor fit.
Is the “wear them in the rain” method a good idea?
It’s a terrible idea for modern shoes. While it might soften the leather quickly, it also saturates the insole, weakens adhesives, promotes interior mildew, and can cause the leather to dry out and crack later. As 5.11 Tactical’s guide states, do not soak tactical boots. The risk far outweighs any benefit.
The Bottom Line
Breaking in leather shoes is a test of patience, not endurance. The timeline is measured in weeks, not days. Stick to the gradual wear plan, use conditioner as a precision tool, and let cedar shoe trees do their job overnight.
If you take away one thing, let it be this: significant pain means stop. The most effective practical break-in techniques in the world cannot fix a shoe that doesn’t fit your fundamental foot shape. Get the size right first. Then, give the leather, and your feet, the gentle, consistent time they need to form a perfect partnership. The comfort that follows will last for years.
