
How to Clean a Leather Dog Collar: The Complete Safe Guide
This post contains affiliate links. As an Amazon Associate, we earn from qualifying purchases.
To clean a leather dog collar, wipe it with a soft, damp cloth to remove dirt, let it air-dry completely away from heat, then apply a thin coat of a pure leather conditioner like a beeswax balm or neatsfoot oil blend. Never soak it, use harsh detergents, or expose it to direct heat, as this dries and cracks the leather.
That’s the basic recipe, and it works. But the difference between a collar that lasts three years and one that lasts a decade isn’t in the steps, it’s in the specifics you layer on top. Which cloth? Which conditioner? And what about the hardware, the salt from winter roads, or the residue from flea treatments?
What follows is a walkthrough of the process, the gear that actually helps, and the inspection habits that catch problems before your dog’s safety depends on a worn-out D-ring.
Key Takeaways
- Test everything first. Always patch-test any cleaner or conditioner on a hidden section of the collar, like the tail end of the lead, and wait 24 hours to check for dye transfer or discoloration.
- Heat is the enemy. Never dry a wet collar on a radiator, with a hairdryer, or in direct sun. Air-dry at room temperature only, forced heat bakes out the leather’s natural oils and guarantees premature cracking. Conditioning is essential.** A quality leather conditioner every three months keeps the fibers supple. Skipping it is the single fastest way to a stiff, cracked collar.
- Inspect the hardware every time you clean. Check the D-ring for wear, the buckle for smooth operation, and all stitching for fraying. Cleaning a structurally failed collar is a waste of time.
- Some damage can’t be cleaned away. Deep cracks, torn stitching, or a deformed D-ring mean the collar is retired. No amount of conditioner restores lost tensile strength.
What You’re Actually Cleaning (And Why It Matters)
Leather isn’t a uniform plastic. It’s a hide, tanned and finished. The tanning method, vegetable or chrome, dictates how it reacts to water and chemicals. Most mass-market dog collars use chrome-tanned leather because it’s cheaper and more water-resistant from the factory. But that finish can trap moisture against your dog’s neck if it’s not cared for, and the chemicals used in tanning can sometimes irritate sensitive skin.
Vegetable-tanned leather, like the Italian, French, or British cowhide specified by makers like Green Dog, ages differently. It develops a patina, a darkening and softening that tells the story of its use. This type is more absorbent, so it needs prompt drying and more regular conditioning, but it generally lacks the chemical irritants of its chrome-tanned counterpart.
Leather is naturally water-resistant, but it is not waterproof. If your collar or lead becomes wet, simply allow it to dry naturally at room temperature before using it again.
Your cleaning approach doesn’t change dramatically between the two, but your vigilance does. A vegetable-tanned collar left damp in a gym bag will develop mildew faster. A chrome-tanned collar treated with the wrong silicone-based “conditioner” will develop a gummy, sealed surface that can’t breathe. Know which you have. The best leather collar care starts with recognizing the material.
What to Use (and What to Run From)
Gather your tools before you start. You need less than you think.
The Safe Toolkit:
- Soft, lint-free cloths: Microfiber or plain cotton. Have two, one damp for cleaning, one dry for buffing.
- Lukewarm water: That’s it. For most cleanings, water is your only cleaner.
- Mild, oil-based leather conditioner: This is your follow-up. Look for a beeswax-based balm (like Renapur or Leather Genie) or a pure neatsfoot oil blend. These nourish the leather fibers without clogging pores.
- Soft-bristled brush: A clean horsehair or boar bristle brush for flicking off dried mud.
The Do-Not-Use List:
- Household cleaners, detergents, or bleach: These strip the leather’s natural oils aggressively. The leather will look clean for a week, then turn bone-dry and start cracking.
- Saddle soap: Unless your dog is actually plowing fields, avoid it. Saddle soap is for removing heavy, ground-in dirt and sweat from equestrian gear. Used on a dog collar, it over-cleans and dries out the leather. Manufacturers like Kegdog note it can cause cracking with overuse.
- Silicone sprays or waterproofing sealants: They create a superficial barrier that traps moisture underneath and prevents proper conditioning a leather collar later. The leather can’t breathe.
- Heat sources: Radiators, hairdryers, and sunny windowsills. They warp leather and evaporate its essential moisture too quickly.
The goal is to clean and nourish the hide, not to sterilize it. Think of it like caring for a leash made of wood, you’re wiping it down and applying a protective oil, not pressure-washing it.
The 5-Step Cleaning Process (and What to Skip)
Here’s the sequence. The timing between steps is as important as the steps themselves.
1. Remove Debris & Wipe Down.
Start with a dry brush to flick off any caked-on mud or sand. Then, wring out your soft cloth in lukewarm water until it’s just damp, not dripping. Wipe the entire collar, following the grain of the leather. Pay extra attention to the area under the buckle and D-ring, where saliva and grime accumulate. This is also your chance to inspect. Is the stitching intact? Does the D-ring spin freely?
2. Air-Dry Completely.
This is the step people shortcut. Lay the collar flat on a clean towel or hang it by the buckle in a room-temperature, well-ventilated area. This can take several hours. The leather must feel completely dry to the touch, no coolness, no dampness. If you put it away or condition it while damp, you’re sealing in moisture and inviting mold. FIREDOG’s safety guide stresses drying “away from direct heat sources” for this exact reason.
3. Apply Conditioner.
Once bone-dry, apply a small amount of your chosen conditioner to a fresh cloth. Rub it into the leather in a thin, even coat, covering the entire surface. A little goes a long way. For oil-based conditioners like the Neatsfoot oil blend from Kegdog, let it absorb for about 20 minutes.
4. Buff Off Excess.
Take your dry cloth and buff the collar vigorously. This removes any conditioner sitting on the surface that would otherwise attract more dirt. You should be left with leather that has a soft sheen, not a greasy feel.
5. Final Hardware Check.
Before putting it back on your dog, do a functional test. Open and close the buckle several times. It should move smoothly. Check the D-ring for any sharp edges or excessive wear. Give the collar a gentle pull. If anything feels loose, gritty, or cracked, stop. This is where regular collar maintenance transitions from cosmetic care to safety assurance.
Common mistake: Conditioning a damp collar. The conditioner seals moisture into the leather fibers, which then rot from the inside out. You’ll see dark, soft spots within a month.
When Standard Cleaning Isn’t Enough: Stains & Special Cases
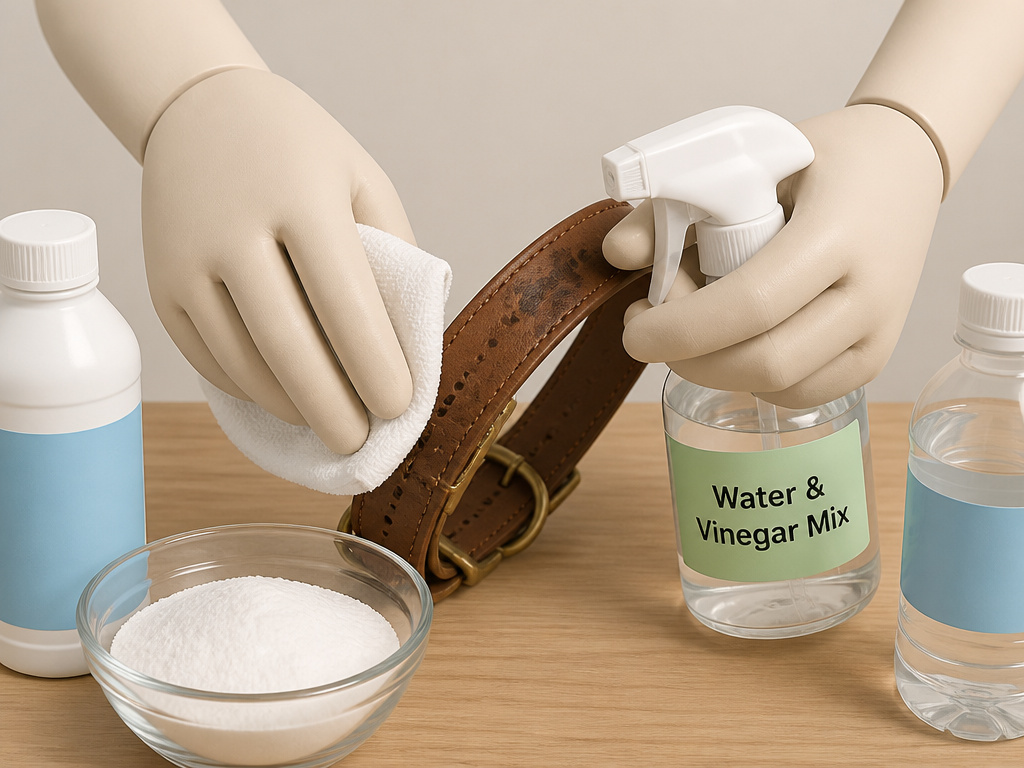
Mud and dust are one thing. Real life delivers tougher problems.
| Issue | Safe Response | What Never to Do |
|---|---|---|
| Saltwater (beach, winter roads) | Rinse immediately with fresh water. Wipe dry, then air-dry fully before conditioning. Salt is corrosive. | Let salt residue dry on the leather or hardware. It accelerates wear dramatically. |
| Flea/Tick Treatment Residue | Wipe area with a cloth dampened with a 50/50 mix of water and white vinegar. Dry and condition. Some treatments contain alcohols that dry leather. | Use harsh soaps to scrub it off. You may drive the chemicals deeper. |
| Light Mold/Mildew | Wipe with a cloth dampened with diluted isopropyl alcohol (1 part alcohol to 3 parts water). Dry thoroughly in sunlight for an hour (the only time sun is okay), then condition. | Soak it. This spreads spores. |
| Strong Odors | After drying, sprinkle with baking soda, let sit for an hour, then brush off. Condition afterward to restore oils. | Use deodorizing sprays; they often contain alcohols and perfumes that damage leather. |
The rule for all special cases is the same: act quickly, use the mildest effective method, and always follow with a full dry and conditioning session. If you’re ever unsure, the maker’s advice is your best bet. Companies like Dogs & Horses UK explicitly invite owners to contact them with photos for advice on older items, use that resource.
The Safety Inspection You Can’t Afford to Skip
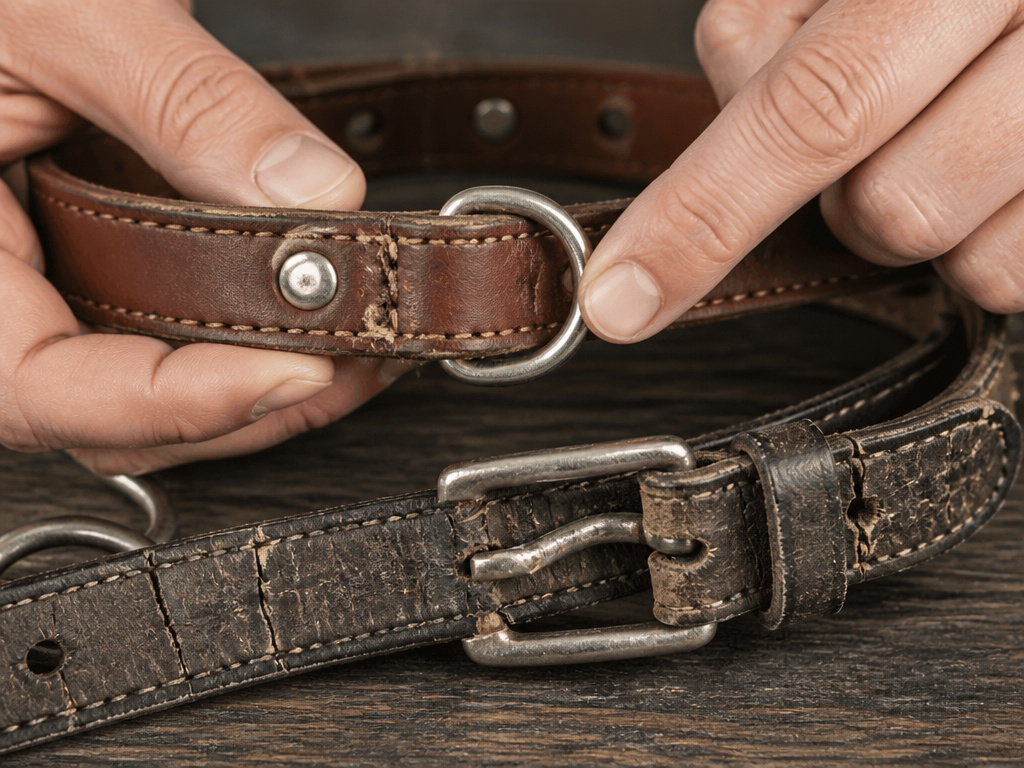
Cleaning is the perfect time to check the collar’s structural integrity. A clean but broken collar is dangerous.
Hardware:
- D-ring: Look for elongation of the hole, cracks, or sharp edges. It should be firmly attached with no lateral wobble.
- Buckle: The tongue should lock securely into each hole. Check for metal fatigue or rust.
- Snap Hooks (on leashes): The spring should snap back with authority. A lazy close is a fail.
Leather & Stitching:
- Stitching: Look for fraying, broken threads, or sections pulling away from the leather. This is common around stress points.
- Leather: Flex the collar along its length. Do you see deep cracks, especially around buckle holes? Does the leather feel spongy or brittle? As noted by Okeypets, deep cracking or torn stitching means cleaning won’t restore strength. The collar is done.
If any item on this checklist fails, retire the collar immediately. This isn’t scare talk. The FIREDOG safety guide is blunt: “Stop using the product and replace it immediately if you notice any damage.” Your dog’s safety relies on this piece of gear. For your next purchase, our guide to the best leather collars focuses on brands that prioritize these safety elements in their construction.
How to Store a Leather Collar Between Cleanings
Storage isn’t passive. It’s the final phase of care.
Do:
- Hang it by the buckle on a hook.
- Store it in a cool, dry, dark place (like a closet).
- Ensure there’s airflow around it.
Do Not:
- Cram it into a sealed plastic bag or airtight box. Leather needs to breathe.
- Leave it in a damp gym bag or car trunk.
- Store heavy objects on top of it, which can deform the shape and hardware.
Think of storage as giving the collar a rest in a good environment. This simple habit prevents most mold issues and keeps the leather from setting into awkward creases. It’s the easiest part of proper leash care.
Frequently Asked Questions
Can I use baby wipes on a leather dog collar?
No. Most baby wipes contain alcohols, mild detergents, and fragrances that will slowly dry out the leather. They might seem convenient for a quick wipe, but water on a cloth is safer and free.
How often should I condition the collar?
The consensus, from sources like Kegdog, is every three months with regular use. But let the leather tell you. If it looks dry, feels stiff, or has lost its subtle sheen, it’s time. A collar worn by a dog that swims weekly may need monthly conditioning.
Is it safe for my dog to swim with a leather collar on?
Manufacturers are united on this: no. FIREDOG’s safety guide states the risk of snagging underwater is a drowning hazard. Repeated soaking is terrible for the leather. If your dog is a swimmer, make removing the collar part of your routine. For post-swim care, our article on leather leash cleaning covers the dry-and-condition process in detail.
Can I fix a cracked leather collar?
You can’t restore the original strength of cracked leather. For superficial surface cracks, conditioning can plump the fibers and make them less noticeable. But if the cracks are deep or around a buckle hole, the structural integrity is compromised. Don’t try to repair it with glue or tape. Replace it. If you’re handy, you could use the hardware from the old collar in a tutorial for making a leather collar.
What if my dog chews his leather collar?
This is a immediate red flag. Chewing quickly weakens the material. Stop using the collar and replace it with a more chew-resistant option (like Biothane) for supervised training. A chewed collar is a liability.
The Bottom Line
Cleaning a leather dog collar isn’t about making it look new. It’s about preserving the material so it stays safe and functional for years. The ritual is simple: wipe, dry, condition, inspect. The discipline is in never skipping a step, especially the drying and the hardware check.
One final, non-negotiable rule: if your dog is a regular swimmer or beachgoer, rinse the salt off the leather and hardware the same day. Let that be the habit that saves a favorite collar from an early retirement. Everything else, the choice of conditioner, the storage hook, flows from there.
