
Learn How to Protect Leather Shoes from Rain & Water Spots
This post contains affiliate links. As an Amazon Associate, we earn from qualifying purchases.
Protect leather shoes from rain by following a clean-condition-protect sequence, using a product matched to your leather type and climate, and accepting that true waterproofing seals the leather. Most effective sprays are acrylic resin-based and can darken the surface; waxes like Obenauf’s Heavy Duty LP offer the strongest barrier but reduce breathability significantly.
That’s the straightforward answer. The nuance comes from one simple fact: leather is skin. It’s porous. Any claim of “waterproofing” leather without sealing those pores is marketing, not material science. This guide isn’t about keeping your shoes bone-dry in a downpour, that’s a job for rubber boots, but about managing moisture so your leather survives and looks better for it.
Here’s what follows: a breakdown of how water resistance actually works on leather, the three product types and the leathers they suit, the essential prep steps, and the maintenance rhythm that keeps them beading water season after season. By the end, you’ll know exactly what to buy, how to apply it, and when to leave well enough alone.
Key Takeaways
- Waterproofing fights leather’s natural breathability; choose protection based on your actual weather exposure, not a fear of rain.
- Always clean and condition leather before applying any protectant, applying wax over dirt locks in dryness.
- Acrylic resin sprays (like Rust-Oleum NeverWet) are for fabric and nubuck; waxes (like Obenauf’s) are for smooth leather boots facing slush.
- Luxury brands like Manolo Blahnik explicitly advise against water contact, making “protection” a direct contradiction of their care rules.
- The telltale sign a treatment has failed is when water stops beading and soaks in within seconds of contact.
The Fabric Truth You Can Touch
Leather isn’t fabric. Treating it like one is the first mistake. A cotton jacket can be coated with a polymer that sits on top of the fibers. Leather, being skin, needs anything you put on it to either absorb into its structure or bond chemically to its surface. Most waterproofing products work by laying down a microscopic film, usually acrylic resin or wax, that makes water bead up. This works until the film wears thin from flexing, scuffing, or cleaning.
The balance is breathability. A fully waterproof seal means no moisture vapor from your foot can escape. That’s why the Sioux guide correctly notes that waterproofing “does not make regular leather shoes completely waterproof. Rather, it ensures that moisture does not penetrate the material as quickly.” You’re buying time for the water to roll off before it soaks in, not building an impermeable barrier.
Where this goes sideways: Applying a wax sealant to a dirty shoe. The wax locks dust and dried salt into the leather’s pores. A year later, the leather underneath is parched and cracked, but the surface looks “protected.”
So, protection is a spectrum. On one end, you have light conditioning with oils that repel a light mist. On the other, a heavy wax coating for hiking boots that trade foot climate for dryness. Check the fill line.
The 3-Step Protection Sequence That Actually Works
The process isn’t random. Skip a step, and you compromise the whole result. This sequence, clean, condition, protect, is the difference between a shoe that beads water for a season and one that does it for a week.
1. Clean: The Non-Negotiable First Move
You cannot protect dirt. Any oil, wax, or spray applied over grime simply sits on top of it. When that grime absorbs water, it swells against the leather, causing stains and stiffness from the inside out. A proper cleaning your leather shoes starts with a horsehair brush to remove dry dust, followed by a damp cloth for surface soil. For heavier grime, a dedicated leather cleaner is safer than dish soap, which can strip natural oils.
The consequence of skipping this: The protectant forms a weak bond with the dirt, not the leather. The first serious flex or scuff flakes the entire treatment off.
2. Condition: Feeding the Leather Before Sealing It
Conditioning is separate from waterproofing. A conditioner like Saphir Renovateur Cream hydrates and plasticizes the leather fibers, keeping them supple. Dry leather is brittle leather; when it gets wet and then dries rapidly, it cracks. Conditioning first ensures the hide is resilient enough to handle the stress of a waterproofing layer on top.
Think of it like applying a hand-rubbed oil finish to wood. You don’t slather it on; you work in thin, even coats, letting each one be fully absorbed before even thinking about the next. Let the conditioner dry completely, overnight is best, before moving to step three.
3. Protect: Choosing and Applying the Right Barrier
Now you select your armor. The choice depends entirely on the leather type and the wetness you expect.
| Protector Type | Best For Leather Type | How It Works | Biggest Drawback |
|---|---|---|---|
| Wax-Based Paste (Obenauf’s Heavy Duty LP) | Smooth, full-grain leather boots & work shoes. | Melts into pores, solidifies into a flexible, water-repellent seal. | Significantly reduces breathability; darkens leather. |
| Silicone / Acrylic Spray (Rust-Oleum NeverWet) | Suede, nubuck, fabric blends. | Forms a clear, thin polymer film on the surface. | Can feel sticky or plastic-like; not for smooth leather. |
| Oil-Enhanced Cream (Nikwax Fabric & Leather Proof) | Garment leather, lightweight shoes. | Water-based formula soaks in, leaving a DWR (Durable Water Repellent) layer. | Less durable than wax; needs more frequent reapplication. |
Apply in a thin, even coat. For wax, use your fingers to warm and work it into the leather, paying extra attention to seams and the welt. For spray, hold the can 6-8 inches away and use short, sweeping passes in a well-ventilated area. Let the protector dry fully, often 24 hours, before wearing. A second coat, applied after the first is dry, dramatically improves durability.
TL;DR: Clean off the dirt, feed the leather, then seal it with the right product for the job. Doing all three in order is what makes protection last.
Wax, Spray, or Cream? Picking Your Product
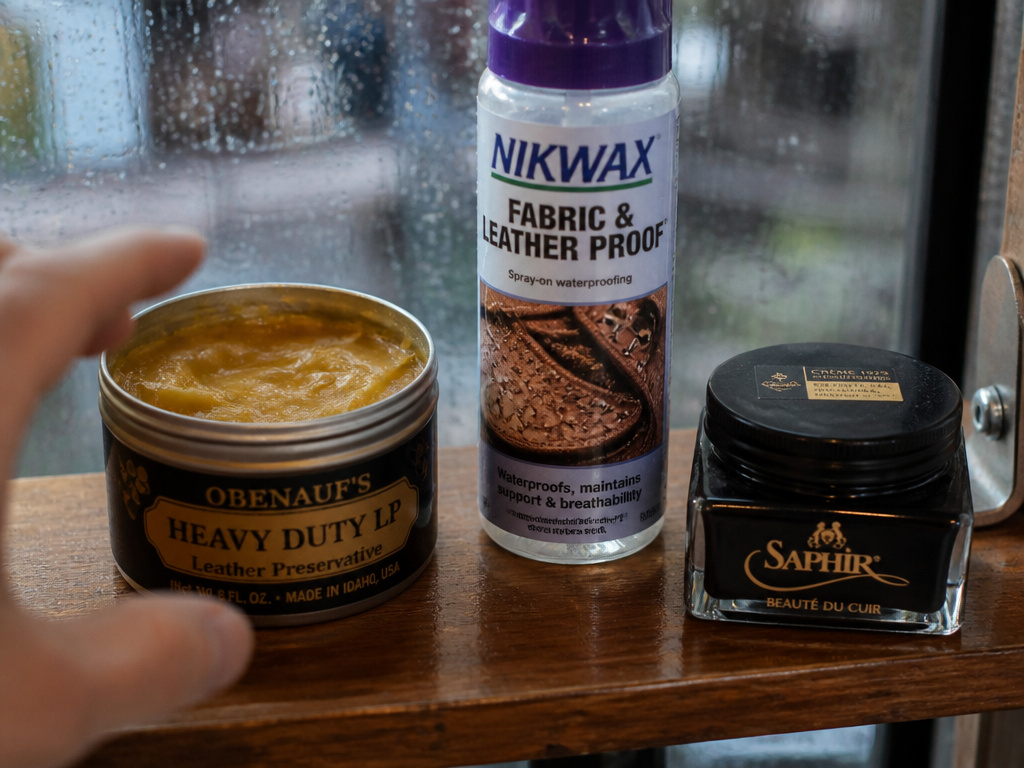 The shelf is crowded. Here’s how to cut through the noise and match a product to your actual shoes.
For Heavy-Duty Boots & Outdoor Shoes: Wax is King
If you face snow, slush, or consistent rain, a wax-based product is your only real choice. I reach for Obenauf’s Heavy Duty LP. It’s a blend of beeswax and oils that you melt into the leather with friction. The result is a flexible, deeply water-repellent barrier. The trade-off is real: the leather will darken (sometimes permanently) and won’t breathe as well. This is for footwear where dryness trumps all else.
Common mistake: Applying wax to cold leather. Warm the can and your hands first. Cold wax won’t penetrate, it just sits on top as a gummy layer that picks up every piece of lint.
For Suede, Nubuck, & Fabric Mixes: Spray Only
The raised nap of suede and nubuck will mat down if a heavy wax or cream is applied. Here, a spray-on protector is mandatory. Products like Nikwax Fabric & Leather Proof are designed for these materials. They deposit a clear, flexible polymer that doesn’t alter the texture. Always test on a hidden area first, some sprays can darken sensitive dyes.
The limitation: Spray coatings wear off faster, especially at flex points like the toe box. Reapplication after 4-6 weeks of wet-weather wear is normal.
For Dress Shoes & Lightweight Leathers: Oil-Enhanced Creams
For shoes that see occasional drizzle, a conditioning cream with waterproofing properties is enough. These products, like some from the Saphir line, add a degree of water resistance while primarily nourishing the leather. They won’t withstand a downpour, but they’ll repel a splash from a puddle. This is the balanced choice for maintaining elegance while adding a practical layer of defense.
The reality: No cream will make a dress shoe safe for a long walk in the rain. For that, you need a different shoe.
The Product Pitfalls and How to Avoid Them
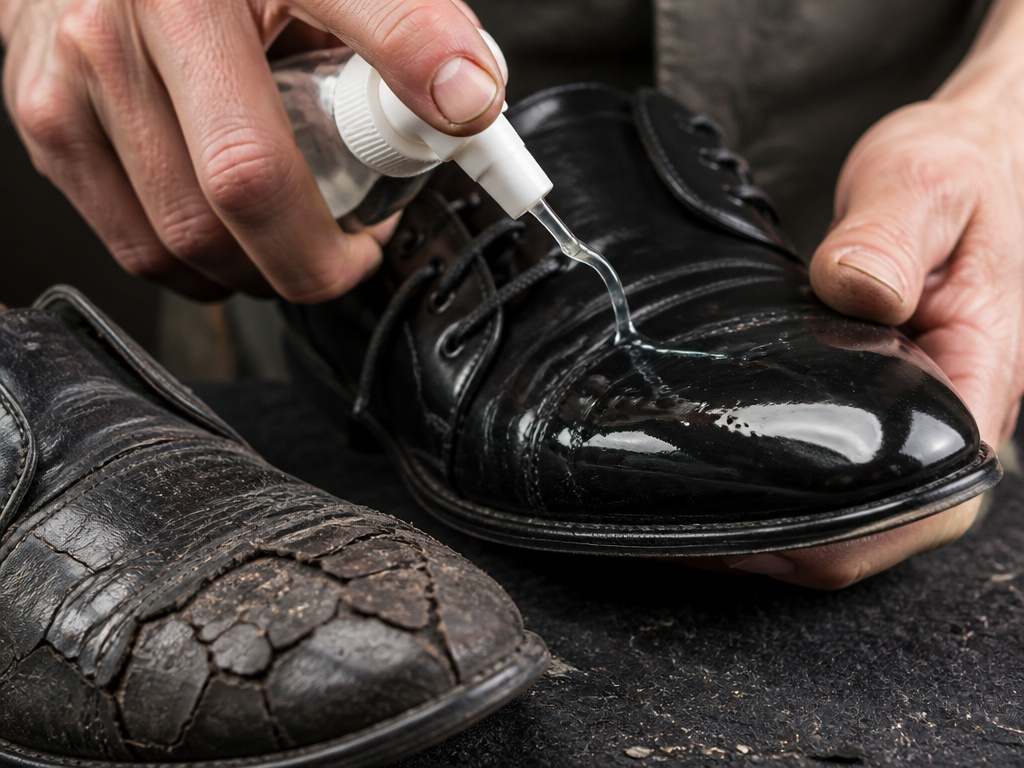 Not all protectors are created equal. Some are outright destructive if misused.
Acrylic Resin Sprays (e.g., Rust-Oleum NeverWet): The technical data sheet doesn’t lie. These are industrial-grade chemicals. The VOC content is 744 g/l, and the flash point is 100°F (38°C). They are fantastic for a canvas work boot but will make a fine calfskin dress shoe feel like plastic. They also require application above 50°F (10°C) and below 85% humidity to cure correctly, a spec most DIYers ignore, leading to a sticky, never-dry finish.
Silicone-Based Sprays: These are the ones that promise everything and deliver a glossy, slick surface. Silicone seals the leather pores completely. Over time, it can cause the leather to dry out underneath because no conditioner can penetrate the silicone seal. I’ve seen it happen on neglected boots where the leather beneath the shiny surface crumbles like a dry leaf.
The “Bloom” Edge Case: I’ve encountered the whitish haze on waxed leather more than once. It looks like a film of mold or salt. This is “bloom,” where oils and waxes migrate to the surface as the leather cures and temperature changes. It’s harmless. The fix is simple: a gentle buff with a soft, dry cloth. Don’t re-wet it or try to scrub it off, you’ll just work it back in.
I’ve learned this the hard way. Applying a product outside its specified temperature range, too cold or too humid, results in a finish that never fully sets. The shoes stay tacky, attract dust, and the protection fails at the first sign of moisture.
What the Luxury Brands Won’t Tell You
Here’s a contradiction that reshapes the entire conversation. Manolo Blahnik’s official care guide is unequivocal: “Keep your shoes out of contact with… Water, including exposure to rain” and “Never attempt to clean your shoes with soap or water.”
Let’s be clear about this. For a brand at that level, water exposure is considered a defect risk, not a condition to be managed. Their position is that the delicate dyes, finishes, and constructions they use are incompatible with mass-market waterproofing products. Applying a wax or spray might void any care expectations they offer. For true luxury items, “protection” might mean never wearing them if there’s a 10% chance of rain.
This clashes directly with brands like Cheaney, which encourage regular polishing with wax-based products to enhance water resistance. They acknowledge that good leather, properly cared for, can handle the rain. This is the practical enthusiast’s approach: accept that leather will get wet, and build a regimen that strengthens it against that inevitability.
So, which is right? It depends on the shoe’s purpose. A $1,000 patent leather pump is a work of art; keep it dry. A $500 Goodyear-welted brogue is a tool; maintain it for the elements. Your protection strategy should match the maker’s intent.
The Long-Term Maintenance Rhythm
Protection isn’t a one-time event. It’s a cycle.
- After Every Wear: Brush with a horsehair brush. This redistributes oils, removes dust, and maintains the surface integrity. It’s the most underrated step in a complete leather shoe care routine.
- When Water Stops Beading: This is your trigger. Splash a few drops on the toe. If they soak in within 10 seconds, it’s time for a fresh coat of your protectant. Don’t wait for the leather to look soaked.
- Seasonal Deep Care: At the start of a wet season (fall/winter), perform the full clean-condition-protect sequence. In drier months, you can often skip the “protect” step and just condition.
- If They Get Soaked: Don’t panic. Don’t put them on a radiator. Remove the laces, stuff them with newspaper to absorb moisture, and let them dry slowly at room temperature. Once fully dry, this can take 48 hours, assess if they need conditioning (they likely will) before reproofing.
Sticking to this rhythm means you’ll almost never need a drastic restoring water-damaged leather shoes intervention. You’re maintaining a state, not recovering from a disaster.
Frequently Asked Questions
Can you make leather shoes 100% waterproof?
No, not without destroying their breathability and comfort. You can make them highly water-resistant. True waterproofing requires a non-porous membrane or material, like rubber. Leather is porous by nature; sealing those pores completely creates a sweaty, uncomfortable environment inside the shoe.
Will waterproofing spray darken my light-colored leather shoes?
Most likely, yes. Both waxes and many sprays note they “may enrich light material with a slightly darker tone.” Always test any product on an inconspicuous area, like the inside of a shoe strap, before applying it to the entire shoe.
How often should I reapply waterproofing?
There’s no universal schedule. It depends on wear. For regularly worn boots in wet weather, this could be every 4-6 weeks. For occasionally worn dress shoes, a seasonal application might suffice.
Is it okay to use a hair dryer to dry wet shoes?
Never. Direct heat is the fastest way to ruin leather. It causes the fibers to contract rapidly, leading to permanent stiffness, cracking, and warped soles. Always let wet shoes dry slowly at room temperature, away from direct sunlight or heaters.
What’s the best product for suede shoes?
Use a spray protector formulated specifically for suede and nubuck, like Nikwax Fabric & Leather Proof. These are designed to protect without flattening the nap. Never use a wax or cream on suede, it will ruin the texture.
Before You Go
Protecting leather from rain isn’t about finding a magic potion. It’s about understanding a conflict: leather needs to breathe, and water needs to be kept out. You’re always negotiating between those two poles.
The single most important thing you can do is the prep work. A meticulously cleaned and conditioned shoe will survive a wet day far better than a dirty one with a thick coat of wax. The products. Obenauf’s for the tough jobs, Nikwax for the delicate ones, are just tools. The craft is in the sequence and the consistency.
So, start with the shoes you wear most. Give them a proper thorough leather shoe cleaning, follow it with a conditioner like Saphir Renovateur, and then choose your protectant based on the forecast. Let each step dry fully. Then go for a walk. The confidence that comes from knowing your gear is cared for is, frankly, its own kind of protection.
