
Learn How to Remove Stains from a Leather Bag Correctly
This post contains affiliate links. As an Amazon Associate, we earn from qualifying purchases.
This post contains affiliate links. As an Amazon Associate, we earn from qualifying purchases.
To remove a stain from a leather bag, your first move is to identify it. You must match the leather type (calfskin, suede, patent, etc.) and the stain (water-based, oil-based, dye transfer) to the correct, gentle method.The wrong product, like saddle soap on a delicate bag, can cause permanent damage.**
That identification step is the line between a successful spot treatment and a ruined finish. Leather isn’t a uniform material; a method that works on a rugged work bag can strip the color from a designer patent piece. The process hinges on patience, gentle tools, and knowing when to stop.
What follows is a breakdown of the safe, manufacturer-recommended approaches for common bag leathers. This guide explains the universal first step everyone skips, a safe cleaning method for most smooth leathers, specific protocols for suede and patent, and what to do when a stain just won’t budge.
Key Takeaways
- Never use saddle soap, oils, ammonia, or furniture polish on modern leather bags; these are prohibited by brands like Tiffany & Co. And will dry out or discolor the leather.
- Always test any cleaner on a hidden area first, like under a flap or inside a pocket seam, and wait for it to dry completely to check for color change or texture damage.
- Blot, never rub, especially with liquid spills. Rubbing grinds the stain deeper into the leather’s pores or damages the surface nap on suede.
- For oil-based stains, use a dry cloth first; applying water can set the stain. For most other spills, a mild solution of 10 parts water to 1 part mild soap is the safest start.
- Different leathers demand different tools: a soft white cloth for smooth leather, a pencil eraser for dry suede marks, and a soft brush for velvet or nubuck.
The Universal First Step: Identify Before You Treat
Grabbing the nearest leather cleaner is how good bags go bad. The single most important step happens before you touch the stain. You need to answer two questions: what is the bag made of, and what is the stain made of?
Before you start: Leather is porous and absorbs liquids quickly. Using the wrong chemical can cause permanent discoloration, hardening, or finish cracking within minutes. Always work in a well-ventilated area with natural light.
First, identify the leather. Run your fingers over it. Is it smooth and slightly glossy? That’s likely calfskin or a similar finished leather. Is it soft, fuzzy, and matte? That’s suede or nubuck. Is it shiny and plastic-like? That’s patent leather. Is it fabric? That’s canvas. Your bag’s care tag or the brand’s website often lists the material. This is the rulebook. For example, Roger Vivier explicitly states that creams or disinfectants can alter the natural beauty of their calfskin, while Balmain warns that leather creams should never be applied to their polyurethane “Jolie Madame” bags.
Second, identify the stain. Look at it. Is it shiny and slick? That’s probably oil or grease. Is it a different color that looks like it rubbed off from jeans or a magazine? That’s dye transfer. Is it a water-based spill like coffee or wine? The approach for each is fundamentally different. Mistaking an oil stain for a water-based one and adding water is a classic error that sets the stain permanently.
| Leather Type | Key Identifier | Primary Cleaning Tool | Biggest Risk |
|---|---|---|---|
| Calfskin / Smooth Leather | Glossy, smooth finish | Soft, damp white cloth | Using abrasive cleaners that strip the topcoat |
| Suede / Nubuck | Soft, velvety, matte nap | Soft bristle brush or pencil eraser | Getting it too wet, which mats the nap irreversibly |
| Patent Leather | High-gloss, plastic-like shine | Damp cloth with mild soap | Color transfer from other materials, sunlight yellowing |
| Canvas / Fabric | Woven textile feel | Damp cloth, mild soap | Using leather products, which can stain the fabric |
This table is your pre-flight checklist. Skipping it means you’re working blind.
What NOT to Use: The Common Cleaner Graveyard
Let’s be clear about this. The most well-intentioned mistakes live in the kitchen and the garage.
Here is the short, essential ban list, drawn directly from the care guidelines of houses like Tiffany & Co. And Roger Vivier: * Saddle Soap: This is for filthy, oil-soaked saddles. On a bag, it leaves a residue that clogs pores and accelerates drying. * Household Cleaners (Ammonia, Bleach, Furniture Polish): Far too harsh. They will strip color and finish, often unevenly. * Oils (Olive, Mink, Neatsfoot): They can go rancid, attract dirt, and darken leather unpredictably. * Hairdryers or Direct Heat: Heat dries leather out from the inside, causing it to crack and become brittle. * Abrasive Tools (Stiff Brushes, Magic Erasers, Steel Wool): These will scratch the surface grain or destroy a suede nap.
I learned this the hard way early on. On a pair of old work boots, I reached for a wire brush for some caked-on mud. It got the dirt off, but it also scratched and dulled the grain more than the years of wear had. On a delicate bag, that same move would be a death sentence. The goal is to lift the stain, not the leather itself.
Step-by-Step: A Safe Cleaning Method for Most Leathers
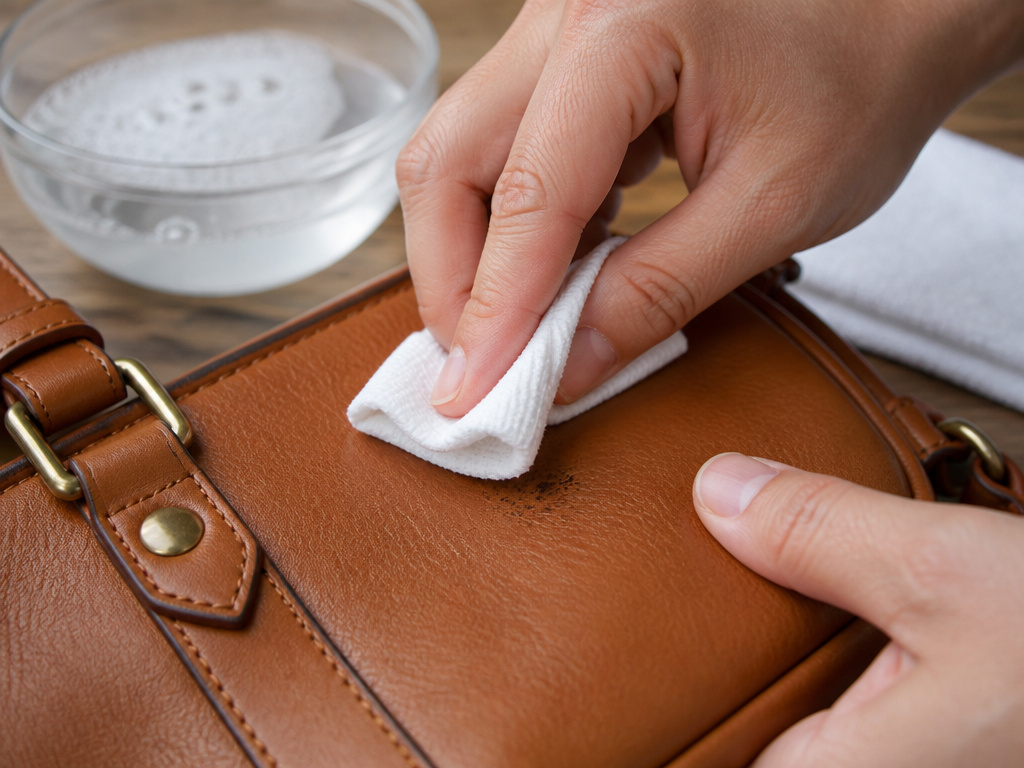
For smooth, finished leathers like calfskin, cowhide, or grain leather, the kind on most everyday totes and satchels, this is your foundational process. It’s boring, it’s slow, and it works.
1. Do the Patch Test. Find a hidden spot, inside a pocket, under a flap, on a bottom corner. Apply your chosen cleaner (we’ll get to that) with a cotton swab. Let it dry completely. Check for any color transfer to your swab, darkening, or texture change. If it passes, proceed.
2. Mix Your Solution. Tiffany & Co.’s guideline is specific: a mild solution of 10 parts water to 1 part mild soap. Use a plain liquid hand soap or castile soap. This creates a gentle cleaning agent without harsh surfactants.
3. Blot the Stain. Dampen a soft, white, lint-free cloth with your solution and wring it out thoroughly. You want the cloth damp, not wet. Gently dab at the stain from the outside in. Do not scrub in circles. The motion is “press and lift.” For a fresh spill, place a clean, absorbent cloth underneath the stain to draw it out.
Where this goes sideways: Rubbing a stain. This grinds the particulate deeper into the leather’s pores and can distort the grain pattern. Dab, don’t rub. Every time.
4. Rinse the Area. This step is missed by almost everyone. Take a second cloth, dampen it with clean, lukewarm water, wring it out, and dab the cleaned area to remove any soap residue. Soap left behind attracts dirt.
5. Dry It Properly. Blot the area with a dry, absorbent towel. Then, let the bag air dry naturally, away from direct heat or sunlight. Stuff it with paper or a towel to help it keep its shape as it dries. This can take 24 hours.
6. Condition (If Needed). After the bag is fully dry, assess. Apply a thin coat of a conditioner like Lexol or Bickmore to restore suppleness. This isn’t always necessary after a simple clean.
The entire process rewards patience. Force is the enemy.
Material-Specific Protocols: Suede, Patent, and Canvas
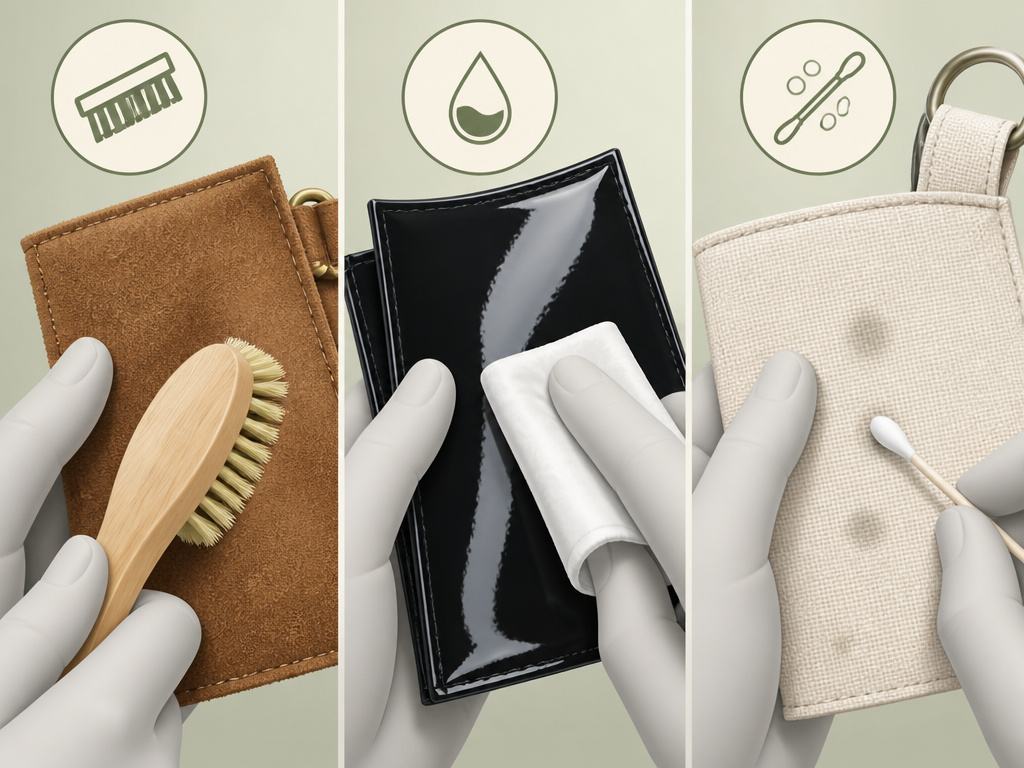
When you move away from standard smooth leather, the rules change. These materials have unique vulnerabilities.
For Suede & Nubuck:
These have a raised nap. Water is the enemy, as it mats the fibers flat. * Dry Dirt/Dust: Use a soft suede brush or a clean, dry microfiber cloth. Brush gently in one direction to lift the nap. * Dry Stains (scuffs, pencil): Tiffany & Co. Recommends a clean pencil eraser. Gently rub the affected area. The eraser crumbles lift the stain without wetting the leather. * Wet Stains: Immediately blot, do not rub, with a clean, absorbent cloth or paper towel. Roger Vivier advises to “remove fresh stains as soon as they appear” with a dry cloth. Let it air dry, then gently brush the nap to restore texture. * Never use standard leather cleaners or conditioners. They will stain and mat the suede.
For Patent Leather:
That high-gloss finish is a coating over leather. Its risks are different. * Cleaning: Use a damp white cloth with a tiny drop of mild soap. Wipe gently, then immediately follow with a cloth dampened with clean water to rinse. Dry with a soft cloth. * Color Transfer: This is a major risk. Patent leather can pick up dye from denim, newsprint, or other leather. Both Tiffany and Roger Vivier warn against resting patent items against other colored materials. Prevention is key. * Yellowing: Light-colored patent leather can yellow with exposure to sunlight and artificial light. Store it in its dust bag.
For Canvas or Fabric Bags:
Treat these like delicate clothing. * Spot clean only with a damp cloth and mild soap. Balmain explicitly states not to use leather lotions or chemicals on canvas, as they can stain. * Let it air dry completely before storing to prevent mildew.
Troubleshooting Stubborn Stains and Next Steps
Sometimes, gentle dabbing isn’t enough. Here’s how to escalate carefully, knowing when to stop.
Oil and Grease Stains: The rule flips here. Do not add water. Immediately blot with a dry, absorbent cloth or paper towel to soak up as much as possible. Often, the oil will dissipate into the leather over time. Tiffany’s guidance is to simply blot and wait, noting “The spot should dissipate into the leather shortly.”
Dye Transfer: This is color rubbed off from another surface. Try the mild soap and water method first. If it persists, a specialized leather cleaner designed for dye transfer may be needed, but test it obsessively first. For colored patent leather, dye transfer may be permanent.
Ink Stains: Act fast. Blot (do not smear) with a dry cloth. Often, a dedicated leather ink remover is required. These are solvent-based and carry higher risk, professional help is a wise consideration.
Old, Set-In Stains: If a stain has been there for months and your gentle cleaning attempts have no effect, it’s likely set. Further aggressive home treatment risks damaging more of the leather’s surface. This is the threshold.
When to call a professional: If the stain is large, on a highly valuable or sentimental bag, or if you’ve attempted safe removal with no progress. A professional leather cleaner has tools and solvents not available to consumers. The cost is almost always less than the cost of replacing a ruined bag.
Frequently Asked Questions
Can I use baby wipes on my leather bag?
No. Most baby wipes contain alcohols, fragrances, and moisturizers that can leave a residue or strip natural oils from the leather. Stick to a damp white cloth with water or a mild soap solution.
How do I remove water stains from leather?
Water stains (dark rings) occur when water soaks in unevenly. Often, the entire bag needs to be evenly, gently dampened and allowed to dry uniformly to minimize the ring. This is a delicate process, and for a noticeable ring on a nice bag, a professional may achieve the best results.
Will cleaning my bag remove its protective finish?
It can, if you use harsh chemicals. The safe method outlined here, a mild soap solution, is designed to clean without stripping. If your bag gets wet frequently, you may need to reapply a leather protector after cleaning and conditioning, but choose a product recommended for your specific leather type.
Can I use vinegar to clean leather?
It’s not recommended. While diluted white vinegar is a natural cleaner, its acidity can be unpredictable on leather dyes and finishes. The 10:1 soap-to-water solution is a safer, manufacturer-vetted alternative.
How often should I clean my leather bag?
For general maintenance, a light wipe-down with a dry, soft cloth after each use removes dust and surface oils. A full clean with conditioner is only needed once or twice a year, or immediately after a spill.
The Bottom Line
Removing a stain from a leather bag is a deliberate, diagnostic process. Your most powerful tool is the patience to identify the leather and the stain before you do anything else.
The one rule that overrides all others: when in doubt, stop. A small, faint stain is always better than a large, clean-looking patch of damaged leather. For daily care, consistent, gentle cleaning beats frantic stain removal every time. Keep a soft white cloth handy, blot spills immediately, and store your bag properly. That’s how a bag develops a patina with a uniform, deep color instead of a collection of scars.
