
How to Remove Ink from Leather | Practical & Proven Steps
This post contains affiliate links. As an Amazon Associate, we earn from qualifying purchases.
This post contains affiliate links. As an Amazon Associate, we earn from qualifying purchases.
To remove ink from leather, first blot and isolate the stain, never rub. Then, select a cleaner based on your leather’s finish: for coated leathers, use a dedicated leather ink remover like Fiebing’s Ink Remover or Angelus Easy Cleaner, applied with a cotton swab. For unfinished or aniline leather, professional assessment is almost always required, as dried ink penetrates the finish and cannot be cleaned out without refinishing.
Let me share what I’ve learned. That first step, blotting, not rubbing, is the whole game. Rub a fresh ink stain and you drive the pigment laterally, turning a dot into a permanent shadow. Isolate it, and you have a fighting chance.
What follows: a breakdown of the leather types that change the entire equation, the specific commercial products that actually work, and the seven-step process that starts with a test patch. We’ll also look at why hand sanitizer is a popular home remedy and why, despite its logic, I recommend against it for anything you care about.
Key Takeaways
- Act within 24 hours. Ink stains become permanent once they soak through the leather’s protective topcoat.
- Identify the leather finish first. Coated (finished) leather can be cleaned; aniline (unfinished) leather often requires professional help for ink.
- Use the blot-and-isolate method. Press a clean cloth onto the stain to lift ink, avoiding any sideways motion that spreads it.
- Test every cleaner. Apply your chosen product to a hidden seam or underside first to check for discoloration or damage.
- **Finish with a conditioner.Any cleaning process strips natural oils, so restoring moisture is essential.
What Kind of Leather Are You Treating?
The leather will tell you what it needs. This isn’t a single material, it’s a category, and the specific tanning and finishing process dictates every cleaning choice you make. Getting this wrong is how a small stain turns into a large, expensive repair.
There are two main camps for our purposes: finished (coated) leather and unfinished (aniline) leather.
Finished or Coated Leather has a protective polymer topcoat sprayed over the dyed hide. This is the most common type for car interiors, most furniture, and many bags and jackets. That clear layer sits between the ink and the leather’s porous color layer, giving you a short window to clean it off. You’re cleaning the finish, not the leather underneath.
Aniline or Unfinished Leather has been dyed all the way through but lacks that protective topcoat. It feels incredibly soft and shows natural grain variations, which is its beauty, and its vulnerability. Ink on aniline leather behaves like ink on a sponge; it wicks into the material immediately. For dried ink stains on aniline leather, the official guidance from aerospace maintenance specs is blunt: removal requires refinishing the leather.
A 2019 aircraft maintenance specification from Perrone Aerospace states that dried or ‘set-in’ ink stains have permeated under the protective clear top coat and can only be removed by properly re-finishing the leather.
That’s not a scare tactic. It’s the physical reality of the material.
The Hand-Sanitizer Question
People frequently ask about using hand sanitizer to quickly clean leather. The logic seems sound: it’s mostly alcohol, and alcohol can dissolve ink. I recommend against it because the high alcohol content, often 60% or more, can severely dry out and strip the natural oils from the leather. On finished leather, it might work once in a panic, but it degrades the finish over time. On aniline leather, it’s a direct path to stiff, cracked material. There are better tools for the job.
The Ink Removal Process, Step-by-Step
This is a straightforward guide. Follow these steps in order. Skipping ahead, especially the patch test, is how you exchange an ink spot for a bleached or discolored one.
Step 1: Blot, Don’t Rub.
The moment you see the stain, grab a clean, white, lint-free cloth or paper towel. Fold it and press firmly onto the ink spot. Hold for 30 seconds. The goal is to lift any excess, surface-level ink out via capillary action. Any rubbing motion grinds the pigment into the leather’s grain and spreads the stain. If the ink is from a leaking pen, you might see a transfer onto your cloth. That’s good.
Step 2: Identify and Isolate.
Determine the ink type if you can. Ballpoint pen ink is oil-based; many fountain pen inks are water-based. This matters for product selection later. Then, if possible, place a clean paper towel under the stained area if it’s on a thin item like a jacket. This prevents the ink from wicking through to the other side.
Step 3: The Non-Negotiable Patch Test.
Pick a completely hidden area, the underside of a flap, an inner seam, the back of a cushion. Apply a tiny amount of your chosen cleaner with a cotton swab. Let it sit for the recommended time (usually 1-2 minutes), then wipe it off. Wait at least an hour. You’re looking for any change in color, texture, or finish. No change means you can proceed. Any change means stop; this cleaner is too harsh for this leather.
Step 4: Apply the Cleaner.
For a targeted ink stain, use a cotton swab for precision. Dab it into your cleaner. I reach for Angelus Easy Cleaner for general use or Fiebing’s Ink & Stain Remover for tougher jobs on finished leathers. Apply it directly to the center of the stain, then gently work outward in a circular motion. Don’t flood the area.
Step 5: Wait and Wipe.
Let the product do its work. Most leather ink removers need 3-5 minutes to break down the stain. Then, take a fresh, damp section of your clean cloth and wipe the area clean. You may need to repeat steps 4 and 5 several times for a stubborn stain.
Step 6: Neutralize and Clean the Whole Area.
Once the ink is gone, you’ll often have a cleaner residue left behind. Wipe the entire surrounding area with a cloth dampened with water to blend the cleaned spot into the rest of the piece. This prevents a “clean ring” from forming.
Step 7: Condition Immediately.
Cleaning strips oils. Full stop. If you don’t replenish them, the leather dries out and becomes prone to cracking. Once the area is completely dry to the touch, apply a small amount of a high-quality leather conditioner. Rub it in thoroughly and evenly over the entire piece, not just the cleaned spot. This final step is what keeps the leather supple and prevents future stains from setting so quickly.
Choosing Your Weapons: Cleaners vs. Home Remedies
You have two paths: commercial leather-specific products or household items. One is predictable; the other is a gamble. Let’s be clear about one thing: for a valued item, predictability wins.
Commercial Leather Ink Removers
These are formulated with a specific pH balance (ideally between 4 and 6) and solvents designed to target ink without dissolving the leather’s dyes or finishes. They are your first and best choice.
| Product Type | Best For | Risk If Skipped |
|---|---|---|
| Dedicated Ink Remover (e.g., Fiebing’s Ink & Stain Remover) | Fresh ballpoint or marker ink on finished leathers. | Using a general cleaner may not break down the ink’s binders, leaving a shadow. |
| Gentle Leather Cleaner (e.g., Angelus Easy Cleaner) | Mild ink stains or general cleaning on coated leather. | A harsher product may dull or strip the protective topcoat over time. |
| Saddle Soap | Heavily soiled, utilitarian finished leather (boots, tack). | Using on fine finishes or aniline leather will leave a residue and dry it out. |
When should you consider a professional? If the ink is on aniline leather, if the stain is larger than a quarter, or if your careful cleaning attempts have made no progress after two cycles. A professional has access to stronger solvents and, critically, the ability to re-dye and refinish the area if needed. This is the core service for tackling dye transfer and deep stains.
The Home Remedy Menu (And Its Pitfalls)
I know the appeal: it’s midnight, the ink is fresh, and the store is closed. Here’s a practical takeaway on what might work and what will likely backfire.
- Rubbing Alcohol (70% Isopropyl): Can work on fresh ink on finished leather. Apply with a cotton swab, blot immediately. The alcohol evaporates fast, which limits dwell time, and damage. It also dries the leather terribly, so conditioning afterward is mandatory.
- Hand Sanitizer: As mentioned, I don’t recommend it. The alcohol concentration is often higher, and the gels and moisturizers added to it can leave a sticky residue that attracts more dirt.
- Hairspray: An old trick for its alcohol content. It’s messy, can leave its own residue, and is no more effective than straight alcohol.
- Milk or Vinegar: Folklore with no chemical basis for ink removal. At best, they do nothing; at worst, they can sour or alter the leather’s pH.
- Magic Eraser (Melamine Foam): This is an abrasive. It works by microscopically sanding the surface. On a leather finish, it will create a dull spot where the topcoat has been literally erased. Never use it.
Where this goes sideways: Reaching for acetone or nail polish remover. These are solvents powerful enough to dissolve the leather’s finish and dye entirely, creating a bleached, sticky patch that cannot be fixed without a full refinish.
Fresh Stain vs. Set-In Stain: A Different Battle
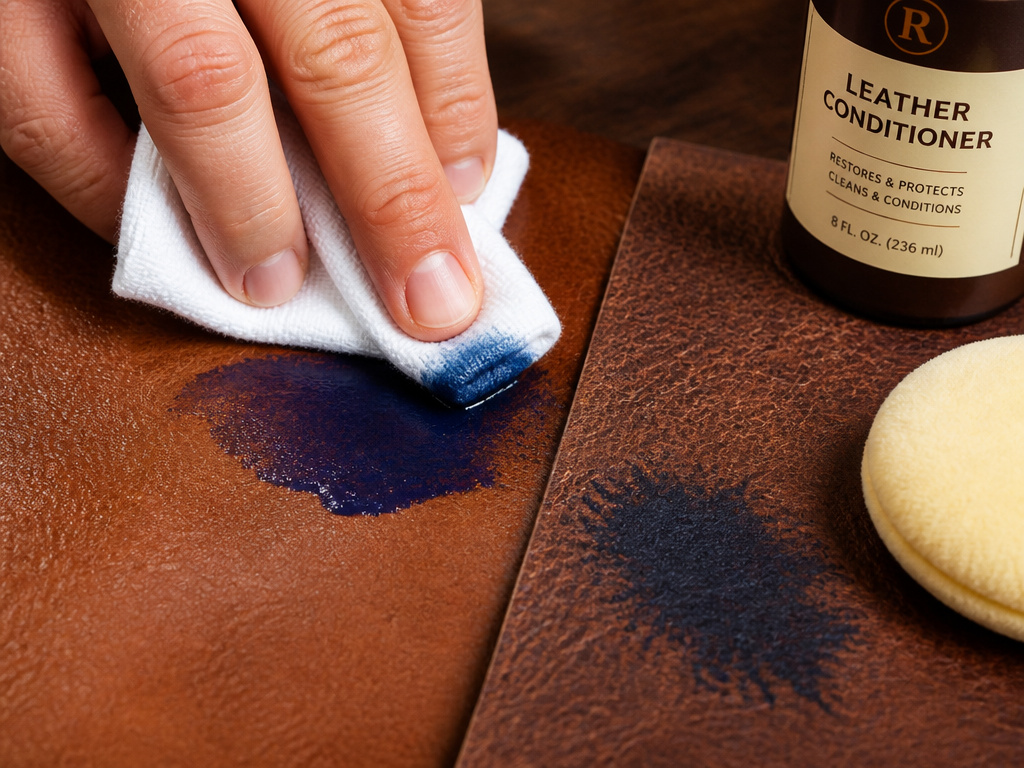
The 24-hour mark isn’t arbitrary. Ink needs time to migrate. On finished leather, it’s working its way through microscopic pores in the topcoat. On aniline leather, it’s spreading through the fibers themselves.
Fresh Stains (Under 24 Hours)
You have the advantage. The ink is primarily on the surface. Follow the blot-and-clean method above with a dedicated leather cleaner. The prognosis is very good. This is the time for methods for pen mark removal that focus on quick, gentle lifting.
Set-In Stains (Days or Weeks Old)
The dynamic changes completely. The ink has likely penetrated the finish. Your goal shifts from “remove” to “lighten and camouflage.” Aggressive cleaning will now damage the finish more than it helps the stain. At this stage, consider: 1. Professional Assessment: A restorer can tell you if it’s salvageable through spot refinishing. 2. Conditioning and Blending: Sometimes, applying a rich conditioner can darken the entire piece slightly, making the faded stain less noticeable. 3. Acceptance: On a natural leather, some marks become part of its character. This is a last resort, but for a small stain on a beloved item, it’s an honest one.
This is why a prompt response is the most powerful part of any guide to leather stain removal.
Aftercare: The Step Everyone Forgets
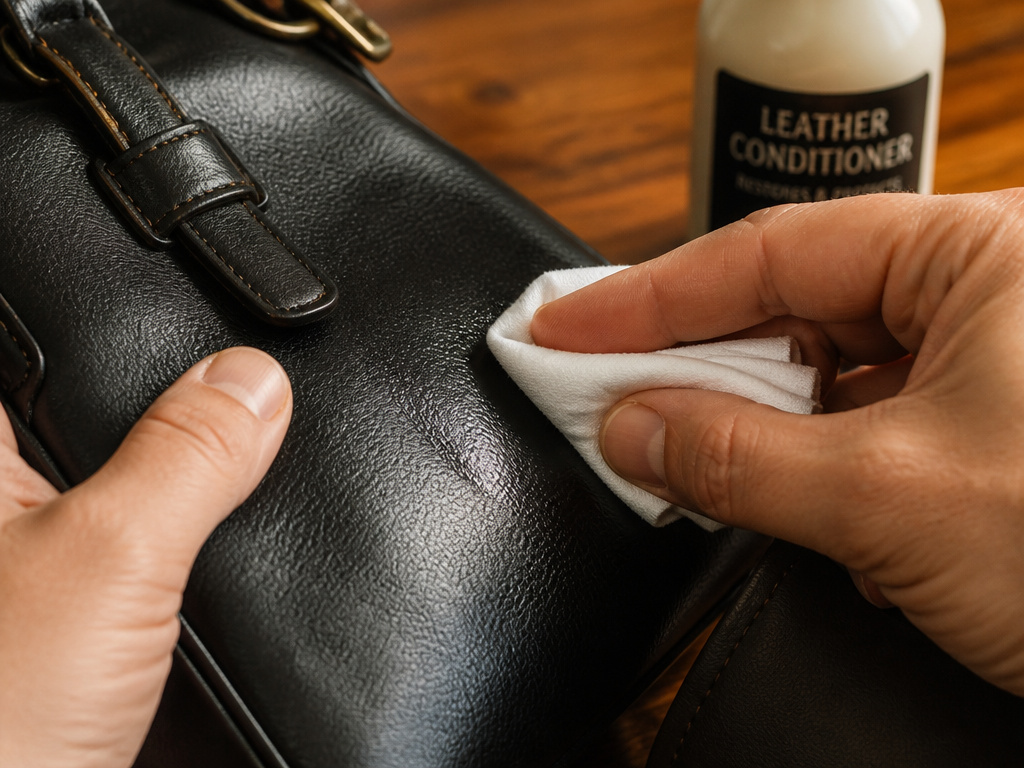
You’ve removed the ink. The leather is clean. But if you stop here, you’ve won the battle but set the stage for losing the war. The cleaned area is now more vulnerable than the surrounding leather.
Conditioning is not optional. It’s the process of replenishing the natural oils that cleaning, even gentle cleaning, strips away. A dry leather patch absorbs the next spill faster and cracks more easily. Use a conditioner suited to your leather type. For most modern finished leathers, a light, non-greasy conditioner like Leather Honey or Bickmore Bick 4 is ideal. Apply it sparingly, let it absorb, and buff off any excess.
Think of this like resetting the leather’s defense system. It’s the final, critical phase of cleaning a leather bag or any other inked item.
Frequently Asked Questions
Can you remove ballpoint pen ink from leather?
Yes, you can remove fresh ballpoint pen ink from finished leather. Blot immediately, then use a leather-specific ink remaver like Fiebing’s, applied with a cotton swab. For dried ink, the success rate drops significantly, and professional refinishing may be the only solution.
Does hand sanitizer remove ink from leather?
Hand sanitizer can remove fresh ink because its high alcohol content dissolves the pigment. However, it also severely dries out the leather by stripping its natural oils. I recommend against it for any valued item, as it can cause long-term damage and stiffening.
Will ink come out of faux leather?
Often, yes, and more easily than genuine leather. Faux leather (vinyl or PU) is non-porous. Ink typically sits on the surface. Rubbing alcohol on a cotton swab usually works without the same drying risks. Always test in a hidden area first, as some faux leathers have coatings that can dissolve.
How do you get old ink out of leather?
Getting old, set-in ink out of leather is very difficult. On finished leather, try a dedicated leather ink remover with patience, but expect only lightening. On aniline leather, professional refinishing is typically required. The older the stain, the more you should manage expectations toward improvement rather than complete removal.
Can you use rubbing alcohol on leather?
You can use 70% rubbing alcohol cautiously on finished leather for fresh ink stains. Apply minimally with a cotton swab, blot quickly, and condition the area afterward to counteract the drying effect. Do not use on aniline, suede, or nubuck leathers, as it will damage the surface and dye.
Before You Go
One rule most guides skip: if the ink stain is on aniline leather and more than a day old, call a professional before you try anything else. Your chance of making it worse by driving the pigment deeper is higher than your chance of fixing it. The cost of a consultation is less than the cost of a ruined jacket or sofa.
For everything else, the quick blot, the patch test, the gentle cleaner, the mandatory conditioner, the process is straightforward. It rewards patience and punishes haste. The leather will tell you what it needs; your job is to listen.
And if you’re dealing with other common issues, the same principles apply. Whether it’s oil stains, water stains, or general cleaning furniture, start by identifying the material, isolate the problem, and always, always follow treatment with conditioning leather. That’s the rhythm of keeping leather alive for the long haul.
