
How to Waterproof Leather Shoes & Avoid Damaging Mistakes
This post contains affiliate links. As an Amazon Associate, we earn from qualifying purchases.
This post contains affiliate links. As an Amazon Associate, we earn from qualifying purchases.
To waterproof leather shoes correctly, follow a three-stage sequence: clean the leather thoroughly, condition it to replace lost oils, then apply a dedicated waterproofer only if needed for your climate. The goal is to maintain the leather’s health first; a healthy, nourished hide naturally resists water better than a sealed but dried-out one. Skipping conditioning before sealing locks dryness into the material, which leads to cracking within a season.
That sequence, clean, condition, then protect, is the mechanical reality of how leather interacts with water. Leather is a fibrous network; when it gets wet, it loses the tanning agents and lubricants that keep it flexible.A wax or silicone sealant applied over dry, dirty fibers doesn’t waterproof. It entombs the problem. The shoe might bead water for a week, but the leather underneath is starving.
What follows is a breakdown of why most waterproofing attempts fail, the exact products that work (and why), and the one solvent mistake from a 2022 industry guideline that explains half the ruined shoes I see.
Key Takeaways
- Clean first, always. Dirt and salt act like sponges, drawing water through any protectant you apply. Conditioning is essential. Products like Nikwax Conditioner for Leather** replace the oils and tanning agents water leaches out; this maintains suppleness, which is a form of water resistance.
- Choose your protectant based on need. For most shoes, a conditioner with Durable Water Repellency (DWR) is enough. For brutal wet conditions, a dedicated product like Nikwax Fabric & Leather Proof adds a layer without fully sealing the leather.
- Test solvent-based sprays on a hidden spot first. A 2022 industry update warns that alcohols and mineral spirits in many sprays can degrade or swell certain leathers irreparably.
- Waterproofing alters breathability. A true sealant (like heavy wax) will make your feet sweat more; accept this trade-off only if you’re facing persistent rain, not a daily commute.
The Leather-Water Reality Check
How does water actually get into a leather shoe? It’s not a single front door. It’s a slow seep through microscopic gaps between fibers, accelerated by capillary action when the surface is dirty. Industry tests like ISO 17702:2003 and ASTM D2099-14(2023) measure this by flexing leather samples in water until penetration occurs. The takeaway for you is that movement, walking, is what forces water in. A static coat of wax on a dress shoe won’t survive a real-world downpour.
Here’s the thing. Leather wants to breathe. It’s why it feels good on your feet. The moment you slap on a thick, pore-clogging sealant, you trade dryness for a swampy interior. Your goal should be managed resistance, not total impermeability. For most people, that means a nourished leather with a revived Durable Water Repellency (DWR), a surface treatment that causes water to bead and roll off. That’s a world apart from the plastic-like barrier a heavy wax creates.
The Clean-Condition-Protect Sequence
This is the only order that works long-term. Swap the steps, and you’re fixing a problem you just locked in place.
Step 1: The Deep Clean
You can’t protect dirt. Salt, mud, and urban grime aren’t just ugly; they’re hygroscopic. They pull moisture through the leather matrix, defeating any waterproofing methods you apply on top.
Start with a soft brush, a horsehair brush is perfect, to knock off dry dirt. For a proper clean, use a dedicated leather cleaner like Lexol or a mild saddle soap (used sparingly and followed by conditioning). The aim is to remove the film that masks the leather’s natural Durable Water Repellency (DWR). If you’ve ever seen a shoe that seems to “wet out” instantly, dirt is usually the culprit. A thorough cleaning process is the single most effective pre-treatment.
Common mistake: Applying waterproofing spray over dirty shoes. The solvent carries dirt deeper into the leather, and the resulting seal traps it there. You’ll see a cloudy, stained appearance within a month.
Step 2: Condition Without Compromise
This is where the magic happens. Conditioning isn’t softening; it’s replenishment. When leather gets wet, it loses its internal lubricants and tanning agents. A good leather conditioner replaces those.
I reach for Nikwax Conditioner for Leather. It’s water-based, which means it can’t over-soften the leather the way oil-or fat-based products can. You apply it by hand or sponge, working it into the leather until it stops absorbing. This stage is non-negotiable. A conditioned leather strand is supple and resilient; a dry one is brittle and prone to cracking at the flex points, exactly where water wants to enter.
Think of it like this: conditioning is the foundation. Waterproofing sprays or waxes are the roof. You wouldn’t build a roof on mud.
Step 3: Apply Protector. If You Actually Need It
Do you need a dedicated waterproofer? Ask your climate. For occasional rain, a well-conditioned shoe with a durable water repellent (DWR) treatment rated to withstand at least 50 mm of water pressure is sufficient. For hiking boots or daily wear in a wet season, you need more.
For combination fabric-and-leather boots (like many hiking styles), Nikwax Fabric & Leather Proof is my default. It adds a strong DWR without softening. For extreme, prolonged wetness, think fishing waders or winter slogging, a heavy wax like Sno-Seal creates a true barrier. But know the cost: breathability drops sharply.
| Protector Type | Best For | Trade-Off |
|---|---|---|
| Conditioner with DWR (e.g., Nikwax Conditioner) | Daily wear, urban use, light rain | Limited extreme-weather protection |
| Dedicated DWR Spray/Liquid (e.g., Nikwax Fabric & Leather Proof) | Hiking boots, fabric/leather mixes, frequent rain | Less breathable than conditioner alone |
| Heavy Wax/Sealant (e.g., Sno-Seal, Obenauf’s LP) | Extreme wet conditions, work boots, leather-only construction | Significantly reduced breathability, can darken leather |
The short version: Condition first. Then add a protector only if your use case demands it.
The Solvent Trap: When Waterproofing Sprays Cause Damage
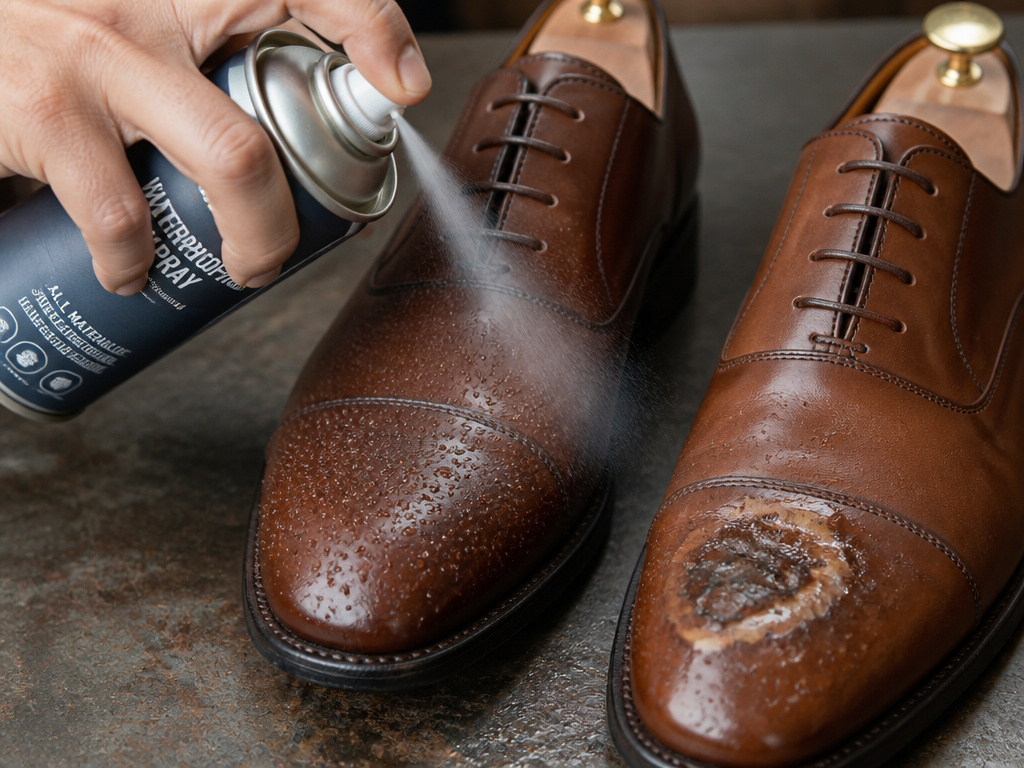
Most of us grab a spray can. It’s easy. The 2022 update to the IKW Quality Assessment Recommendation for shoe care compatibility explains why that’s a gamble. Modern waterproofing sprays often use alcohols or mineral spirits as solvents. The guideline states plainly: “not all shoe uppers are compatible with these substances. In many cases, uppers are degraded or become swollen, which may cause irreparable damage.”
Let me share what I’ve learned. That damage isn’t always immediate. A spray might seem fine, but the solvent can weaken the finish or underlying leather over a few months. The shoe loses its shape, or the surface becomes tacky. This is especially true for dress shoes with delicate finishes or any leather treated with an unknown factory coating.
Where this goes sideways: Assuming all sprays are safe for all leathers. The IKW update removed impregnating agents from standard care recommendations in part due to this solvent risk.
Your move? Always test in a hidden area, inside the tongue or behind a strap. Apply, let it dry fully for 24 hours, and check for discoloration, stiffness, or texture change. If it passes, proceed. If you’re unsure, stick with a water-based product like Nikwax. The peace of mind is worth it.
Product Deep Dive: What Actually Works
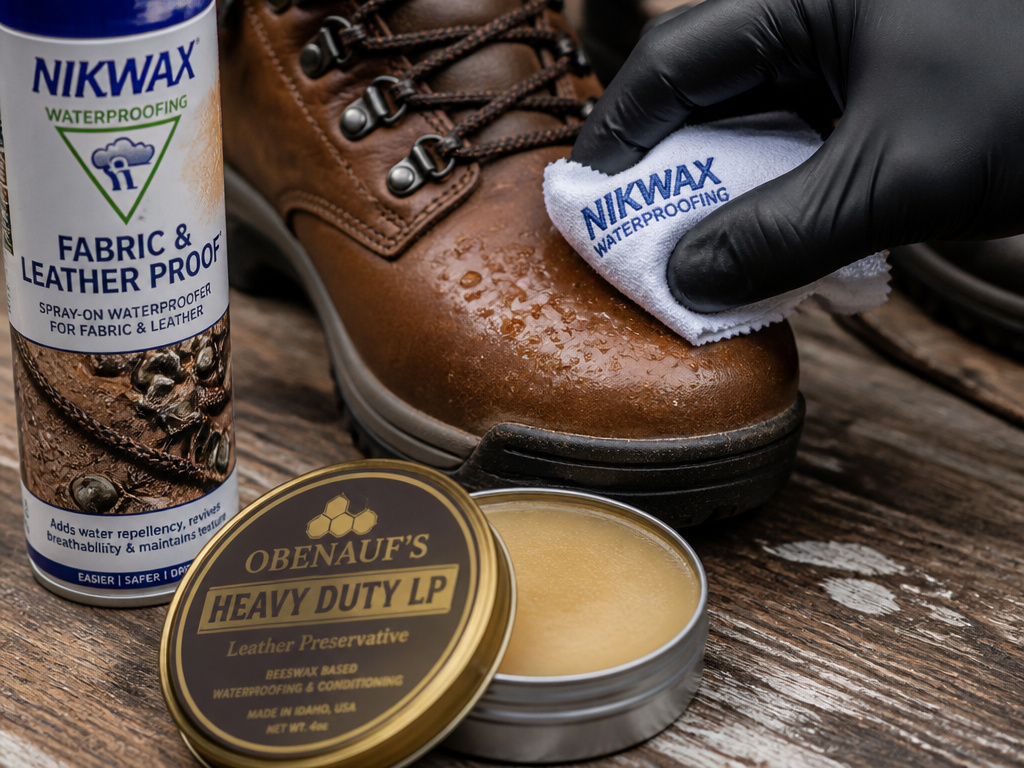
Generic advice creates generic results. Here are the specific products that execute the clean-condition-protect sequence, and why I pick them.
Nikwax Conditioner for Leather is the backbone. It’s a water-based formula recommended for Gore-Tex and eVent waterproof liners, meaning it won’t clog them. It nourishes without over-softening, and it adds a light DWR. For a full leather shoe care routine, this is your first bottle.
Nikwax Fabric & Leather Proof is for when you need more. It’s designed for fabric-and-leather mixes, reviving breathability while adding water repellency. It’s also non-flammable and PFAS-free, which matters if you’re spraying indoors. Apply it to clean, damp leather for best absorption.
For a heavy-duty, leather-only barrier, Obenauf’s Heavy Duty LP is a beeswax and oil blend. It darkens leather significantly and reduces breathability, but for a plain-toe work boot facing slush and salt, it’s unmatched. This is the nuclear option, effective, but with clear consequences.
The wrong choice is any product that promises a miracle without specifying its mechanism. A “waterproofer” that leaves leather sticky or chalky has failed its primary job.
Matching Method to Leather Type
Not all leather is created equal. Your waterproofing strategy should respect the hide.
- Full-Grain & Vegetable-Tanned Leather: These are the most receptive to conditioning and benefit greatly from oils and waxes. They will darken, embrace that patina. A heavy wax like Obenauf’s works well here.
- Corrected-Grain & Finished Leathers: These have a surface coating. Solvent-based sprays risk damaging that finish. Stick with water-based conditioners and protectors, and always test first.
- Suede & Nubuck: You need a specialist protector designed for these napped leathers (like Nikwax Nubuck & Suede Proof). Never use a standard wax or cream; it will ruin the nap.
Your shoe care routine starts with identifying what you own. Treating suede like full-grain is a one-way ticket to ruined shoes.
Frequently Asked Questions
Can I use beeswax to waterproof leather shoes?
Yes, beeswax (or a blend like Obenauf’s) creates a formidable barrier. However, it significantly reduces breathability and will darken the leather permanently. It’s best reserved for heavy-duty boots, not everyday dress shoes. Apply it sparingly over a clean, conditioned surface, warming the wax with your fingers to help it penetrate.
Does waterproofing leather shoes ruin them?
Not if done correctly. The ruin comes from using the wrong product (like a damaging solvent spray on a delicate finish) or from sealing in dirt and dryness. Following the clean-condition-protect sequence with compatible products preserves the leather. Skipping conditioning before applying a heavy sealant is what causes the leather to dry out and crack underneath.
How often should I re-waterproof my shoes?
There’s no fixed schedule. Reapply when water stops beading on the surface. For a conditioner with DWR, that might be every few months with regular wear. For a heavy wax sealant on a boot used in harsh conditions, a fresh coat at the start of each wet season is wise. Regular cleaning leather shoes will extend the life of any waterproofing treatment.
Can I waterproof shoes that are already wet?
No. Always apply conditioners and protectors to dry leather. Water in the fibers dilutes the product, preventing proper absorption and bonding. If your shoes are soaked, stuff them with newspaper, let them air-dry away from direct heat, then proceed with your care routine once they’re fully dry.
Is there a difference between waterproof and water-resistant?
Yes, and it’s a practical one. Water-resistant means the shoe can handle light rain or splashes for a short time. Waterproof means it should keep your feet dry in sustained, heavy rain, often due to a sealed seam construction and a waterproof membrane (like Gore-Tex). Your aftercare methods to waterproof mainly boost water resistance; they cannot make a non-waterproof construction truly waterproof.
Before You Go
The goal is to extend your shoes’ life and your comfort in the conditions you actually face. If you remember one thing, let it be this: conditioning is a part of waterproofing.It’s the most important part.
Start with a cheap pair you don’t mind experimenting on. Try the sequence. Notice how the leather responds. That hands-on lesson beats any article.
And the next time you see a can of spray promising instant waterproofing, remember the 2022 IKW guideline on solvents. Sometimes, the easiest solution creates the hardest problem to fix.
