
Compare Leather Saddle Stitch vs Machine Stitch Durability
This post contains affiliate links. As an Amazon Associate, we earn from qualifying purchases.
This post contains affiliate links. As an Amazon Associate, we earn from qualifying purchases.
The structural difference between a leather saddle stitch and a machine lockstitch concerns how the seam fails, not just looks or tradition. A hand saddle stitch locks every loop independently, so a single break doesn’t unravel the seam.A machine lockstitch chains all loops through two continuous threads, so one cut can cause the whole seam to unzip like a stocking. For any load-bearing leather good, belts, holsters, bag handles, the saddle stitch is the essential standard.**
That independent locking is the whole game. It changes how you think about durability, maintenance, and even the economics of a piece. Most leather goods don’t fall apart from the leather tearing; they fail at the seams. Understanding this one mechanism lets you decode why a $500 belt feels like a lifetime investment while a $50 one feels like a temporary accessory.
What follows: a breakdown of exactly how each stitch is formed, the thread and tool specs that make or break them, the surprising hybrid approach used by professional workshops, and a simple test you can run with your fingernail to tell which method was used on any piece you own.
Key Takeaways
- A saddle stitch won’t unravel because each stitch locks itself inside the leather. A single cut in a machine lockstitch can cause the entire seam to run open.
- Thread choice is critical: hand stitching uses thicker, waxed thread (like Ritza 25 Tiger), while machine stitching relies on thinner, bonded nylon under high tension.
- Production workshops aren’t purists, they often machine-stitch non-stress panels for speed and hand-saddle-stitch the high-stress points like handle attachments.
- You can identify a hand saddle stitch by its identical appearance on both sides and a subtle diagonal slant in each stitch.
- For beginners, mastering the hand saddle stitch first is the only path to building durable goods; a machine is an optimization you add later, if ever.
Why a Saddle Stitch Won’t Unzip Like a Machine Stitch
The core difference lives in a single word: independence.
A hand saddle stitch uses one length of waxed thread with a needle on each end. Both needles pass through the same pre-punched hole from opposite sides, forming an X inside the leather. That X is a mechanical lock. Each stitch is an isolated anchor. If the thread on one side snaps, the other side holds and the neighboring stitches don’t care. The damage stays local.
A machine lockstitch uses two separate threads: a top thread from the needle and a bobbin thread from below. They interlock in the middle of the material, forming a continuous chain. Cut one link, and the chain can run in both directions. This “ladder in silk stockings” failure mode is why a torn machine-stitched seam can gape open several inches from the original break.
Think about where leather goods actually take stress. A belt bends at the buckle a thousand times. A bag handle bears weight at the rivets. A holster’s mouth flexes with every draw. At these points, a seam that interconnects every loop is a series of single points of failure. The saddle stitch removes that risk by making each stitch its own island.
The implications go beyond just strength. A saddle-stitched seam is also inherently more repairable. You can often open a short section, replace the thread, and re-stitch without touching the rest of the seam. Fixing a run machine stitch usually means removing the entire continuous thread and starting over, if the leather holes aren’t already wallowed out from the unzipping action.
The Tools That Enable Independence
You can’t saddle stitch correctly without the right gear. The hole matters as much as the thread.
| Tool | Purpose in Saddle Stitch | Common Mistake |
|---|---|---|
| Pricking Iron / Diamond Chisel | Creates clean, angled holes in a straight line. The angle helps the thread bed in. | Using a round awl freehand. It leads to wandering stitch lines and inconsistent hole size. |
| Stitching Pony or Clamp | Holds the work firmly, freeing both hands to manage the two needles. | Trying to hold the leather in your lap. Tension drifts, and the stitch quality plummets. |
| Harness Needles (e.g., John James) | Blunt-tipped needles that push between leather fibers instead of piercing them. They have large eyes for thick thread. | Using sharp sewing needles. They cut the leather fibers, weakening the hole over time. |
| Waxed Thread (e.g., Ritza 25 Tiger, Vinymo MBT) | The wax reduces friction, helps the thread lie flat, and partially seals the hole. | Using unwaxed or cheap bonded nylon thread meant for machines. It frays and doesn’t lock cleanly. |
Where this goes sideways: Skipping the stitching groove. A groover cuts a shallow channel for the thread to sit in, protecting it from abrasion. Belts and wallets stitched without a groove show thread wear within two years, while the leather is still fine.
Here’s a practical sensory detail: when you pull a saddle stitch tight with the right tension, you feel a soft, distinct snap as the threads lock against each other inside the hole. Pull too hard, and the thread strains audibly. Pull too soft, and the stitch feels loose and sloppy. Your hands learn that snap long before your brain can articulate it.
The Hybrid Workshop Reality: Why Pros Use Both
Walk into a professional leather workshop producing high-end bags, and you won’t see a religious war between hand and machine. You’ll see a pragmatic division of labor.
Most production shops use a hybrid approach. The large, non-stress panels, the back of a tote, the interior lining, decorative accent strips, are run through an industrial machine. It’s fast, consistent, and frees up skilled hands for the critical work. Then, the craftspeople take over. Every load-bearing point gets the hand saddle stitch. Handle attachments. Belt loops at the waistband. The reinforced corners of a briefcase. The mouth of a holster.
This approach is the professional standard because it marries the right strength to the right task. The machine handles the miles of straightforward seam, and the hand ensures the piece won’t fail where it matters.If you’re looking at a bag wondering if it’s “hand-stitched,” the answer is often “in the places that count.”
What most people get wrong: Believing a machine-stitched leather good is inherently inferior. For the right application, a non-stress seam on a thin leather, a well-tuned industrial machine like a JUKI DDL-900B produces a strong, clean seam. The problem arises when that same seam is asked to handle repeated flexing or load.
My wooden mallet has been indispensable for years, delivering firm, controlled blows for setting stamps or driving chisels. I learned the same lesson with stitching: use the right tool for the right part of the job. A machine is a tool, not a villain. The mistake is letting the tool’s capability dictate the project’s requirements, instead of the other way around.
How to Spot the Difference Visually (and by Feel)
You don’t need to be an expert to tell these stitches apart. A few simple checks will reveal the method.
Look at both sides of the seam. A true saddle stitch looks identical on the front and the back. Both sides show the same thread color and the same slight diagonal slant. A machine lockstitch often looks different on the top and bottom. The top thread might sit straighter, while the bobbin thread on the underside can look tighter or looser, sometimes forming tiny loops.
Examine the holes. Hand-stitched holes, punched with a pricking iron, are clean, slightly elongated slots. The thread beds down into them. Machine stitching uses a needle that punches a round hole in the same motion as forming the stitch. The thread often sits more on the leather than in it.
Run your fingernail across the back. On a machine stitch, you’ll often feel the bobbin thread sitting at a slightly different height or tension than the top thread. One might be pulled in, the other proud. On a saddle stitch, the back should feel as smooth and even as the front because the same action formed both sides.
Here’s the timing surprise most beginners don’t expect: a practiced maker can saddle stitch at about 200-300 stitches per hour. A bifold wallet with 96 stitches takes a beginner 90 minutes; an experienced hand can do it in 30. A machine does it in 4 minutes. That speed gap is real, but it’s also why the hybrid approach makes economic sense for anything beyond hobbyist volume.
| Aspect | Hand Saddle Stitch | Machine Lockstitch |
|---|---|---|
| Seam Failure Mode | Independent. One broken stitch stays local. | Catastrophic. One cut can unravel many stitches. |
| Typical Thread | Thick, waxed polyester or linen (0.6mm – 0.8mm). | Thin, bonded nylon (e.g., #138, ~0.45mm) under high tension. |
| Best Application | High-stress, load-bearing seams (belts, handles, holsters). | Non-stress seams, linings, high-volume production panels. |
| Skill Curve | Steep initial learning curve, then steady speed. | Steep machine setup/tuning curve, then very fast execution. |
| Repairability | High. Localized damage can often be re-stitched in place. | Low. Usually requires removing the entire continuous thread. |
The Beginner’s Path: Why You Should Start with Hand Stitching
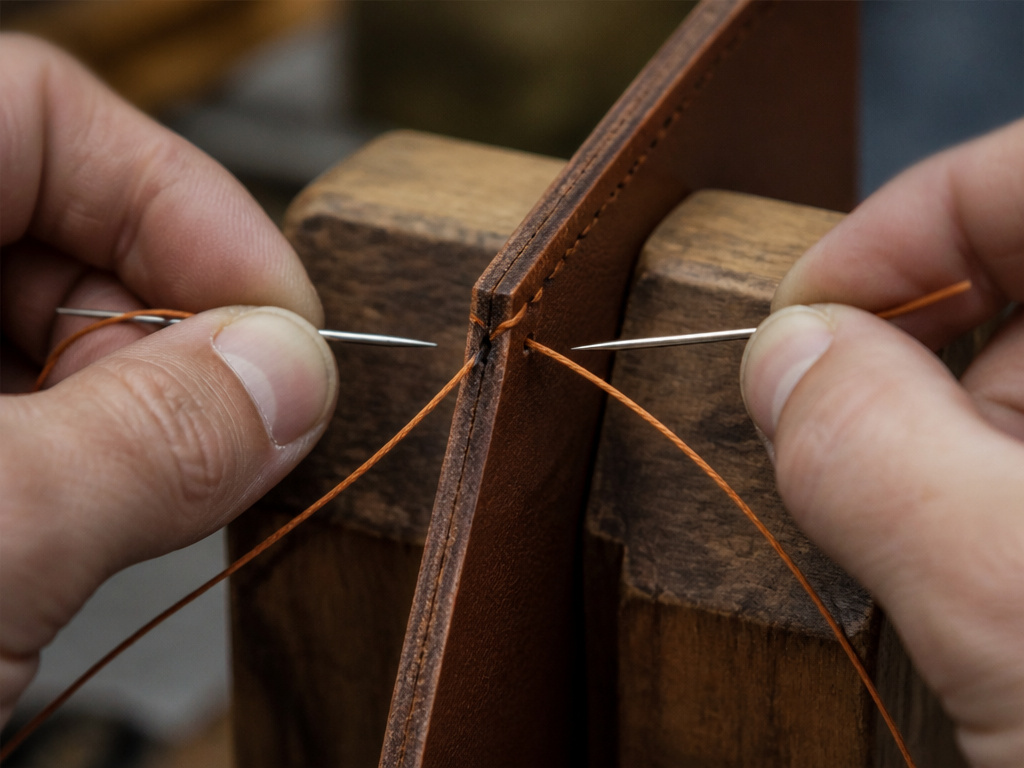 If you’re new to leatherwork and looking at this debate, the path is clear: learn the hand saddle stitch first. Master it. The machine is an optimization you can layer on years later, if your production volume ever demands it.
Why? Because the saddle stitch is the foundational skill that teaches you everything about how leather behaves under tension, how thread interacts with a hole, and what a durable seam actually feels like. Cranking out panels on a machine without that foundational knowledge is how you end up with pieces that look fine on day one but fail predictably on day 300.
Your first project will be slow. Your stitch line might wander. That’s the process. The goal isn’t speed; it’s building the muscle memory for that consistent snap of a locked stitch. Invest in a decent set of 4mm diamond chisels, some Ritza 25 Tiger thread in 0.6mm, and a stitching pony. Practice on scrap until you can produce six inches of straight, even stitching without thinking about needle order.
The part nobody mentions: The single biggest cause of ugly, puckered saddle stitching is pulling each stitch too tight. You’re not trying to strangle the leather. You’re aiming for firm, consistent tension that seats the threads without distorting the material. A puckered seam is weaker, not stronger.
Once the saddle stitch is automatic, you’ll have the discernment to know when a machine might be useful. And you’ll have the skill to use it correctly, knowing which seams to run through it and which ones demand your hands and two needles regardless of the time cost.
Frequently Asked Questions
Is hand stitching really stronger than machine stitching for leather?
Structurally, yes, for the specific stitch types used. The hand saddle stitch creates independent locks, while the machine lockstitch creates an interlinked chain. Under abrasion or point stress, the chain has a single failure path. The independent locks of a saddle stitch force damage to progress one stitch at a time, which is why it’s the standard for any item meant to endure flexing and load.
Can a sewing machine replicate a saddle stitch?
No. A sewing machine operates from one side of the material, interlocking two separate threads. The saddle stitch requires simultaneous access to both sides of the leather, passing two ends of the same thread through the same hole in opposite directions. This fundamental difference in process is why the resulting seam has a fundamentally different failure mode.
How do I choose the right thread for hand saddle stitching?
Match your thread thickness to your chisel spacing. For general goods with 4mm spacing (about 6 stitches per inch), use 0.6mm thread like Ritza 25 Tiger. For finer work like watch straps with 3mm spacing, drop to 0.45mm thread. The thread should be waxed, either pre-waxed like Tiger Thread or drawn through a block of beeswax, to reduce friction and help it lay flat. For a deep dive on this pairing, see our guide on thread selection for leather.
What’s the best sewing machine for leather?
It depends on the leather weight and volume. For hobbyists working with medium-weight leathers, a heavy-duty domestic machine like the Brother ST531HD can handle up to six layers of denim. For serious work with thick hides, you step into industrial territory with machines like the Sailrite Fabricator or a JUKI DDL-9000B. These machines have higher presser foot lifts, stronger motors, and are built for the constant friction of leather. You can explore more in our article on the best machines for leatherwork.
Why does my saddle stitch look messy on the back?
This “drunken stitch line” is almost always caused by inconsistent needle order. You must always pass the same needle through the hole first (e.g., the left needle), followed by the other. If you alternate randomly, the threads cross inconsistently inside the hole and the back stitch line wanders. Commit to one sequence, left needle first, then right, and your lines will straighten out.
The Practical Takeaway
Let’s be clear about one thing. This approach is about matching the construction method to the job the piece has to do, rather than romanticizing the past or dismissing modern tools.
For anything you expect to carry a load, take daily flex, or simply outlive a fashion trend, a good belt, a holster, the handles on a bag, the saddle stitch is the only answer. Its independent locking is a non-negotiable safety net. For the miles of straight seam on a bag’s gusset or a wallet’s interior lining, a well-set machine lockstitch is perfectly appropriate, and it lets you focus your hand-stitching time where it counts.
So, before you invest hours in a project or hundreds in a machine, ask one question: where will this piece fail first? If the answer is “at the seams under stress,” then your next step is to learn the two-needle motion of a proper saddle stitch. The leather, and the person who uses your work, will thank you for the decades of service that single choice provides.
