
How to Make a Leather Watch Strap for a Perfect, Custom Fit
This post contains affiliate links. As an Amazon Associate, we earn from qualifying purchases.
This post contains affiliate links. As an Amazon Associate, we earn from qualifying purchases.
To make a leather watch strap, you need three precise measurements: your watch’s lug width (in mm), your wrist circumference, and the thickness of your leather (ideally 3-4 oz). Cut two outer pieces and two lining pieces to your calculated length, skive the ends, glue and stitch them around a buckle and spring bars, then finish the edges. A simple, unlined strap takes about two hours; a stitched, lined version takes closer to four.
Most guides treat those three numbers as interchangeable suggestions. They aren’t. A two-millimeter mistake in lug width means your strap won’t fit the watch at all. A misjudged wrist measurement leaves you with a useless tail or a band that’s too tight. And leather that’s too thick simply won’t slide through the gap between the watch case and the spring bar.
What follows is a breakdown of those three essential specs, the tools that make the job clean, and the step-by-step process that turns a strip of hide into a band you’ll wear for years. This guide includes both a simple no-sew method and the traditional stitched approach, so you can pick the project that matches your skill level.
Key Takeaways
- Your watch’s lug width is the single most important measurement; a 20mm strap is for 20mm lugs, not 21mm. Each millimeter is a mile in strap terms.
- Leather for the main strap should be 3 to 4 ounces thick (1.2–1.6mm). Anything thicker won’t fit standard spring bars, and anything thinner lacks structure.
- Never measure an old, deformed strap for length. Use your wrist circumference and a standard sizing chart, then add 25mm for the buckle fold and tail.
- A vegetable-tanned leather lining is non-negotiable for comfort and to prevent allergic reactions; it’s not just for looks.
- Edge finishing (burnishing) isn’t optional decoration. It seals the leather’s edge fibers, preventing fraying and adding years to the strap’s life.
The Three Measurements You Can’t Guess
You can’t cut what you haven’t measured. This isn’t like guessing at a belt size. The tolerances are tight, and the hardware is unforgiving. Get one of these wrong and your project stops before you make the first cut.
The lug width is the distance between the two lugs on your watch case, measured in millimeters. This number dictates the width of your strap at its widest point. A 20mm measurement means you need a 20mm strap. A 21mm lug width typically requires a 20mm strap, as the leather compresses slightly.
Start with the lug width. Use a digital caliper, not a ruler. Place the jaws inside the lugs, from the inside of one to the inside of the other. Write down the number. If your watch has a 21mm measurement, you’ll make a 20mm strap. That one-millimeter difference is why buying straps is so frustrating, it’s also why making your own is so satisfying.
Next, your wrist size. Wrap a soft measuring tape snugly around your wrist where the watch sits. Note the circumference in centimeters. Now, throw away the old strap you were going to trace. As noted by Decocuir, an old strap has likely shrunk or stretched from heat and sweat. Using it as a template guarantees a bad fit.
Instead, cross-reference your wrist measurement with a standard sizing chart. Here’s the breakdown:
| Wrist Circumference | Strap Size | Long Piece | Short Piece | Total Length |
|---|---|---|---|---|
| < 16.5 cm | 16mm (S) | 105 mm | 65 mm | 170 mm |
| 16.5 – 18.5 cm | 18mm (M) | 115 mm | 75 mm | 190 mm |
| 18.5 – 20.5 cm | 20mm (L) | 120 mm | 80 mm | 200 mm |
| > 20.5 cm | 22mm (XL) | 130 mm | 90 mm | 220 mm |
These lengths are for the finished, sewn strands. You’ll need to add extra length for the fold where the spring bar sits, typically another 25mm per end. This is your first moment of truth. If your wrist is 19cm, you’re in the 20mm (L) category. Your long piece starts at 120mm, but you’ll cut it longer.
Finally, leather thickness. For a simple strap, aim for 3–4 ounce leather (about 1.2–1.6mm). This is thick enough to feel substantial but thin enough to fold and stitch. If you go over 4oz, the folded end where the spring bar lives becomes a stiff, bulky knot that won’t slide between the watch lugs. I’ve seen it happen, a beautiful piece of 5oz harness leather rendered useless because it couldn’t physically attach to the watch. The fit is that precise.
Tools and Materials: The Short, Honest List
You don’t need a workshop. A basic leathercraft toolkit covers it. Buying specialty watch strap tools is for your tenth strap, not your first.
Here’s what you actually need: * Cutting: A sharp utility knife or round knife, a metal ruler, a self-healing cutting mat. * Measuring & Marking: Digital calipers, a flexible tape measure, a pen or leather marker. * Hole Punching: A rotary punch or a set of drive punches (1.5mm and 2mm are key). * Finishing: An edge beveler (size #1 or #2), sandpaper (400 grit), a wooden burnisher, Tokonole or gum tragacanth. * Assembly: Leather glue (contact cement like Barge), a bone folder, a stitching awl or needles with linen thread if you’re sewing.
For materials, you need leather, a buckle, and spring bars. Let’s be clear about one thing: your lining leather must be vegetable-tanned. Chrome-tanned leathers can contain residues that cause skin irritation over time. A veg-tan lining might look pale at first, but it darkens with wear and is hypoallergenic.
Your outer leather can be anything you like, smooth calfskin, pebbled cowhide, or something from a tannery like Horween. Their Chromexcel or Shell Cordovan are iconic, but they’re also an investment. For a first strap, a piece of quality 4oz vegetable-tanned leather is perfect. You can dye it any color, and it will develop a patina that’s entirely your own. It’s also far more forgiving to work with than a thin, floppy leather.
Cutting and Assembly: Glue Before You Move
Now you have your numbers and your leather. This is where the project becomes physical. The smell of the hide, the sound of the knife cutting, the tacky pull of the glue, this is the craft.
Where this goes sideways: Gluing the entire strap surface at once. Contact cement sets fast. If you smear glue over a 200mm piece and then try to align a lining, you’ll get wrinkles, bubbles, and misalignment every time. Glue in sections.
Start by cutting your four pieces: two outer strips and two lining strips. Cut them 3mm wider than your final desired width (e.g., 23mm for a 20mm strap). This trim allowance is your safety net for clean edges later.
Lay your outer piece flesh-side up. Apply a thin, even layer of contact cement to one end, about the first 40mm. Let it dry until it’s tacky, not wet. Now, take your corresponding lining piece and press it into place, aligning one end perfectly. Use your bone folder to burnish it down, working out any air pockets. This creates a perfectly aligned “sandwich” at one end.
Next, apply glue to the remaining surface of the outer piece. Let it dry. Now, carefully roll the lined end over and press the rest of the lining down, working from the glued end outward. This roll technique prevents trapped air. Repeat for the other strap piece.
Once the glue is set, it’s time to trim. Use your ruler and knife to cut the strap down to its final, exact width. That 3mm allowance you left is now gone, leaving a crisp, glued block. Now, skive the ends that will fold over the spring bars. This is the single most important skill for comfort. You need to shave the leather down to almost nothing for about 25mm at each end. A skive with a 30-degree bevel creates a smooth, gradual ramp. A bad skive leaves a lump you’ll feel with every wrist movement.
Punch your spring bar holes in these skived ends. The hole should be about 5mm from the tip. Use a 1.5mm punch. This is a small, precise hole. It’s not for the buckle; it’s for the metal bar to pass through.
The Buckle and the Keeper
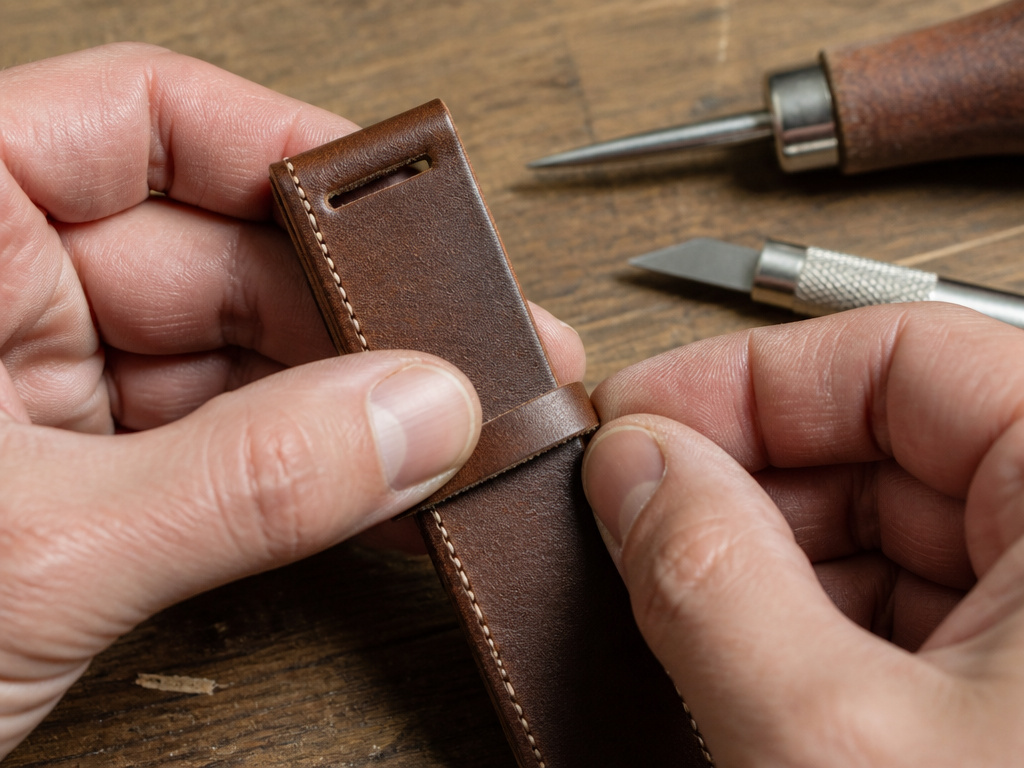 The buckle side has its own fold. Measure the width of your buckle’s center bar. You need to cut a slot for it, not a round hole. Mark two small holes with your awl, then connect them with your knife to create a clean rectangular slot. Test the fit, the buckle should swing freely.
The keeper is that little loop that holds the tail of the strap. You can make a fixed keeper or a floating one. A fixed keeper is sewn in place and looks cleaner. A floating one slides, which some people prefer for adjustment.
To make a simple fixed keeper, cut a thin strip of leather about 4mm wide and 10mm longer than the circumference of your two straps stacked together. Wrap it around the straps where you want the keeper to sit, mark the overlap, and skive the ends. Glue it into a loop, let it dry, then slide it onto the strap. You can now saddle stitch through the keeper and both layers of the strap to lock it permanently in place. This is the point where the strap starts to look professional.
Stitching vs. No-Sew: A Real Choice
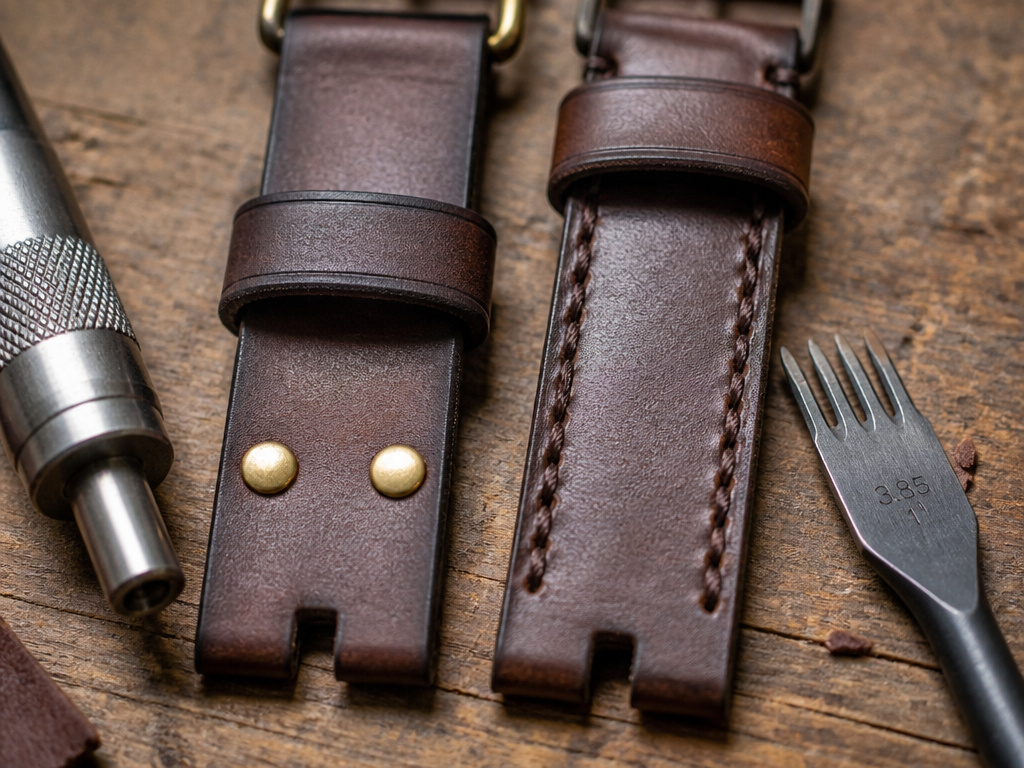 You have two paths here: rivets or thread. A no-sew strap, like the one outlined in The Leather Guy tutorial, uses rivets or glued folds. It’s fast, maybe 90 minutes start to finish. The look is rustic and robust. It’s a fantastic first project.
But a stitched strap is in a different league. The saddle stitch isn’t just decoration; it’s structural. If the glue ever fails, the stitches hold everything together. It also allows for more refined shapes and tapering. It takes practice, your first stitching lines will wobble. That’s fine. Use a stitching chisel or pricking irons to mark your holes before you sew. This guarantees straight lines and even spacing.
Which should you choose? If you want a strap by the end of the afternoon and own a rivet setter, go no-sew. If you’re building a skill and want a result that rivals a boutique strap, learn the saddle stitch. The investment in time pays off for every leather good you make afterward, from a detailed leather wallet guide to a custom briefcase.
Finishing and Edge Work
This is the step everyone wants to skip. Don’t. An unfinished edge on a watch strap will fray, absorb sweat, and look unkempt within a month. A burnished edge looks polished and lasts for years.
Start by sanding. Use 400-grit sandpaper to smooth the raw edge of the leather. Sand it flush and level. You’ll feel it get smooth under your fingers. Next, take your edge beveler and gently run it along both top and bottom edges of the strap. This removes the sharp 90-degree corner, creating a slight roundness.
Now, apply your edge finish. Tokonole is the modern standard, it’s a creamy gum tragacanth mix. Rub a small amount onto the edge with a fingertip. Then, take your wooden burnisher and rub it back and forth quickly. The friction heats the finish and melts it into the leather fibers, creating a glassy, sealed edge. You’ll see the color change and feel it get slick.
Do this for every edge, including the inside of the spring bar holes and the buckle slot. That attention to detail is what separates a homemade strap from a handcrafted one.
Attaching the Hardware and Final Fit
You’re nearly there. Slide your spring bars through the holes in the folded ends. These are the little spring-loaded pins that click into the lugs of your watch. If your original strap had quick-release bars, buy new standard ones. The tabs on quick-release bars will chew up the inside of your leather holes.
Attach the buckle to its end. Now, try the strap on your watch. Use a spring bar tool, the forked end, to gently compress the spring bar and slot it into the lugs. You should hear a soft, definitive click. If it doesn’t click, it’s not seated. Don’t force it.
The final test is on your wrist. The tail should slide cleanly through the buckle and the keeper. The strap should feel snug but not tight. Remember, a new leather strap will break in and soften, a process you can guide with proper watch strap maintenance. If it’s stiff, you can soften a leather band with a few specific techniques.
Frequently Asked Questions
What is the easiest leather for a beginner to use for a watch strap?
Start with a medium-firm vegetable-tanned leather around 3–4 ounces (1.2–1.6mm). It’s easy to cut, holds its shape, sands and burnishes beautifully, and is widely available. Avoid very soft, drapey leathers or very stiff, heavy ones for your first attempt.
Can I make a strap without any special tools?
You can make a very basic strap with a sharp knife, a ruler, glue, a hole punch, and sandpaper. However, a few key tools, a skiving knife, an edge beveler, and a burnisher, elevate the result from “makeshift” to “handmade.” They’re worth acquiring early.
How do I know what length to make the two pieces of the strap?
Use the standard sizing chart based on your wrist circumference. The long piece goes on the top side of your wrist (12 o’clock side) and the short piece holds the buckle (6 o’clock side). The long piece is typically 40-50mm longer than the short piece. When in doubt, err on the side of longer, you can always trim and punch a new hole.
My strap is too stiff. What did I do wrong?
You likely used leather that was too thick or too firm for the application, or you didn’t skive the folded ends enough. A new strap will always be stiff, but proper skiving at the folds is critical for flexibility where it counts. You can also conditioning stiff leather with a light conditioner to help it break in.
How do I care for a leather watch strap I made myself?
Care is straightforward. Keep it dry, remove it before showers or swimming. If it gets damp, pat it dry and let it air away from direct heat. Condition it sparingly, once or twice a year, with a product like Leather Honey or a pure neatsfoot oil blend. For daily grime, a slightly damp cloth is enough. A deep guide to cleaning leather watch bands can handle tougher stains.
Before You Go
The real metric of success isn’t a perfect stitch on your first try. It’s putting the strap on your wrist and realizing the buckle sits exactly where you want it. That’s the payoff for measuring twice and skiving carefully.
One rule most guides skip: if your first strap is a little wobbly or the edges aren’t mirror-smooth, wear it anyway. The patina from your own use will forgive a multitude of minor flaws. Your second strap will be better because you lived with the first. The third will be something you’re proud to give as a gift. That’s the progression. Start with the measurements, respect the thickness limits, and take your time with the glue and the edge. The rest is just practice, and practice is what turns craft into artistry.
