
How to Waterproof Leather Boots with Expert Tips & Methods
This post contains affiliate links. As an Amazon Associate, we earn from qualifying purchases.
To waterproof leather boots, you need to follow a specific sequence: clean them thoroughly, condition the leather while it’s slightly damp, and then apply a dedicated waterproofing product suited to your boot’s material. The goal is to nourish the hide first, then add a protective layer without clogging the leather’s pores. Using a silicone-based spray on a Gore-Tex-lined boot, for example, can void the membrane’s warranty.
That sequence is required. Most boot failures start with skipping a step or using the wrong product for the job. Leather is a porous, fibrous material; it needs hydration from a conditioner before you ask it to repel a storm.
What follows is the breakdown: why cleaning first matters, how to match a product to your boot’s leather and lining, and the one drying rule that will keep the soles from falling off. We’ll also look at the real-world lifespan of a waterproofing treatment and when to reapply.
Key Takeaways
- Waterproofing is the last step, not the first. Always clean and condition leather boots before applying any sealant.
- Match the product to your boot. Silicone sprays can ruin Gore-Tex membranes, while waxes can darken and stiffen suede.
- Never use direct heat to dry boots. It shrinks leather and delaminates soles, causing irreversible damage.
- Even the best treatments wear off. A spray like LOWA Waterstop Pro loses effectiveness after about three weeks of regular use.
- For maximum durability, focus on the flex points. Apply extra conditioner to the toe area where the leather bends and cracks first.
The Cardinal Rules of Boot Care (Break These and You Break Your Boots)
Let’s be clear about this. The official maintenance guides from brands like Zamberlan aren’t gentle suggestions. They list these as “cardinal rules” that, if broken, will void your warranty. I treat them as physical law.
Rule one is simple: never use direct heat. Not by a fireplace, not on a radiator, not with a hair dryer. Heat forces moisture out too fast, causing the leather fibers to shrink and warp permanently. That beautiful, molded shape around your ankle? Gone. The change in the leather’s tension also pulls at the adhesive holding the sole on, a process called delamination. You’ll see the sole start to peel away at the toe or heel within a few cycles.
Never put your boots near a heat source. Leather shrinkage from heat is irreversible and leads to sole delamination, a repair that often costs more than the boot.
The second rule protects modern boot technology. If your boots have a Gore-Tex or similar waterproof lining, you must use a conditioner approved for it. The membrane has microscopic pores that let vapor out but block water from coming in. A silicone-based conditioner or waterproofing spray clogs those pores like grease in a drain. The boot stops breathing, your feet sweat more, and the Gore-Tex warranty is null and void. Zamberlan explicitly warns against this.
Wet boot interiors demand a specific approach. After a deep stream crossing, your instinct might be to speed up the drying. Resist it. Stuff the boots with crumpled newspaper, which acts as a powerful moisture sponge. Change the paper every few hours. A boot dryer that uses room-temperature air, like a Peet dryer, is also safe. Storing damp boots in a closet or car is a guarantee for mold, a sour, musty smell that never really leaves.
The 3-Step Boot Waterproofing Process
This is a system where each step enables the next, not a single product application. Jump to waterproofing a dirty boot and you’ll seal in grime, creating a stiff, abrasive patch that wears out from the inside.
Step 1: Clean Thoroughly (This Isn’t Just Wiping Mud Off)
Mud is worse than dirt. When it dries on the leather, it acts as a desiccant, pulling natural oils and moisture from the hide. That’s why you need to clean boots soon after a hike, before the mud hardens. Use lukewarm water and a soft brush. For stubborn grime, a dedicated leather cleaner like LOWA Shoe Cleaner is formulated to lift dirt without stripping oils.
The critical detail most miss is what happens after cleaning. As the LOWA guide states, cleaned leather is in an “open-pored” state. The fibers have relaxed and will eagerly soak up the next liquid they touch. If that’s water from a puddle, your boot is already saturated. If it’s conditioner, you’re feeding the leather.
Step 2: Condition on Damp Leather
This is the step that defines a boot’s long-term flexibility. Leather is skin. Let it dry out completely, and the fibers become brittle and snap with each flex, this is how cracks start at the toe box. The Zamberlan guide calls this a “boardy” feel.
Apply your chosen leather conditioner while the boot is still slightly damp from cleaning. This timing helps the conditioner penetrate evenly. Focus on the flex-points around the toes and the ankle collar. Massage it in thoroughly, then brush away any excess with a horsehair brush. The conditioner’s job is to replenish the fats and oils that keep the fiber network supple. Without this, any waterproofing products you apply later are just sitting on top of a dry, vulnerable surface.
Step 3: Apply a Dedicated Waterproofing Agent
Now you protect your work. A waterproofing product, whether wax, cream, or spray, creates a top-layer barrier. It causes water to bead up and roll off the surface. Because you conditioned first, the leather underneath is nourished and resilient.
The golden rule here is to match the product to the boot type. Using the wrong one doesn’t just fail; it actively causes damage. The table below is your quick-match guide.
| Boot Type / Leather | Recommended Waterproofing | What to Avoid |
|---|---|---|
| Full-Grain Leather (Unglined) | Beeswax-based paste (Sno-Seal, Obenauf’s LP) | Silicone sprays; they sit on top and wear off unevenly. |
| Full-Grain Leather (Gore-Tex Lined) | Water-based Nikwax spray or Hydrobloc cream | Any silicone-based product; it clogs the Gore-Tex membrane. |
| Nubuck or Suede | Specialist spray for nubuck (Nikwax) | Waxes or oils; they will darken the nap and create permanent stains. |
| Synthetic / Fabric Mix | Fabric waterproofing spray (Nikwax TX Direct) | Leather conditioners; they won’t absorb and will leave a residue. |
Let the treatment dry fully. This isn’t a five-minute wait. Products like Rust-Oleum NeverWet require 24 hours before exposure to water. Skipping this cure time means the product hasn’t polymerized, and water will wash it right off.
Which Waterproofing Product is Right for Your Boots?
The aisle of options is overwhelming. Here’s the breakdown of what each type actually does, and who should use it.
Beeswax-Based Pastes (Sno-Seal, Obenauf’s Heavy Duty LP)
These are the heavy lifters. They melt around 110–125°F and penetrate deep into the leather, forming a semi-permeable, waxy barrier. They’re ideal for unlined work boots or hiking boots that will see constant moisture, mud, and abrasion. The trade-off is breathability. The leather will darken significantly and feel stiffer. They are overkill for a casual boot and a terrible choice for anything with a Gore-Tex lining.
Water-Based Sprays and Creams (Nikwax, LOWA Waterstop Pro, Zamberlan Hydrobloc)
This is the modern standard for most hiking and backpacking boots. These products are designed to be compatible with technical membranes. They waterproof the outer leather without clogging the inner liner’s pores. Their effectiveness has a measurable lifespan. LOWA states its Waterstop Pro spray begins to wear off after about three weeks of regular use. This is a planning number, not a failure, it tells you when to think about reapplication.
Silicone & Polymer Sprays (Generic “Waterproofing Sprays”)
I’m skeptical of most of these for leather. They often create a superficial coating that can feel sticky or chalky. While fine for some fabrics, they are the most likely to void a Gore-Tex warranty and they do nothing to condition the leather. They’re the definition of a short-term, cosmetic fix.
Where this goes sideways: Using a wax-based sealant on a Gore-Tex boot. The wax seals the outer leather so completely that the boot’s breathability collapses, and the warranty is void. You get a sweaty foot and a dead membrane.
Your choice dictates your maintenance rhythm. A waxed boot needs occasional re-waxing when water stops beading. A sprayed boot needs more frequent, lighter touch-ups. Your boot care routine should be built around this product cycle.
The Science Behind the “Why”: Leather, Water, and You
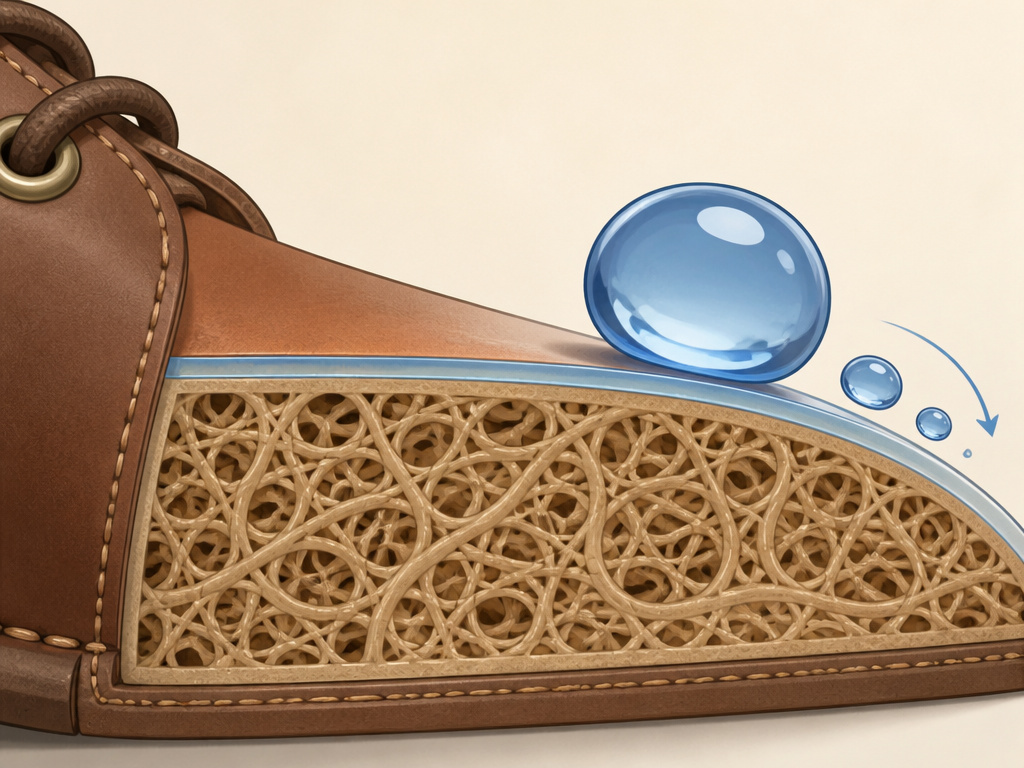
Leather is a dense, collagen fiber network, similar to a tough, natural sponge, rather than a plastic sheet.When you condition it, you’re replenishing the lipids that keep those fibers lubricated and flexible. When you waterproof it, you’re temporarily coating the top of that sponge to make water roll off.
This is why sequence matters so much. Applying a waterproofing wax to dry, unconditioned leather is like painting a cracked wall. You’re covering the problem, not solving it. The leather underneath remains brittle and will eventually crack, taking your nice wax layer with it.
The hydrolysis warning from LOWA is a perfect example of a non-obvious failure mode. Polyurethane (PU) midsoles, common in many boots, break down chemically when exposed to moisture and lack of use. The manufacturer’s fix involves simply using the boots at least every three months to flex the sole and keep the chemical bonds active, rather than adding more waterproofing. If you store them, a light application of conditioner maintains the leather’s health during the hiatus.
This logic extends to all leather boot care. The goal is to maintain the material’s integrity. Waterproofing is just one tactic in that larger strategy.
How to Maintain Waterproofing and Spot Failure
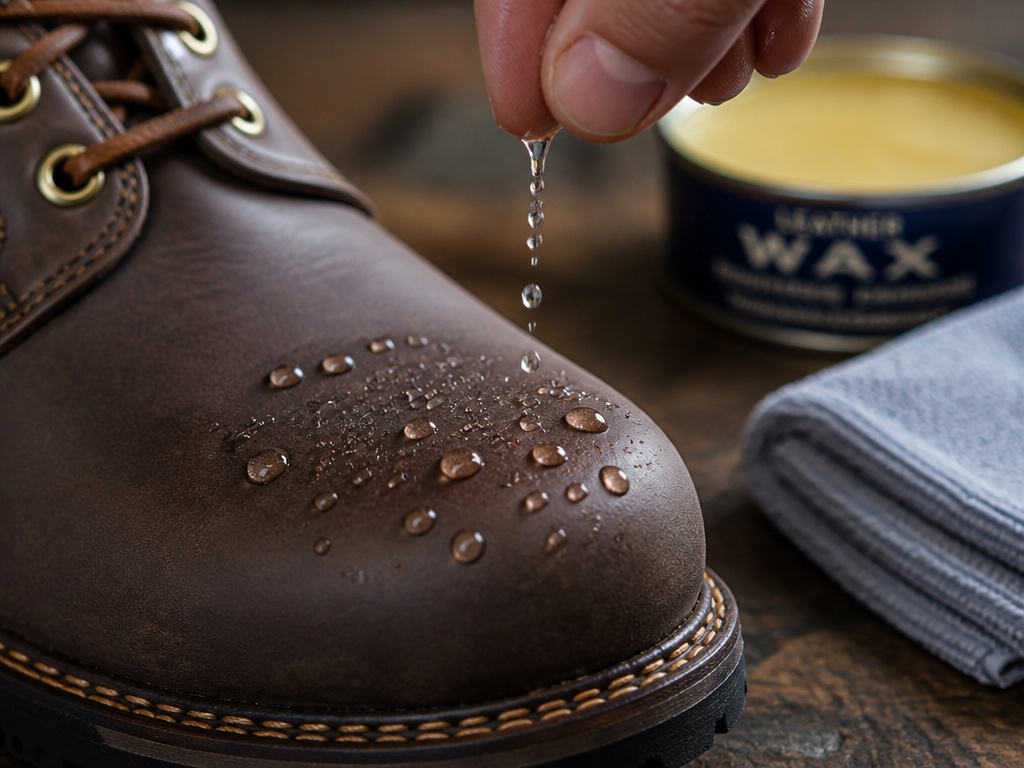
Waterproofing isn’t permanent. You need to know when it’s wearing off and how to refresh it without starting from scratch.
The test is simple. Sprinkle a few drops of water on the boot’s upper. If the water beads up and sits on the surface, you’re still protected. If it darkens the leather immediately and soaks in, it’s time for a refresh. Don’t wait until your socks are wet on the trail.
For a waxed boot, refreshment means applying a thin new layer of wax to dry, clean leather. Melt it in with a hairdryer on a low, warm setting (not hot!), then let it cool and buff.
For a spray-protected boot, the process is easier. Ensure the boot is clean, then apply a fresh, even coat of the same spray. Remember the three-week guideline from LOWA, if you’re hiking every weekend, mark your calendar.
Common mistake: Reapplying a spray over a dirty boot. The new layer bonds to the dirt, not the leather, and peels off at the first scuff.
A full re-proofing, cleaning, conditioning, and waterproofing, should be part of your seasonal gear prep. Before a big hiking season or a wet winter, give your boots the full three-step process. For daily drivers, a quick condition and spray every couple of months is sufficient. This regular cleaning and conditioning is what truly extends boot life.
Frequently Asked Questions
Can you waterproof boots that are already wet?
No. You must let them dry completely first, using newspaper or air drying. Applying any conditioner or waterproofing product to wet leather traps moisture against the fibers, promoting mold and rot. Always start with a dry boot.
Does waterproofing leather boots make them less breathable?
Yes, always. You are adding a barrier. Wax-based products reduce breathability the most. Modern water-based sprays for Gore-Tex boots are engineered to minimize this trade-off, but some reduction is inevitable. The choice is between maximum dryness (wax) and a balance of dryness and breathability (technical spray).
How often should I re-waterproof my leather boots?
There’s no single schedule. It depends on use and the product. A wax treatment on work boots might last a season. A spray-on treatment like LOWA Waterstop Pro loses effectiveness after about three weeks of regular hiking. Use the water bead test: when water soaks in instead of beading, it’s time.
Can I use mink oil to waterproof my boots?
You can, but it’s not the best tool for all jobs. Mink oil is an excellent conditioner that offers some water resistance. However, it can darken leather significantly and may soften the leather too much for supportive hiking boots. It’s also not recommended for Gore-Tex linings. For pure waterproofing, a dedicated beeswax or technical spray is more reliable.
Will waterproofing change the color of my boots?
Almost always. Waxes darken leather the most, often giving a rich, “wet” look. Creams cause moderate darkening. Sprays designed for nubuck or suede cause the least color change, but may still darken slightly. Always test any product on a small, hidden area first.
Before You Go
The one rule I learned the hard way is to always test a new product on a hidden seam first. A conditioner that works miracles on one type of leather can leave a permanent stain on another. That small, five-minute test has saved more pairs of boots than any brand recommendation.
Your next step this week is to look at the boots you wear most and check the flex point at the toe, not to buy a fancy spray.Is the leather dry and pale? That’s your signal. Clean them, condition them while they’re still damp, and then, only if you need it, apply the right waterproofing layer. Your boots are a partnership with a material that, treated right, will outlast seasons of abuse. Start the partnership with the right first step.
