
How to Remove Dye Transfer from Leather: Effective Methods
This post contains affiliate links. As an Amazon Associate, we earn from qualifying purchases.
To remove dye transfer from leather, stop rubbing it. Use a pH-neutral, solvent-free leather cleaner designed for finished leather, and apply it with a soft microfiber cloth using gentle, circular motions. Never use harsh chemicals, abrasive pads, or aggressive scrubbing, as this strips the protective top coat and embeds the dye deeper.
That answer sounds simple, but the step everyone misses isn’t the product choice—it’s the pre-test. If you skip testing for colorfastness in a hidden spot, you risk pulling the original dye out with the transfer, creating a permanent faded patch that no conditioner will fix. This isn’t a guess; it’s the exact reason automakers like Toyota and Subaru issue technical bulletins on this specific stain.
What follows: the one cleaner ingredient that voids warranties, the three physical tests from a manufacturer’s data sheet you can use at home, and the difference between a stain you can lift and one you now own.
Key Takeaways
- Dye transfer is a surface stain on the finish, not the leather hide itself. Treat it like cleaning a painted wall, not scrubbing a concrete floor.
- Car manufacturers like Subaru and Toyota explicitly state that using harsh cleaners or solvents damages factory coatings and voids warranty coverage for seats.
- Always perform a two-part pre-test: first with water, then with your chosen cleaner on a hidden area. If color transfers, stop.
- The right motion is a gentle, patient lift. Aggressive rubbing grinds the dye particles deeper into the finish’s microscopic pores.
- For persistent indigo transfer from denim, a dedicated dye-transfer remover like FENICE’s product is formulated for this one job, but it is strictly for finished leather, never suede.
Why Dye Transfer is a Surface Problem
Look at your leather sofa or car seat. You’re not looking at raw hide. You’re looking at a carefully engineered sandwich. The base leather gets a color coat, then a clear protective top coat. Dye transfer from denim, colored fabrics, or printed magazines sits on top of that clear layer.
The Toyota T-SB-0009-18 service bulletin includes a cross-section diagram showing these layers. It warns that abrasive cleaning methods physically scrape away this top coat, removing the leather’s built-in resistance to future staining.
That’s the mechanism. When you scrub, you aren’t pulling the foreign dye up. You’re wearing a microscopic channel through the finish, letting the dye particles sink in. The stain looks darker because you’re seeing it through a scratched, cloudy lens. The fix then isn’t more cleaning—it’s a professional recolor leather process to replace the entire color system.
The Right Cleaner vs. The Wrong One
This choice concerns chemistry. Your leather’s top coat is designed to resist oils and water, but it can be dissolved by strong solvents.Many all-purpose cleaners or homemade mixes contain these solvents.
| Cleaner Type | Why It’s Often Chosen | The Actual Risk |
|---|---|---|
| All-Purpose Spray (with solvents) | “Cuts through anything.” | Dissolves the acrylic/polyurethane top coat, leaving a sticky, unprotected area that attracts dirt. |
| Vinegar/Water Mix | “Natural and non-toxic.” | The acetic acid can dull and degrade some finishes over time, especially aniline leathers. |
| Magic Eraser / Abrasive Pad | “It worked on my wall!” | Acts like ultra-fine sandpaper, scouring the top coat. The stain may lighten because you’re removing the stained finish itself. |
| OEM-Approved Leather Cleaner | “It’s what the maker says to use.” | Formulated to clean without damaging the specific finish chemistry. This is your only safe bet for warranty coverage. |
The essential pick here is a cleaner approved for finished automotive or furniture leather. Subaru’s service bulletin names Leather Master products as tested and approved. For home use without a specific OEM directive, a product like Angelus Easy Cleaner is a reliable, pH-neutral option. Its label says “for finished leather,” which is the phrase you need.
The wrong cleaner doesn’t just fail. It changes the material. A stripped top coat feels tacky to the touch within a day, and it will never hold a conditioner correctly again.
The Manufacturer-Approved Step-by-Step Method
This method synthesizes the procedures from Subaru, Toyota, and Mercedes-Benz bulletins, adapted for any finished leather. Follow it in order.
Before you start: Ensure the leather is at room temperature (not cold or hot from sun exposure). Gather a white microfiber cloth, your chosen leather cleaner, and a second dry microfiber cloth. Put on nitrile gloves to keep skin oils off the leather.
- Perform the Two-Part Pre-Test. Dampen a corner of your microfiber cloth with distilled water. Rub it gently in a hidden spot (under a cushion, behind a seatback). Check the cloth. If you see your leather’s dye color on it, stop. Your leather’s color is not stable, and aggressive cleaning will make it worse. If the cloth is clean, proceed to test with your leather cleaner on a different hidden spot. Apply, wait 60 seconds, wipe. Check for color transfer or finish damage.
- Apply Cleaner to the Cloth, Not the Leather. Spray or pour a small amount of cleaner onto your microfiber cloth. This controls saturation and prevents cleaner from pooling in seams.
- Work in Gentle, Overlapping Circles. Place the cloth on the stain and move it in slow, light, circular motions. You’re letting the cleaner’s surfactants do the work, not your elbow grease. You should not hear a squeaking sound—that’s friction from too much pressure.
- Blot, Don’t Rub, to Lift Residue. After 30-45 seconds of cleaning, use the dry side of your cloth or the second dry cloth to blot the area firmly. This wicks the dissolved dye and cleaner away.
- Inspect and Repeat if Necessary. Let the area dry completely (10-15 minutes). If a shadow remains, repeat the process. Do not attempt more than three cycles on the same day; if it’s not gone by then, the dye may have set beyond DIY repair.
Where this goes sideways: Skipping the pre-test because the stain is “right in the middle.” I’ve seen a perfect blue-jean transfer pattern turn into a permanent, splotchy beige circle because the owner’s vigorous cleaning lifted the original brown dye. The test takes two minutes. The repair costs hundreds.
The goal is to lift, not excavate. If the stain is fading with each pass, you’re winning. If it’s not moving, stop. The next step isn’t a stronger chemical; it’s consulting a professional about leather color restoration.
When to Use a Dedicated Dye Transfer Remover
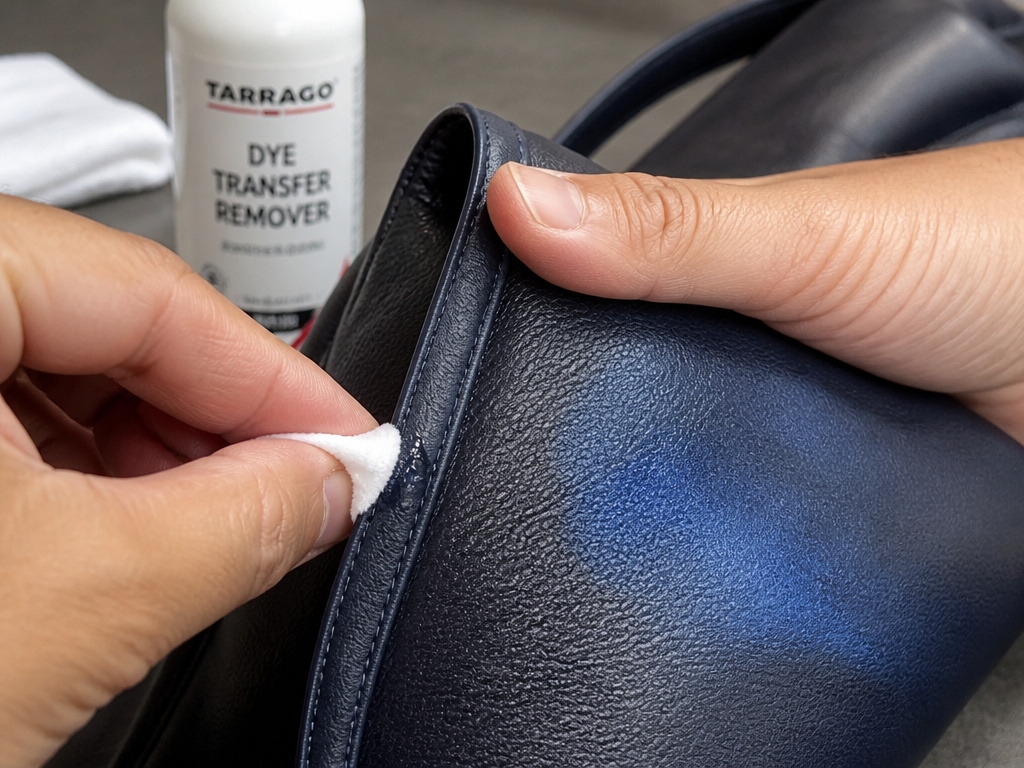
For relentless indigo from denim, a specialty product exists. The FENICE Dye Transfer Stain Remover technical sheet spells it out: it’s a solvent-based cleaner formulated for this single job on finished leather and vinyl.
Its data sheet gives you three physical checks you can understand: it’s a colorless fluid with a density close to water, and it won’t flash-ignite below 60°C. More importantly, it shouts the limitation in all caps: “DO NOT USE ON SUEDE/NUBUCK.”
Here’s the practical takeaway. If a standard leather cleaner hasn’t made a dent after two controlled attempts, a dedicated remover is your next logical step. But its rules are stricter. – Pre-test is mandatory. The FENICE sheet insists on it. – Use even less pressure. Its solvents are more active; let them work. – Flush the area. After removal, wipe the spot with a cloth dampened with water to remove any residual cleaner, then dry thoroughly.
This is a targeted tool with a narrow job description. Using it on suede or an untested, unstable leather is a guaranteed way to need a full leather dye vs leather paint decision to fix the new damage you caused.
What Never to Do: Warranty-Voiding Moves
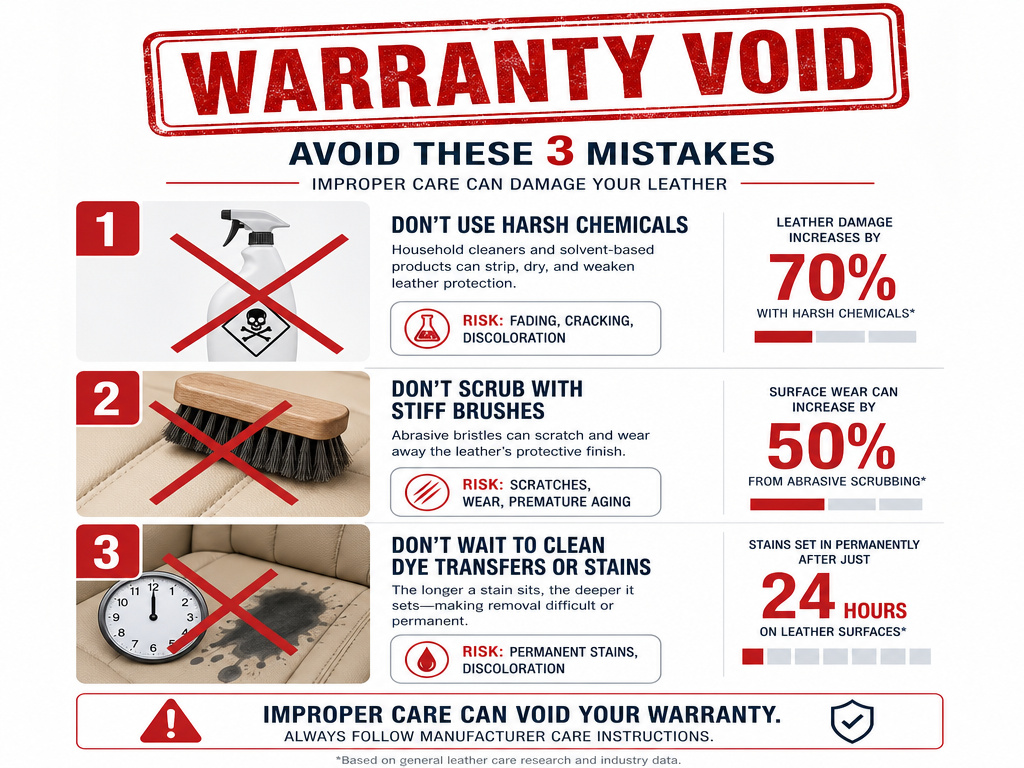
Car companies are not the enemy here. Their service bulletins are a map of every expensive mistake they’ve had to fix under warranty. The Toyota T-SB-0009-18 bulletin and the Mercedes-Benz SB-10064726-2280 guide are public, so you can read their reasoning.
They list three actions that automatically forfeit any warranty claim for dye transfer or soiling: 1. Using unapproved cleaning products. Specifically, those with harsh solvents or propellants. 2. Employing abrasive cleaning methods. This includes stiff brushes, scouring pads, and powders. 3. Letting the stain sit untreated. Time allows the dye to plasticize and bond to the finish.
The NHTSA leather care best practices document consolidates this advice. It’s not about making repairs difficult; it’s about preventing you from turning a $50 cleaning into a $2,000 seat cover replacement. Your aggression is the variable they can’t control, so they forbid the tools that enable it.
Think of it like this: a surgeon can fix a broken bone, but not if you’ve poured acid on the break first. Your first response sets the ceiling for any professional’s ability to help later.
FAQ: Your Specific Dye Transfer Questions
Can baking soda remove dye transfer from leather?
No, and do not try it. Baking soda is a mild abrasive. While it might lighten a stain by scouring the surface, you are damaging the top coat. Also, as a fine powder, it’s nearly impossible to fully remove from leather pores and stitching, which can lead to ongoing abrasion and a gritty feel. For a true deep clean that doesn’t grind the finish, follow the general stain removal guide.
Will conditioning leather remove dye transfer?
No. Leather conditioners and oils are for nourishing the hide beneath the finish, not for cleaning the surface. Applying a conditioner over a dye transfer stain will not remove it. In fact, it can seal the dye in by filling the pores of the top coat, making future removal harder. Always clean thoroughly before conditioning.
How do I remove blue jean dye from my car seats?
Follow the step-by-step method above using an OEM-approved leather cleaner. For severe, set-in indigo, a dedicated dye transfer remover like the FENICE product may be necessary after pre-testing. The key is patience and multiple gentle applications, not one aggressive scrubbing session. If the dye persists, the next step is evaluating professional color restoration rather than risking further damage.
Can dye transfer be permanent?
Yes, it can become permanent if it is not addressed promptly or if incorrect cleaning methods are used. Aggressive scrubbing can drive the dye through the top coat into the color layer beneath, or it can damage the finish so that a stain “shadow” remains even after the dye is gone. This is often the point where a complete recoloring process becomes the only viable solution.
The Bottom Line
The one rule that overrides all others: if your pre-test shows color transfer with water, your leather is too unstable for aggressive cleaning. In that case, the only safe path is to live with the stain or consult a professional restorer—any DIY attack will make it worse.
For everyone else, the equation is simple. Match the cleaner to the finish, not the stain. Use the pressure you’d use to clean a pair of glasses, not scrub a pan. And understand that leather care, at its core, is about preservation, not punishment. A well-mainished finish that gets a quick wipe-down after a spill will see you through years of use. A finish that’s been scoured thin fighting one blue jean shadow will show every fingerprint and scuff that comes after.
Start with the right product, move with a light hand, and know when to stop. That’s how you remove a stain without creating a bigger problem.
